
1. Safety Guidelines
Please read this manual carefully before operating the LE-IDEA IDEA9 Mini Drone. Improper use may result in injury or damage. Keep this manual for future reference.
- Age Recommendation: This drone is suitable for users aged 8 and above. Adult supervision is recommended for younger users.
- Flight Environment: Fly in open, clear areas, away from people, animals, buildings, and power lines. Avoid flying in strong winds or rain.
- Battery Safety: Use only the provided batteries and charging cable. Do not overcharge or puncture batteries. Discontinue use if batteries show signs of damage or swelling.
- Propeller Safety: Keep fingers, hair, and loose clothing away from rotating propellers. The drone features propeller guards for enhanced safety.
- Visual Line of Sight: Always maintain visual line of sight with the drone during flight.
- Emergency Stop: Familiarize yourself with the emergency stop function on the remote control.
2. Package Contents
Verify that all items are present in the package:
- 1x LE-IDEA IDEA9 Mini Drone
- 1x Remote Control
- 2x Drone Batteries (Lithium Polymer)
- 4x Spare Propellers
- 4x Propeller Guards
- 1x USB Charging Cable
- 1x Screwdriver
- 1x Wind Blade Wrench
- 1x User Manual

Image: All components included in the LE-IDEA IDEA9 Mini Drone package.

Image: Visual representation of the drone and its accessories.
3. Assembly
The LE-IDEA IDEA9 Mini Drone is designed for DIY assembly, offering an educational experience. Follow these steps to assemble your drone:
- Attach Propeller Guards: Securely attach the four propeller guards to the drone's frame using the provided screws and screwdriver. Ensure they are firmly in place to protect the propellers during flight.
- Install Propellers: Carefully attach the propellers to the motor shafts. Note that propellers are typically marked (e.g., A or B) and must be installed on the correct motor for proper flight. Refer to the drone's frame markings if available.
- Insert Battery: Slide a charged drone battery into the battery compartment until it clicks into place.
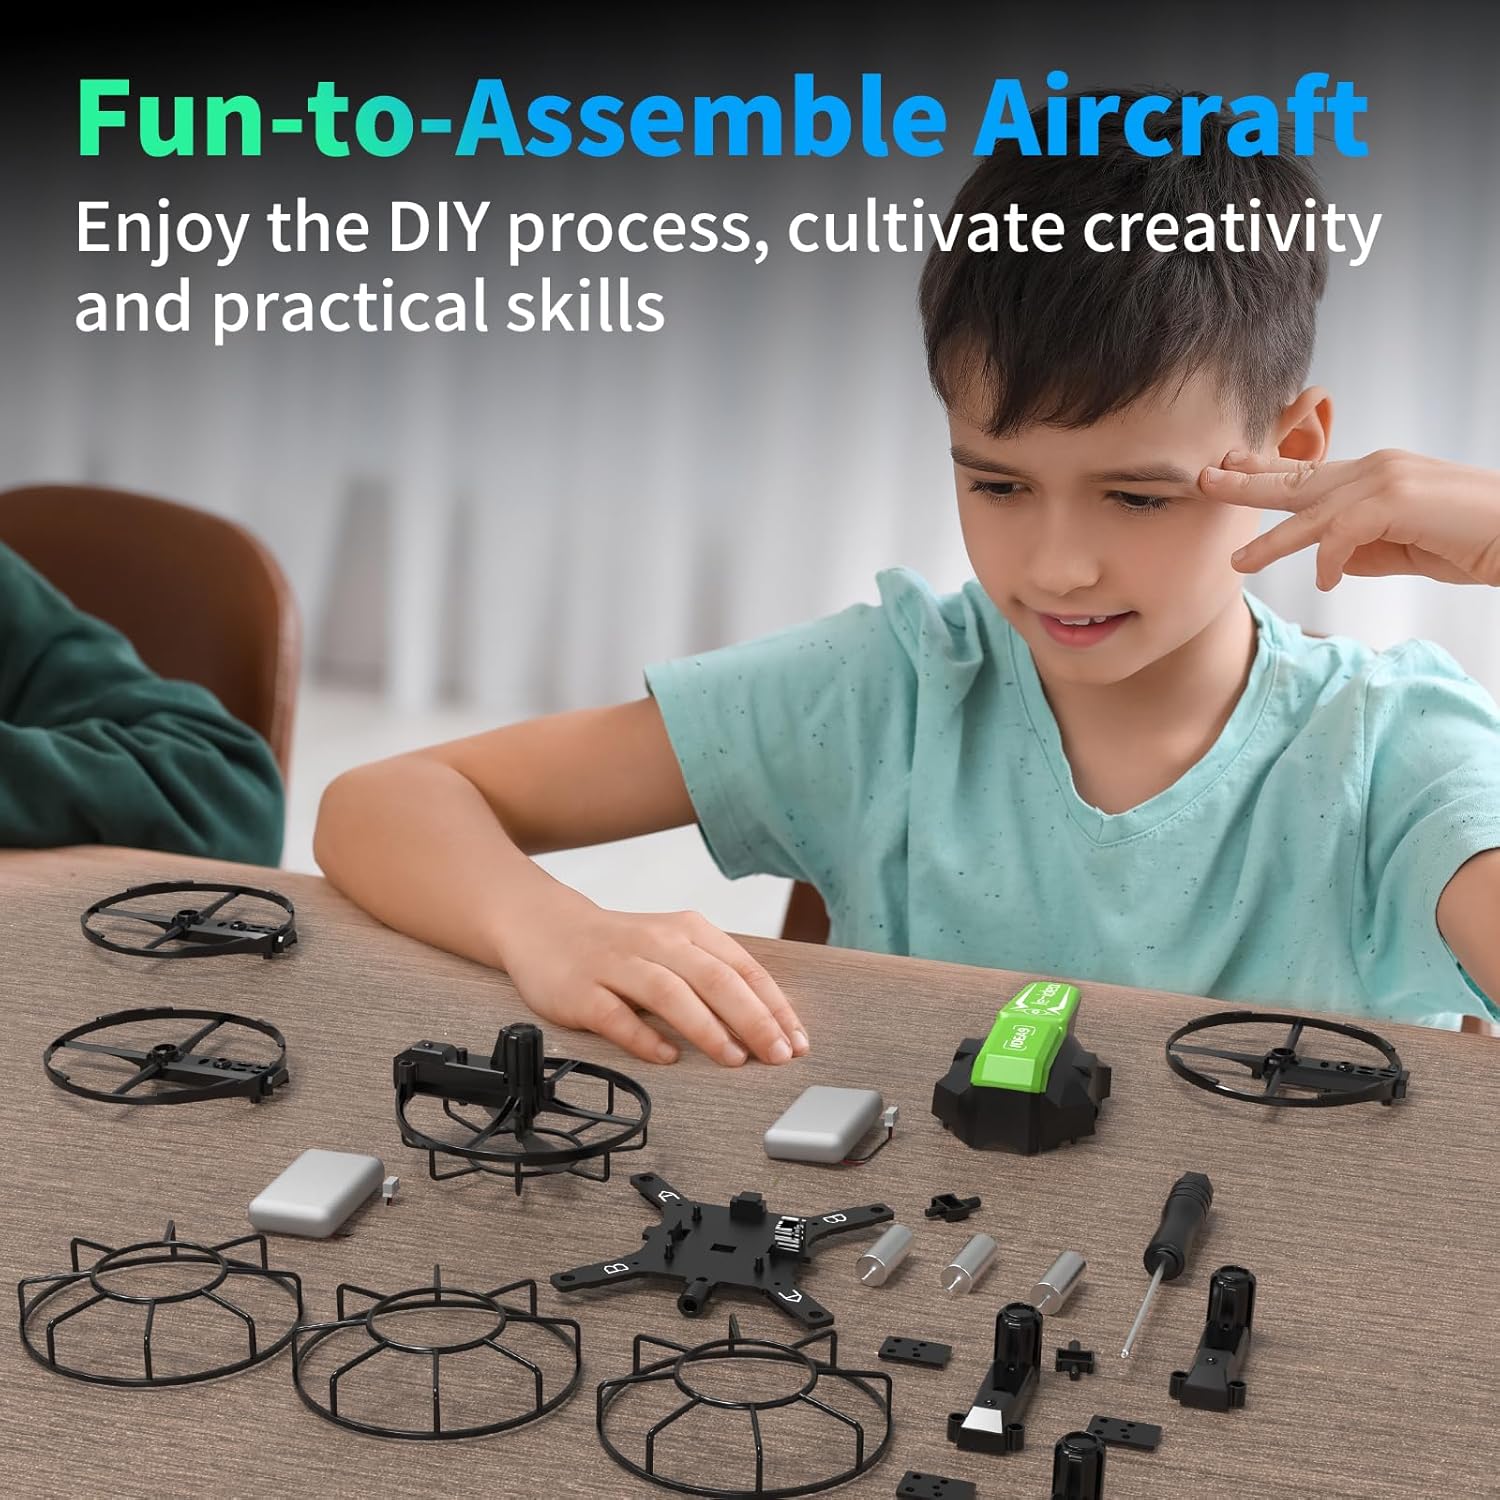
Image: A child engaging in the DIY assembly of the drone, with components like the frame, propeller guards, and battery visible.
4. Battery Charging
The drone uses Lithium Polymer batteries. Proper charging ensures optimal performance and battery longevity.
- Connect the USB charging cable to the drone battery.
- Plug the other end of the USB cable into a USB power adapter (e.g., computer USB port, wall adapter).
- The indicator light on the charging cable will show the charging status (e.g., red for charging, off/green for fully charged).
- Charging time is approximately 60-90 minutes for a full charge.
- Do not leave batteries unattended while charging.
Low Battery Warning
When the drone's battery is low, the LED lights on the drone will flash continuously, and the remote control will emit an audible warning. Land the drone immediately when this warning occurs to prevent loss of control.

Image: Visual depiction of the low battery warning system in action.
5. Remote Control Overview
The remote control operates on Radio Frequency (RF) technology. Familiarize yourself with its buttons and functions:
- Left Joystick: Controls throttle (up/down) and yaw (rotate left/right).
- Right Joystick: Controls pitch (forward/backward) and roll (left/right).
- One-Key Take-off/Landing Button: Initiates automatic take-off or landing.
- Speed Mode Button: Cycles through Low, Medium, and High-speed modes.
- Headless Mode Button: Activates/deactivates Headless Mode.
- 360° Flip Button: Press and then move the right joystick to perform a flip.
- Infrared Button (Competitive Mode): Used to 'shoot' at another drone in competitive mode.
- Trim Buttons: Used to fine-tune the drone's stability if it drifts.
- Power Switch: Turns the remote control on/off.
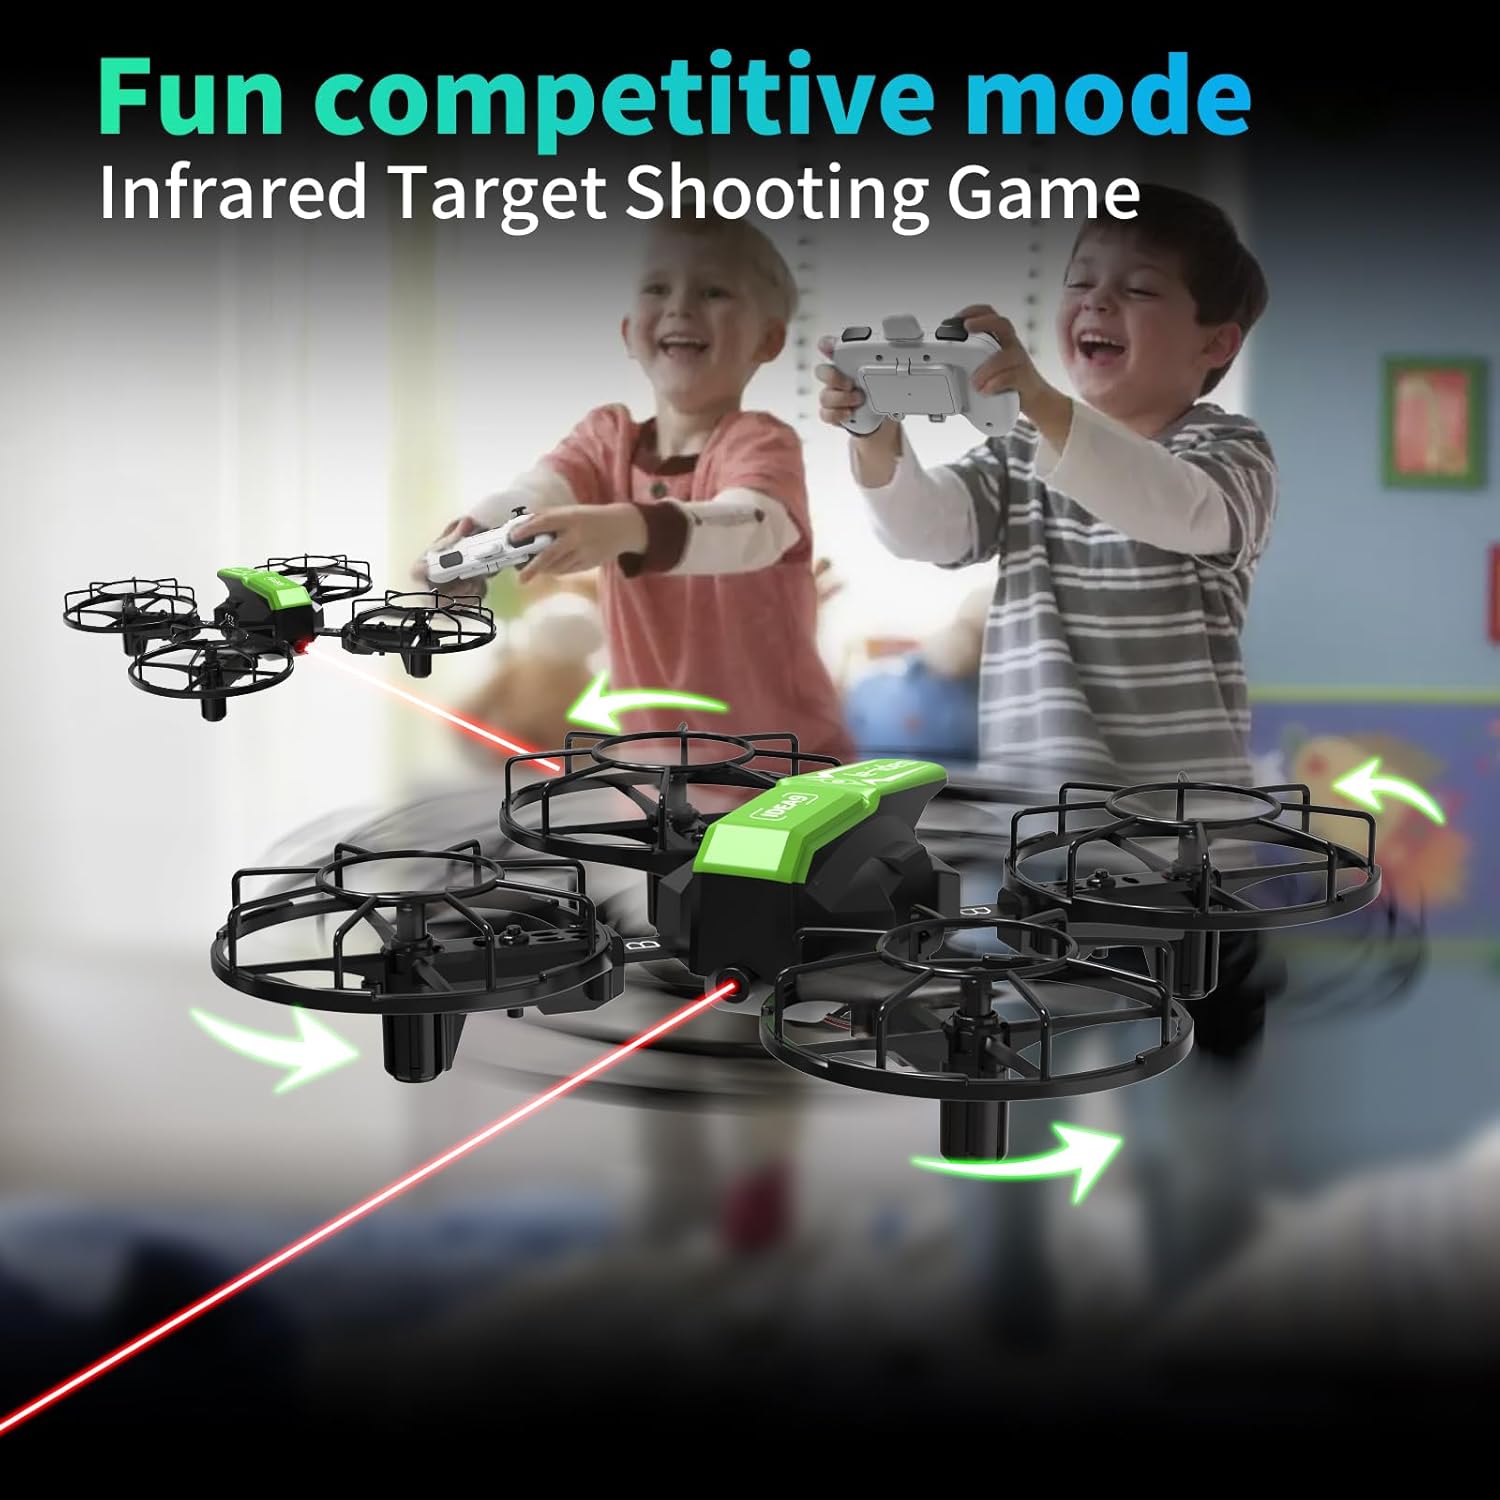
Image: The LE-IDEA IDEA9 Mini Drone and its corresponding remote control.
6. Operating Instructions
6.1 Pairing the Drone and Remote
- Ensure the drone battery is charged and installed.
- Place the drone on a flat, level surface.
- Turn on the drone's power switch. The drone's indicator lights will flash.
- Turn on the remote control's power switch.
- Push the left joystick (throttle) all the way up, then all the way down. The drone's indicator lights will stop flashing and remain solid, indicating successful pairing.
6.2 One-Key Take-off and Landing
- After pairing, press the One-Key Take-off/Landing button. The drone will automatically ascend to a stable hovering height.
- To land, press the One-Key Take-off/Landing button again. The drone will automatically descend and land gently.

Image: The drone executing an automatic take-off or landing maneuver.

Image: Diagram showing the simplicity of one-key start and landing.
6.3 Speed Modes
The drone offers three speed modes: Low, Medium, and High. Press the Speed Mode button on the remote to cycle through them.
- Low Speed: Recommended for beginners and indoor flight, offering stable and easy control.
- Medium Speed: Balanced for general leisure flight.
- High Speed: For experienced pilots seeking faster, more agile flight.

Image: Drones demonstrating the three available speed adjustments.

Image: Diagram explaining the three speed modes and their applications.
6.4 Headless Mode
Headless Mode simplifies flight control by eliminating the need to distinguish the drone's front from its rear. In this mode, the drone's orientation is relative to the pilot.
- Press the Headless Mode button to activate. The drone's lights will indicate activation.
- Pushing the right joystick forward will always make the drone fly away from you, regardless of its actual orientation.
- Press the button again to deactivate Headless Mode.

Image: The drone showcasing its propeller protection and the concept of Headless Mode.

Image: Diagram illustrating how Headless Mode simplifies directional control.
6.5 360° Flips
Perform exciting aerial acrobatics with the 360° flip function.
- Ensure the drone is flying at a sufficient height (at least 2-3 meters).
- Press the 360° Flip button.
- Immediately move the right joystick in the desired direction (forward, backward, left, or right). The drone will perform a flip in that direction.

Image: Diagram showing the drone executing 360-degree flips.
6.6 Competitive Mode (Infrared Target Shooting)
Engage in interactive battles with another LE-IDEA IDEA9 Mini Drone.
- Requires two LE-IDEA IDEA9 Mini Drones flying simultaneously.
- Aim the infrared sensor on your drone's controller towards the tail of the opponent's drone.
- Press the Infrared Button on your remote control to 'shoot'.
- If hit, the affected drone will spin in the air.
- After three successful hits, the affected drone will slowly land, indicating it has been 'defeated'.

Image: Two drones engaged in competitive infrared target shooting, with children controlling them.

Image: Promotional banner for the IDEA9 Drone's infrared targeting game.

Image: Diagram explaining the competitive mode with infrared aiming.
7. Maintenance
Regular maintenance ensures the longevity and performance of your drone.
- Cleaning: Use a soft, dry cloth to clean the drone. Avoid water or harsh chemicals.
- Propeller Inspection: Regularly check propellers for damage (bends, cracks). Replace damaged propellers immediately using the provided spare parts and wind blade wrench.
- Battery Storage: Store batteries in a cool, dry place, away from direct sunlight and extreme temperatures. For long-term storage, charge batteries to about 50%.
- Motor Care: Keep motors free from dust and debris. Do not attempt to lubricate motors.
8. Troubleshooting
If you encounter issues with your LE-IDEA IDEA9 Mini Drone, refer to the following common problems and solutions:
| Problem | Possible Cause | Solution |
|---|---|---|
| Drone does not respond to remote. | Not paired; low battery (drone or remote); out of range. | Re-pair the drone and remote. Charge batteries. Ensure drone is within operating range. |
| Drone drifts during flight. | Not calibrated; uneven surface at take-off; wind interference. | Land the drone, place on a flat surface, and re-calibrate (refer to remote control instructions for calibration steps). Use trim buttons to adjust. |
| Drone cannot take off or flies weakly. | Low battery; damaged propellers; propellers installed incorrectly. | Charge drone battery. Replace damaged propellers. Ensure propellers are installed on correct motors. |
| One or more propellers do not spin. | Motor obstruction; motor damage; loose wiring. | Check for any obstructions around the motor. If problem persists, contact customer support. |
| Competitive mode not working. | Incorrect aiming; infrared sensor blocked; too far apart. | Ensure direct line of sight to the opponent drone's tail. Check for obstructions. Reduce distance between drones. |
9. Specifications
| Feature | Detail |
|---|---|
| Brand | LE-IDEA |
| Model Name | IDEA9 |
| Special Features | Fun Competitive Mode, DIY Assembly, Fully Protected Propellers, 360° Flips, Headless Mode, One-Key Take-off/Landing, 3 Speed Modes |
| Age Range (Description) | Kid |
| Color | Green |
| Connectivity Technology | Radio Frequency |
| Included Components | Drone, Remote Control, 2 Batteries, Propeller Guards, Spare Propellers, USB Charging Cable, Screwdriver, Wind Blade Wrench, User Manual |
| Control Type | Remote Control |
| Material | Plastic |
| Battery Cell Composition | Lithium Polymer |
| Optical Sensor Technology | Infrared |
| Product Dimensions | 14.5"L x 14.5"W x 3.6"H |
| Item Weight | 12.7 ounces |
10. Warranty and Support
LE-IDEA is committed to providing quality products and customer satisfaction.
- Customer Support: If you have any questions, concerns, or require assistance with your LE-IDEA IDEA9 Mini Drone, please contact our customer service team. Refer to the product packaging or the official LE-IDEA website for contact information.
- Warranty: Specific warranty details may vary. Please retain your proof of purchase for any warranty claims. The warranty typically covers manufacturing defects but may not cover damage caused by improper use, accidents, or unauthorized modifications.