
1. Introduction
Welcome to the ZWXYVUT X10 PRO Retro Game Stick. This device is designed to provide an immersive retro gaming experience on your 4K HDMI-compatible display. With over 50,000 pre-installed classic games and support for more than 50 emulators, you can relive your favorite gaming memories. This manual provides essential information for setting up, operating, and maintaining your game stick.
2. Important Safety Information
Please read and follow these safety guidelines to ensure safe operation and prolong the life of your device:
- Use only a 5V/2A power adapter (not included) to power the game stick. Using an incorrect adapter may damage the device.
- Keep the device away from water, moisture, and extreme temperatures.
- Do not attempt to disassemble, repair, or modify the game stick or controllers. This will void the warranty.
- Keep the device and accessories out of reach of small children.
- Avoid prolonged exposure to direct sunlight.
- Ensure proper ventilation around the game stick during use.
3. Package Contents
Verify that all items are present in your package:

Image: Contents of the X10 PRO Retro Game Stick package.
- 1 x X10 PRO Game Stick
- 2 x 2.4G Wireless Controllers
- 1 x HDMI Cable
- 1 x USB Power Cable
- 1 x TF Card (128GB, pre-installed with 50000+ games)
- 1 x USB Receiver for controllers
- 1 x User Manual (this document)
4. Product Overview
Familiarize yourself with the X10 PRO Game Stick and its various ports:
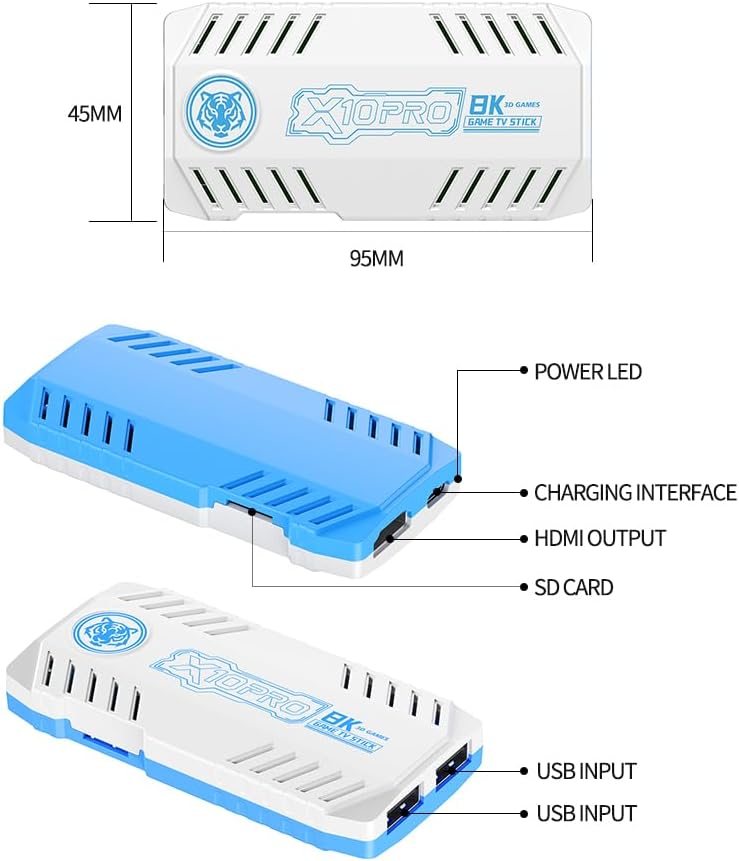
Image: Front and side views of the X10 PRO Game Stick with port labels.
- Power LED: Indicates power status.
- Charging Interface: Micro USB port for power input.
- HDMI Output: Connects to your TV or display.
- SD Card Slot: Contains the pre-installed game TF card.
- USB Input (x2): For connecting the wireless controller receiver and other peripherals.
5. Setup Instructions
Follow these steps to set up your X10 PRO Retro Game Stick:
- Connect to TV: Plug the X10 PRO Game Stick directly into an available HDMI input port on your television or display using the provided HDMI cable.
- Power the Game Stick: Connect the USB power cable to the game stick's charging interface. Plug the other end of the USB cable into a 5V/2A USB power adapter (not included) or a USB port on your TV that provides sufficient power. The game stick will automatically power on once connected.
- Insert Controller Batteries: Each wireless controller requires 2x AAA batteries (not included). Open the battery compartment on the back of each controller and insert the batteries, ensuring correct polarity.
- Connect Wireless Receiver: Insert the USB wireless receiver into one of the USB input ports on the game stick. The controllers should automatically pair.
- Select TV Input: Turn on your TV and use its remote control to select the correct HDMI input source where the game stick is connected.
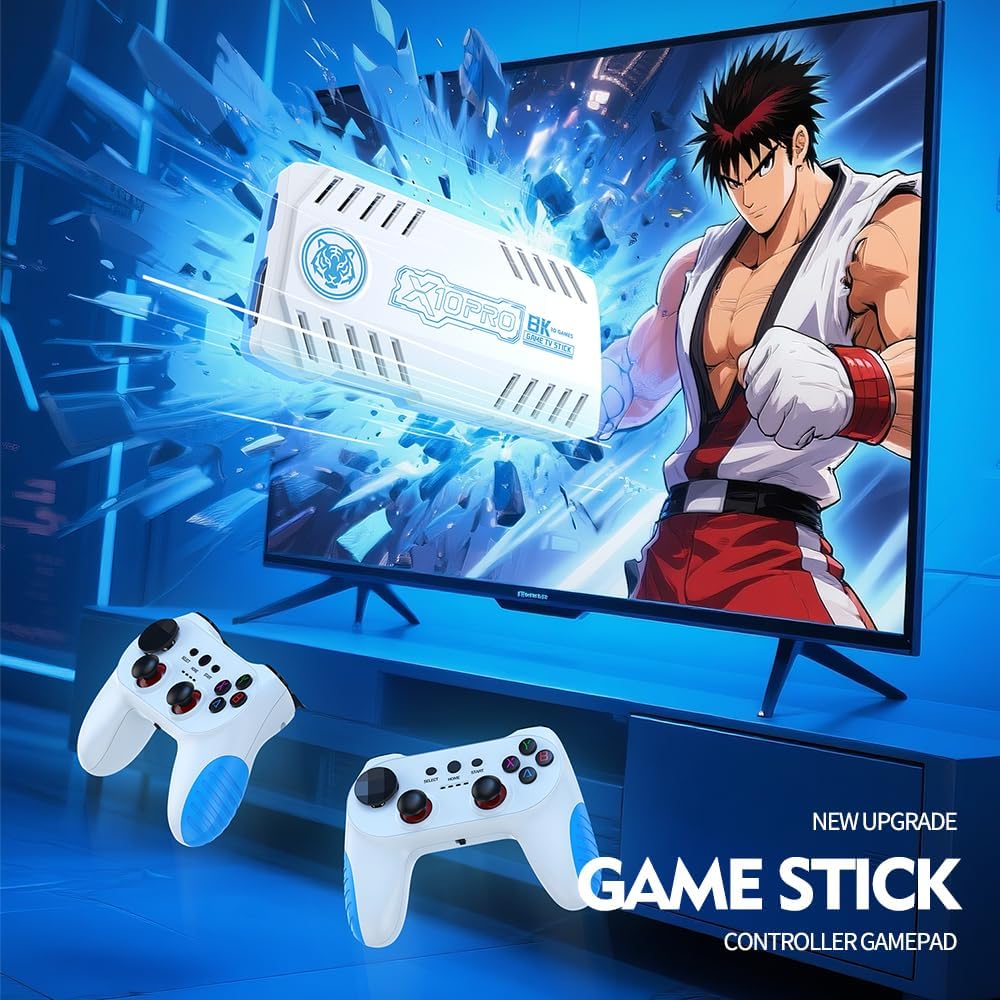
Image: The game stick connected to a TV, ready for use.
6. Operating Instructions
6.1 Navigating the Menu
Once powered on, the game stick will display the main menu. Use the directional pad (D-pad) on your wireless controller to navigate through the game categories and options. The 'A' button typically confirms selections, and the 'B' button acts as a back/cancel function.

Image: Example of the game selection interface.
6.2 Game Selection and Emulators
The X10 PRO supports over 50 emulators, allowing access to a wide range of classic consoles. Browse through the emulator categories to find games from your preferred system.

Image: A visual representation of the various emulators supported by the device.
6.3 Saving and Loading Game Progress
Most emulators on the X10 PRO support save states. During gameplay, press the 'MODE' button on your controller to access the in-game menu. From this menu, you can typically save your current game progress (save state) or load a previously saved state. Refer to specific emulator instructions if available for detailed saving procedures.
6.4 Adding New Games
The X10 PRO supports adding new games. To do this, you will need to remove the TF card from the game stick, connect it to a computer using a card reader, and transfer compatible game ROMs to the appropriate emulator folders on the card. Ensure the ROMs are in the correct format for the respective emulators. Reinsert the TF card into the game stick after transferring files.
7. Troubleshooting
If you encounter any issues, please refer to the following troubleshooting guide:
| Problem | Possible Cause | Solution |
|---|---|---|
| No display on TV. | Incorrect HDMI input selected; Loose HDMI cable; Insufficient power. | Ensure TV is on the correct HDMI input. Check HDMI cable connection. Verify power adapter is 5V/2A and connected securely. |
| Controllers not responding. | Low or no battery; USB receiver not connected; Controllers not paired. | Replace AAA batteries in controllers. Ensure USB receiver is firmly plugged into the game stick. Re-pair controllers if necessary (refer to controller instructions). |
| Game lag or poor performance. | Some games/emulators are more demanding; SD card issues. | Ensure the game stick has adequate ventilation. Try restarting the device. Verify the TF card is properly inserted and not corrupted. |
| Cannot save game progress. | Insufficient space on TF card; Emulator limitation. | Check available space on the TF card. Some older emulators may not fully support in-game saving. Use save states via the 'MODE' button. |
8. Specifications
- Model: X10 PRO Retro Game Stick
- Output: 4K HDMI HD
- Pre-installed Games: 50,000+
- Supported Emulators: 50+
- Controllers: 2 x 2.4G Wireless Gamepads
- Storage: 128GB TF Card (included)
- Power Input: 5V/2A (USB)
- Product Dimensions: Approximately 1 x 1 x 1 inches
- Item Weight: Approximately 15.2 ounces
- Manufacturer: ZWXYVUT
- Recommended Age: 4 years and up
9. Warranty and Support
9.1 Warranty Information
The ZWXYVUT X10 PRO Retro Game Stick comes with a standard manufacturer's warranty against defects in materials and workmanship. Please retain your proof of purchase for warranty claims. The warranty does not cover damage caused by misuse, accidents, unauthorized modifications, or failure to follow the instructions in this manual.
9.2 Customer Support
For technical assistance, troubleshooting, or warranty inquiries, please contact ZWXYVUT customer support through the retailer's platform or visit our official website. Please have your product model and purchase details ready when contacting support.