Introduction
This manual provides essential information for the setup, operation, and maintenance of your Hisense 100U8Q Mini LED Pro Smart TV. Please read it thoroughly to ensure proper use and to maximize your viewing experience.
Important Safety Information
Always follow basic safety precautions when using this product to reduce the risk of fire, electric shock, and injury. Keep this manual for future reference.
- Do not block ventilation openings.
- Do not install near any heat sources.
- Protect the power cord from being walked on or pinched.
- Only use attachments/accessories specified by the manufacturer.
- Refer all servicing to qualified service personnel.
What's in the Box
Verify that all components are present:
- Hisense 100U8Q Mini LED Pro Smart TV
- Remote Control
- Stand
- User Manual
Setup
1. Assembling the Stand
Carefully place the TV screen-down on a soft, flat surface. Attach the stand to the TV using the provided screws, ensuring it is securely fastened.

Image: Hisense 100U8Q TV with stand dimensions. This image illustrates the physical dimensions of the 100-inch TV, including its width, height, and depth, both with and without the stand. It also shows the VESA wall mount size (1000x600 mm) and product weight (73.2 kg with stand, 70.7 kg without stand).
Note: For wall mounting, use a VESA compatible bracket (1000x600 mm) and consult a professional installer.
2. Connecting Peripherals
Connect your devices (e.g., gaming consoles, soundbars, cable boxes) to the appropriate ports on the back of the TV. The Hisense 100U8Q features multiple HDMI 2.1 ports for high-speed connectivity.

Image: Rear view of the Hisense 100U8Q TV showing various input/output ports. These include USB, CI Card Slot, Headphone, AV Input, HDMI 2.1 (including eARC), ANT (x2), Digital Audio Out, Ethernet, and Type-C.
- HDMI 2.1: For high-resolution and high-refresh-rate devices (e.g., gaming consoles, PCs).
- USB: For connecting USB flash drives for media playback.
- Ethernet: For a wired internet connection.
- Type-C: For versatile connectivity, sharing, and charging.
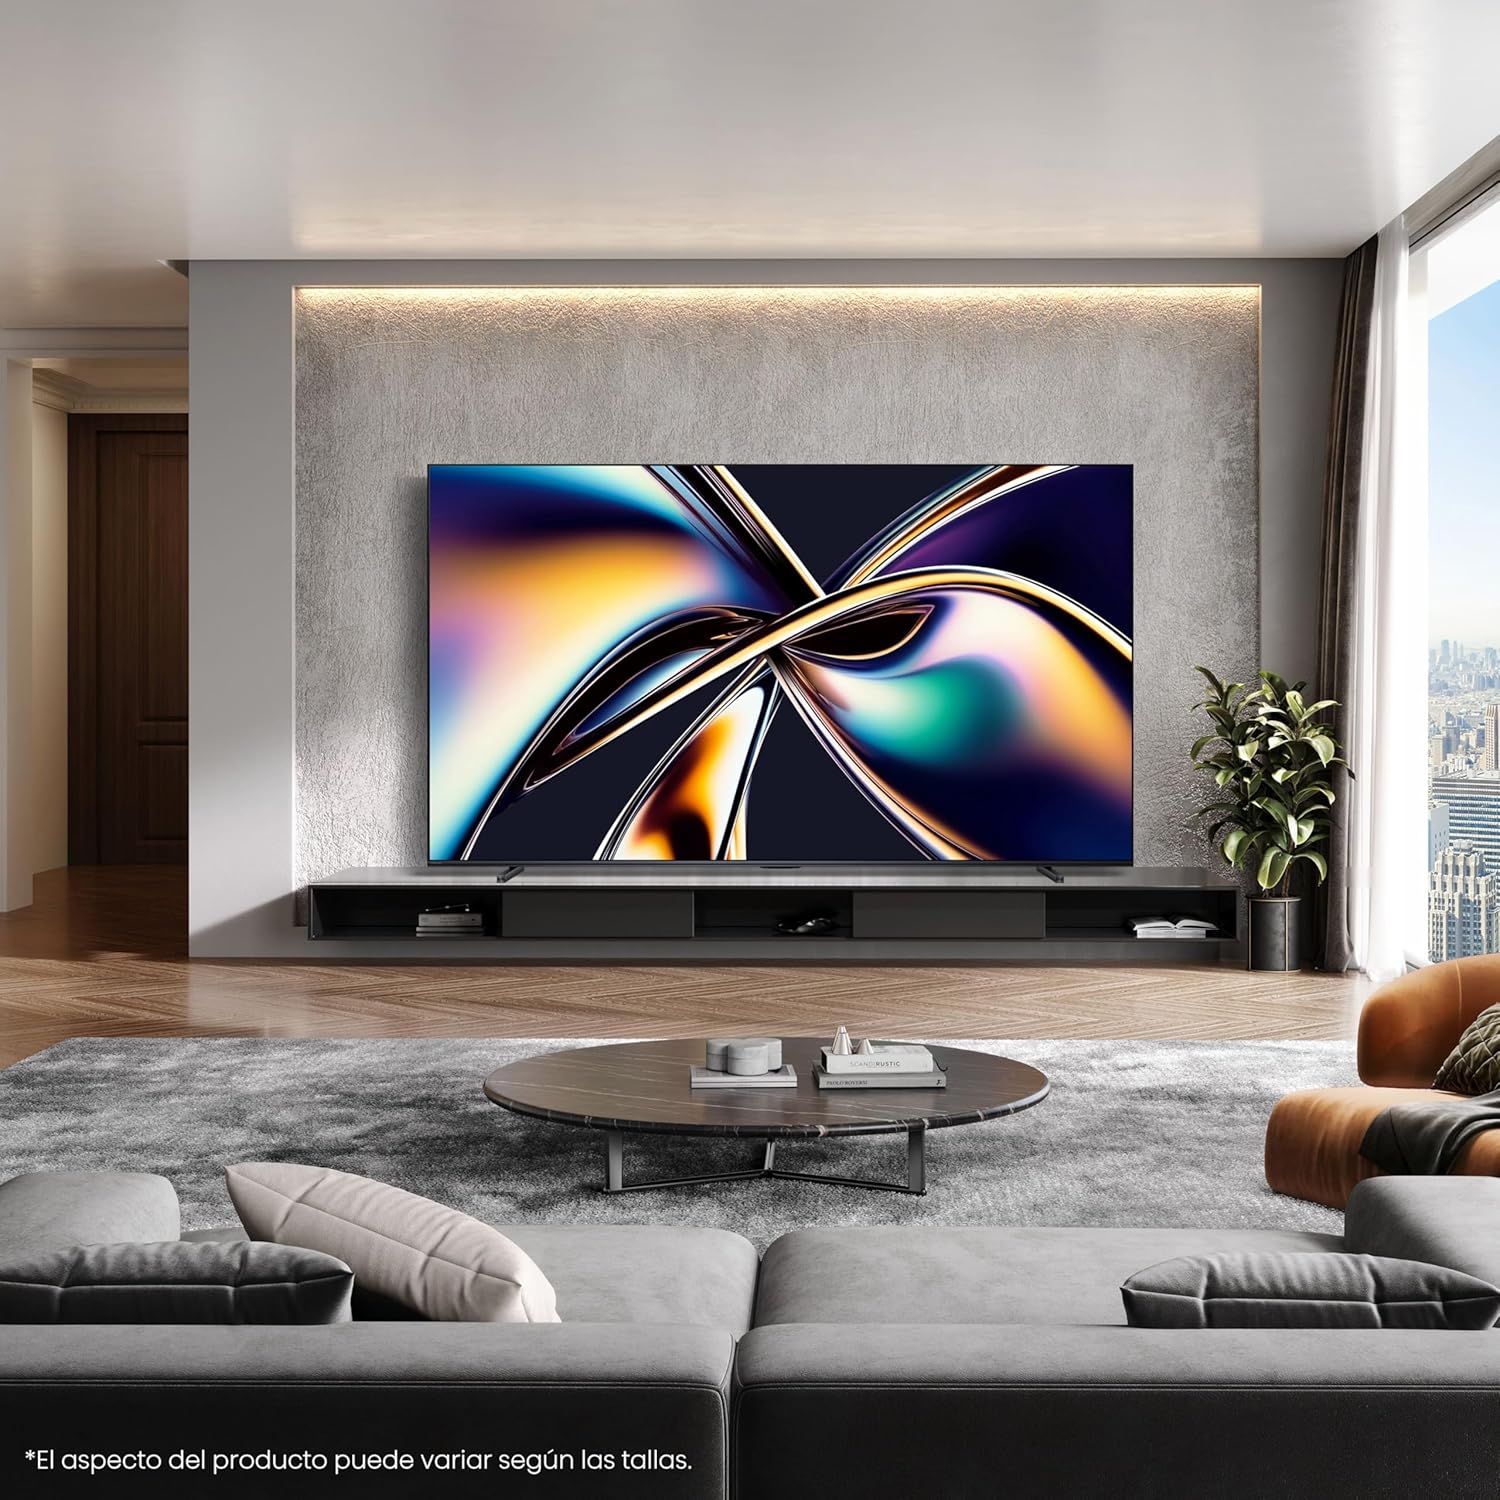
Image: Close-up view of the Type-C port on the side of the Hisense 100U8Q TV, highlighting its modern and versatile connectivity option.
3. Initial Power On and Network Connection
Plug the TV into a power outlet. Follow the on-screen instructions to select your language, connect to your Wi-Fi network (or use Ethernet), and complete the initial setup process.
Operating Instructions
1. Remote Control Functions
The included remote control allows you to navigate the TV's interface, adjust settings, and access smart features. The remote is solar-powered and can also be charged via USB-C.

Image: The Hisense TV remote control, featuring dedicated buttons for popular streaming services like Netflix, YouTube, and Disney+, voice control capabilities, a solar panel for charging, and a USB-C charging port.
- Power Button: Turns the TV on/off.
- Navigation Pad (Up/Down/Left/Right/OK): For menu navigation and selection.
- Volume Up/Down: Adjusts the sound level.
- Voice Control Button: Activates voice commands (e.g., "Alexa built-in", "VIDAA Voice").
- Quick Access Buttons: Direct access to popular streaming services.
2. Smart TV Features (VIDAA OS)
Your Hisense 100U8Q runs on the VIDAA OS, offering a user-friendly interface for accessing apps, streaming services, and smart home integration.

Image: The Hisense Smart TV home screen, displaying various streaming applications and content recommendations. It highlights integration with Apple HomeKit, Apple AirPlay, ConnectLife, Alexa built-in, and VIDAA Voice.
- App Store: Download and install additional applications.
- Voice Control: Use voice commands for navigation, content search, and smart home control.
- Content Availability: Note that content and application availability may vary by region.
3. Gaming Mode (Ultra 165Hz)
For an optimized gaming experience, activate the Ultra Game Mode 165Hz. This mode reduces input lag and provides smoother graphics.
Video: This video demonstrates how to use the Game Bar feature on a Hisense TV. It shows connecting a gaming device, launching the Game Menu, checking FPS and HDR status, selecting Game Picture Mode for optimized visuals, adjusting screen ratio and position, and enabling FreeSync, Aim Point, and Map Zoom for enhanced gaming. This feature is crucial for utilizing the 165Hz refresh rate effectively.
- Connect your gaming device to an HDMI 2.1 port.
- Access the Game Menu to view FPS, HDR status, and adjust settings like Game Picture Mode, Screen Ratio, and AMD FreeSync.
- Utilize features like Aim Point and Map Zoom for competitive gaming.
Video: This video showcases Hisense TV technology, focusing on features like Mini-LED PRO for pure blacks and stellar brightness, Hi-View AI Engine PRO for intelligent scene recognition and remastering, 165Hz Ultra Game Mode for smooth gaming, 4.1.2 Multi-channel Surround Sound for immersive audio, and Anti-Reflection PRO for minimal light intrusion. It also highlights the TV's QLED colors and AI-powered energy saving.
4. Audio Settings (4.1.2 Multi-channel Sound)
The TV features 4.1.2 multi-channel sound with lateral speakers, rear subwoofers, and upward-firing speakers for an immersive audio experience with Dolby Atmos support.
- Access audio settings through the TV menu to customize sound profiles.
- Ensure Dolby Atmos content is played for the full immersive effect.
Maintenance
1. Cleaning the Screen
Gently wipe the screen with a soft, dry, lint-free cloth. For stubborn marks, slightly dampen the cloth with water or a specialized screen cleaner. Avoid harsh chemicals.
2. Cleaning the Remote Control
Wipe the remote with a soft, dry cloth. For the solar panel, ensure it is clean and exposed to light for optimal charging.
3. Software Updates
The TV may receive automatic software updates. Ensure your TV is connected to the internet to receive these updates, which improve performance and add new features.
Troubleshooting
| Problem | Possible Solution |
|---|---|
| No Power | Check if the power cord is securely plugged into the TV and the wall outlet. Try a different outlet. |
| No Picture/Sound | Verify correct input source. Check HDMI/audio cable connections. Restart connected devices. |
| Remote Not Working | Ensure the remote is charged (solar or USB-C). Check for obstructions between the remote and TV. |
| Poor Wi-Fi Connection | Move the router closer to the TV or use a wired Ethernet connection. Restart the router. |
If problems persist, consult the full online user manual or contact Hisense customer support.
Specifications
| Feature | Detail |
|---|---|
| Model Number | 100U8Q |
| Screen Size | 100 Inches |
| Display Technology | Mini LED |
| Resolution | 4K |
| Refresh Rate | 165 Hz |
| Special Features | Game Mode, Hi-View AI PRO Processor, 4.1.2 Multi-channel Sound, Anti-Reflection PRO |
| Connectivity | Bluetooth, HDMI, Wi-Fi, Type-C |
| Dimensions (with stand) | 223.9 x 128.1 x 4.3 cm (approx. 88.1 x 50.4 x 1.7 inches) |
| Weight (with stand) | 73.2 kg (approx. 161.4 lbs) |
| VESA Wall Mount | 1000x600 mm |
| Energy Efficiency Rating | F |
For detailed energy information, refer to the EU EPREL database: https://eprel.ec.europa.eu/qr/2378016

Image: The EU Energy Label for the Hisense 100U8Q TV, showing its energy efficiency class F, power consumption (127 kWh/1000h for SDR, 380 kWh/1000h for HDR), and screen dimensions.
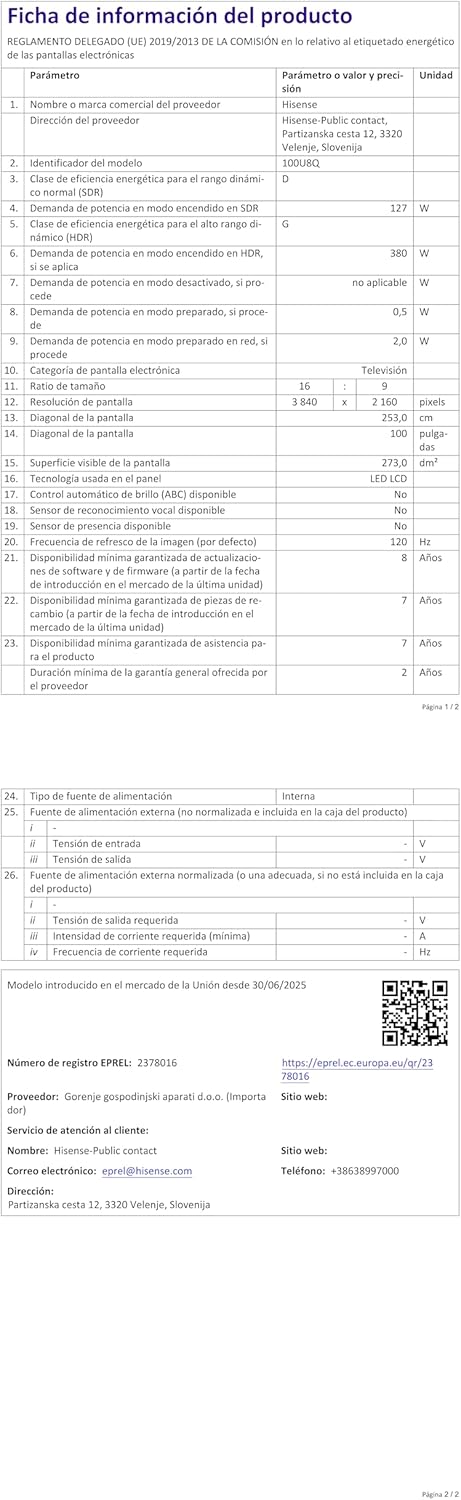
Image: The product information sheet for the Hisense 100U8Q TV, detailing various technical specifications, energy consumption, and warranty information in a tabular format.
Warranty and Support
Hisense provides a standard warranty for its products. Please refer to the warranty card included with your TV or visit the official Hisense website for detailed terms and conditions.
- Warranty Period: Typically 2 years for parts and labor.
- Customer Service: For technical assistance or service requests, contact Hisense customer support. Contact details can be found on the product information sheet or Hisense's official website.
- Online Resources: Visit the Hisense Brand Store for additional product information and support.


