1. Introduction
Thank you for choosing the Brightown 3 Pack Christmas Archway Outdoor Light Set. This manual provides essential information for the safe and efficient assembly, operation, and maintenance of your new outdoor light decoration. Please read these instructions carefully before use and retain them for future reference.
This set includes three archways, each featuring 100 LED lights, totaling 300 LEDs across a 24-foot length. It offers 8 distinct lighting modes and is designed for easy assembly and customization to enhance your outdoor holiday display.
2. Package Contents
Verify that all components listed below are present in your package:
- 3 x Archway Pole Sets (segmented fiberglass rods)
- 3 x 100 LED String Lights (Multicolor)
- 6 x Metal Ground Stakes
- 1 x Storage Bag
- String Light Clips (sufficient quantity for attachment)
- 1 x Remote Control (32FT range)
- 1 x Power Adapter
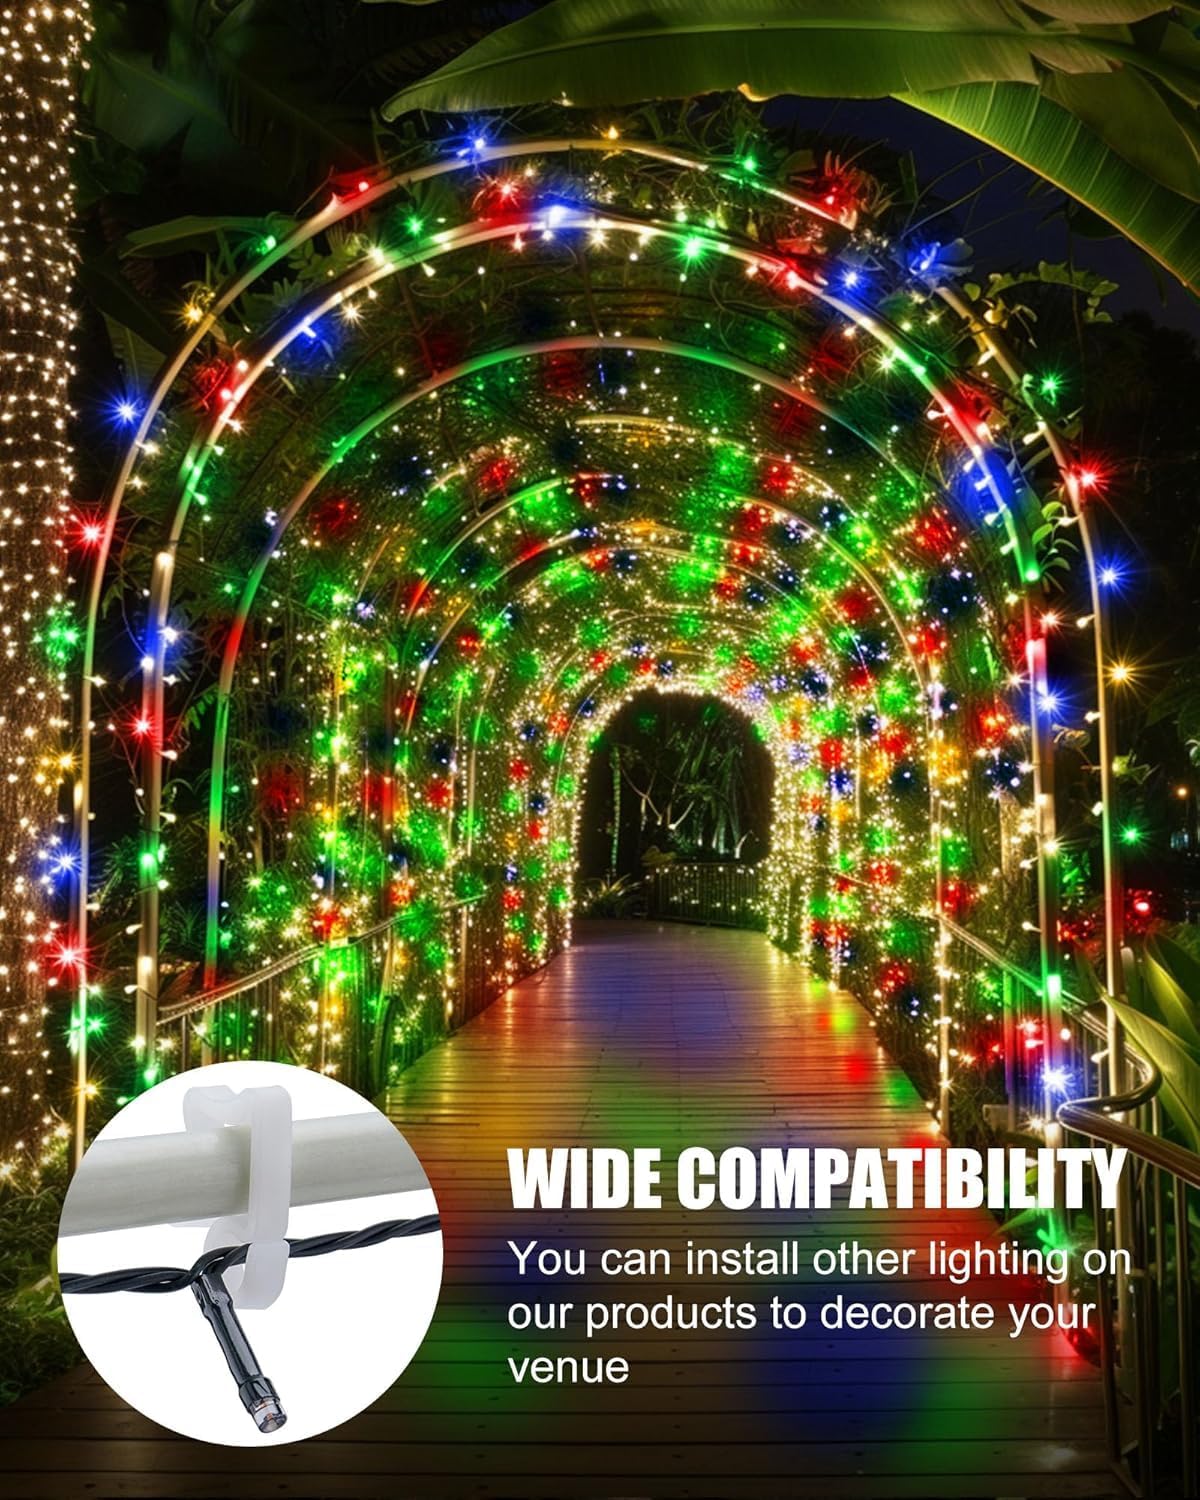
Figure 2.1: Included components of the Brightown Christmas Archway Light Set. This image displays the metal ground stakes, storage bag, segmented arch poles, string light clips, and the multicolored LED string lights with their power adapter.
3. Specifications
| Feature | Detail |
|---|---|
| Model Number | JT-EL/FC300V0200 |
| Total Length | 24 FT (7.3 meters) |
| Adjustable Arch Dimensions | Up to 10 FT wide x 10 FT tall |
| Number of LEDs | 300 (100 LEDs per arch) |
| Light Color | Multicolor |
| Lighting Modes | 8 (Combination, Waves, Sequential, Slow Glow, Chasing/Flash, Slow Fade, Twinkle/Flash, Steady On) |
| Voltage | 120 Volts |
| Frame Material | Carbon Fiber / Fiberglass (segmented rods) |
| Item Weight | 16.41 pounds (7.46 Kilograms) |
| UPC | 810134653290 |
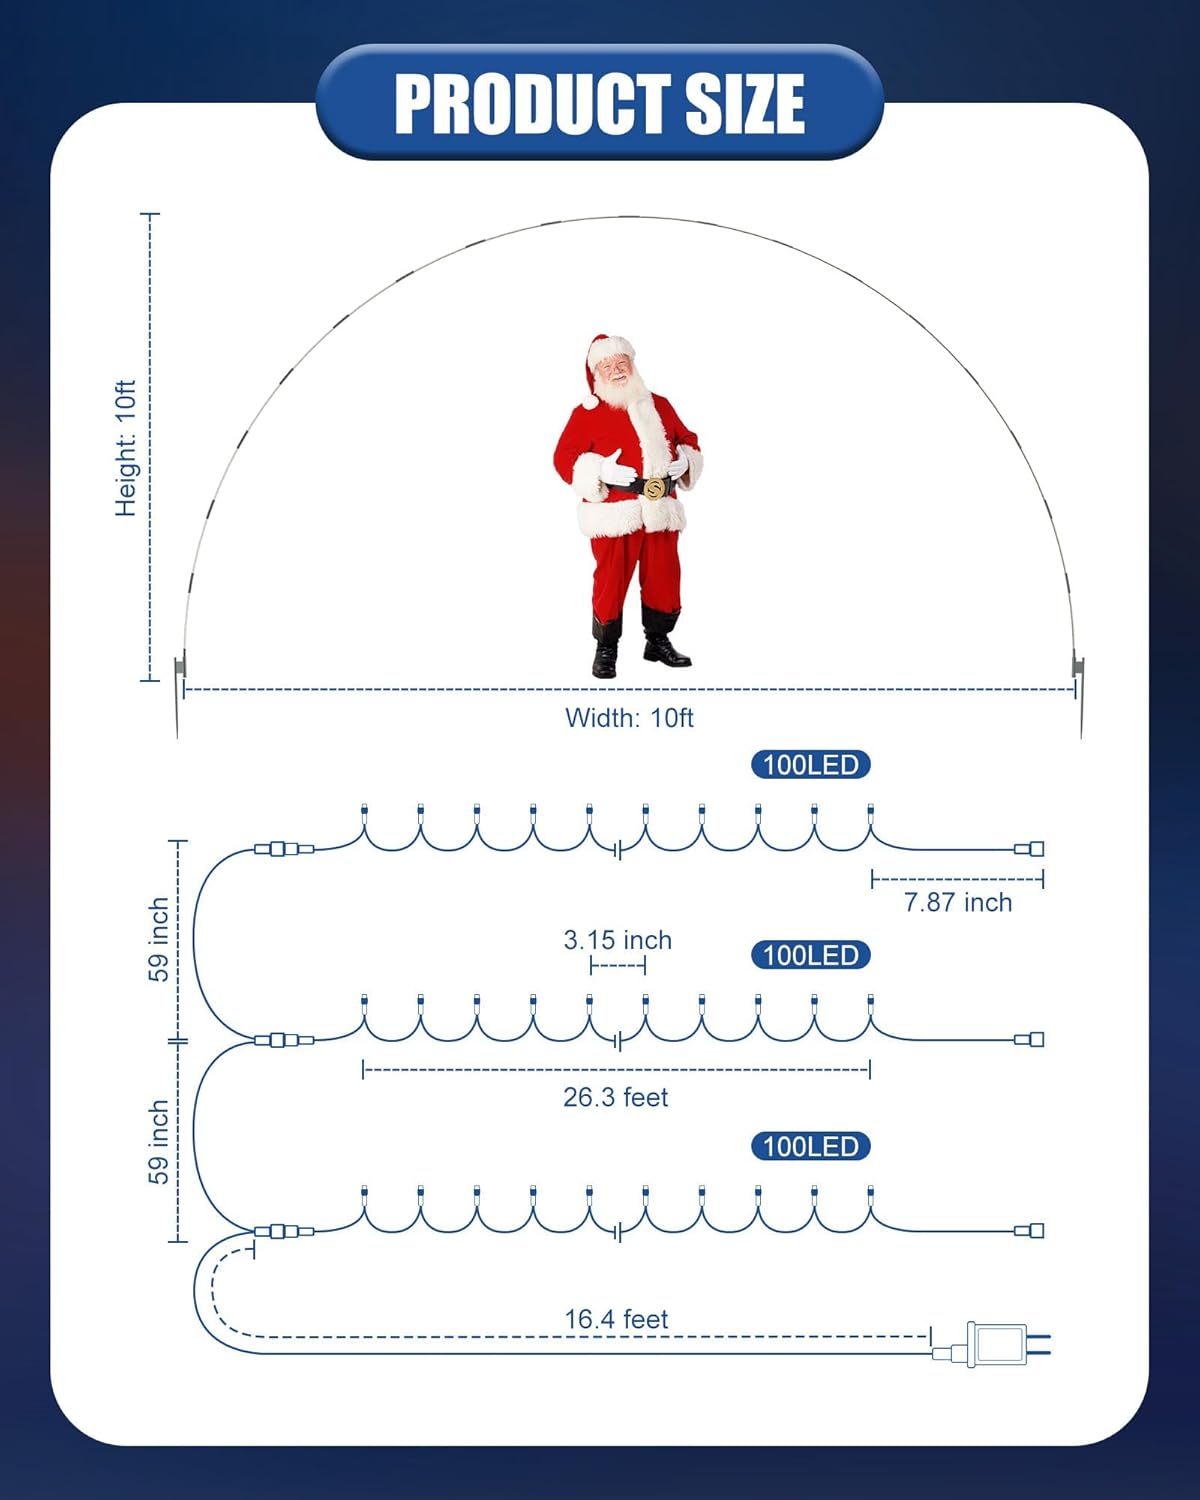
Figure 3.1: Product dimensions and light string measurements. The arch can be configured up to 10 feet high and 10 feet wide. The diagram also shows the spacing of the 100 LED lights on each string.
4. Setup and Assembly Instructions
The Brightown Christmas Archway is designed for simple and quick assembly. Follow these steps for proper setup:
- Unpack Components: Carefully remove all items from the storage bag and verify against the "Package Contents" list.
- Assemble Arch Poles: The arch poles are segmented fiberglass rods connected by elastic cords. Gently extend and connect the segments until each arch forms a complete, curved pole. Ensure all connections are secure.
- Position Ground Stakes: Determine the desired location for your archway. Insert the metal ground stakes firmly into the ground where each end of an arch will rest. Ensure the stakes are spaced appropriately for the desired arch width (up to 10 feet).
- Mount Arch Poles: Slide the assembled arch poles onto the ground stakes. The poles should fit securely into the base of the stakes. Repeat for all three arches, positioning them as desired for your display.
- Attach String Lights: Carefully uncoil the 100 LED string lights. Using the provided string light clips, attach one string of lights to each arch pole. Distribute the lights evenly along the arch for optimal illumination. Ensure the clips securely hold the lights to the arch.
- Connect Power: Connect the power adapter to the string lights. Ensure all connections are tight and protected from moisture. Plug the power adapter into a suitable outdoor-rated electrical outlet.
- Secure Archways: For added stability, especially in windy conditions, ensure the ground stakes are deeply embedded. The archways are designed to resist wind, rain, and snow.

Figure 4.1: Example of the Brightown Christmas Archway Light Set fully assembled and illuminated, enhancing an outdoor home entrance.

Figure 4.2: Detail of the string light clip mechanism, demonstrating how to securely attach the LED lights to the arch poles.
5. Operating Instructions
The Brightown Christmas Archway Light Set features 8 lighting modes controlled by the included remote control.
- Power On/Off: Press the ON button to turn the lights on, and OFF to turn them off.
- Select Lighting Mode: Use the numbered buttons (1-8) on the remote control to cycle through the 8 different lighting effects:
- 1. Combination
- 2. Waves
- 3. Sequential
- 4. Slow Glow
- 5. Chasing/Flash
- 6. Slow Fade
- 7. Twinkle/Flash
- 8. Steady On
- Timer Function: Press the TIMER button to activate the built-in timer. The lights will automatically turn on for 6 hours and then off for 18 hours, repeating the cycle daily.
- Brightness Adjustment: Use the DIM+ and DIM- buttons to adjust the brightness level of the lights.

Figure 5.1: The remote control for selecting lighting modes and adjusting settings. It features buttons for power, timer, 8 distinct modes, and brightness control.
6. Maintenance and Storage
- Cleaning: Disconnect power before cleaning. Wipe the arch poles and lights with a soft, damp cloth. Do not use harsh chemicals or abrasive cleaners.
- Inspection: Before each use, inspect the arch poles, light strings, and power adapter for any signs of damage, frayed wires, or loose connections. Do not use if damaged.
- Disassembly: To disassemble, reverse the assembly steps. Carefully remove the light strings, then detach the arch poles from the ground stakes. Disconnect the pole segments.
- Storage: Store all components in the provided storage bag in a cool, dry place, away from direct sunlight and extreme temperatures. Ensure lights are completely dry before storing.
7. Safety Information
Please adhere to the following safety guidelines to prevent injury or damage:
- Outdoor Use Only: This product is designed for outdoor use. Ensure all electrical connections are suitable for outdoor conditions.
- Power Disconnection: Always unplug the light set from the power outlet before assembly, disassembly, cleaning, or maintenance.
- Weather Conditions: While designed to resist wind, rain, and snow, it is recommended to unplug the unit during severe weather conditions (e.g., heavy storms, strong winds) to prevent damage.
- Flammable Materials: Keep the light set away from flammable materials.
- Children and Pets: Keep out of reach of children and pets. Adult supervision is required when children are near the display.
- Electrical Safety: Do not overload electrical outlets. Do not connect to another lighting string or seasonal product unless specified. Ensure the power cord is not pinched or damaged.
- Ground Stakes: Ensure ground stakes are fully inserted into the ground to provide maximum stability and prevent the archways from falling.
8. Troubleshooting
If you encounter issues with your Brightown Christmas Archway Light Set, refer to the following common problems and solutions:
- Lights Not Turning On:
- Check if the power adapter is securely plugged into a working outlet.
- Ensure all connections between the light strings and the power adapter are firm.
- Verify the remote control battery is functional and the "ON" button has been pressed.
- Inspect the entire light string for any visible damage or broken bulbs.
- Remote Control Not Working:
- Ensure there are no obstructions between the remote and the light set's receiver.
- Check and replace the remote control battery if necessary.
- Confirm you are within the 32FT operating range of the remote.
- Lights Flickering or Dim:
- Check for loose connections in the power supply or between light strings.
- Ensure the power outlet is providing consistent voltage.
- Adjust brightness using the DIM+ button on the remote.
9. Warranty and Customer Support
Brightown is committed to providing high-quality products and excellent customer service. Your Christmas arch is built with durable materials designed to withstand outdoor conditions.
If you have any questions, concerns, or require assistance with your product, please contact our responsive customer service team. We are ready to assist you within 24 hours.
For support, please visit the Brightown Store on Amazon or refer to the contact information provided with your purchase.


