Introduction
This user manual provides detailed instructions for the operation, maintenance, and troubleshooting of your Trevi GO 2600 4K Action Cam. Please read this manual thoroughly before using the device to ensure proper functionality and to prevent damage.
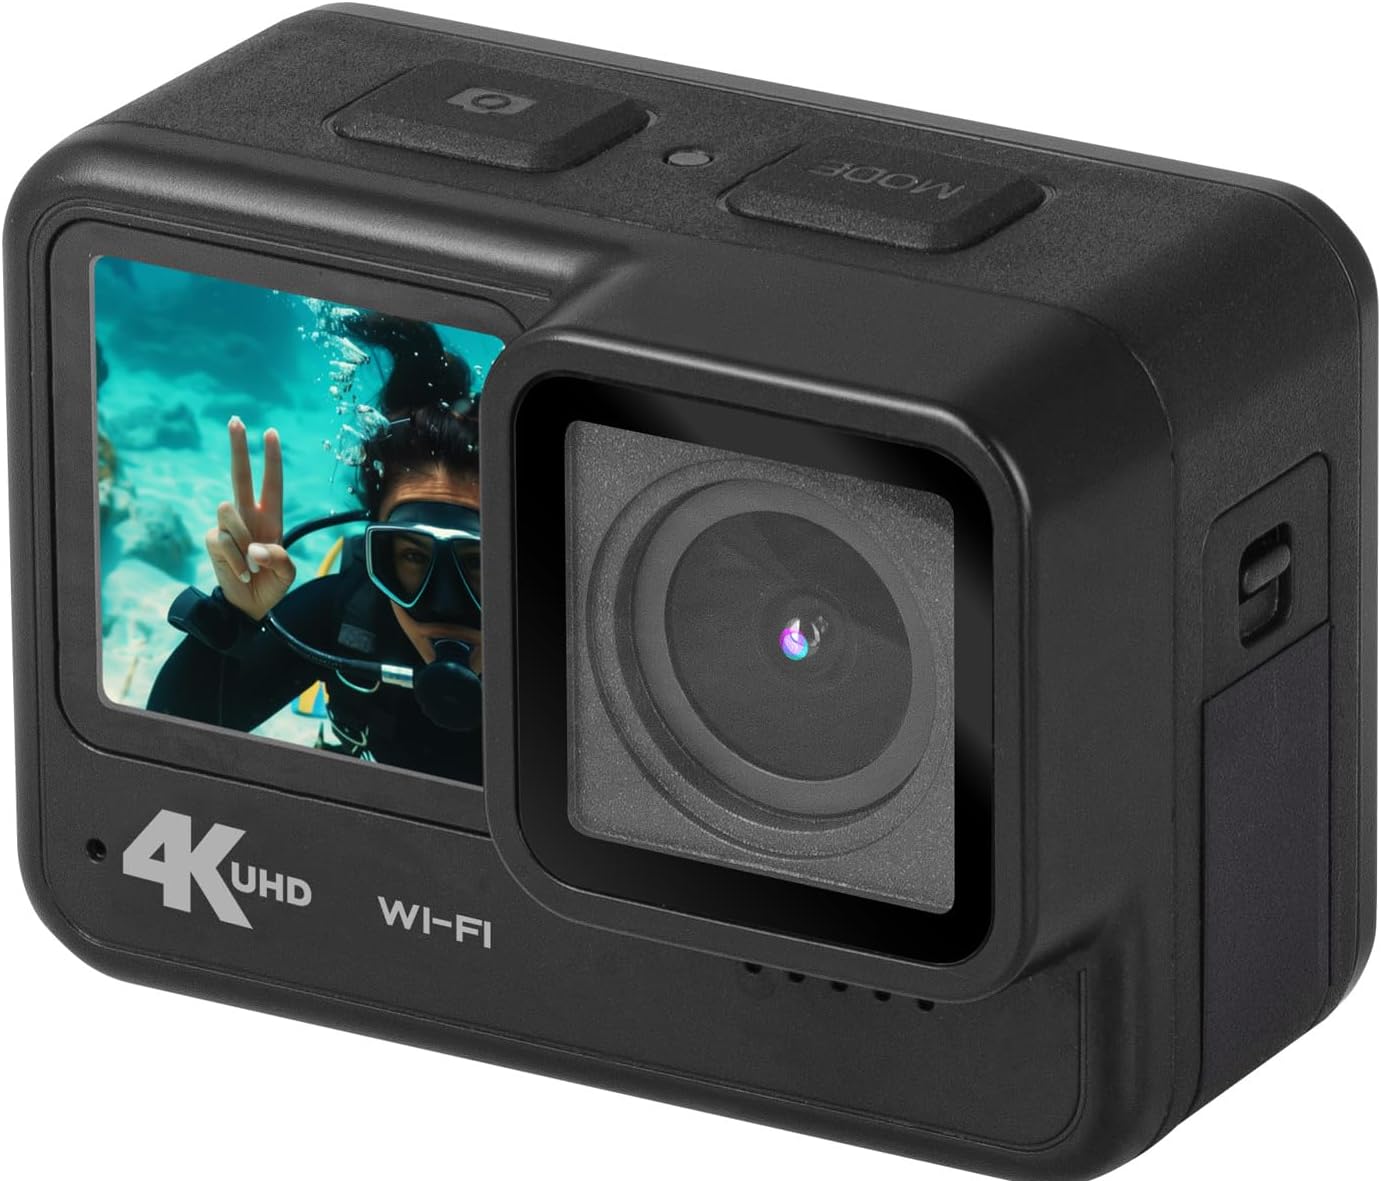
Figure 1: Trevi GO 2600 4K Action Cam, angled view showing front and side.
Product Features
- 4K Ultra HD Video: Records crisp videos at 4K@30fps.
- High-Resolution Photos: Captures still images up to 20MP.
- Dual IPS Displays: Features a 2-inch rear touchscreen for settings and playback, and a 1.3-inch front display for selfies and vlogging.
- Wi-Fi Connectivity: Connects to your smartphone via a dedicated app for live viewing and content sharing.
- Wide-Angle Lens: 140° wide-angle lens captures a broad field of view.
- Built-in Microphone: Ensures clear audio recording.
- Versatile Use: Functions as a video camera, still camera, and webcam.
- USB Type-C Port: For data transfer and charging.
- Expandable Storage: Supports Micro-SD cards up to 128GB (not included).
- Rechargeable Battery: Internal rechargeable lithium battery for extended use.

Figure 2: Front view of the Trevi GO 2600 4K Action Cam, highlighting the dual display.
Package Contents
Verify that all items listed below are included in your package:
- Trevi GO 2600 4K Action Cam
- USB Type-C Cable (for charging and data transfer)
- Mounting Kit (for handlebars, sports helmets, and underwater equipment)
- User Manual (this document)
- Warranty Certificate
- List of Service Centers

Figure 3: Included accessories for the Trevi GO 2600 4K Action Cam.
Setup
1. Battery Charging
The Trevi GO 2600 4K Action Cam comes with an internal rechargeable lithium battery. Before first use, fully charge the battery.
- Connect the supplied USB Type-C cable to the camera's USB Type-C port.
- Connect the other end of the cable to a USB power adapter (not included) or a computer's USB port.
- The charging indicator light will illuminate. It will turn off or change color when charging is complete.
2. MicroSD Card Installation
A MicroSD card (up to 128GB, Class 10 or higher recommended) is required for recording videos and photos. The card is not included.
- Locate the MicroSD card slot on the side of the camera.
- Gently open the protective cover.
- Insert the MicroSD card with the gold contacts facing the back of the camera until it clicks into place.
- Close the protective cover firmly to ensure water resistance.

Figure 4: Side view of the camera, indicating the location of the port cover for MicroSD card and USB-C port.
3. Mounting the Camera
Use the included mounting kit to attach your camera to various surfaces or equipment.
- Refer to the specific bracket instructions for mounting on handlebars, helmets, or underwater gear.
- Ensure the camera is securely fastened to prevent accidental detachment during use.
Operating Instructions
1. Power On/Off
- To Power On: Press and hold the Power/Mode button (usually on top or front) for a few seconds until the display illuminates.
- To Power Off: Press and hold the Power/Mode button again until the display turns off.
2. Using Dual Displays
- Rear Touchscreen (2-inch): Use this display to navigate menus, change settings, and review recorded footage. Tap and swipe as you would on a smartphone.
- Front Display (1.3-inch): This display is ideal for framing selfies or vlogs, allowing you to see yourself while recording.
3. Recording Video
- Ensure the camera is in video recording mode. If not, press the Mode button to cycle through modes until the video icon is displayed.
- Press the Shutter/OK button (usually on top) to start recording. A red dot or recording indicator will appear on the screen.
- Press the Shutter/OK button again to stop recording. The video file will be saved to the MicroSD card.
4. Taking Photos
- Switch to photo mode by pressing the Mode button until the camera icon is displayed.
- Frame your shot using either the front or rear display.
- Press the Shutter/OK button to take a photo. The image will be saved to the MicroSD card.
5. Wi-Fi Connectivity and App
The camera can connect to your smartphone via Wi-Fi for remote control, live preview, and file transfer.
- Download the dedicated Trevi action cam app from your smartphone's app store.
- On the camera, enable Wi-Fi (refer to the camera's on-screen menu for Wi-Fi settings).
- On your smartphone, connect to the camera's Wi-Fi network (SSID and password will be displayed on the camera screen).
- Open the app to control the camera, view live footage, and download files.

Figure 5: Side view of the camera, showing buttons that may include Wi-Fi activation.
6. Webcam Function
The Trevi GO 2600 4K can be used as a webcam for video calls.
- Connect the camera to your computer using the USB Type-C cable.
- Select "Webcam Mode" on the camera's display if prompted.
- Your computer should recognize the camera as a webcam. Select it as the video input device in your video conferencing software.
Maintenance
1. Cleaning
- Use a soft, lint-free cloth to clean the camera body and displays.
- For the lens, use a specialized lens cleaning cloth and solution. Avoid abrasive materials.
- Ensure the camera is dry before closing any ports or covers, especially after underwater use.
2. Storage
- Store the camera in a cool, dry place away from direct sunlight and extreme temperatures.
- If storing for an extended period, ensure the battery is partially charged (around 50%) to prolong its lifespan.
3. Waterproofing
The Trevi GO 2600 4K is designed to be water-resistant. However, always ensure all port covers and the battery/MicroSD card compartment are securely closed before exposing the camera to water, especially for underwater activities.
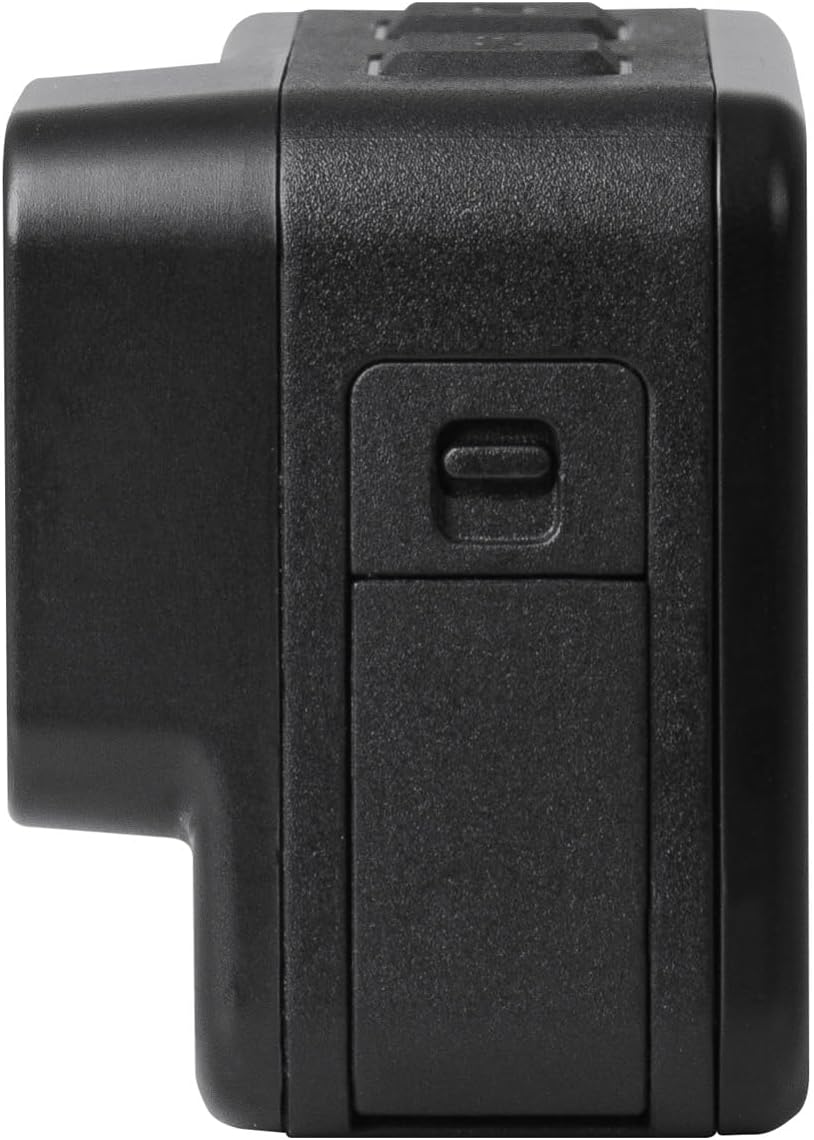
Figure 6: The Trevi GO 2600 4K Action Cam demonstrating its water resistance.
Troubleshooting
| Problem | Possible Cause | Solution |
|---|---|---|
| Camera does not power on. | Battery is depleted or not charged. | Charge the battery fully using the USB Type-C cable. |
| Cannot record video/take photos. | No MicroSD card inserted or card is full/corrupted. | Insert a MicroSD card. Format the card if it's new or corrupted. Delete old files if full. |
| Wi-Fi connection issues. | Incorrect Wi-Fi password or app issues. | Ensure correct password. Restart camera and smartphone. Reinstall the app if necessary. |
| Poor video/photo quality. | Lens is dirty or lighting conditions are poor. | Clean the lens. Ensure adequate lighting. Check resolution settings. |
Specifications
| Feature | Detail |
|---|---|
| Model Number | 26004K00 |
| Video Resolution | Up to 4K@30fps (also 1080p@60/30fps) |
| Photo Resolution | Up to 20MP |
| Image Sensor | Sony IMX175 (CMOS Technology) |
| Video Codec | H.264 (MPEG format) |
| Rear Display | 2-inch IPS Touchscreen |
| Front Display | 1.3-inch IPS Display |
| Lens Angle | 140° Wide Angle |
| Connectivity | Wi-Fi, USB Type-C |
| Storage | Micro-SD card up to 128GB (not included) |
| Battery | Internal Rechargeable Lithium |
| Dimensions | 11 x 10 x 9 cm |
| Weight | 340 grams |
| Recommended Use | Outdoor activities |
Warranty and Support
Your Trevi GO 2600 4K Action Cam comes with a warranty. Please refer to the included Warranty Certificate for specific terms and conditions regarding coverage and duration.
For technical assistance, repairs, or any product-related inquiries, please consult the List of Service Centers provided in your package. You may also visit the official Trevi website for further support information.
Return Policy: If you wish to return a product within 30 days of receipt because you have changed your mind, please consult the Amazon return policy page. If you have received a defective or damaged product, please consult the Amazon help page for defective/damaged products. For specific information on purchases made on the Marketplace, please consult the Amazon help page for Marketplace purchases.


