
1. Safety Information
Please read and understand this entire manual before attempting to assemble, operate, or install the product. Failure to follow these instructions could result in electric shock, fire, or serious personal injury.
- All electrical connections must be in accordance with local codes and ordinances, and the National Electric Code (NEC). If you are unfamiliar with proper electrical wiring connections, obtain the services of a qualified electrician.
- Before starting installation, disconnect power by turning off the circuit breakers at the main fuse box.
- Ensure the installation site can support the fan's weight.
- Do not connect the fan to a dimmer switch or variable speed control.
- Ensure the fan blades are at least 7 feet (2.1 meters) from the floor.
- Avoid placing objects in the path of the blades.
2. Package Contents
Verify that all components are present before beginning installation:
- Ceiling Fan Assembly
- Remote Control
- Downrods (7.87" and 4.92")
- Mounting Bracket
- Hardware Pack (screws, wire nuts, etc.)
- Instruction Manual
3. Specifications
| Feature | Detail |
|---|---|
| Brand | Merexcint |
| Model Name | MX-60071-B52 |
| Product Dimensions | 20.47"L x 20.47"W x 13"H |
| Item Weight | 9.92 Pounds |
| Color | Black |
| Material | Metal (Lampshade), ABS (Fan Blades) |
| Motor Type | DC Reversible Motor |
| Fan Speeds | 6 Speeds |
| Light Source | E12*5 (bulbs not included) |
| Voltage | 120 Volts |
| Control Method | Remote Control |
| Timer Settings | 1H, 2H, 4H |
| Recommended Room Size | Up to 200 sq. ft. |
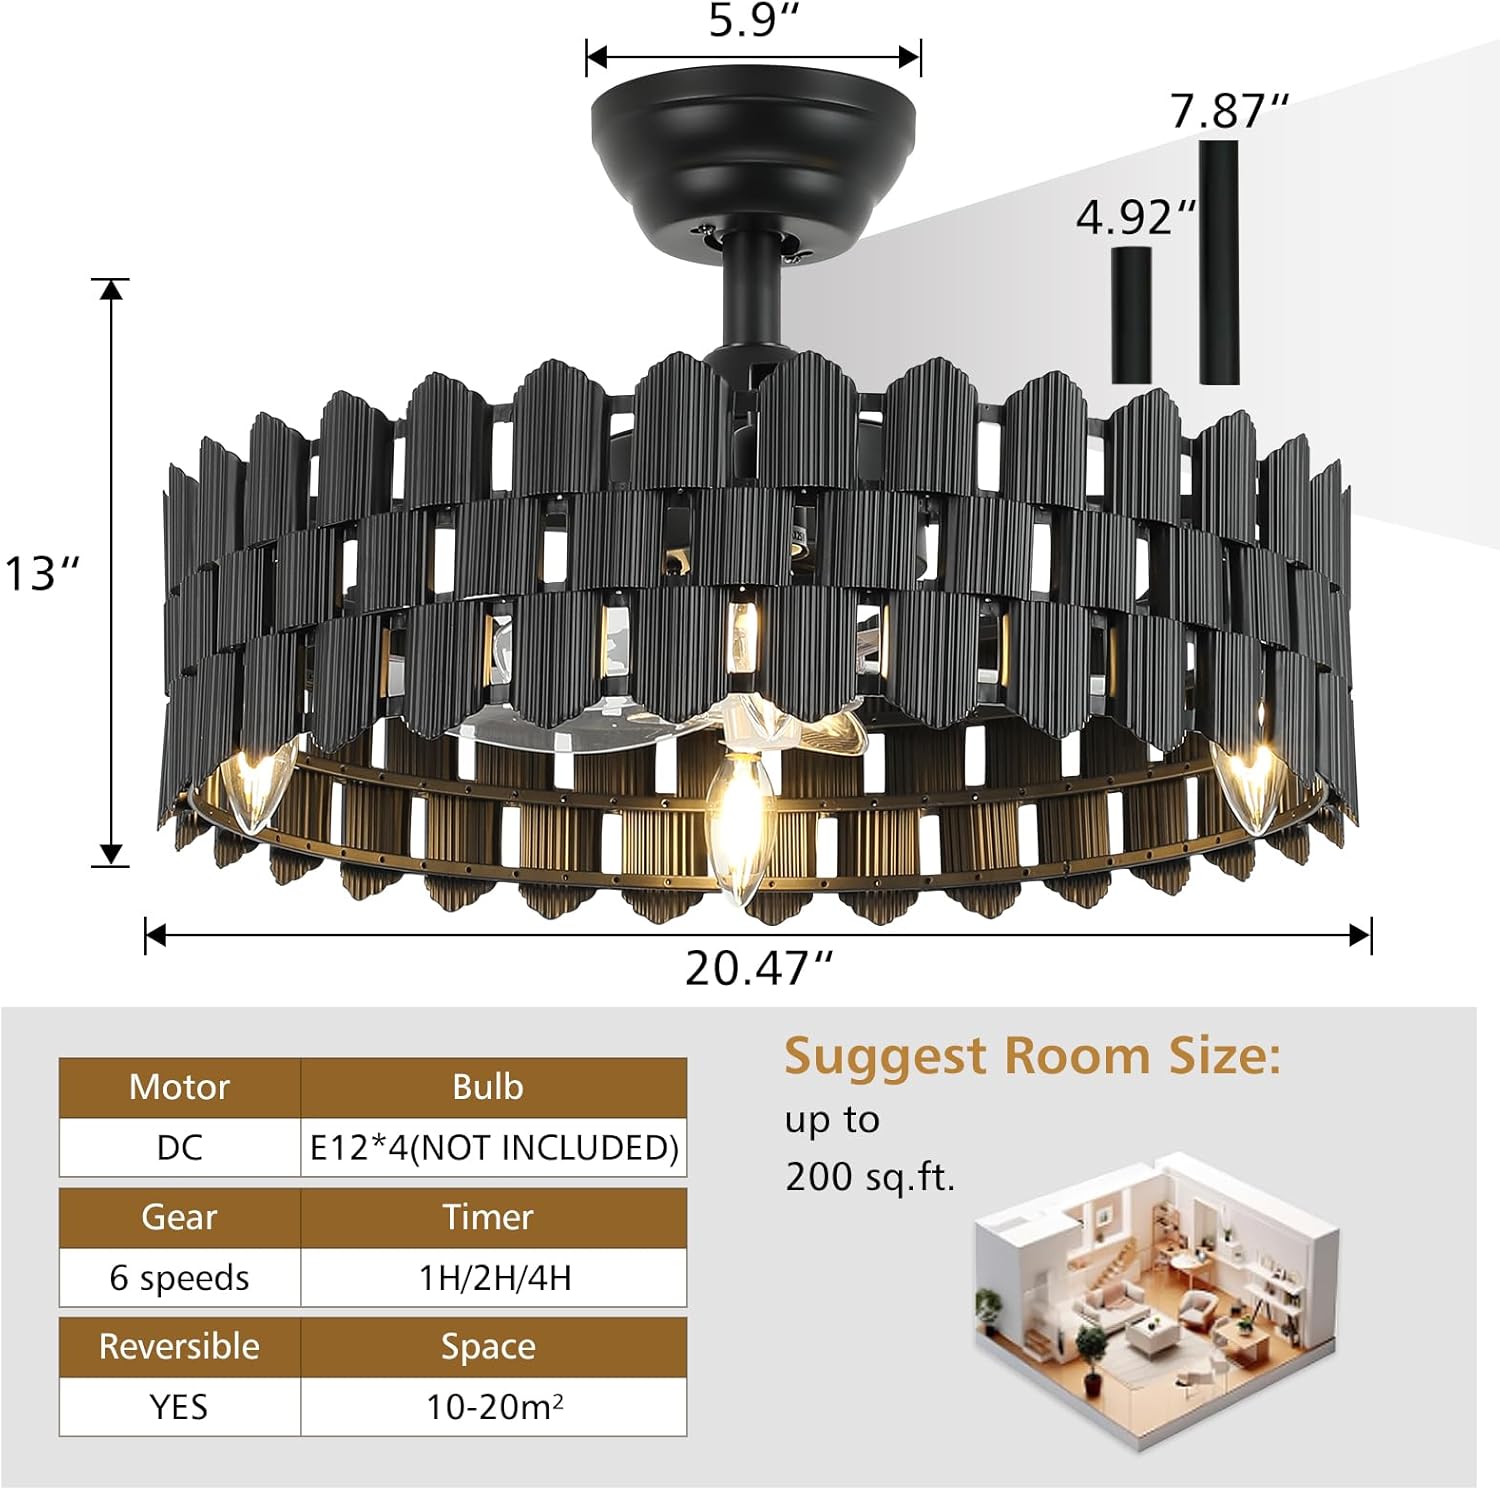
Image 3.1: Detailed dimensions of the ceiling fan and a summary of key specifications including motor type, bulb requirements, fan speeds, and timer settings.
4. Setup and Installation
It is recommended that installation be performed by a qualified electrician. Ensure power is disconnected at the circuit breaker before beginning.
4.1. Component Overview

Image 4.1: Close-up views of the fan's main components, including the metal lampshade, ceiling plate, ABS fan blades, and the DC reversible motor.
4.2. Installation Steps
- Prepare the Mounting Location: Turn off power at the circuit breaker. Securely attach the mounting bracket to the ceiling junction box. The junction box must be capable of supporting the fan's weight.
- Assemble the Downrod: Choose the appropriate downrod (7.87" or 4.92") for your ceiling height. Feed the electrical wires from the fan motor through the downrod.
- Hang the Fan: Carefully lift the fan assembly and place the downrod ball into the mounting bracket. Ensure the safety cable is also secured.
- Make Electrical Connections: Connect the fan's electrical wires to the household wiring according to the wiring diagram provided in the full manual. Use the included wire nuts. Ensure all connections are secure.
- Secure the Canopy: Slide the canopy up to the ceiling and secure it to the mounting bracket with the provided screws, ensuring all wires are tucked inside.
- Install Light Bulbs: Insert five E12 base bulbs (not included) into the light sockets.

Image 4.2: Visual representation of a person installing the ceiling fan, highlighting the straightforward installation process.
5. Operating Instructions
The Merexcint ceiling fan is operated using the included remote control.
5.1. Remote Control Functions

Image 5.1: Diagram of the remote control, showing buttons for light on/off, fan on/off, 6-speed fan control, reversible motor, and timer settings.
- Light ON/OFF: Press the light button to turn the light on or off.
- Fan ON/OFF: Press the fan button to turn the fan on or off.
- Fan Speed (1-6): Use the speed buttons (1-6) to adjust the fan's airflow. Speed 1 is the lowest, Speed 6 is the highest.
- Reversible Motor: Press the 'R' button to switch between summer and winter modes.
- Timer Settings (1H, 2H, 4H): Press the corresponding button to set the fan to turn off automatically after 1, 2, or 4 hours.
5.2. Summer and Winter Modes

Image 5.2: Visual guide demonstrating the fan's reversible airflow for optimal comfort in both summer (downward airflow for cooling) and winter (upward airflow for heat distribution).
- Summer Mode: The fan blades rotate counter-clockwise, pushing air downwards to create a cooling breeze.
- Winter Mode: The fan blades rotate clockwise, drawing air upwards to circulate warm air trapped near the ceiling, helping to balance room temperature.
5.3. Timer Function

Image 5.3: A visual representation of the fan's timer function, allowing users to set automatic shut-off after 2 or 4 hours to conserve energy.
The timer function allows you to set the fan to operate for a specific duration (1, 2, or 4 hours) before automatically turning off. This feature is useful for energy saving.
6. Maintenance
Regular maintenance ensures optimal performance and extends the lifespan of your ceiling fan.
- Cleaning: To clean the fan, wipe with a soft, damp cloth. Do not use abrasive cleaners or solvents, as these may damage the finish. Ensure power is off before cleaning.
- Bulb Replacement: Ensure power is off before replacing bulbs. This fan uses E12 base bulbs. Replace with bulbs of the same type and wattage as specified in the full manual.
- Tighten Fasteners: Periodically check all screws and fasteners on the fan and mounting hardware to ensure they are secure.
7. Troubleshooting
Refer to the table below for common issues and their solutions.
| Problem | Possible Cause | Solution |
|---|---|---|
| Fan does not start | No power to the fan; Loose wire connections; Remote control battery low. | Check circuit breaker and wall switch; Verify all wire connections; Replace remote control battery. |
| Light does not work | Bulb faulty; Loose wire connection; No power to the light. | Replace bulb; Check light wire connections; Verify power supply. |
| Fan wobbles | Loose mounting screws; Unbalanced blades. | Ensure all mounting screws are tight; Check for bent blades or use a balancing kit if necessary. |
| Remote control not responding | Battery low or incorrectly installed; Remote not paired with fan. | Replace battery, ensuring correct polarity; Refer to the full manual for remote pairing instructions. |
| Excessive noise | Loose screws; Motor issue. | Check and tighten all screws; If noise persists, contact customer support. |
8. Support and Warranty
Merexcint is committed to providing customer satisfaction.
8.1. After Sales Support
If you encounter any issues or have questions regarding your Merexcint ceiling fan, please contact our customer service. We are available to assist with product inquiries, troubleshooting, and parts replacement.
In the event of damage during transportation, we offer a free exchange. Please report any such issues upon receipt of the product.
8.2. Warranty Information
Specific warranty details are provided with your purchase documentation. Please retain your proof of purchase for warranty claims. The warranty typically covers manufacturing defects under normal use.