
Introduction
Thank you for choosing the HIPIHOM J70 Table Set. This manual provides essential information for the safe assembly, operation, and maintenance of your new 45.3-inch round dining table and four U-shaped black chairs. Please read these instructions carefully before beginning assembly and retain them for future reference.
Safety Information
Always assemble according to the provided instructions. Be cautious of the round table shape to prevent tip-overs, especially in homes with children or pets. Ensure all screws and fasteners are securely tightened before use. Do not stand on the table or chairs. Keep small parts away from children during assembly.
Package Contents
Your HIPIHOM J70 Table Set will arrive in two separate boxes. Please verify all components are present before beginning assembly.
- 1 x Round Dining Table Top
- 1 x Table Base (X-shaped carbon steel legs)
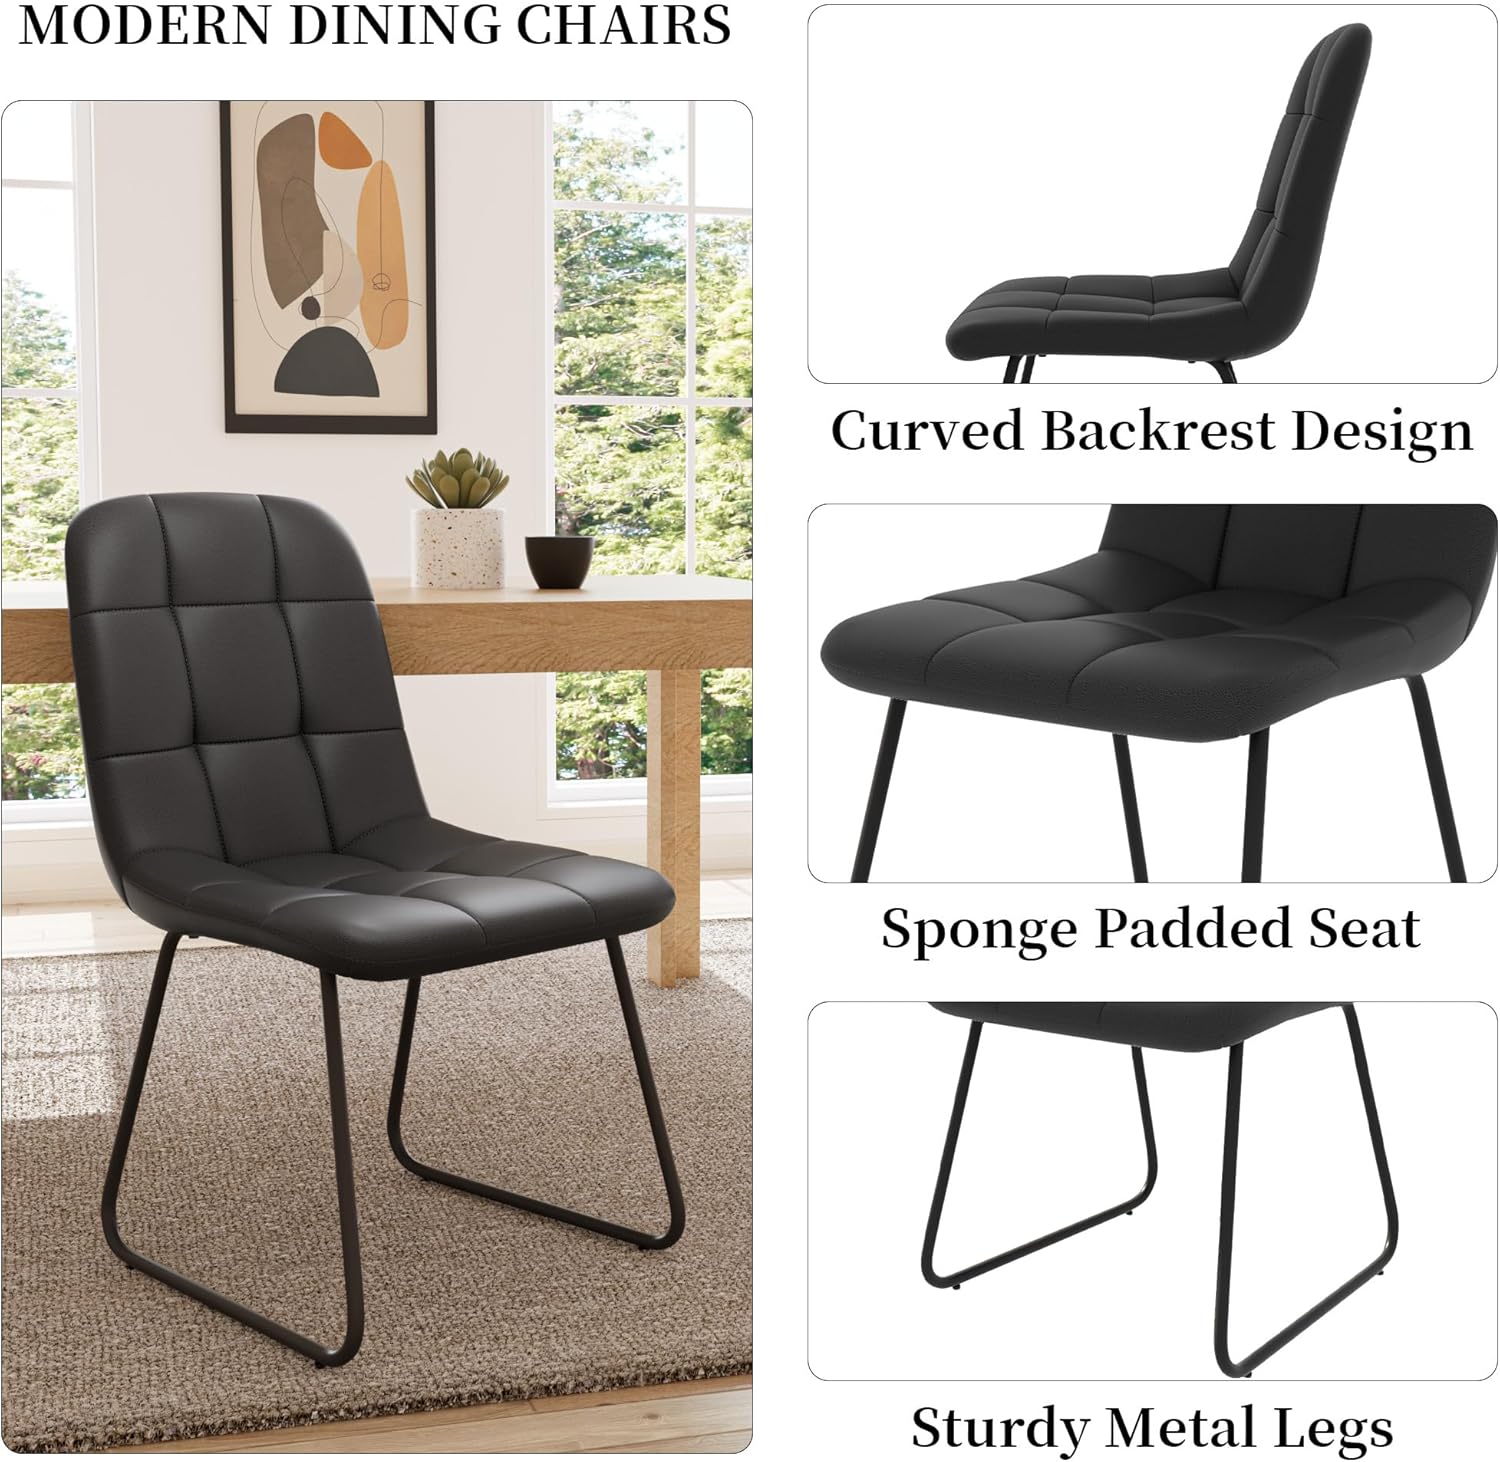
- 4 x U-Shaped Dining Chairs (including seat, backrest, and metal legs)
- Assembly Hardware (screws, washers, Allen wrench)
- Instruction Guide

Setup and Assembly
Assembly is required for both the table and chairs. It is recommended to have two people for table assembly. Please follow the steps below carefully.
Table Assembly
- Unpack all table components and lay them out on a soft, clean surface to prevent scratches.
- Attach the X-shaped carbon steel legs to the underside of the round table top using the provided screws and Allen wrench. Ensure the legs are oriented correctly for stability.
- Tighten all screws firmly, but do not overtighten.
- Carefully flip the table upright.
- Adjust the non-slip rubber pads on the table feet to ensure stability and prevent floor scratches.



Chair Assembly
- Unpack all chair components for one chair.
- Attach the U-shaped metal legs to the chair seat using the provided hardware. Ensure the legs are correctly aligned with the pre-drilled holes.
- Tighten all screws securely. If screws do not align, try rotating the leg frame or switching sides.
- Repeat for the remaining three chairs.

Operating and Usage
The HIPIHOM J70 Table Set is designed for versatile use in various settings.
- Dining: Ideal for daily meals and gatherings.
- Coffee/Breakfast Nook: Suitable for smaller spaces or casual dining.
- Conference: Can be used in small meeting areas.
- Space-Saving: The chairs are designed to tuck neatly under the table when not in use, maximizing your living space.

Maintenance and Care
Proper care will ensure the longevity and appearance of your dining set.
- Cleaning: Wipe the table and chairs with a damp cloth. Avoid harsh chemicals or abrasive cleaners.
- Spills: The table surface is waterproof. Wipe spills immediately to prevent staining.
- Protection: The table features adjustable foot pads to protect your floors. Ensure they are properly adjusted.
- Regular Checks: Periodically check and tighten all screws and fasteners to maintain stability.


Troubleshooting
If you encounter issues during assembly or use, refer to the following common solutions:
- Difficulty with Screw Alignment (Chairs/Table): If screws do not align with holes, try rotating the component (e.g., chair leg frame, table base section) 180 degrees or switching it to the opposite side. Sometimes, minor adjustments are needed to find the correct fit.
- Wobbly Table/Chairs: Ensure all screws are fully tightened. For the table, adjust the foot pads on the base to compensate for uneven floors. For chairs, re-check leg assembly and tightness.
- Missing Parts: Carefully check all packaging materials. If parts are genuinely missing, contact customer support with your purchase details.
Specifications
| Feature | Detail |
|---|---|
| Model Number | J70 Table Set |
| Brand | HIPIHOM |
| Table Dimensions (L x W x H) | 45.32 x 45.32 x 29.93 inches |
| Table Material | MDF (Table Top), Carbon Steel (Base) |
| Chair Material | PU Leather, High Elastic Sponge, Metal (Legs) |
| Color | Light Walnut (Table), Black (Chairs) |
| Item Weight | Approximately 50.8 pounds (entire set) |
| Special Features | Space-Saving Design, X-shaped Legs, Waterproof Table Top, Adjustable Foot Pads |
| Assembly Required | Yes, instructions included |
| Product Care | Wipe with Damp Cloth |
Warranty Information
Specific warranty details for the HIPIHOM J70 Table Set are not provided in this manual. For information regarding warranty coverage, terms, and conditions, please refer to your purchase documentation or contact HIPIHOM customer support directly.
Customer Support
If you have any questions, require assistance with assembly, or need to report missing/damaged parts, please contact HIPIHOM customer support. You can typically find contact information on the packaging, your purchase receipt, or by visiting the official HIPIHOM store on the retailer's website.
For online purchases, you may also refer to the "Customer Support" link provided by the retailer.