
1. Product Overview
The Sunstone Zapp Plus 2 is a portable pulse arc welder designed for permanent jewelry applications. It features a dial-based control system for precise energy adjustments and is engineered for ease of use and portability.
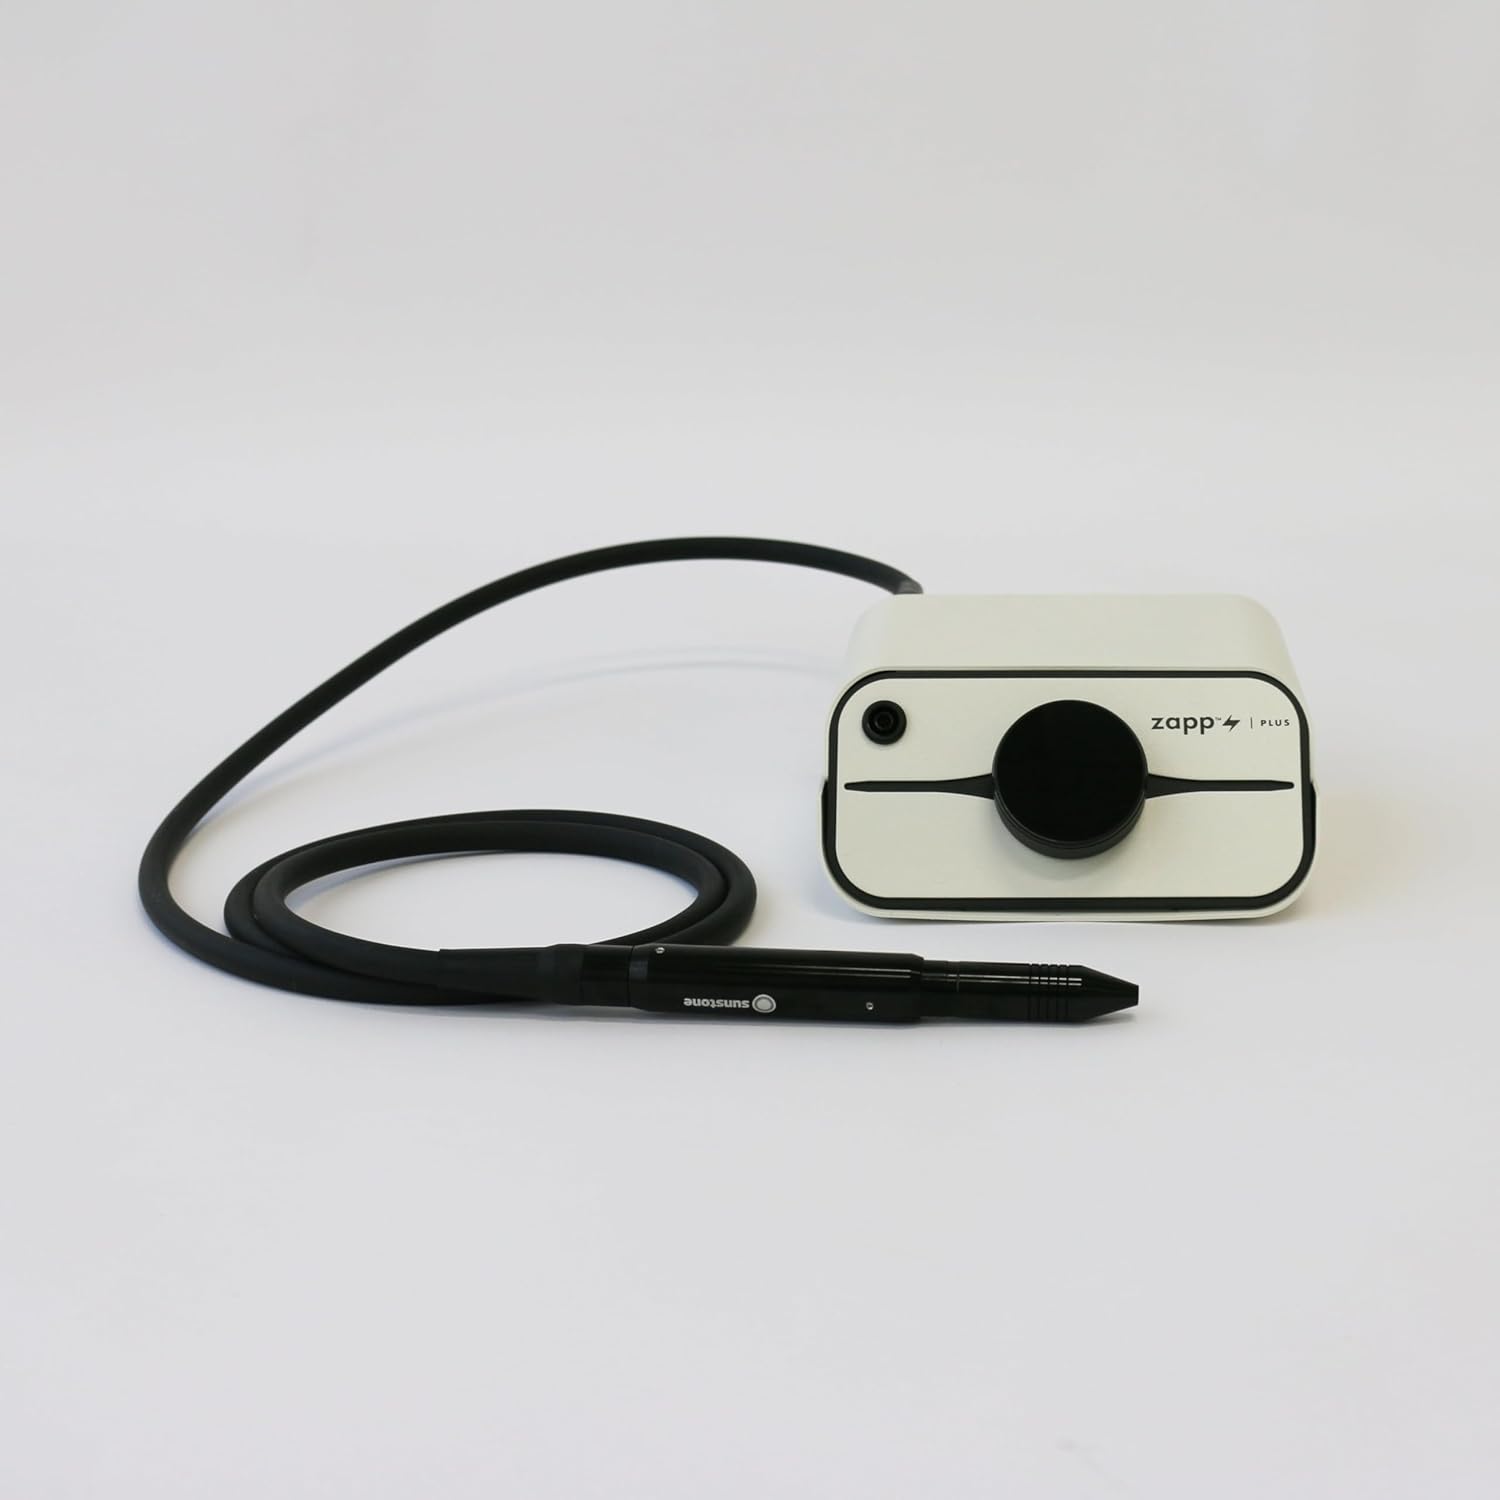
Figure 1: Sunstone Zapp Plus 2 Welder with connected stylus.
Key Features:
- Dial Control: Intuitive dial for adjusting weld power settings (1-30 Joules).
- Energy Range: 1-30 Joules in 1-Joule increments.
- Portability: Compact and lightweight design (1.9 lbs, 13.3 x 15.5 x 6.9 cm).
- Tru-Fire Technology: Supports arc initiation and welding control.
- Argon Ready: Compatible with external argon gas setups.
- Stylus: Includes Sunstone v3.0 welding stylus with a 72-inch cord.
2. Safety Information
Always prioritize safety when operating welding equipment. Failure to follow safety guidelines can result in serious injury or damage to the equipment.
General Safety Precautions:
- Eye Protection: Always wear appropriate shaded safety glasses or other approved eye protection (e.g., PJ Scope, 5x Arm Microscope) to protect against intense light and sparks.
- Ventilation: Ensure adequate ventilation in your workspace to disperse welding fumes.
- Electrical Safety: Do not operate the welder with wet hands or in damp conditions. Ensure all connections are secure before powering on.
- Flammable Materials: Keep flammable materials away from the welding area.
- Grounding: Always use the precision grounding clip as instructed.
- Children and Pets: Keep children and pets away from the welding equipment during operation.
3. Package Contents
Verify that all items listed below are included in your package:
- Zapp Plus 2 Permanent Jewelry Welder
- Power Adapter
- Power Cord
- (3) 1mm Premium Orion Electrodes
- 7' Argon Gas Tubing (for optional argon setup)
- 72" Advanced Orion Welding Stylus
- Shaded Safety Glasses
- Precision Grounding Clip
- Standard Alligator Clip
- Stylus Holder
- Metal Welding Practice Card
- Comprehensive Operator's Guide
4. Setup Instructions
Follow these steps to set up your Zapp Plus 2 welder for operation.
4.1 Connect Power
- Connect the power adapter to the welder's power input port (labeled '48VDC, 90W, 1.87A').
- Plug the power cord into the power adapter, then into a suitable electrical outlet.
4.2 Connect Welding Stylus
- Insert the connector of the 72" Advanced Orion Welding Stylus into the 'STYLUS' port on the welder. Ensure it is securely fastened.
4.3 Attach Grounding Clip
- Connect the precision grounding clip to the 'GROUND' port on the welder.
- Attach the other end of the grounding clip to the workpiece or a suitable grounding point near the welding area.

Figure 2: Rear view of the Zapp Plus 2 showing connection ports.
4.4 Argon Gas Connection (Optional)
If using argon gas for enhanced weld quality:
- Connect one end of the 7' argon gas tubing to the 'ARGON GAS 5-10 psi' port on the welder.
- Connect the other end of the tubing to your argon gas regulator. Ensure the gas pressure is set between 5-10 psi.
- Toggle the 'ARGON GAS' switch to the ON position when ready to weld.
4.5 Optics Connection (Optional)
If using external optics (e.g., PJ Scope, 5x Arm Microscope):
- Connect the optics cable to the 'OPTICS' port on the welder.
5. Operating Instructions
This section details how to operate your Zapp Plus 2 welder.
5.1 Powering On/Off
- To power on, press the 'POWER' switch located on the rear panel to the 'I' (ON) position.
- To power off, press the 'POWER' switch to the 'O' (OFF) position.
5.2 Adjusting Weld Power
The Zapp Plus 2 features a revolutionary dial control for adjusting weld energy.

Figure 3: Dial control for adjusting weld power settings.
- Rotate the central dial clockwise to increase the weld energy (Joules) and counter-clockwise to decrease it. The current setting (1-30J) will be displayed on the dial.
- To lock the current weld power setting, tap the dial. Tap again to unlock and allow further adjustments.
5.3 Welding Process
Before welding on actual jewelry, practice on the provided metal welding practice card.
- Ensure proper eye protection is worn.
- Select an appropriate energy setting for your material and desired weld.
- Position the workpiece so that the grounding clip makes good contact.
- Bring the tip of the welding stylus into contact with the area to be welded. The Tru-Fire Technology will assist in arc initiation.
- The welder is capable of 1 weld per second, with a weld spot diameter of 0.5-2.0mm.
6. Maintenance
Regular maintenance ensures optimal performance and longevity of your Zapp Plus 2 welder.
6.1 Cleaning
- Wipe the exterior of the welder with a soft, dry cloth. Do not use abrasive cleaners or solvents.
- Keep the stylus tip clean. Refer to the comprehensive operator's guide for detailed stylus cleaning procedures.
6.2 Electrode Replacement
- Electrodes will wear down over time and require replacement. Use only 1mm Premium Orion Electrodes.
- Refer to the comprehensive operator's guide for instructions on safely replacing electrodes in the stylus.
7. Troubleshooting
This section addresses common issues you might encounter. For more detailed troubleshooting, consult the comprehensive operator's guide.
Common Issues and Solutions:
- No Power:
- Ensure the power cord and adapter are securely connected.
- Verify the power switch is in the 'ON' position.
- Check the electrical outlet for power.
- Poor Weld Quality:
- Adjust the weld energy setting using the dial.
- Ensure the electrode tip is clean and properly shaped. Replace if necessary.
- Verify the grounding clip has good contact with the workpiece.
- If using argon, check gas flow and pressure (5-10 psi).
- Stylus Not Firing:
- Check that the stylus is securely connected to the welder.
- Ensure the electrode is properly installed and making contact.
8. Product Specifications
| Feature | Specification |
|---|---|
| Manufacturer | Sunstone Welders |
| Part Number | 318111 |
| Product Dimensions (L x W x H) | 15.49 x 13.34 x 6.86 cm |
| Item Weight | 862 g (1.9 lbs) |
| Power Source | AC |
| Voltage | 48 Volts |
| Wattage | 55 Watts |
| Energy Range | 1-30 Joules (in 1-Joule increments) |
| Weld Rate | 1 weld per second |
| Weld Spot Diameter | 0.5-2.0 mm |
| Argon Gas Pressure | 5-10 psi (if used) |
9. Warranty and Support
9.1 Warranty Information
The Sunstone Zapp Plus 2 Permanent Jewelry Welder is covered by a 3-Year Warranty from Sunstone Welders. This warranty covers defects in materials and workmanship under normal use.
9.2 Customer Support
Sunstone Welders provides US-based customer service. For technical assistance, warranty claims, or further inquiries, please refer to the contact information provided in your comprehensive operator's guide or visit the official Sunstone Welders website.


