
AMYET G60
AMYET V9-G60 Electric Bike User Manual
Model: G60
1. Introduction
Thank you for choosing the AMYET V9-G60 Electric Bike. This manual provides essential information for the safe operation, maintenance, and care of your new electric bicycle. Please read this manual thoroughly before your first ride and keep it for future reference. Proper assembly and understanding of all functions are crucial for your safety and the longevity of the product.
2. Safety Information
Your safety is paramount. Always wear a helmet and appropriate safety gear when riding. Adhere to all local traffic laws and regulations. Perform a pre-ride inspection before each use.
- Always wear a certified helmet.
- Check tire pressure, brakes, and battery charge before each ride.
- Do not ride under the influence of alcohol or drugs.
- Be aware of your surroundings and other road users.
- Avoid riding in adverse weather conditions (heavy rain, snow, ice).
- Ensure all quick releases and fasteners are securely tightened.
3. Components Overview
Familiarize yourself with the main components of your AMYET V9-G60 Electric Bike.
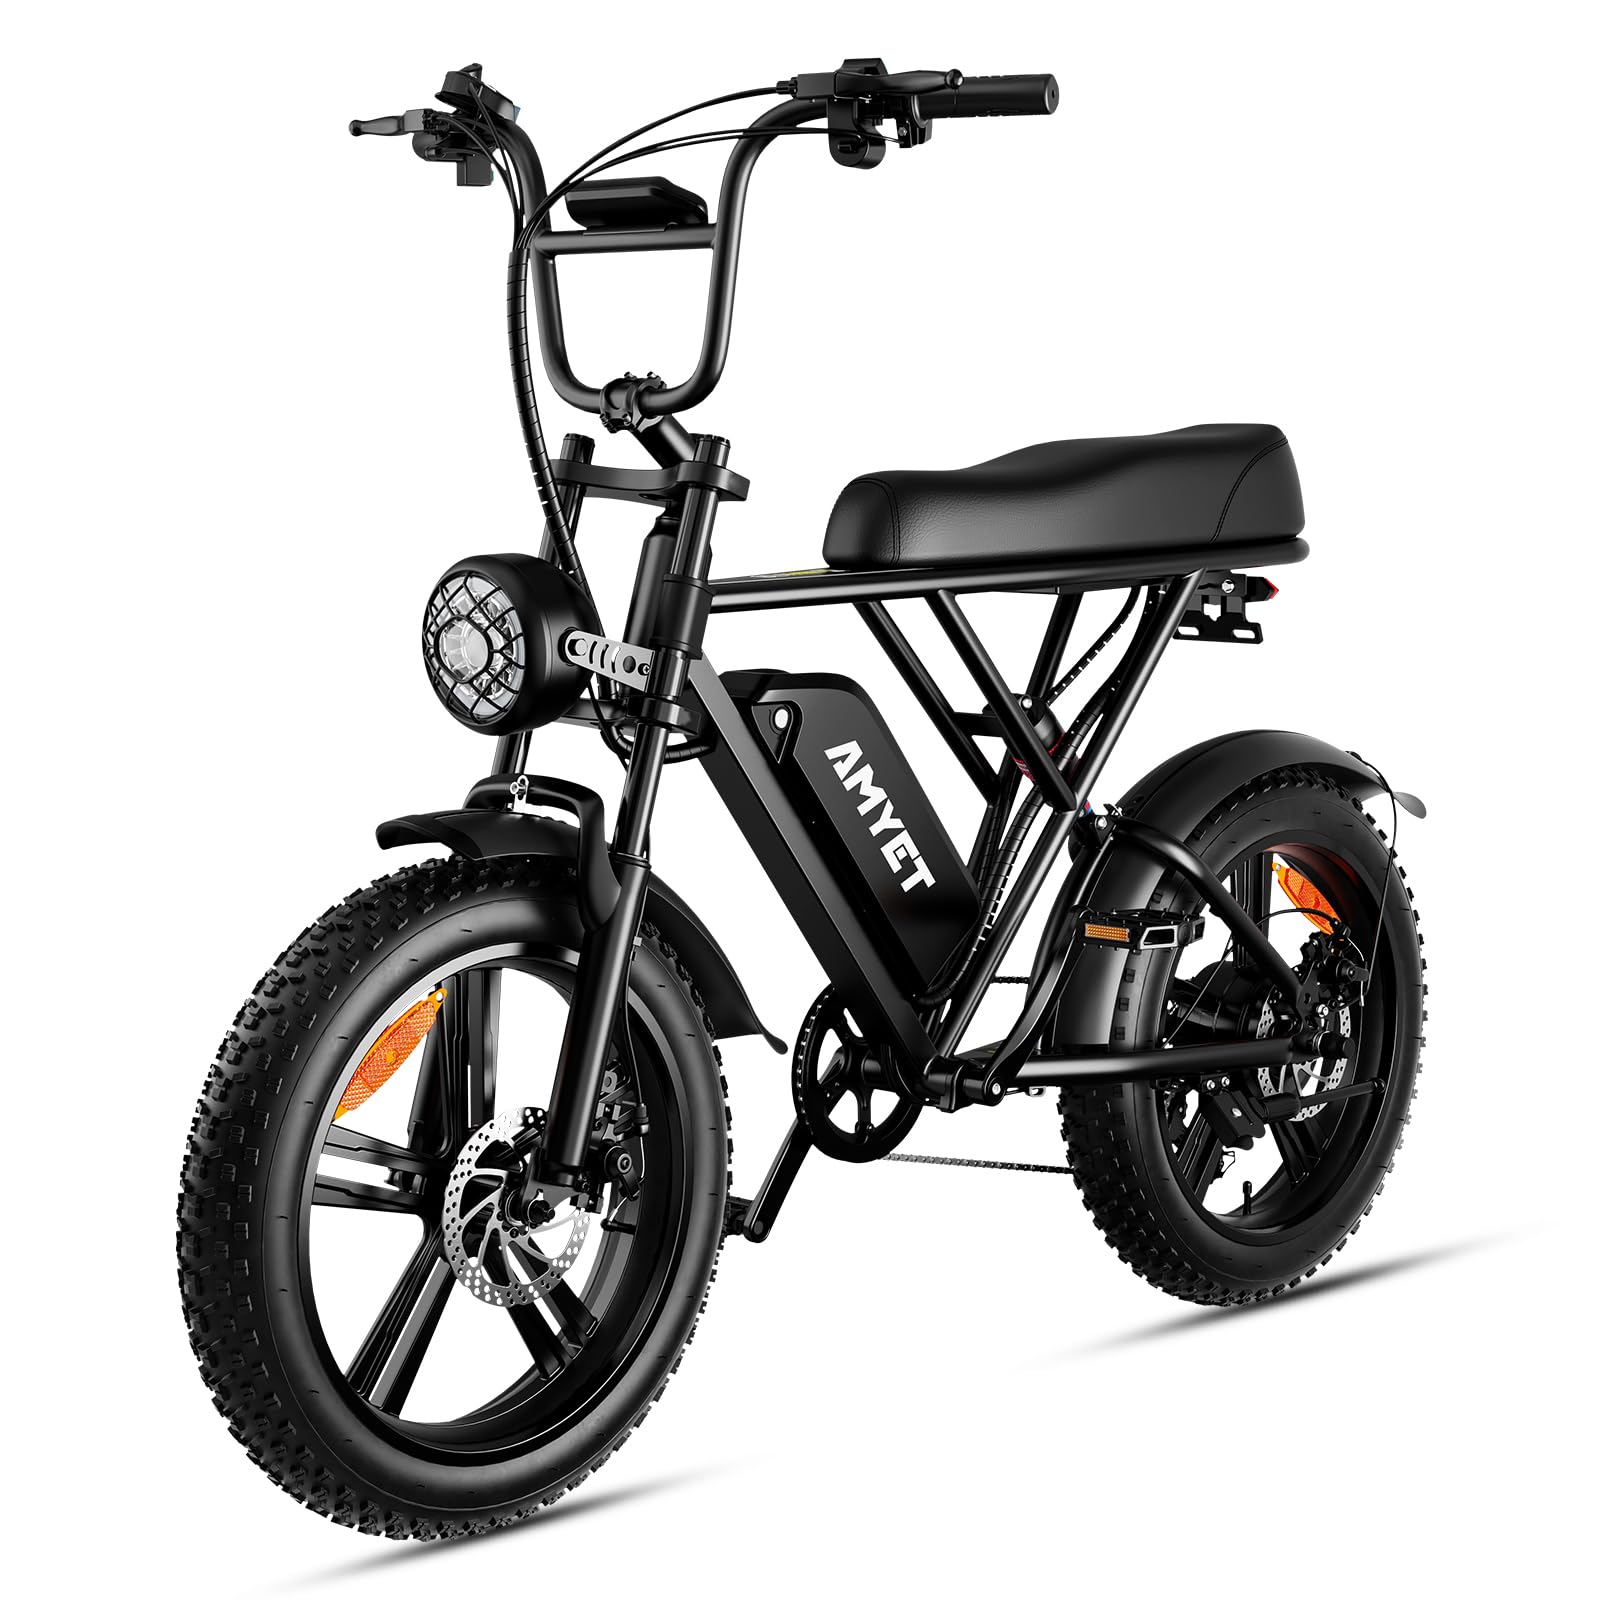
Figure 3.1: Full view of the AMYET V9-G60 Electric Bike. This image displays the overall design, including the fat tires, front headlight, seat, handlebars, and the integrated battery pack on the frame.
- Frame: Durable aluminum alloy frame.
- Motor: 1500W Peak Brushless Motor (1000W rated).
- Battery: Removable 48V 20Ah (960WH) Lithium-ion battery.
- Tires: 20-inch Fat Tires for enhanced stability and grip.
- Brakes: Disc brakes for reliable stopping power.
- Gears: 7-speed gear system.
- Suspension: Front suspension system.
- Lighting: Integrated LED front and rear lights.
- Display: LCD display for speed, battery level, and other metrics.
4. Setup and Assembly
Your AMYET V9-G60 Electric Bike comes partially assembled. Follow these steps to complete the assembly:
- Unpacking: Carefully remove all components from the packaging. Retain packaging for potential future transport or returns.
- Handlebar Installation: Attach the handlebars to the stem. Ensure they are centered and tightened securely.
- Front Wheel Installation: Install the front wheel, ensuring the disc brake rotor is correctly aligned with the caliper. Secure the quick release or axle nuts.
- Pedal Installation: Identify the left (L) and right (R) pedals. Thread the pedals into the crank arms. Note that the left pedal is reverse-threaded. Tighten firmly.
- Seat Post Installation: Insert the seat post into the frame's seat tube. Adjust the height for comfortable riding and secure with the quick release lever.
- Battery Installation: Insert the fully charged battery into its compartment on the frame. Ensure it clicks into place securely.
- Pre-Ride Check: Before your first ride, double-check all bolts, nuts, and quick releases for tightness. Verify brake function and tire pressure.
5. Operating Instructions
Learn how to operate your electric bike's various functions.
5.1 Power On/Off
- To power on the bike, press and hold the power button on the LCD display for a few seconds.
- To power off, press and hold the power button again until the display turns off.
5.2 Pedal Assist System (PAS)
The bike features multiple levels of pedal assist. Use the '+' and '-' buttons on the control panel to adjust the assist level. Higher levels provide more motor assistance.
5.3 Throttle Operation
The throttle provides power on demand without pedaling. Gently twist the throttle grip to engage the motor. Be cautious when using the throttle, especially at higher assist levels.
5.4 Gear Shifting
The 7-speed gear system allows you to adjust your pedaling effort. Use the shifter on the handlebars to change gears. Shift to lower gears for climbing hills and higher gears for flat terrain or downhill riding.
5.5 Braking
The bike is equipped with disc brakes. Squeeze the brake levers on the handlebars to slow down or stop. Apply both brakes simultaneously for optimal stopping power and control.
6. Battery Management
Proper battery care ensures maximum range and lifespan.
- Charging: Connect the charger to the battery charging port, then plug into a standard wall outlet. The indicator light on the charger will show charging status (usually red for charging, green for full).
- Charging Time: A full charge typically takes 4-6 hours.
- Removal: To remove the battery, unlock it with the provided key and slide it out of the frame.
- Storage: Store the battery in a cool, dry place, away from direct sunlight and extreme temperatures. If storing for extended periods, charge the battery to 50-70% every 2-3 months.
7. Maintenance
Regular maintenance will keep your AMYET V9-G60 in optimal condition.
- Cleaning: Clean the bike regularly with a damp cloth. Avoid high-pressure washing directly on electrical components.
- Lubrication: Lubricate the chain and other moving parts every few weeks, or more often if riding in wet or dusty conditions.
- Brakes: Check brake pads for wear and replace as needed. Ensure brake levers have proper tension.
- Tires: Maintain recommended tire pressure (check sidewall for PSI). Inspect tires for wear, punctures, or damage.
- Fasteners: Periodically check all bolts and nuts for tightness, especially on critical components like handlebars, wheels, and seat post.
- Professional Service: For complex issues or annual tune-ups, it is recommended to consult a professional bike mechanic.
8. Troubleshooting
Here are some common issues and their potential solutions:
| Problem | Possible Cause | Solution |
|---|---|---|
| Bike does not power on | Battery not charged or not properly seated. Loose electrical connection. | Charge battery fully. Ensure battery is securely inserted. Check all visible cable connections. |
| Motor not assisting | PAS level set to zero. Brake levers engaged. Motor cable disconnected. | Increase PAS level. Release brake levers. Check motor cable connection. |
| Brakes squealing or ineffective | Dirty brake pads/rotors. Worn brake pads. Loose brake cable. | Clean brake pads and rotors. Replace worn pads. Adjust brake cable tension. |
| Gears not shifting smoothly | Derailleur out of adjustment. Dirty or dry chain. | Adjust derailleur limits and cable tension. Clean and lubricate chain. |
If you encounter issues not listed here or cannot resolve a problem, please contact AMYET customer support.
9. Specifications
Detailed technical specifications for the AMYET V9-G60 Electric Bike:
- Model Name: G60
- Bike Type: Fat Tire Electric Bike
- Age Range: Adult
- Motor: 1000W (1500W Peak) Brushless Motor
- Battery: 48V 20Ah (960WH) Removable Lithium-ion
- Max Speed: Up to 32 MPH (51 km/h)
- Max Range: Up to 70 miles (113 km) (Pedal Assist)
- Number of Speeds: 7
- Frame Material: Aluminum
- Suspension Type: Front
- Brake Style: Disc
- Included Components: Battery, Charger, User Manual
- Color: BLACK
10. Warranty and Support
Your AMYET V9-G60 Electric Bike comes with a manufacturer's warranty.
- Warranty Description: 1 year limited warranty. Please refer to the warranty card included with your purchase for full terms and conditions.
- Customer Support: For technical assistance, warranty claims, or spare parts, please contact AMYET customer service. Refer to the contact information provided on the product packaging or the official AMYET website.
Related documentsG60


Ask a question about this manual
Ask about setup, troubleshooting, compatibility, parts, safety, or missing instructions. Manuals+ will review the question and use this page’s manual context to help answer it.