
1. Introduction
Thank you for purchasing the ZHIWHIS ZWS-908 Multi-Function Emergency Radio. This device is designed to provide essential communication, light, and power in various situations, including emergencies and outdoor activities. It combines multiple features into a compact and portable unit, ensuring you stay informed and connected.
2. Key Features
- Multi-Band Radio: Supports VHF, FM, AM, SW, and Wide FM for comprehensive reception.
- Multiple Playback Modes: Enjoy audio via Bluetooth 5.2, MicroSD card, or radio.
- APP Control: Remotely control the radio functions via a mobile application within a 20-meter range.
- Emergency Power Options: Features solar charging, hand-crank charging, USB-C charging, and compatibility with AAA dry cell batteries.
- Integrated Flashlight: High-brightness LED flashlight with multiple modes (high beam, low beam, combined) for illumination.
- SOS Alarm: Activates a loud siren and flashing light for emergency signaling.
- Power Bank Function: Built-in 4000mAh battery can charge external devices via USB-C.
- High-Performance Display: VA color screen displays frequency, time, battery level, and operating mode with backlight for visibility in the dark.
- Portable Design: Compact size (190x77x104mm) and lightweight (490g) with a carrying handle for easy transport.
- Timer & Alarm Clock: Includes timer-on and alarm functions for scheduled operation.
- IPX4 Water Resistance: Protects against splashes and light rain.
3. Package Contents
- 1 x ZWS-908 Multi-Function Emergency Radio
- 1 x USB Type-C Cable
- 1 x Strap
- 1 x Screwdriver
- 1 x User Manual & Warranty Card (Japanese)
- 2 x 2000mAh Lithium Batteries (internal)
Note: Please check all contents upon unboxing.
4. Product Overview
The ZHIWHIS ZWS-908 features a user-friendly layout with clearly marked controls and ports. Below is an overview of the device's main components and their functions.
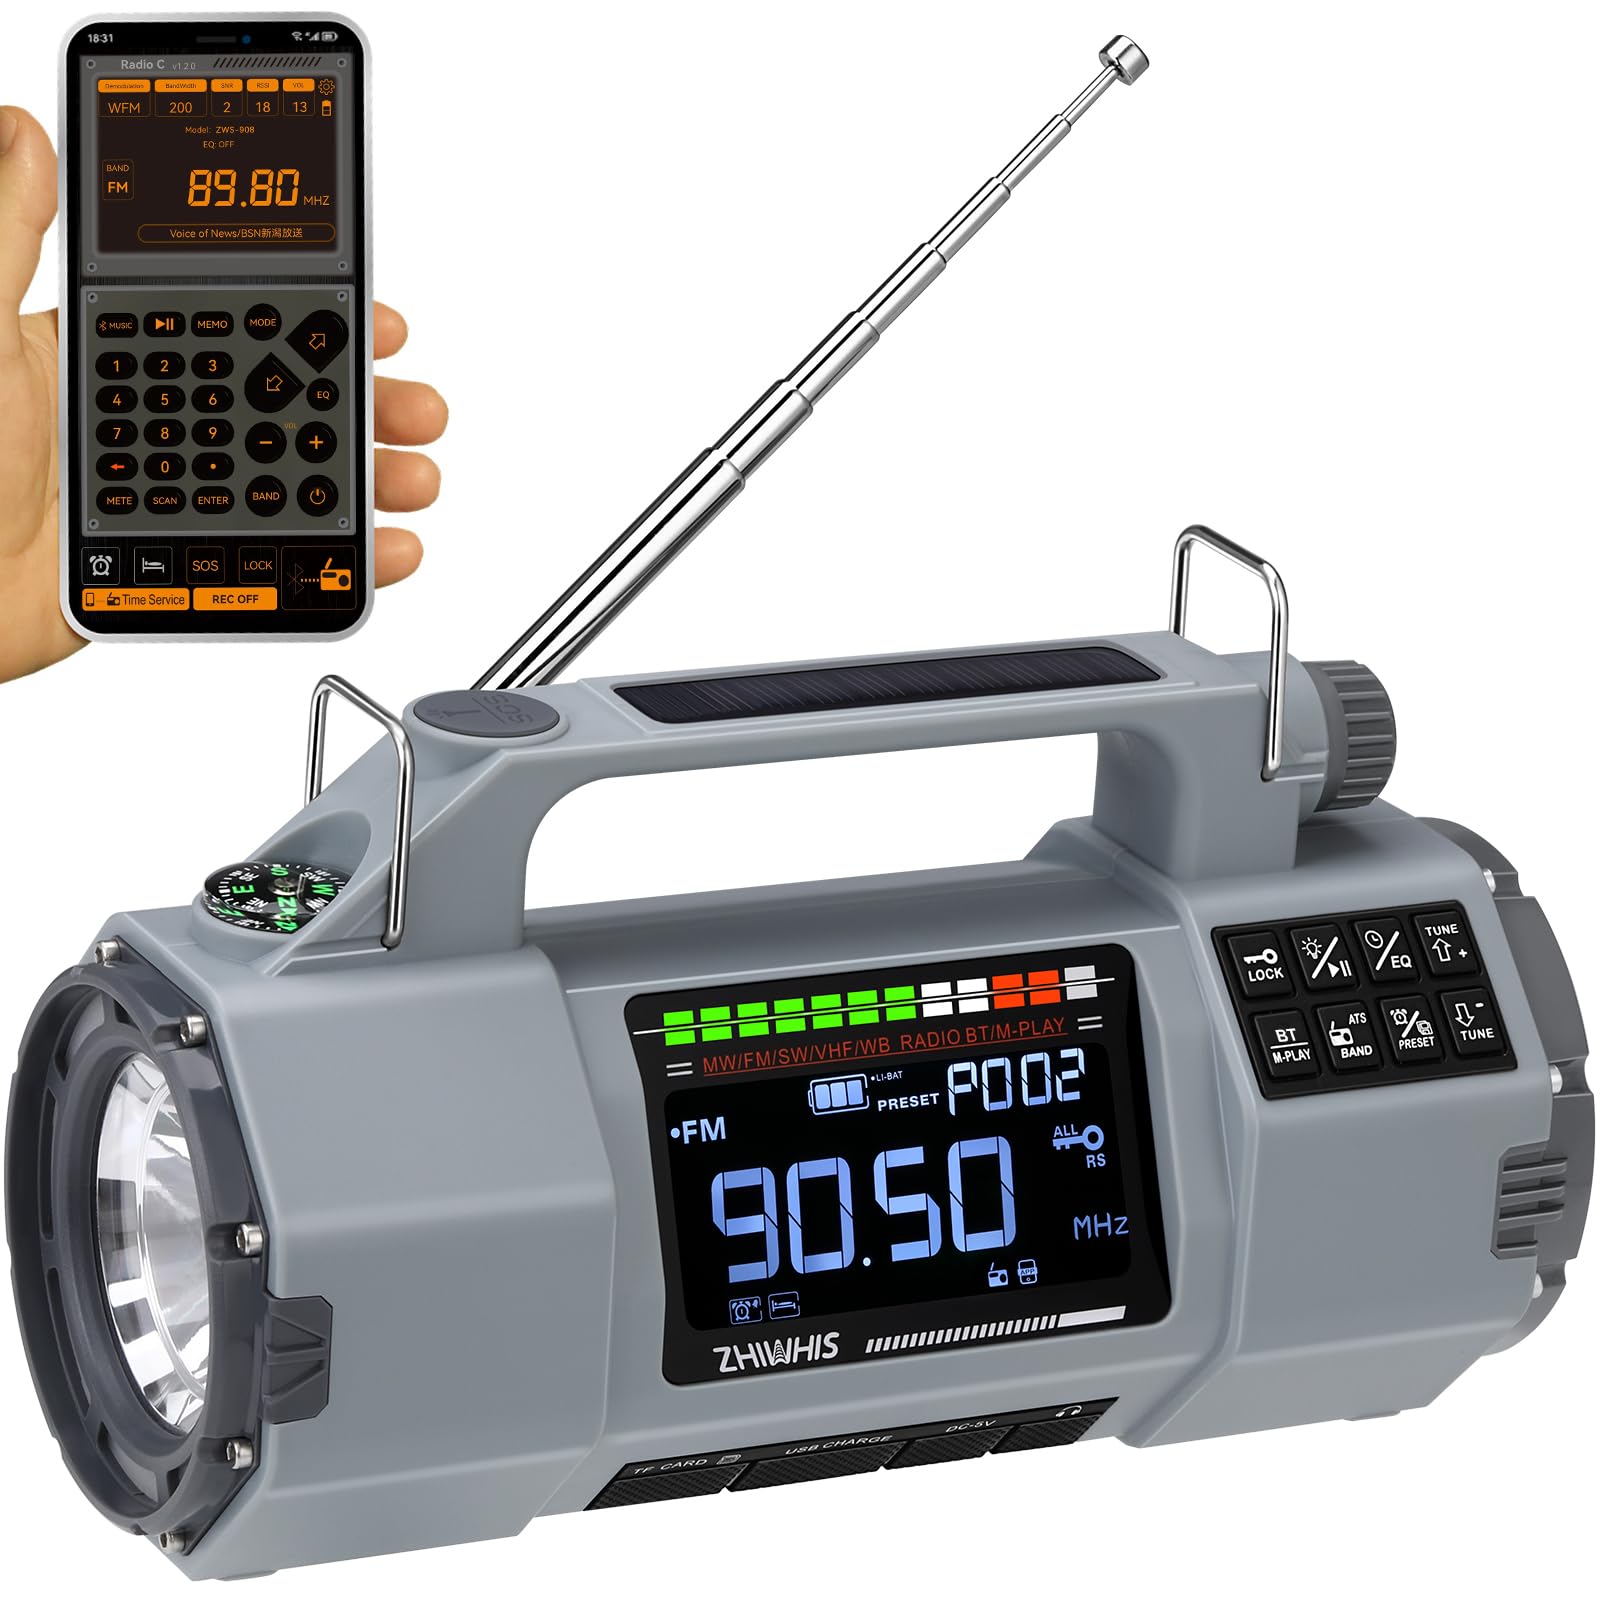
Figure 1: Front view of the ZHIWHIS ZWS-908 with key dimensions (approx. 19cm width, 10cm height, 8cm depth).
4.1. Controls and Ports
- Tuning Dial: Rotate to select radio frequencies.
- Volume Control: Adjusts the audio output level.
- Band Switch: Toggles between FM, AM, SW, and VHF bands.
- Power Button: Turns the device on/off.
- Flashlight Button: Activates the LED flashlight and cycles through modes.
- SOS Button: Long-press to activate the emergency alarm.
- USB-C Input/Output Port: For charging the device and charging external devices.
- MicroSD Card Slot: For playing audio files from a MicroSD card.
- 3.5mm Headphone Jack: For private listening (headphones not included).
- Solar Panel: Located on top for solar charging.
- Hand-Crank: Foldable crank for manual power generation.
- Antenna: Telescopic antenna for radio reception.
- VA Display: Digital screen showing frequency, time, battery status, and mode.

Figure 2: Detailed view of the radio's control panel and display.
5. Setup
5.1. Initial Charging
Before first use, it is recommended to fully charge the internal 4000mAh lithium battery using the USB-C cable. Connect the provided USB-C cable to the radio's USB-C port and a compatible USB power adapter (not included). The battery indicator on the VA display will show charging progress.
5.2. Battery Installation (AAA Dry Cells)
For backup power, the radio can operate on 3 x AAA dry cell batteries (not included). Open the battery compartment cover on the back of the unit using the provided screwdriver, insert the batteries according to the polarity markings, and close the cover securely. Ensure the battery selection switch is set to 'AAA' when using dry cells.

Figure 3: AAA battery compartment and hand-crank mechanism.
6. Operating Instructions
6.1. Radio Reception
- Extend the telescopic antenna for optimal reception.
- Press the 'BAND' button to select your desired frequency band (VHF, FM, AM, SW, Wide FM).
- Rotate the 'TUNING' dial to scan for stations. The VA display will show the current frequency.
- Adjust the 'VOLUME' dial to your preferred listening level.

Figure 4: Radio in use with extended antenna for enhanced reception.
6.2. Bluetooth Speaker
- Turn on the radio and switch to Bluetooth mode. The display will indicate 'BT'.
- Enable Bluetooth on your smartphone or other device and search for 'ZWS-908'.
- Pair with the device. Once connected, you can stream audio wirelessly.
6.3. MicroSD Playback
- Insert a MicroSD card (up to 256GB) with MP3, WMA, WAV, APE, or FLAC audio files into the MicroSD card slot.
- Switch the radio to MicroSD playback mode. The device will automatically detect and play audio files.
- Use the playback controls (Play/Pause, Next/Previous Track) on the radio or via the APP.
6.4. Flashlight & Reading Lamp
- Press the flashlight button once to turn on the main flashlight (high beam).
- Press again to switch to low beam.
- Press a third time for combined high and low beam.
- Press a fourth time to turn off.

Figure 5: Different illumination modes of the integrated LED flashlight.
6.5. SOS Alarm
In an emergency, long-press the 'SOS' button to activate a loud siren and a flashing red light. This function is designed to attract attention and signal for help. Press the 'SOS' button again to deactivate the alarm.

Figure 6: SOS alarm function for emergency signaling.
6.6. APP Control
The ZWS-908 can be controlled remotely via a mobile application. Download the 'Radio CT' app from the App Store (for iOS) or Google Play Store (for Android). Connect your smartphone to the radio via Bluetooth. The app allows you to control various functions, including tuning, volume, and playback modes, from up to 20 meters away.

Figure 7: Remote control via the dedicated mobile application.
6.7. Timer & Alarm Clock
The device includes a timer-on function, allowing you to set the radio to turn off automatically after a specified period (10-90 minutes in 10-minute increments, or 'FULL' for continuous play until manually turned off). An alarm clock function is also available to wake you up at a set time.
7. Charging Methods
The ZHIWHIS ZWS-908 offers multiple ways to ensure continuous power, especially during emergencies.
7.1. USB-C Charging
Connect the provided USB-C cable to the radio's USB-C input port and a standard USB power source (e.g., wall adapter, power bank, computer). The battery indicator on the display will show charging status.
7.2. Solar Charging
Place the radio with its solar panel facing direct sunlight. The solar panel will convert sunlight into electricity to charge the internal battery. This method is ideal for outdoor use and maintaining battery levels over time.
7.3. Hand-Crank Charging
Unfold the hand-crank handle on the back of the radio. Rotate the crank clockwise or counter-clockwise at a steady pace (approximately 130 RPM) to generate power and charge the internal battery. One minute of cranking can provide several minutes of radio operation.
7.4. AAA Dry Cell Batteries
As described in the Setup section, 3 x AAA dry cell batteries can be used as an alternative power source. Ensure the battery selection switch is set correctly.

Figure 8: Overview of the multiple charging options available.
8. Power Bank Function
The ZHIWHIS ZWS-908 can act as a power bank to charge your mobile devices. Connect your smartphone or other USB-powered device to the radio's USB-C output port using a compatible cable. The radio's internal 4000mAh battery will provide power to your device. This feature is particularly useful during power outages or when away from conventional power sources.
9. Maintenance
- Keep the device clean by wiping it with a soft, dry cloth. Avoid using harsh chemicals or abrasive cleaners.
- Store the radio in a cool, dry place away from direct sunlight and extreme temperatures.
- If using AAA dry cell batteries, remove them if the device will not be used for an extended period to prevent leakage.
- Regularly charge the internal lithium battery (at least once every 3-6 months) to maintain its lifespan, even if not in use.
- The IPX4 water resistance protects against splashes; do not submerge the device in water.
10. Troubleshooting
- No Power: Check battery level. Ensure the battery selection switch is set correctly (LI-ION for internal battery, AAA for dry cells). Try charging via USB-C or hand-crank.
- Poor Radio Reception: Fully extend the antenna. Try repositioning the radio. Adjust the tuning dial slowly.
- Bluetooth Connection Issues: Ensure the radio is in Bluetooth mode and your device's Bluetooth is enabled. Make sure the radio is within 20 meters of your device. Try unpairing and re-pairing.
- MicroSD Playback Failure: Ensure the MicroSD card is inserted correctly and contains supported audio formats. Check if the card is damaged.
- Flashlight Not Working: Check battery level. Ensure the flashlight button is pressed correctly.
11. Specifications
| Receiving Frequency Range | FM: 76.0-108MHz, AM: 522-1710KHz, SW: 4.75-21.85MHz, VHF: 30-199.975MHz (NFM) |
| Receiving Sensitivity | FM≤10dB, AM≤90dB, SW≤30dB, VHF≤30dB |
| Signal-to-Noise Ratio | FM: 36dB, AM: 30dB, SW: 35dB, VHF: 30dB |
| Quiescent Current | ≤220uA |
| Maximum Current | ≤650mA |
| External Charging Output Current | 1000mA |
| Operating Voltage | 3.6V-4.2V |
| Maximum Power Consumption | ≤1.8W |
| Bluetooth Version | 5.2 |
| Bluetooth Reception Distance | ≤20 meters |
| Preset Stations | 400 stations (100 per band: FM/MW/SW/VHF) |
| Speaker | Φ66mm 4Ω 5W |
| MicroSD Card Playback | MP3, WMA, WAV, APE, FLAC |
| MicroSD Card Max Capacity | 256GB |
| Stereo Separation | 32dB |
| Internal Battery | 4000mAh |
| Dry Cell Battery (Optional) | AAA 1.5V x 3 |
| Product Size | 189.6 x 77 x 103.5mm |
| Waterproof Level | IPX4 |
| Net Weight | Approx. 490g (including battery) |
12. Warranty and Support
This product is certified with TELEC technical compliance (Frequency band: 2402MHz~2480MHz), ensuring its quality and adherence to regulatory standards. For any issues or inquiries, please refer to the contact information provided on your warranty card or reach out to ZHIWHIS customer support.
13. Official Product Videos
908 Emergency Radio Demonstration
This video demonstrates the key features and functions of the ZWS-908 emergency radio, including its various modes and controls. (Source: LIJIANI-jp)
