
PRAISUN B0FDKNW18D
PRAISUN L Shaped Gaming Desk (Model B0FDKNW18D) User Manual
Your guide to assembly, operation, and maintenance.
1. Introduction
Thank you for choosing the PRAISUN L Shaped Gaming Desk. This manual provides detailed instructions for the assembly, operation, and maintenance of your new desk. Please read this manual thoroughly before assembly and use to ensure proper function and longevity of the product.
This desk features a reversible L-shaped design, integrated LED lighting, a built-in power strip with AC outlets and USB ports, and various storage solutions including shelves and a drawer.

Image 1.1: Overview of the PRAISUN L Shaped Gaming Desk.
2. Safety Information
- Always follow assembly instructions carefully. Ensure all parts are securely fastened before use.
- Do not overload the desk or shelves. Refer to specifications for weight limits.
- Keep liquids away from electrical components (power strip, LED lights).
- Ensure the power strip is connected to a grounded outlet. Do not use damaged power cords.
- Keep small parts and packaging materials away from children to prevent choking hazards.
- Use the desk on a level surface. Adjust the leveling feet as needed to prevent wobbling.
3. Package Contents
Before beginning assembly, verify that all components are present and undamaged. If any parts are missing or damaged, please contact customer support.
- Desktop panels (L-shaped sections)
- Metal frame components (legs, support bars)
- Storage drawer components (fabric drawer, frame)
- Upper shelf and grid panel
- Power strip with AC outlets, USB, and USB-C ports
- LED light strip and controller
- Cup holder, headphone hook, S-hooks
- Assembly hardware (screws, bolts, nuts)
- Assembly tools (Allen keys, screwdriver)
- Instruction manual
4. Setup and Assembly
Assembly is designed to be straightforward with labeled parts and clear instructions. It is recommended to assemble the desk with two people.
4.1. Pre-Assembly Steps
- Unpack all components and lay them out on a clean, soft surface to prevent scratches.
- Identify all parts using the provided parts list in the separate assembly guide.
- Ensure you have the included tools (Allen keys, screwdriver) readily available.
4.2. Assembly Options
The desk offers flexible layout options, allowing you to switch the storage drawer and high shelf to either the left or right side to suit your room configuration or workflow.

Image 4.1: Reversible configurations for the desk's storage unit.
4.3. Step-by-Step Assembly
Refer to the separate detailed assembly guide for specific step-by-step instructions and diagrams. Pay close attention to the orientation of parts, especially during the initial framing and desktop attachment steps.

Image 4.2: Product dimensions for assembly reference.
4.4. Post-Assembly Adjustments
- Once assembled, gently shake the desk to check for stability.
- Adjust the leveling feet at the bottom of the desk legs to ensure the desk is stable and level on uneven floors.
- Ensure all screws and bolts are tightened, but do not overtighten.
5. Operating Instructions
5.1. Integrated Power Strip
The desk includes a built-in power strip for convenient device charging and power access.
- AC Outlets: 4 AC outlets (125V/12A) are provided for standard electronic devices.
- USB Ports: 2 USB ports (5V/3A) are available for charging smartphones, tablets, and other USB-powered devices.
- USB-C Port: 1 USB-C port (5V/3A) offers faster charging for compatible devices.
To use, plug the desk's main power cord into a wall outlet. Then, connect your devices to the integrated power strip.

Image 5.1: Integrated power strip for device charging.
5.2. RGB LED Lights
The desk features dynamic LED lighting to enhance your environment.
- Control: The LED lights can be controlled via a smart controller or a dedicated app. Refer to the LED light strip's separate instructions for app download and pairing.
- Color Options: Choose from over 6,000 color options.
- Modes: Various modes are available, including music sync, timing mode, and static color options.
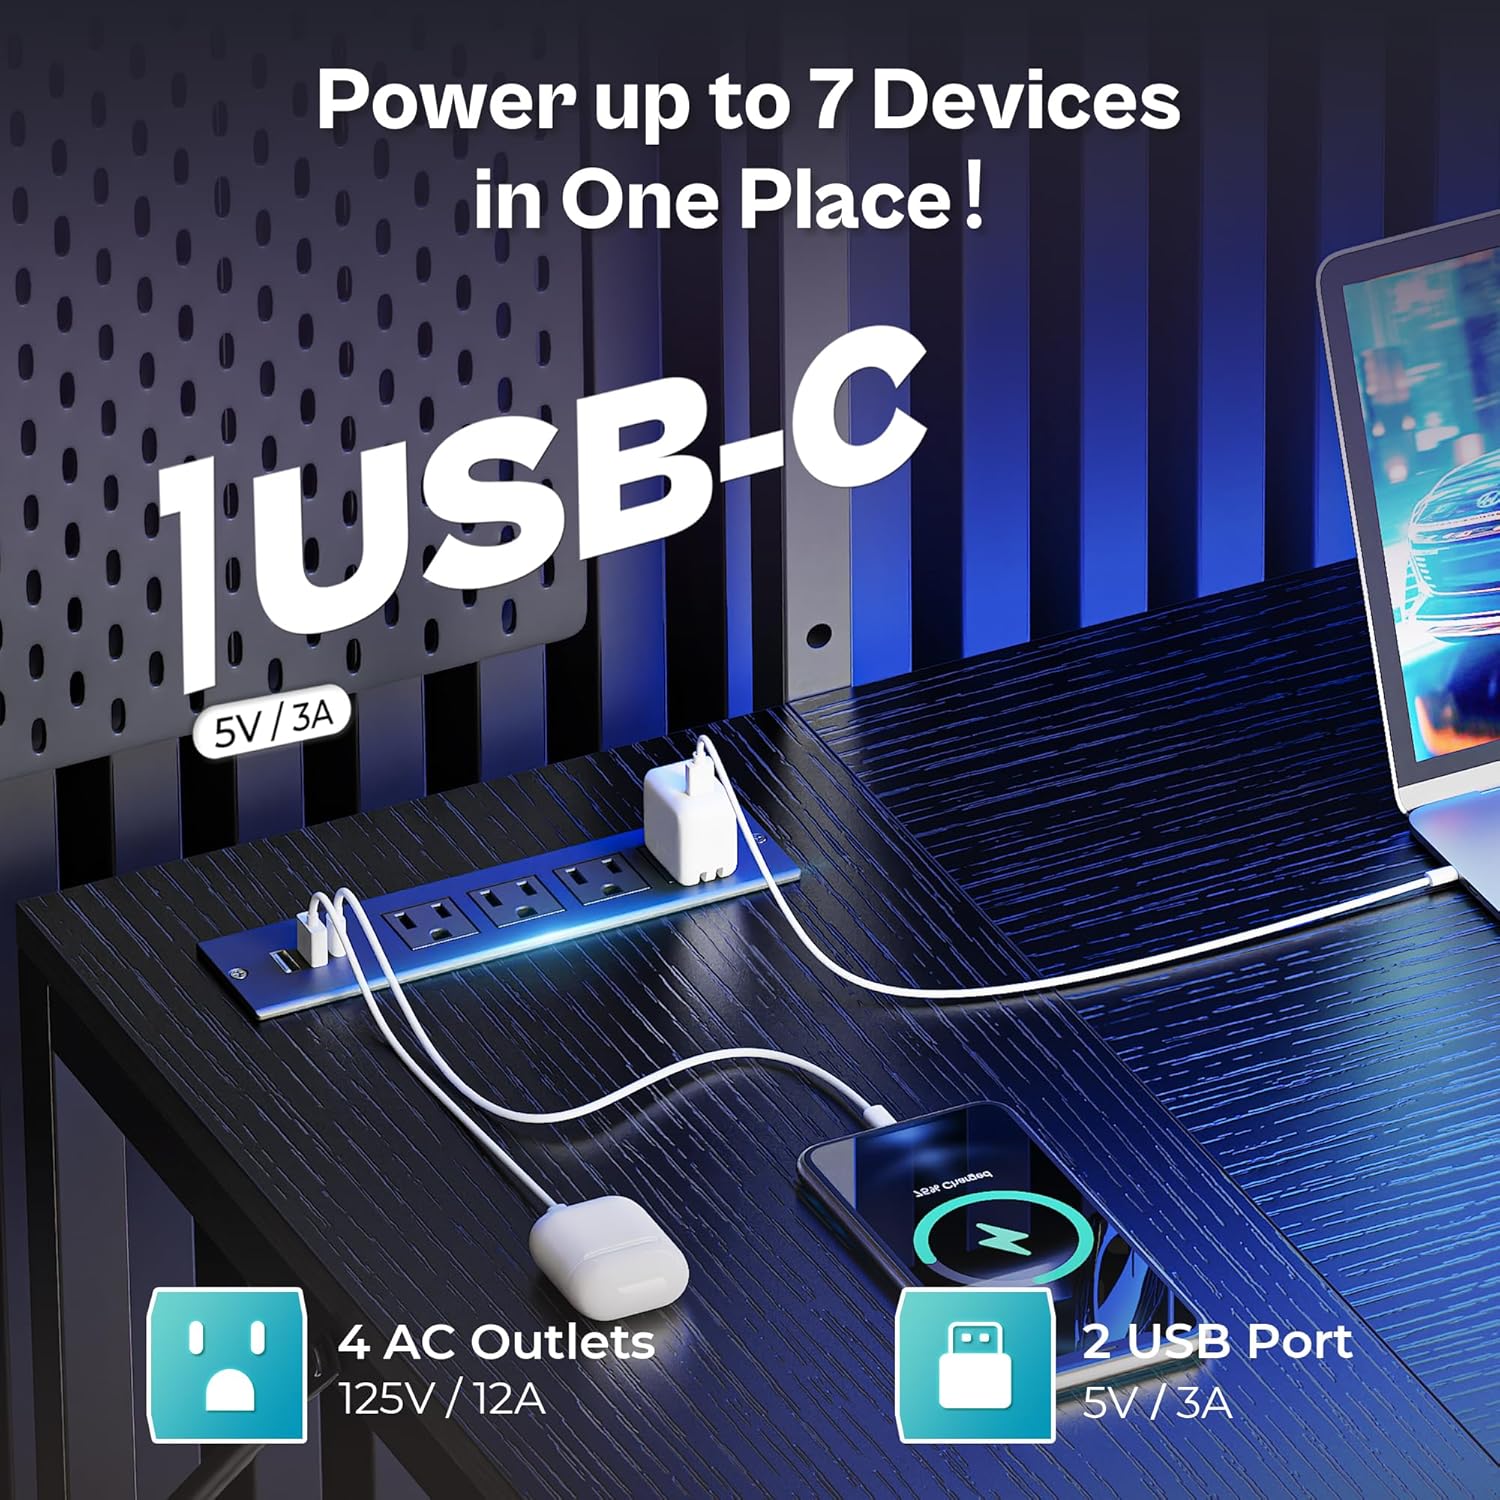
Image 5.2: Controlling the RGB LED lights via app.
5.3. Storage and Organization Features
The desk is equipped with multiple storage and organizational elements:
- Fabric Drawer: A pull-out fabric drawer provides enclosed storage for small essentials.
- High Shelf: An elevated shelf offers space for collectibles, decor, or additional monitors. It has two height positions for customization.
- Metal Grid Panel: Located beneath the high shelf, this grid panel includes 6 S-hooks for hanging headphones, cables, or other accessories.
- Cup Holder: A side-mounted cup holder helps prevent spills.
- Headphone Hook: A dedicated hook for hanging headphones.
- Under-Desk Storage Shelf: A bottom shelf is ideal for storing a PC tower or storage bins.
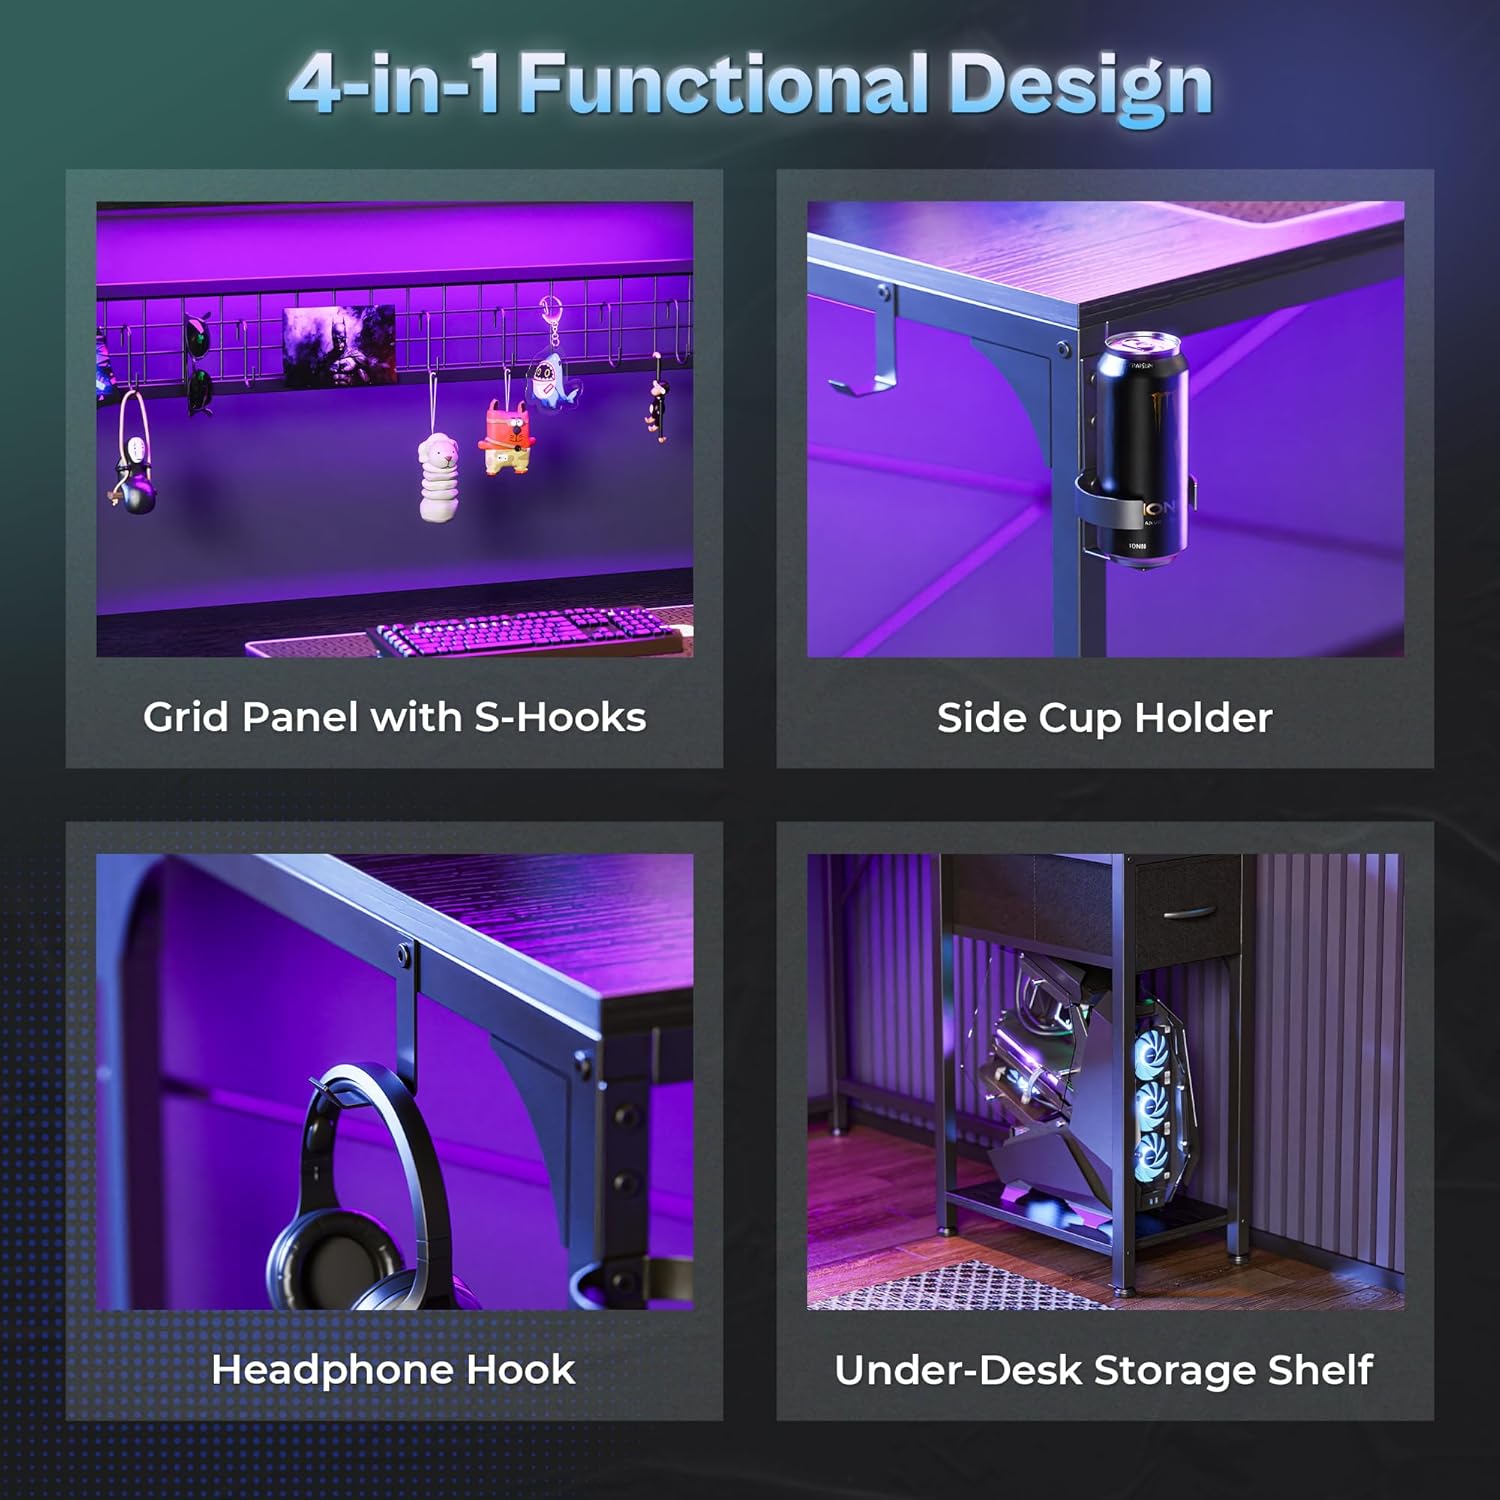
Image 5.3: Top shelf with baffles for secure item placement.

Image 5.4: Detailed view of integrated storage and organization features.
6. Maintenance
- Cleaning: Wipe the desk surfaces with a soft, damp cloth. Avoid harsh chemicals or abrasive cleaners that may damage the finish.
- Dusting: Regularly dust the LED light strip and power outlets to ensure optimal performance and prevent dust buildup.
- Hardware Check: Periodically check all screws and bolts to ensure they remain tight. Retighten if necessary, but do not overtighten.
- Cable Management: Keep cables organized to prevent tripping hazards and maintain a tidy workspace.
7. Troubleshooting
7.1. Stability Issues (Wobbling)
- Solution: Ensure the desk is on a flat, even surface. Adjust the leveling feet on each leg until the desk is stable. Check that all assembly hardware is securely tightened.
7.2. LED Lights Not Functioning
- Solution: Verify that the LED light strip is properly connected to its power source and controller. Ensure the desk's main power cord is plugged into a working wall outlet. Check the controller or app settings.
7.3. Power Outlets/USB Ports Not Working
- Solution: Confirm the desk's main power cord is securely plugged into a functional wall outlet. Test the outlet with another device. Ensure devices are properly connected to the power strip. Avoid exceeding the power strip's maximum load.
7.4. Assembly Difficulties / Misalignment
- Solution: Review the assembly guide carefully, paying attention to part orientation. Sometimes, a part may need to be flipped or re-positioned. If significant manufacturing issues are encountered, contact customer support.
8. Specifications
| Feature | Detail |
|---|---|
| Brand | PRAISUN |
| Model | B0FDKNW18D |
| Product Dimensions (D x W x H) | 39.4"D x 49.8"W x 30.1"H |
| Color | Black |
| Style | Modern |
| Base Material | Metal |
| Top Material Type | Engineered Wood |
| Finish Type | Polished |
| Special Feature | LED Lights, Power Outlets (4 AC, 2 USB, 1 USB-C) |
| Room Type | Office, Study, Gameroom |
| Required Assembly | Yes |
9. Warranty and Support
9.1. Warranty Information
Specific warranty details for the PRAISUN L Shaped Gaming Desk are typically provided at the point of purchase or within separate documentation included with your product. Please retain your proof of purchase for any warranty claims. For detailed warranty terms and conditions, please contact the seller or manufacturer directly.
9.2. Customer Support
If you have any questions regarding assembly, operation, missing parts, or require technical assistance, please contact PRAISUN customer support through the retailer where the product was purchased. Provide your model number (B0FDKNW18D) and a detailed description of the issue for faster service.
Ask a question about this manual
Ask about setup, troubleshooting, compatibility, parts, safety, or missing instructions. Manuals+ will review the question and use this page’s manual context to help answer it.