
1. Introduction
This manual provides detailed instructions for the proper use and maintenance of your SAMCOM FPCN50A DMR Digital Two Way Radio. Please read this manual thoroughly before operating the device to ensure safe and efficient communication.
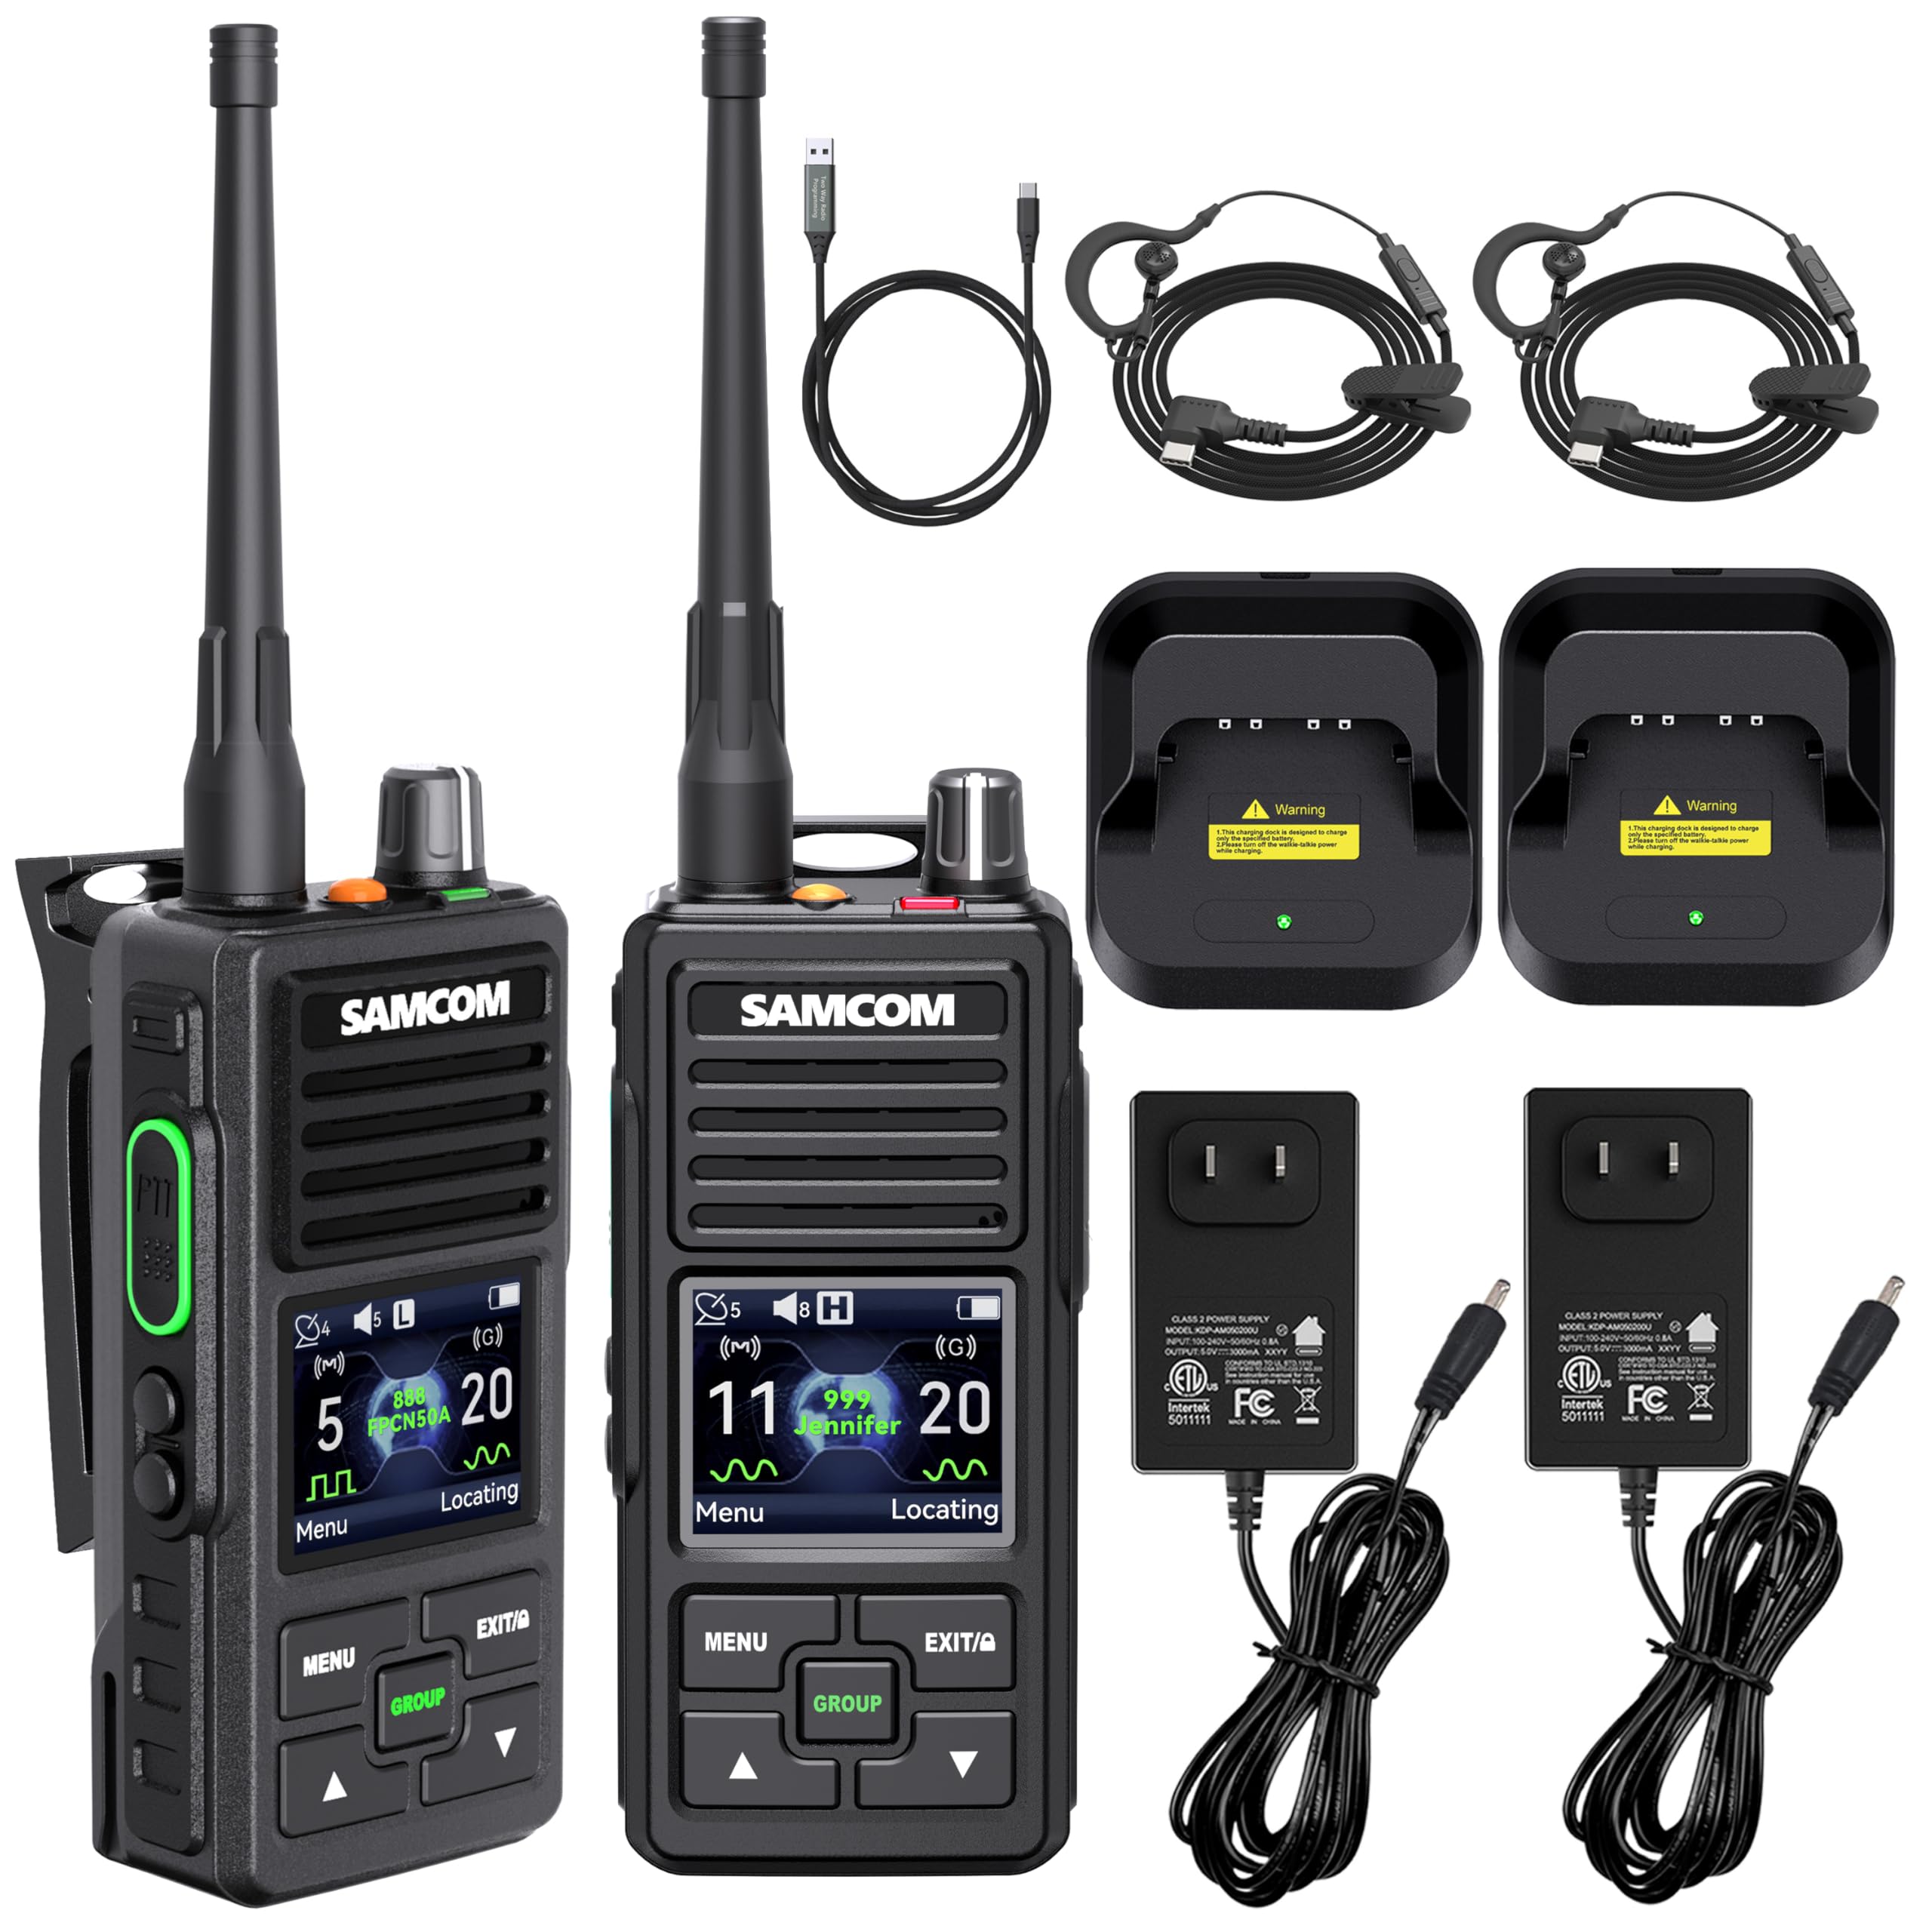
Image: The SAMCOM FPCN50A DMR Digital Two Way Radio.
2. Package Contents
Verify that all items are present in the package:
- 2 x SAMCOM FPCN50A Radios
- 2 x Batteries (2000mAh)
- 2 x Headsets
- 2 x USB-C Charging Cables
- 2 x Base Chargers
- 2 x Back Clips
- 1 x User Manual
- 2 x UHF Antennas
3. Product Overview
Familiarize yourself with the components of your SAMCOM FPCN50A radio.

Image: Detailed diagram showing the various parts of the SAMCOM FPCN50A radio, including the Type-C Port, Customizable Side Key, Big PTT Button, and Emergency Contact Button.
Key Components:
- Antenna: For transmitting and receiving signals.
- On-Off/Volume Control Knob: Powers the radio on/off and adjusts volume.
- LED Indicator: Displays radio status (e.g., transmitting, receiving, charging).
- Emergency Alarm Key: Activates emergency alert functions.
- USB-C Jack: For charging and connecting accessories.
- Speaker: For audio output.
- Push-to-Talk (PTT) Key: Press and hold to transmit, release to receive.
- Microphone: For voice input.
- LCD Display: Shows channel, status, and menu information.
- Side Key 1 (sk1) & Side Key 2 (sk2): Programmable function keys.
- Back/Keyboard Lock Key: Locks/unlocks the keypad.
- Menu Key: Accesses the radio's menu.
- GROUP Key: Initiates group calls.
- Up Key & Down Key: Navigates through menus and adjusts settings.

Image: Close-up of the radio's display, showing icons for GPS satellites, volume, battery, and channel information, along with labeled buttons for menu, group, and navigation.
4. Setup
4.1 Battery Installation and Charging
- Ensure the radio is powered off.
- Align the battery with the battery compartment on the back of the radio and slide it into place until it clicks securely.
- To charge, place the radio in the included charging base or connect the USB-C charging cable directly to the radio's USB-C port. The LED indicator will show charging status.
- A full charge provides over 20 hours of operation.
4.2 Antenna and Belt Clip Attachment
- Screw the UHF antenna clockwise onto the connector on top of the radio until it is finger-tight. Do not overtighten.
- Attach the belt clip to the back of the radio using the provided screws.
4.3 Initial Power On
Rotate the On-Off/Volume control knob clockwise until you hear a click. The radio will power on and display the current channel.
5. Operating Instructions
5.1 Dual Mode Operation (Digital and Analog)
The FPCN50A supports both Digital (DMR) and Analog modes. Digital mode offers clear audio and disturbance resistance, while Analog mode ensures compatibility with standard analog walkie-talkies.
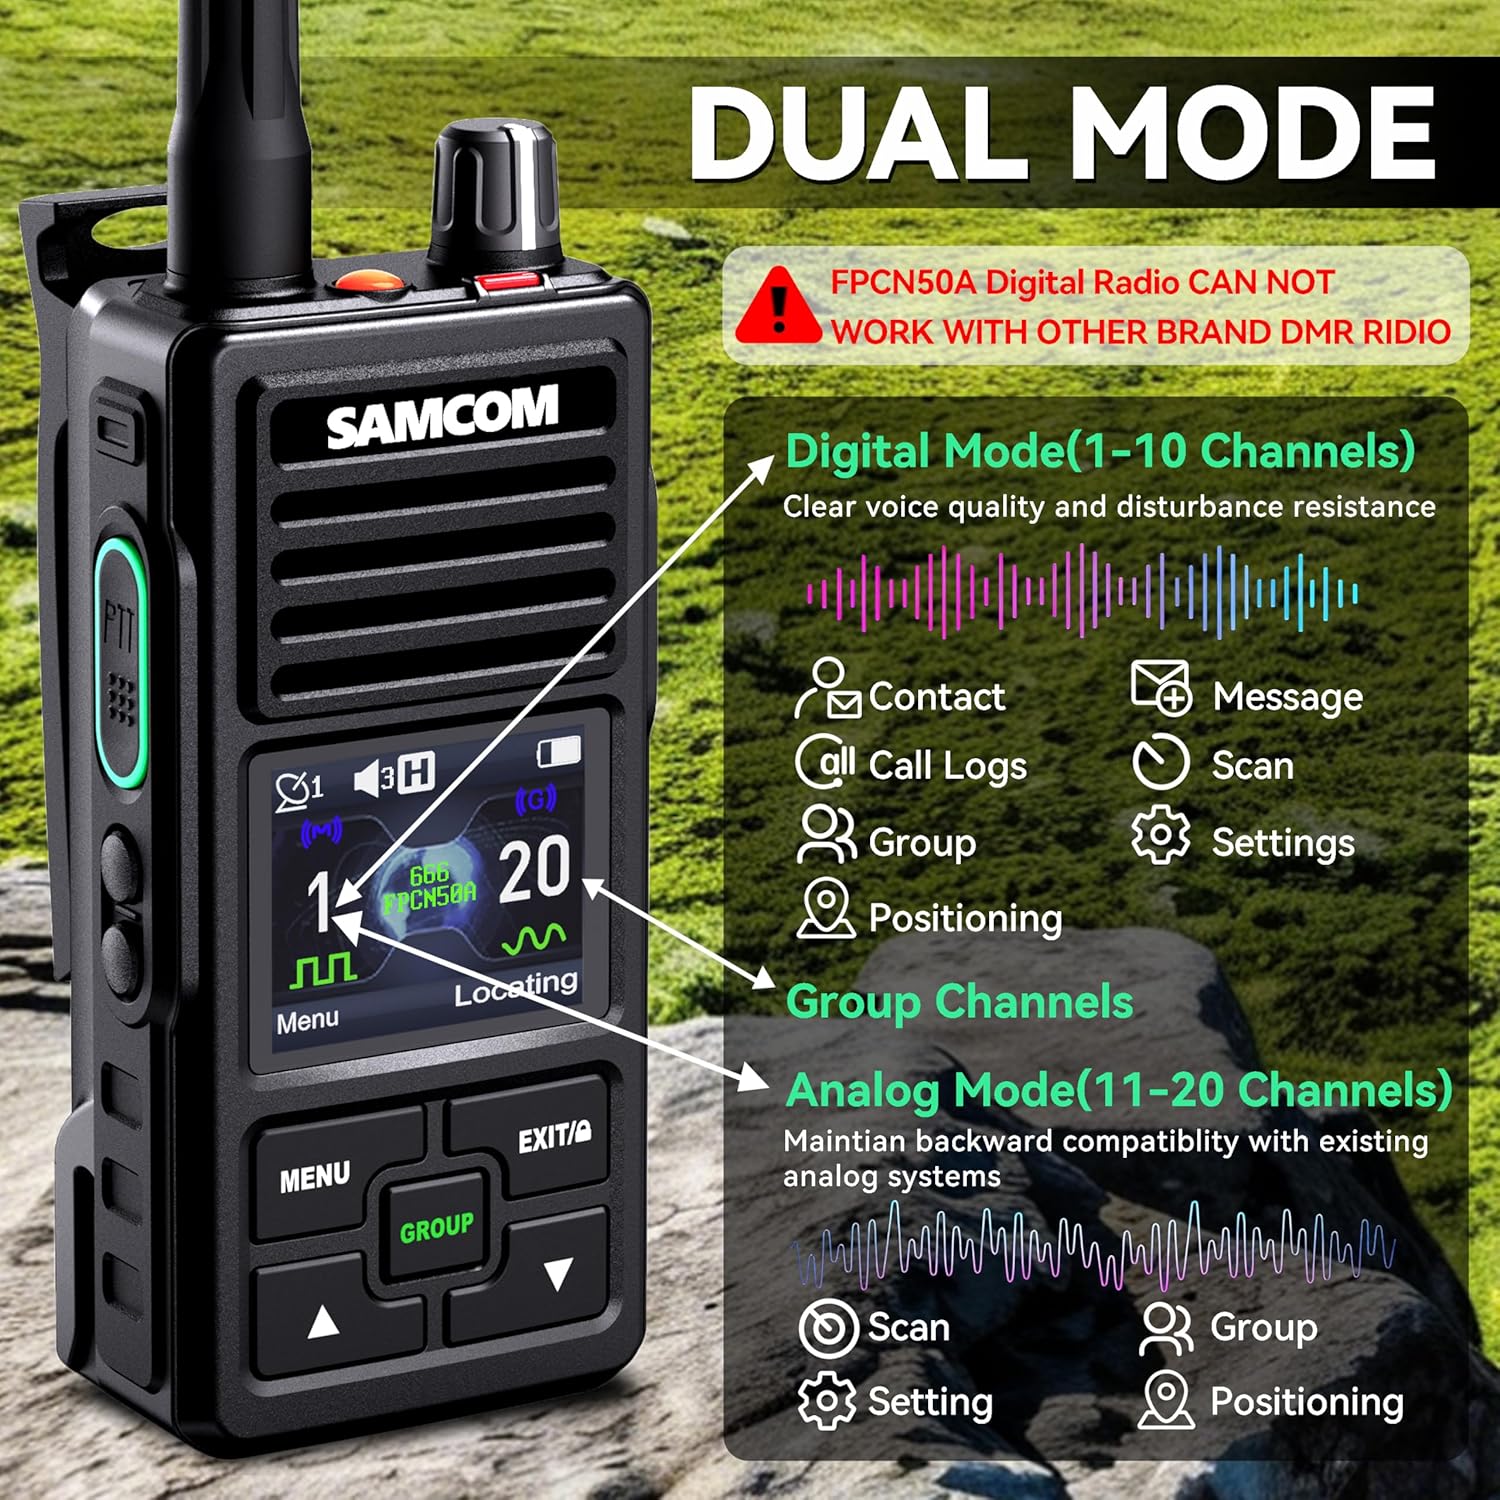
Image: Diagram illustrating the dual mode capabilities of the FPCN50A, showing Digital Mode (Channels 1-10) with features like Contact, Message, Scan, Group, Positioning, and Settings, and Analog Mode (Channels 11-20) with Scan, Group, and Setting options.
To switch between modes, use the channel selection feature. Channels 1-10 are typically configured for Digital mode, and Channels 11-20 for Analog mode. Note that the FPCN50A Digital Radio cannot work with other brand DMR radios in digital mode, but can communicate with analog radios in analog mode.
5.2 Basic Communication
- Select a Channel: Use the Up/Down keys to select the desired channel.
- Adjust Volume: Rotate the On-Off/Volume control knob.
- Transmit: Press and hold the PTT (Push-to-Talk) button on the side of the radio. Speak clearly into the microphone.
- Receive: Release the PTT button to listen for incoming transmissions.
5.3 Customizable Channels and ID
The radio allows for programmable radio IDs and names, which can be edited via SAMCOM Programming Software. This feature helps identify specific users or departments, reducing communication errors.

Image: Display showing customizable contact names and IDs for privacy, emergency, and all calls. This feature allows for flexible calling options.

Image: Screenshot of the FPCN50A programming software interface, showing fields for Model No., Serial Number, Unit ID, and User Name, highlighting how to customize radio identification.
5.4 GPS Tracking and Positioning
The FPCN50A features built-in GPS tracking, allowing location data to be shared with your team. This operates automatically on every transmission or at set intervals (e.g., every 30 minutes or 1000 meters).

Image: Radio display showing GPS tracking settings, allowing users to set location information transmission periodically (e.g., every 30 minutes) or when a certain distance is exceeded (e.g., every 1000 meters).

Image: Illustrates advanced GPS navigation, showing real-time latitude, longitude, altitude, and course angle for precise positioning.
5.5 Lone Worker and Emergency Alert
For enhanced safety, the radio includes a Lone Worker function and an Emergency Alert button. Pressing the orange emergency button sends a digital alarm to your supervisor or pre-programmed contacts.

Video: This video demonstrates the Message Function Operation on the SAMCOM FPCN50A radio, showing how to send and receive text messages.
5.6 Text Messaging
Send text messages directly to other radios without interrupting voice channels. This is useful for sending coordinates, part numbers, or instructions.

Image: Display showing the text messaging interface, including an inbox and quick text options, useful for quiet communication or sending specific data.
5.7 Group Call Function
The GROUP button allows for instant broadcasts to all radios, even if they are not on the same channel, facilitating efficient team collaboration.
Video: This video demonstrates the Contact Function Operation, which includes initiating group calls and managing contacts on the SAMCOM FPCN50A radio.
5.8 Call Log
The radio maintains a historical record of incoming and outgoing calls, supporting accountability and incident review.

Image: Display showing the call log menu, including options to view dialed calls, received calls, and details of specific call entries like name, ID, and timestamp.
5.9 Radio Settings
Access the radio's menu to configure various settings:
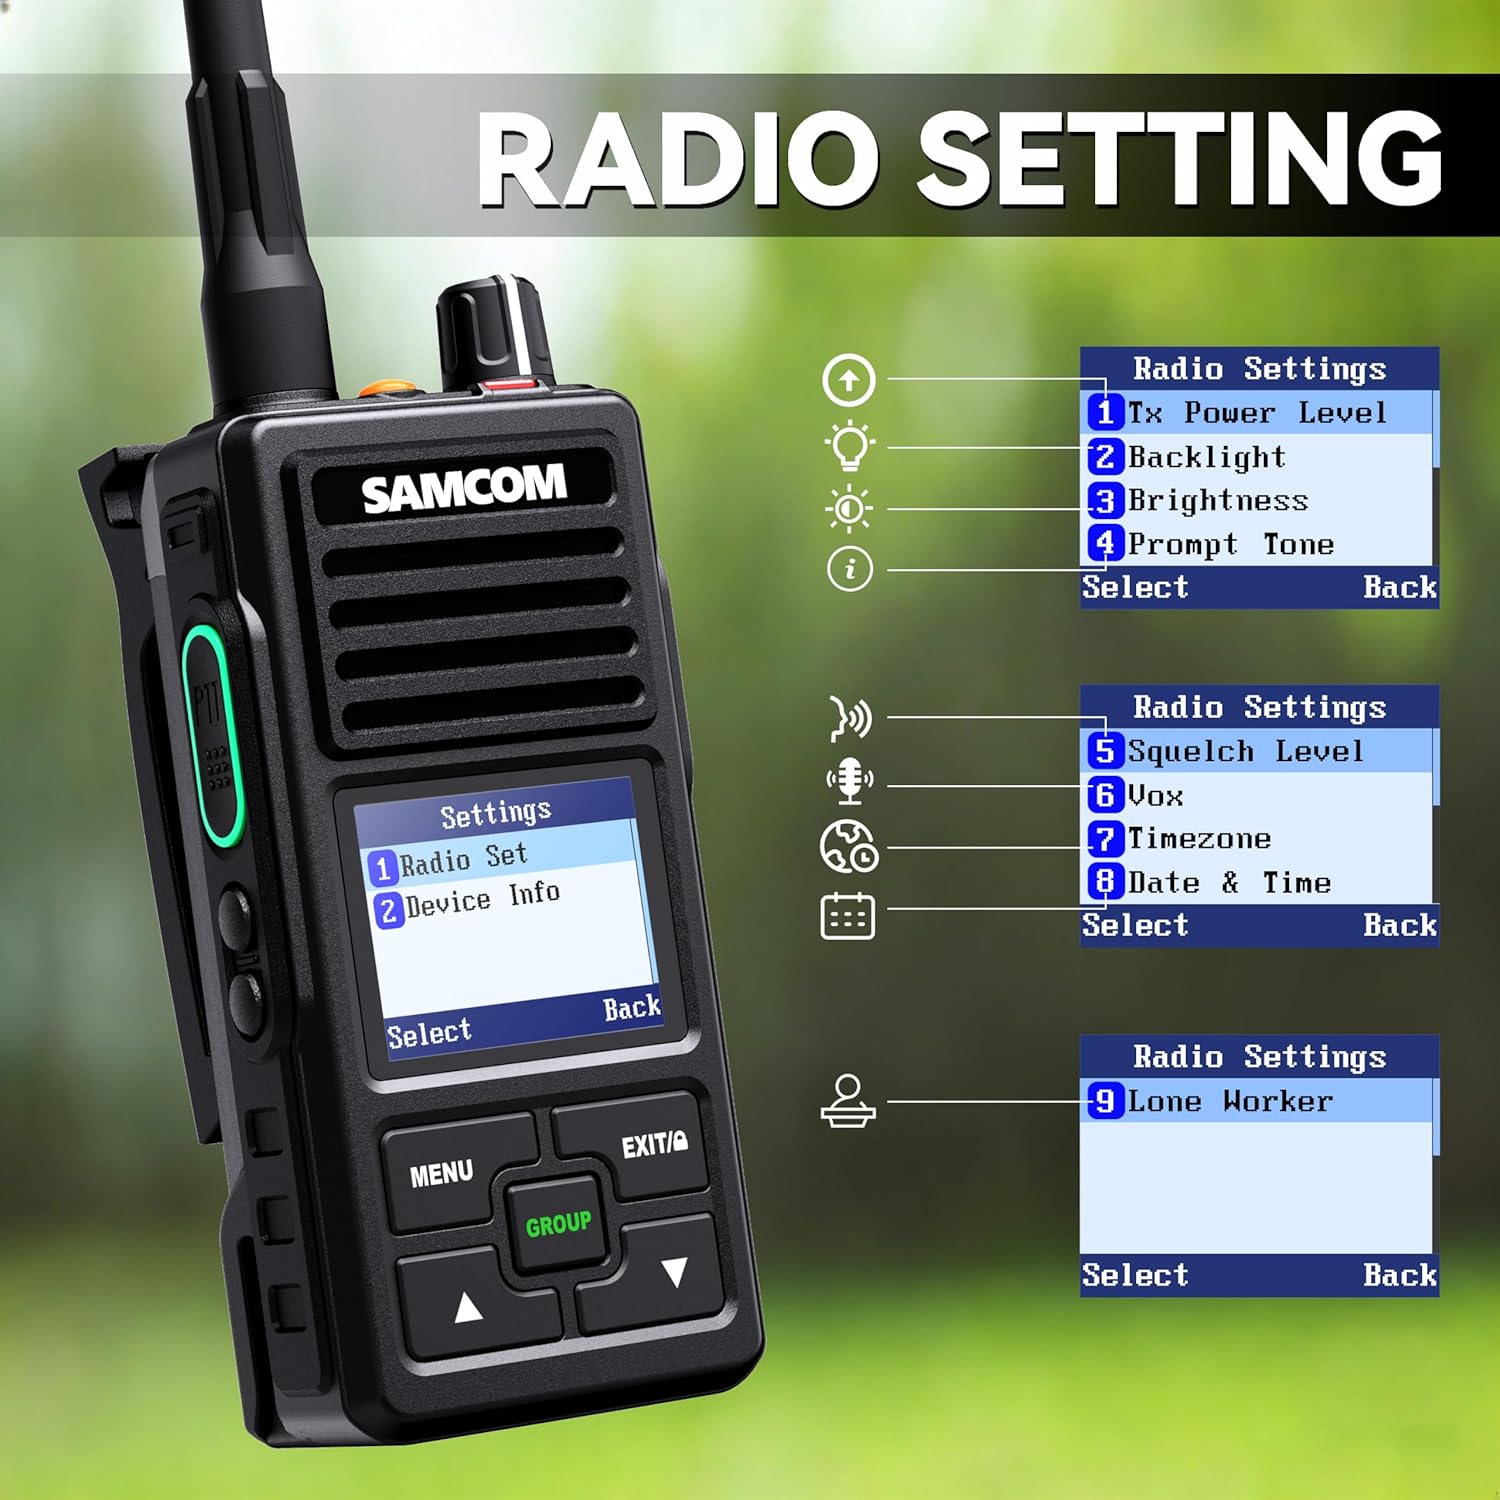
Image: Radio display showing the settings menu, including options for Tx Power Level, Backlight, Brightness, Prompt Tone, Squelch Level, VOX, Timezone, Date & Time, and Lone Worker settings.
- Tx Power Level: Adjust transmit power (High/Low).
- Backlight & Brightness: Control display illumination.
- Prompt Tone: Customize alert sounds.
- Squelch Level: Adjust the threshold for receiving signals to filter out noise.
- VOX: Voice-activated transmission.
- Timezone & Date & Time: Set local time and date.
- Lone Worker: Enable or disable the lone worker safety feature.
6. Maintenance
6.1 General Care
Keep the radio clean by wiping it with a soft, damp cloth. Avoid using harsh chemicals or abrasive cleaners.
6.2 Battery Care
To maximize battery life, fully charge the battery before initial use. Avoid overcharging or completely draining the battery frequently. If the radio becomes warm during use in hot weather, allow it to cool to room temperature before charging.
6.3 Water and Dust Resistance
The FPCN50A is IP67 rated, meaning it is protected against dust ingress and can withstand immersion in water up to 1 meter for 30 minutes. Ensure all port covers are securely closed to maintain water resistance.

Image: The SAMCOM FPCN50A radio being splashed with water, demonstrating its IP67 waterproof capability.
7. Troubleshooting
If you encounter issues with your radio, try the following basic troubleshooting steps:
- No Power: Ensure the battery is properly installed and charged. Check if the On-Off/Volume knob is turned on.
- Cannot Transmit/Receive: Verify that you are on the correct channel and that the volume is adjusted. Check antenna connection. Ensure the PTT button is fully pressed when transmitting.
- Poor Audio Quality: Adjust squelch level. Ensure you are within range of other radios. Check for obstructions.
- Radio Not Responding: Try turning the radio off and then on again.
For more complex issues or if troubleshooting steps do not resolve the problem, please contact SAMCOM customer support.
8. Specifications
| Feature | Specification |
|---|---|
| Brand | SAMCOM |
| Model Number | FPCN50A |
| Color | Black |
| Number of Channels | 20 |
| Frequency Range | 406.1-470MHz |
| Talking Range Maximum | 5 Miles |
| Voltage | 3.7 Volts |
| Water Resistance Level | IP67 Waterproof |
| Product Dimensions | 2.39"D x 1.45"W x 4.73"H |
| Battery Type | 2 Lithium Polymer batteries (included) |
| Battery Average Life | 20 Hours |
| Tuner Type | UHF |
| Connectivity Protocol | DMR |
9. Warranty and Support
9.1 Warranty Information
SAMCOM offers a Lifetime Warranty for the FPCN50A radio. This includes extended protection, accidental damage protection, and efficient replacement services.
9.2 Customer Support
For programming software, technical assistance, or any inquiries, please contact SAMCOM customer service via Amazon. Local tech support is available to assist you with setting up channel lists, custom names, ID numbers, and side button configurations.
