
1. Introduction
Thank you for purchasing the GOEBLESON 75" Arc Floor Lamp, Model E15LD05. This lamp features a natural marble base, adjustable height and arm, a rotating shade, and dimmable LED lighting with three color temperature options (3CCT). It can be controlled via a magnetic remote or a convenient foot switch. This manual provides detailed instructions for assembly, operation, and maintenance to ensure safe and optimal use of your new floor lamp.
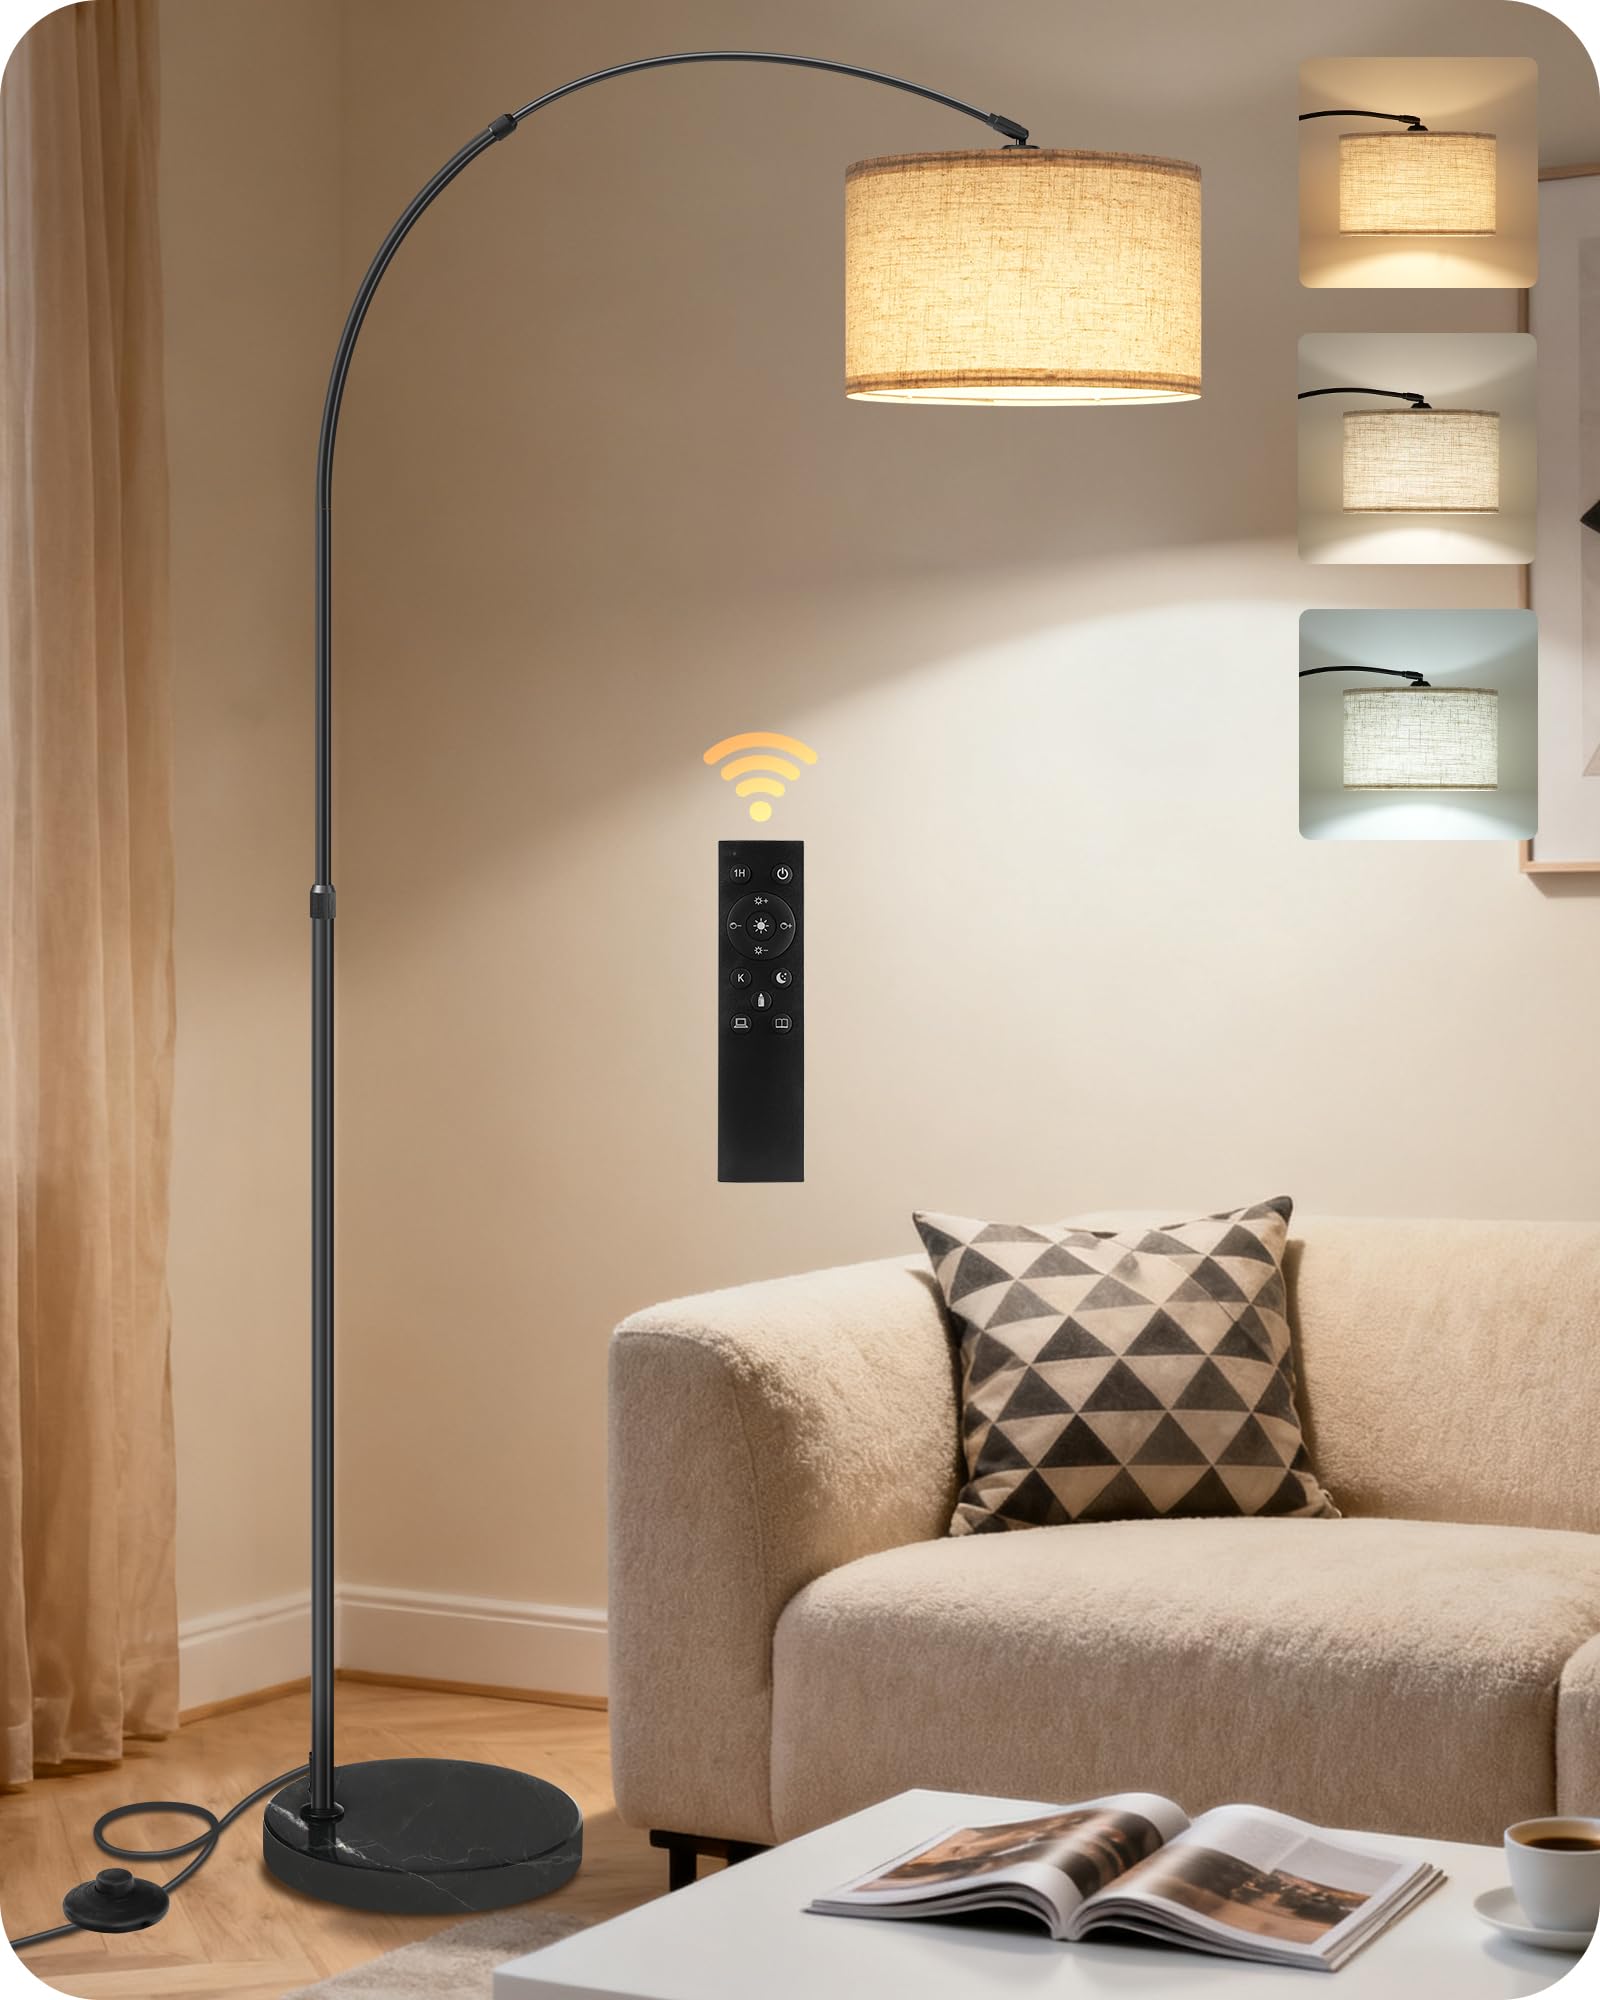
Figure 1.1: GOEBLESON 75" Arc Floor Lamp (Model E15LD05)
2. Safety Information
- Read all instructions carefully before assembly and use.
- Do not connect the power until the lamp is fully assembled.
- Ensure the power cord is not pinched or damaged during assembly.
- Use only the specified bulb type (E26) and wattage (9W LED bulb included).
- Keep the lamp away from water and moisture. For indoor use only.
- The marble base is heavy (13.7 lbs) for stability. Handle with care during movement to prevent injury or damage.
- Do not attempt to modify or disassemble the lamp beyond what is instructed in this manual.
- If any part is damaged or missing, contact customer support before use.
3. Package Contents
Verify that all components are present and undamaged before beginning assembly.
- Lamp Pole Sections (with pre-attached cord)
- Marble Base
- Linen Lampshade
- 9W E26 LED Bulb
- Remote Control (with battery)
- Foot Switch (integrated into power cord)
- Assembly Tool (if required)

Figure 3.1: All components included in the package.
4. Setup and Assembly
Follow these steps to assemble your GOEBLESON Arc Floor Lamp:
- Attach the Base: Carefully screw the lowest lamp pole section into the natural marble base. Ensure it is tightened securely to prevent wobbling.
- Assemble Pole Sections: Connect the remaining lamp pole sections by screwing them together clockwise. Gently pull any excess power cord through the base as you assemble to avoid tangling.
- Attach Arc Arm: Screw the arc arm section onto the top of the assembled pole.
- Install Lampshade: Unscrew the retaining ring from the lamp holder at the end of the arc arm. Place the linen lampshade over the lamp holder and secure it with the retaining ring.
- Insert Bulb: Screw the provided 9W E26 LED bulb into the lamp holder. Do not overtighten.
- Position Lamp: Place the lamp in your desired location, ensuring the power cord can reach an outlet without being stretched or obstructed.
- Connect Power: Plug the power cord into a standard electrical outlet.

Figure 4.1: Assembly of lamp pole sections.
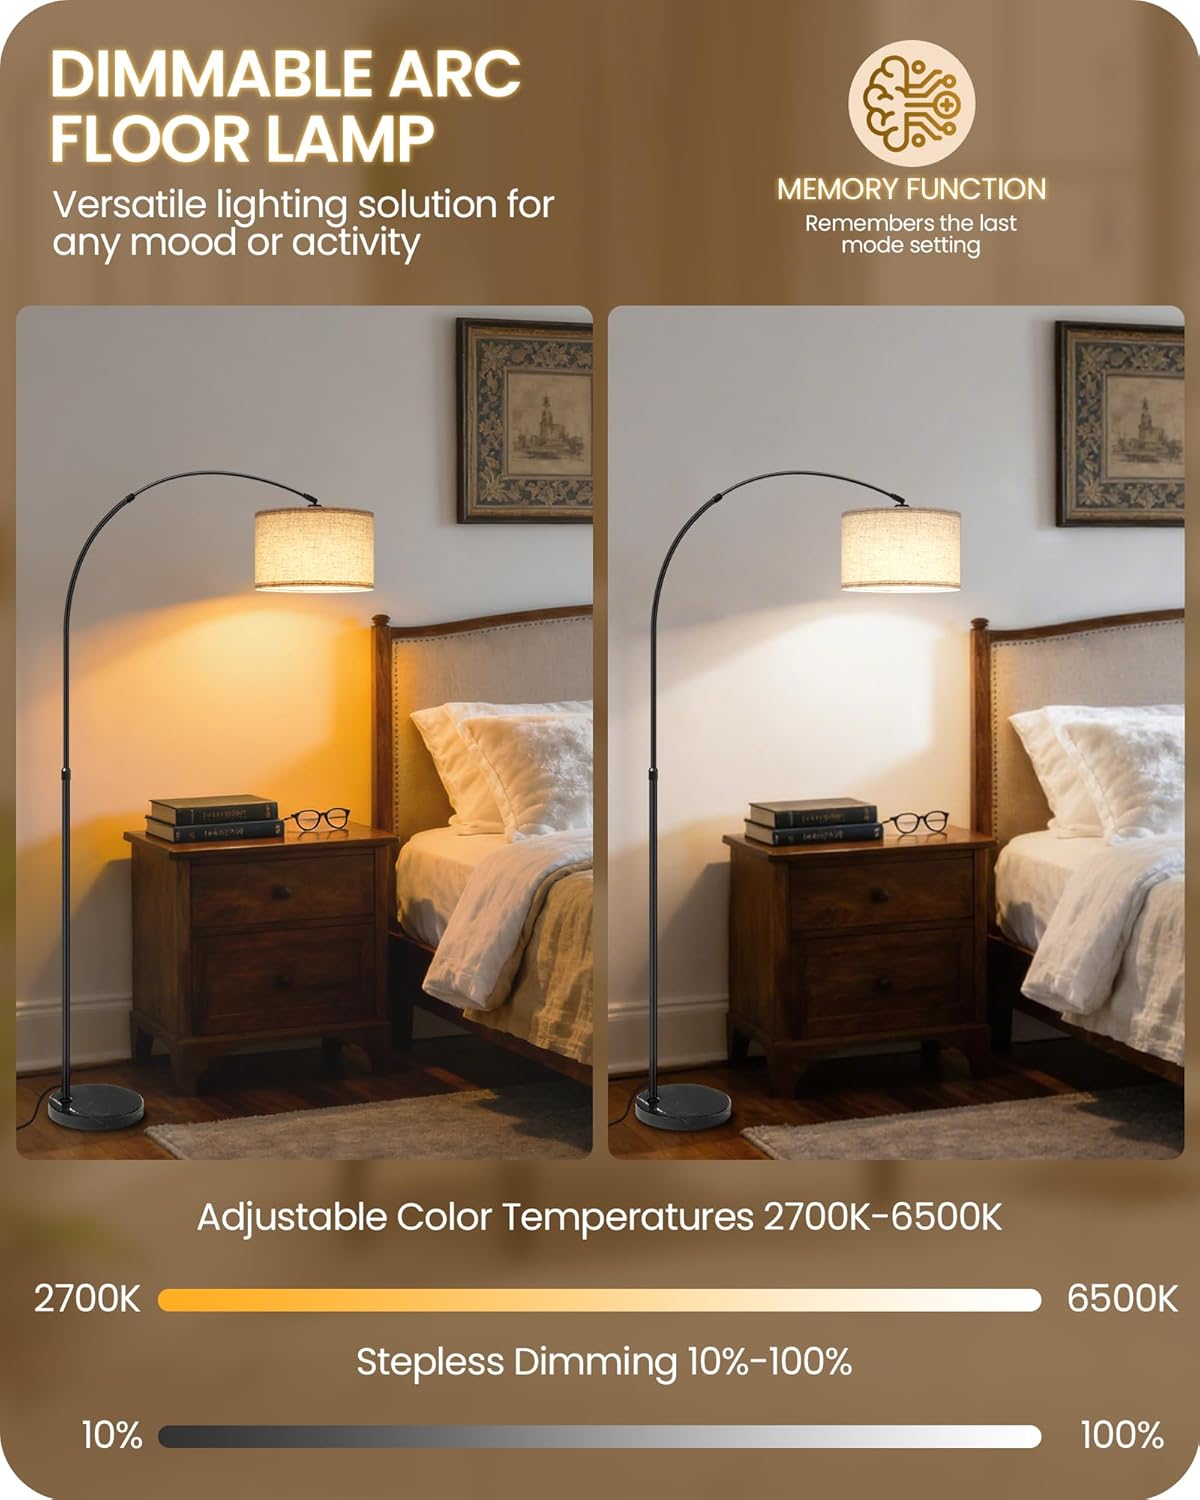
Figure 4.2: Lampshade and bulb installation.
5. Operating Instructions
5.1 Power On/Off
- Foot Switch: Press the foot switch located on the power cord to turn the lamp on or off.
- Remote Control: Press the power button (ON/OFF) on the remote control to turn the lamp on or off.
5.2 Adjusting Brightness (Dimming)
The lamp offers stepless dimming from 10% to 100% brightness.
- Remote Control: Use the brightness adjustment buttons (+ for brighter, - for dimmer) on the remote.
5.3 Adjusting Color Temperature (3CCT)
The lamp provides three color temperature options: Warm White (2700K), Natural White (4500K), and Cool White (6500K).
- Remote Control: Use the color temperature adjustment buttons (K+ for cooler, K- for warmer) on the remote.
5.4 Preset Lighting Modes
The remote control includes buttons for quick access to various lighting modes:
- Night Light Mode: Provides a soft, low-intensity light.
- Reading Mode: Optimized brightness and color temperature for reading.
- Working Mode: Brighter, cooler light suitable for tasks.
- Nursing Mode: Gentle light for nighttime care.
5.5 Timer Function
Set the lamp to automatically turn off after 60 minutes.
- Remote Control: Press the timer button (1H) on the remote. The lamp will flash once to confirm the timer is set.
5.6 Adjustable Lamp Features
- Height Adjustment: The lamp's height can be adjusted from 63 to 75 inches. Loosen the adjustment knob on the pole, slide to the desired height, and re-tighten.
- Arm Extension: The arc arm extends from 22 to 29 inches. Adjust the arm to position the light as needed.
- Head Rotation: The lamp head rotates 350° horizontally and 180° vertically, allowing precise light direction.

Figure 5.1: Remote control and foot switch operation.

Figure 5.2: Dimmable color temperatures and brightness range.

Figure 5.3: Angle adjustable lamp head.

Figure 5.4: Preset lighting modes and timer.
6. Maintenance
- Cleaning: Disconnect the lamp from power before cleaning. Wipe the lamp pole and base with a soft, dry cloth. For the lampshade, use a lint roller or a slightly damp cloth to remove dust. Do not use abrasive cleaners or solvents.
- Bulb Replacement: Ensure the lamp is unplugged and the bulb has cooled before attempting to replace it. Unscrew the old E26 bulb and screw in a new E26 LED bulb (max 9W).
- Remote Control Battery: If the remote control stops responding, replace its battery. Refer to the remote control's specific instructions for battery type and replacement procedure.
7. Troubleshooting
| Problem | Possible Cause | Solution |
|---|---|---|
| Lamp does not turn on. | No power, loose bulb, faulty bulb. | Check if plugged in. Ensure bulb is screwed in tightly. Replace bulb if necessary. Check wall outlet with another device. |
| Remote control not working. | Dead battery, remote out of range, obstruction. | Replace remote battery. Ensure remote is pointed at the lamp and within range. Remove any obstructions between remote and lamp. |
| Lamp flickers or dims unexpectedly. | Loose connection, incompatible bulb, power fluctuation. | Check all connections. Ensure bulb is E26 LED 9W. Try plugging into a different outlet. |
| Lamp is unstable. | Loose pole sections, uneven surface. | Ensure all pole sections are securely tightened. Place lamp on a flat, stable surface. |
8. Specifications
| Feature | Detail |
|---|---|
| Model Number | ST-F31107 (E15LD05) |
| Brand | GOEBLESON |
| Product Dimensions | 12"D x 31.5"W x 75"H (Adjustable Height: 63"-75") |
| Item Weight | 13.7 pounds |
| Base Material | Natural Marble |
| Shade Material | Linen |
| Light Source Type | LED |
| Bulb Base | E26 |
| Wattage | 9 watts (Max) |
| Color Temperature | 2700K-6500K (Dimmable) |
| Control Method | Remote Control, Foot Switch |
| Additional Features | Adjustable Arm, Adjustable Height, Dimmable, Timer, Rotating Head |
| Indoor/Outdoor Usage | Indoor Only |
9. Warranty and Support
GOEBLESON products are manufactured with quality and care. For warranty information, please refer to the documentation included with your purchase or contact GOEBLESON customer support directly. If you encounter any issues or have questions regarding your lamp, please reach out to our support team for assistance.
Customer Support: Please refer to the contact information provided on the product packaging or the official GOEBLESON website.