Sanyo DRW-500 DVD Recorder/Player Instruction Manual
Model: DRW-500
Introduction
This manual provides comprehensive instructions for the safe and efficient operation of your Sanyo DRW-500 DVD Recorder/Player. Please read this manual thoroughly before using the device and retain it for future reference. The Sanyo DRW-500 allows you to record television programs and home videos onto DVD-R/RW discs, as well as play back DVD-Video and Audio CD discs.
Important Safety Information
WARNING: TO REDUCE THE RISK OF FIRE OR ELECTRIC SHOCK, DO NOT EXPOSE THIS APPLIANCE TO RAIN OR MOISTURE.
Always follow basic safety precautions when using this product to reduce the risk of fire, electric shock, and injury to persons.
Do not block any ventilation openings. Install in accordance with the manufacturer's instructions.
Do not install near any heat sources such as radiators, heat registers, stoves, or other apparatus (including amplifiers) that produce heat.
Protect the power cord from being walked on or pinched, particularly at plugs, convenience receptacles, and the point where they exit from the apparatus.
Only use attachments/accessories specified by the manufacturer.
Refer all servicing to qualified service personnel. Servicing is required when the apparatus has been damaged in any way.
Package Contents
Please check that all items are present in the box:
Sanyo DRW-500 DVD Recorder/Player Unit
Remote Control
RCA Audio/Video Cable
Power Cord
Instruction Manual (this document)
Product Overview
Familiarize yourself with the front and rear panels of your Sanyo DRW-500.
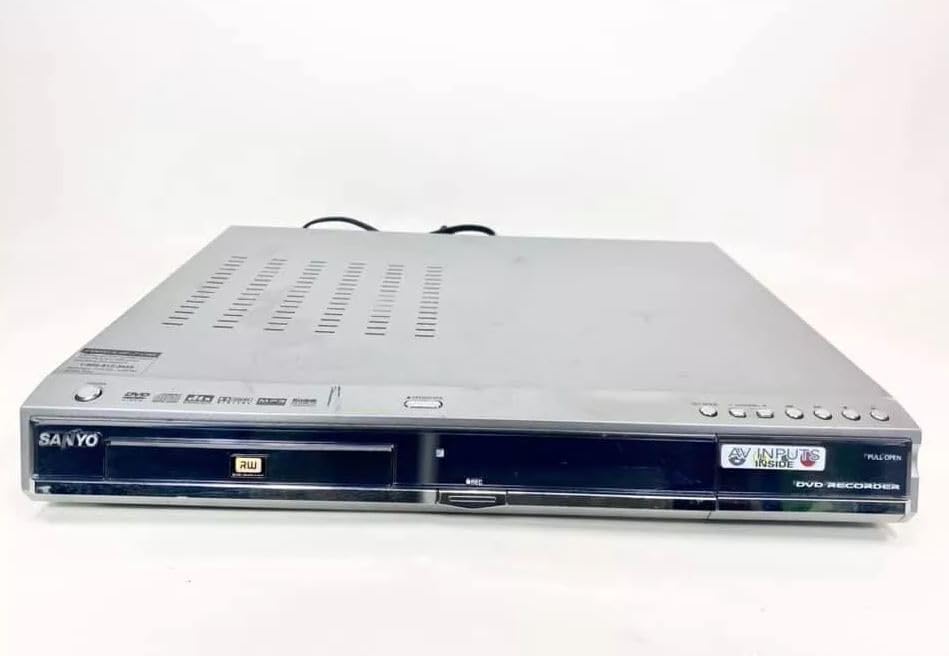
Figure 1: Front Panel of Sanyo DRW-500. Shows the disc tray, power button, play/pause, stop, record buttons, and the display screen.
Front Panel Controls:
POWER Button: Turns the unit on or off.
OPEN/CLOSE Button: Opens and closes the disc tray.
PLAY Button: Starts disc playback.
STOP Button: Stops disc playback or recording.
RECORD Button: Initiates recording.
DISPLAY: Shows current status, time, and track information.
Rear Panel Connections:
AUDIO/VIDEO OUT (RCA): Connects to your TV's audio/video input.
S-VIDEO OUT: Provides higher quality video output to compatible TVs.
AUDIO/VIDEO IN (RCA): Connects to external devices like VCRs or camcorders for recording.
POWER IN: Connects the power cord.
Setup
1. Connecting to a Television
There are two primary ways to connect your Sanyo DRW-500 to a television:
Option A: RCA (Composite Video) Connection
Connect one end of the RCA audio/video cable (red, white, yellow) to the AUDIO/VIDEO OUT jacks on the rear of the DRW-500.
Connect the other end of the RCA cable to the corresponding AUDIO/VIDEO IN jacks on your television. Ensure colors match (yellow to yellow for video, red to red for right audio, white to white for left audio).
Select the correct input channel on your TV (e.g., Video 1, AV1, Input 1).
Connect an S-Video cable (not included) from the S-VIDEO OUT jack on the DRW-500 to the S-Video input on your television.
Connect a separate RCA audio cable (red, white) from the AUDIO OUT jacks on the DRW-500 to the corresponding audio input jacks on your television. S-Video only carries video, not audio.
Select the correct input channel on your TV (e.g., S-Video, Input 2).
2. Power Connection
Connect the supplied power cord to the POWER IN port on the rear of the DRW-500.
Plug the other end of the power cord into a standard AC wall outlet.
3. Initial Setup and Clock Setting
Upon first power-on, the unit may prompt you to set the clock and other basic settings. Follow the on-screen instructions using the remote control.
Operating Instructions
Playing a DVD or CD
Press the POWER button to turn on the unit.
Press the OPEN/CLOSE button to open the disc tray.
Place a DVD or CD disc onto the tray with the label side facing up.
Press the OPEN/CLOSE button again to close the tray.
Playback should begin automatically. If not, press the PLAY button.
Use the remote control for functions like Pause, Stop, Fast Forward, Rewind, and Chapter Skip.
Recording to DVD-R/RW
The Sanyo DRW-500 can record from various external sources connected to its AUDIO/VIDEO IN jacks.
Recording from a TV/Cable Box:
Connect the audio/video output of your TV or cable box to the AUDIO/VIDEO IN jacks on the rear of the DRW-500.
Insert a blank recordable DVD (DVD-R or DVD-RW) into the disc tray.
Select the correct input source on the DRW-500 using the INPUT SELECT button on the remote control (e.g., L1, L2).
Tune your TV/cable box to the desired program.
Press the RECORD button on the DRW-500 or its remote control to start recording.
Press the STOP button to end recording.
Recording from a VCR or Camcorder:
Connect the audio/video output of your VCR or camcorder to the AUDIO/VIDEO IN jacks on the rear of the DRW-500.
Insert a blank recordable DVD into the disc tray.
Select the correct input source on the DRW-500 using the INPUT SELECT button on the remote control.
Start playback on your VCR or camcorder.
Press the RECORD button on the DRW-500 or its remote control to start recording.
Press the STOP button to end recording.
Finalizing a Disc
For recorded DVD-R/RW discs to be playable on other DVD players, they must be "finalized."
Insert the recorded DVD-R/RW disc into the DRW-500.
Access the MENU on the remote control.
Navigate to the "Disc Settings" or "Setup" menu.
Select the "Finalize Disc" option.
Confirm the action. The finalization process may take several minutes. Do not interrupt power during this process.
Note: DVD-RW discs can be unfinalized and re-recorded multiple times. DVD-R discs, once finalized, cannot be recorded on again.
Maintenance
Cleaning the Unit
Always unplug the unit from the power outlet before cleaning.
Use a soft, dry cloth to wipe the exterior of the unit.
Do not use liquid cleaners, aerosol cleaners, or strong chemical solvents, as these may damage the finish.
Disc Care
Handle discs by their edges to avoid fingerprints on the recording surface.
Store discs in their cases when not in use to prevent scratches and dust accumulation.
Clean dirty discs with a soft, lint-free cloth, wiping gently from the center outwards.
Troubleshooting
Problem
Possible Cause
Solution
No power
Power cord not connected securely.
Check power cord connection to the unit and wall outlet.
No picture or sound
Incorrect TV input selected. A/V cables not connected properly.
Select the correct input on your TV. Ensure A/V cables are securely connected to the correct input/output jacks.
Disc does not play
Disc is dirty or scratched. Disc is inserted incorrectly. Incompatible disc format.
Clean the disc. Insert the disc with the label side up. Ensure the disc is a compatible format (DVD-Video, Audio CD, recorded DVD-R/RW).
Cannot record
No blank recordable disc inserted. Disc is full or protected. Incorrect input source selected.
Insert a blank DVD-R or DVD-RW. Use a new disc or erase a DVD-RW. Select the correct input source (e.g., L1, L2).
Recorded disc won't play on other players
Disc not finalized.
Finalize the disc using the "Finalize Disc" option in the unit's menu.
Specifications
Feature
Detail
Model
DRW-500
Manufacturer
Sanyo
Compatible Disc Formats (Playback)
DVD-Video, CD-Audio, DVD-R, DVD-RW (finalized)
Recordable Disc Formats
DVD-R, DVD-RW
Video Output
Composite Video (RCA), S-Video
Audio Output
Stereo RCA
Video Input Compatibility
NTSC
Connectivity Technology
AUX (RCA)
Special Feature
Compact Design
Power Supply
AC 120V, 60Hz (typical for US models)
Warranty and Support
This product is covered by a limited manufacturer's warranty. Please refer to the warranty card included with your purchase for specific terms and conditions. For technical support or service inquiries, please contact Sanyo customer service through their official website or the contact information provided in your warranty documentation.
Please note that warranty terms may vary by region and retailer. Keep your proof of purchase for warranty claims.
Related Documents - DRW-500
SANYO MCD-Z120/MCD-Z120F Portable CD Radio Cassette Recorder Service Manual This comprehensive service manual provides detailed technical specifications, adjustment procedures, exploded views, and parts lists for the SANYO MCD-Z120 and MCD-Z120F portable CD radio cassette recorder systems. Essential for technicians and repair professionals.
SANYO DC-F210 Mini Component System Instruction Manual Instruction manual for the SANYO DC-F210 Mini Component System, covering setup, operation of CD player, tuner, amplifier, and cassette deck, recording, dubbing, timer functions, maintenance, and technical specifications. Includes important safety precautions and warranty information.
SANYO 18H-815 Portable Radio Service Manual Detailed service manual for the SANYO 18H-815 portable radio, covering specifications, block diagrams, schematic drawings, and parts lists for repair and maintenance.
Manual de Usuario Radio Portátil Digital Sanyo KS132N FM/AM Manual de usuario detallado para la radio portátil digital Sanyo KS132N. Incluye descripción del producto, especificaciones técnicas, instrucciones de uso, mantenimiento, solución de problemas y advertencias de seguridad.