
1. Important Safety Instructions
Always read and understand all safety warnings, instructions, illustrations, and specifications provided with this power tool. Failure to follow all instructions listed below may result in electric shock, fire, and/or serious injury.
- Wear appropriate personal protective equipment (PPE): Always wear safety goggles, gloves, and sturdy footwear when operating the tool.
- Keep work area clear: Ensure the area around you is free from obstacles, bystanders, and pets.
- Inspect the tool before use: Check for any damaged parts, loose connections, or worn components. Do not operate if damaged.
- Secure your footing: Maintain proper balance and footing at all times, especially when using the extension pole.
- Avoid contact with electrical lines: Never operate near power lines or other electrical hazards.
- Use the correct battery: This tool is designed for DeWALT 20V MAX batteries. Using incompatible batteries may cause damage or injury.
- Proper chain lubrication: Ensure the chain is adequately lubricated before and during operation to prevent overheating and wear.
- Store safely: When not in use, store the tool in a dry, secure place out of reach of children.
2. Package Contents
Verify that all items listed below are included in your package. If any parts are missing or damaged, contact customer service.
- 8-inch & 6-inch Mini Chainsaw (x1)
- Adjustable Extension Pole (x1)
- 8-inch Chain (x1)
- 6-inch Chain (pre-installed on chainsaw) (x1)
- 8-inch Guide Bar (x1)
- 6-inch Guide Bar (pre-installed on chainsaw) (x1)
- Shoulder Strap (x1)
- Anti-slip Gloves (x1 pair)
- Goggles (x1 pair)
- Oil Bottle (empty) (x1)
- Brush (x1)
- Screwdriver (x1)
- User Manual (x1)

Figure 1: AVADA 2-IN-1 Cordless Pole Saw and Mini Chainsaw, illustrating its dual functionality.
3. Setup and Assembly
3.1 Battery Installation
The AVADA 2-IN-1 Cordless Pole Saw is compatible with DeWALT 20V MAX batteries (DCB200, DCB201, DCB203, DCB204, DCB205, DCB206, DCB230, DCB240, DCB246, DCB248). Batteries and charger are not included.
- Align the battery with the battery slot on the tool.
- Slide the battery into the slot until it clicks into place, ensuring it is securely fastened.
- To remove, press the battery release button and slide the battery out.

Figure 2: Battery compatibility and installation for the AVADA Pole Saw.
3.2 Attaching the Extension Pole (2-in-1 Functionality)
The tool can be used as a mini chainsaw or attached to the extension pole for increased reach.
- Ensure the mini chainsaw is powered off and the battery is removed.
- Align the chainsaw's connection point with the extension pole's socket.
- Insert the chainsaw into the socket and secure it by locking the safety latch.
- Insert the battery into the handle of the extension pole.

Figure 3: Steps for converting the mini chainsaw to a pole saw.
4. Operating Instructions
4.1 Adjusting Pole Length and Cutting Angle
The telescoping pole adjusts from 5.6 ft to 9.9 ft, providing an overhead reach of up to 15.9 ft. The cutting head can be adjusted from 0° to 180° for precise cuts.
- To adjust the pole length, release the length adjustment clamps, extend or retract the pole to the desired length, and then securely fasten the clamps.
- To adjust the cutting angle, press the angle adjustment button and rotate the cutting head to the desired position (0°-180°). Release the button to lock the angle.

Figure 4: Adjusting the pole length and cutting head angle for optimal reach and precision.
4.2 Starting and Stopping the Tool
The tool features a safety lock to prevent accidental starts.
- To start the tool, press and hold the safety lock button, then pull the power switch (trigger).
- To stop the tool, release the power switch.

Figure 5: The AVADA chainsaw in operation, demonstrating its cutting capability.
4.3 General Operation Tips
- Always ensure the chain is sharp and properly tensioned for efficient cutting.
- When cutting, let the tool do the work. Do not force the saw through branches.
- For larger branches, make a relief cut on the underside first to prevent pinching.
- Be aware of falling branches and maintain a safe distance.
5. Maintenance
5.1 Chain Lubrication
The integrated auto-lubrication system ensures the chain runs smoothly.
- Fill the provided oil bottle with appropriate chain lubricant (not included).
- Add oil to the reservoir on the chainsaw.
- Gently press the clear cap before use to activate the automatic lubrication system during operation.
5.2 Chain Tensioning and Replacement
The tool features tool-free chain installation and an automatic tensioner.
- To adjust chain tension, twist the tool-free adjusting knob by hand. Turn clockwise to tighten, counter-clockwise to loosen.
- To replace the chain, loosen the knob completely, remove the old chain and guide bar, install the new chain and guide bar, and then tighten the knob until the chain is properly tensioned.
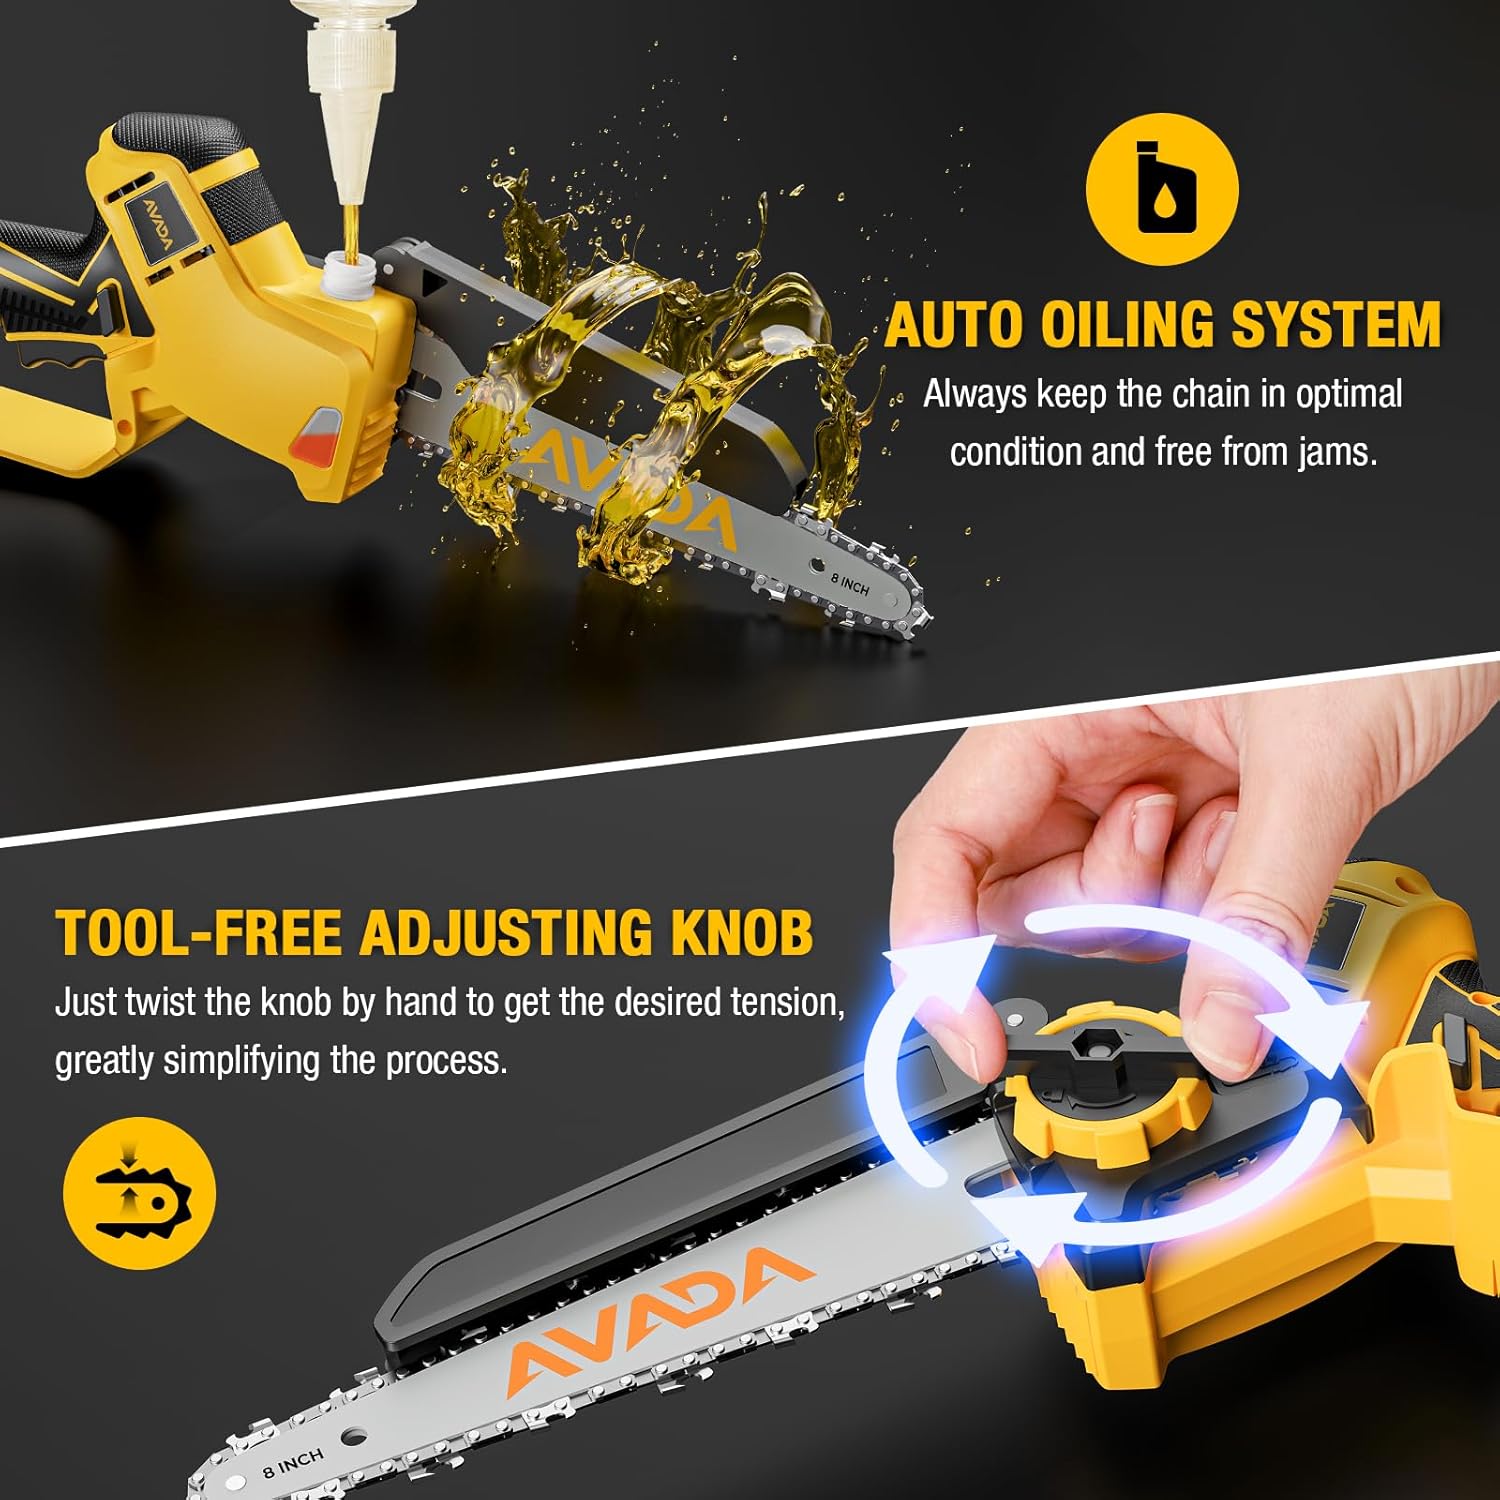
Figure 6: Auto-oiling system and tool-free chain adjustment knob.
5.3 Cleaning and Storage
- After each use, clean the tool with the provided brush to remove sawdust and debris.
- Ensure the tool is dry before storing.
- Store the tool in a cool, dry place, away from direct sunlight and moisture.
6. Specifications
| Feature | Specification |
|---|---|
| Brand | AVADA |
| Power Source | Battery Powered (DeWALT 20V MAX compatible) |
| Wattage | 1200 watts |
| Blade Material | Alloy Steel |
| Blade Sizes | 8-inch & 6-inch |
| Cutting Angle | 0-180 Degrees Adjustable |
| Max Reach (with pole) | Up to 15.9 ft |
| Item Weight | 5.7 Pounds |
| Handle Material | Plastic |
| Special Features | Adjustable Cutting Angle, Adjustable Length, Brushless Motor, Auto-Lubrication System, Tool-less Tensioning, Shoulder Strap Design, Safety Lock |
7. Troubleshooting
This section provides general guidance for common issues. For more complex problems, please contact customer support.
- Tool not starting: Ensure the battery is fully charged and correctly inserted. Check that the safety lock is pressed before pulling the power switch.
- Chain not moving or moving slowly: Verify the chain tension is correct (not too tight or too loose). Check for any debris obstructing the chain or guide bar. Ensure the chain is properly lubricated.
- Excessive vibration or noise: Inspect the chain and guide bar for damage or improper installation. Ensure all connections, especially the extension pole, are secure.
- Poor cutting performance: The chain may be dull and require sharpening or replacement. Ensure proper lubrication.
8. Warranty and Customer Support
For any issues during use or questions about our products, please contact our customer service. We are committed to providing a satisfactory solution within 24 hours.
Specific warranty details may be provided with your purchase documentation. Please retain your proof of purchase for warranty claims.