
1. Introduction
Thank you for choosing the SUNGOOYUE 1080p Auto Dash Camera. This device is designed to provide reliable video recording while driving, enhancing your safety and providing evidence in case of incidents. It features 1080p resolution, night vision, motion detection, G-sensor, loop recording, and 24-hour parking monitoring. Please read this manual carefully before use to ensure proper operation and maintenance.
2. Safety Information
- Do not operate the dash camera while driving. Adjust settings only when the vehicle is safely parked.
- Ensure the dash camera is securely mounted and does not obstruct your view of the road or interfere with airbag deployment.
- Use only the provided power cable and accessories to prevent damage or fire.
- Do not expose the device to extreme temperatures, direct sunlight for prolonged periods, or excessive moisture.
- Keep the lens clean to ensure clear video recordings.
- Regularly back up important video files to prevent loss.
3. Package Contents
Please check the package for the following items:
- 1 x SUNGOOYUE Dash Camera
- 1 x Rear Camera (if included in your specific model)
- 1 x Power Cord (Car Charger)
- 1 x Suction Cup Mount
- 1 x Double-Sided Adhesive Mount
- 2 x Screws (for rear camera mounting, if applicable)
- 1 x User Manual

Image: The SUNGOOYUE Dash Camera shown with its included accessories, including the main unit, power cable, suction cup mount, and a separate rear camera.
4. Product Overview
Familiarize yourself with the main components of your dash camera:
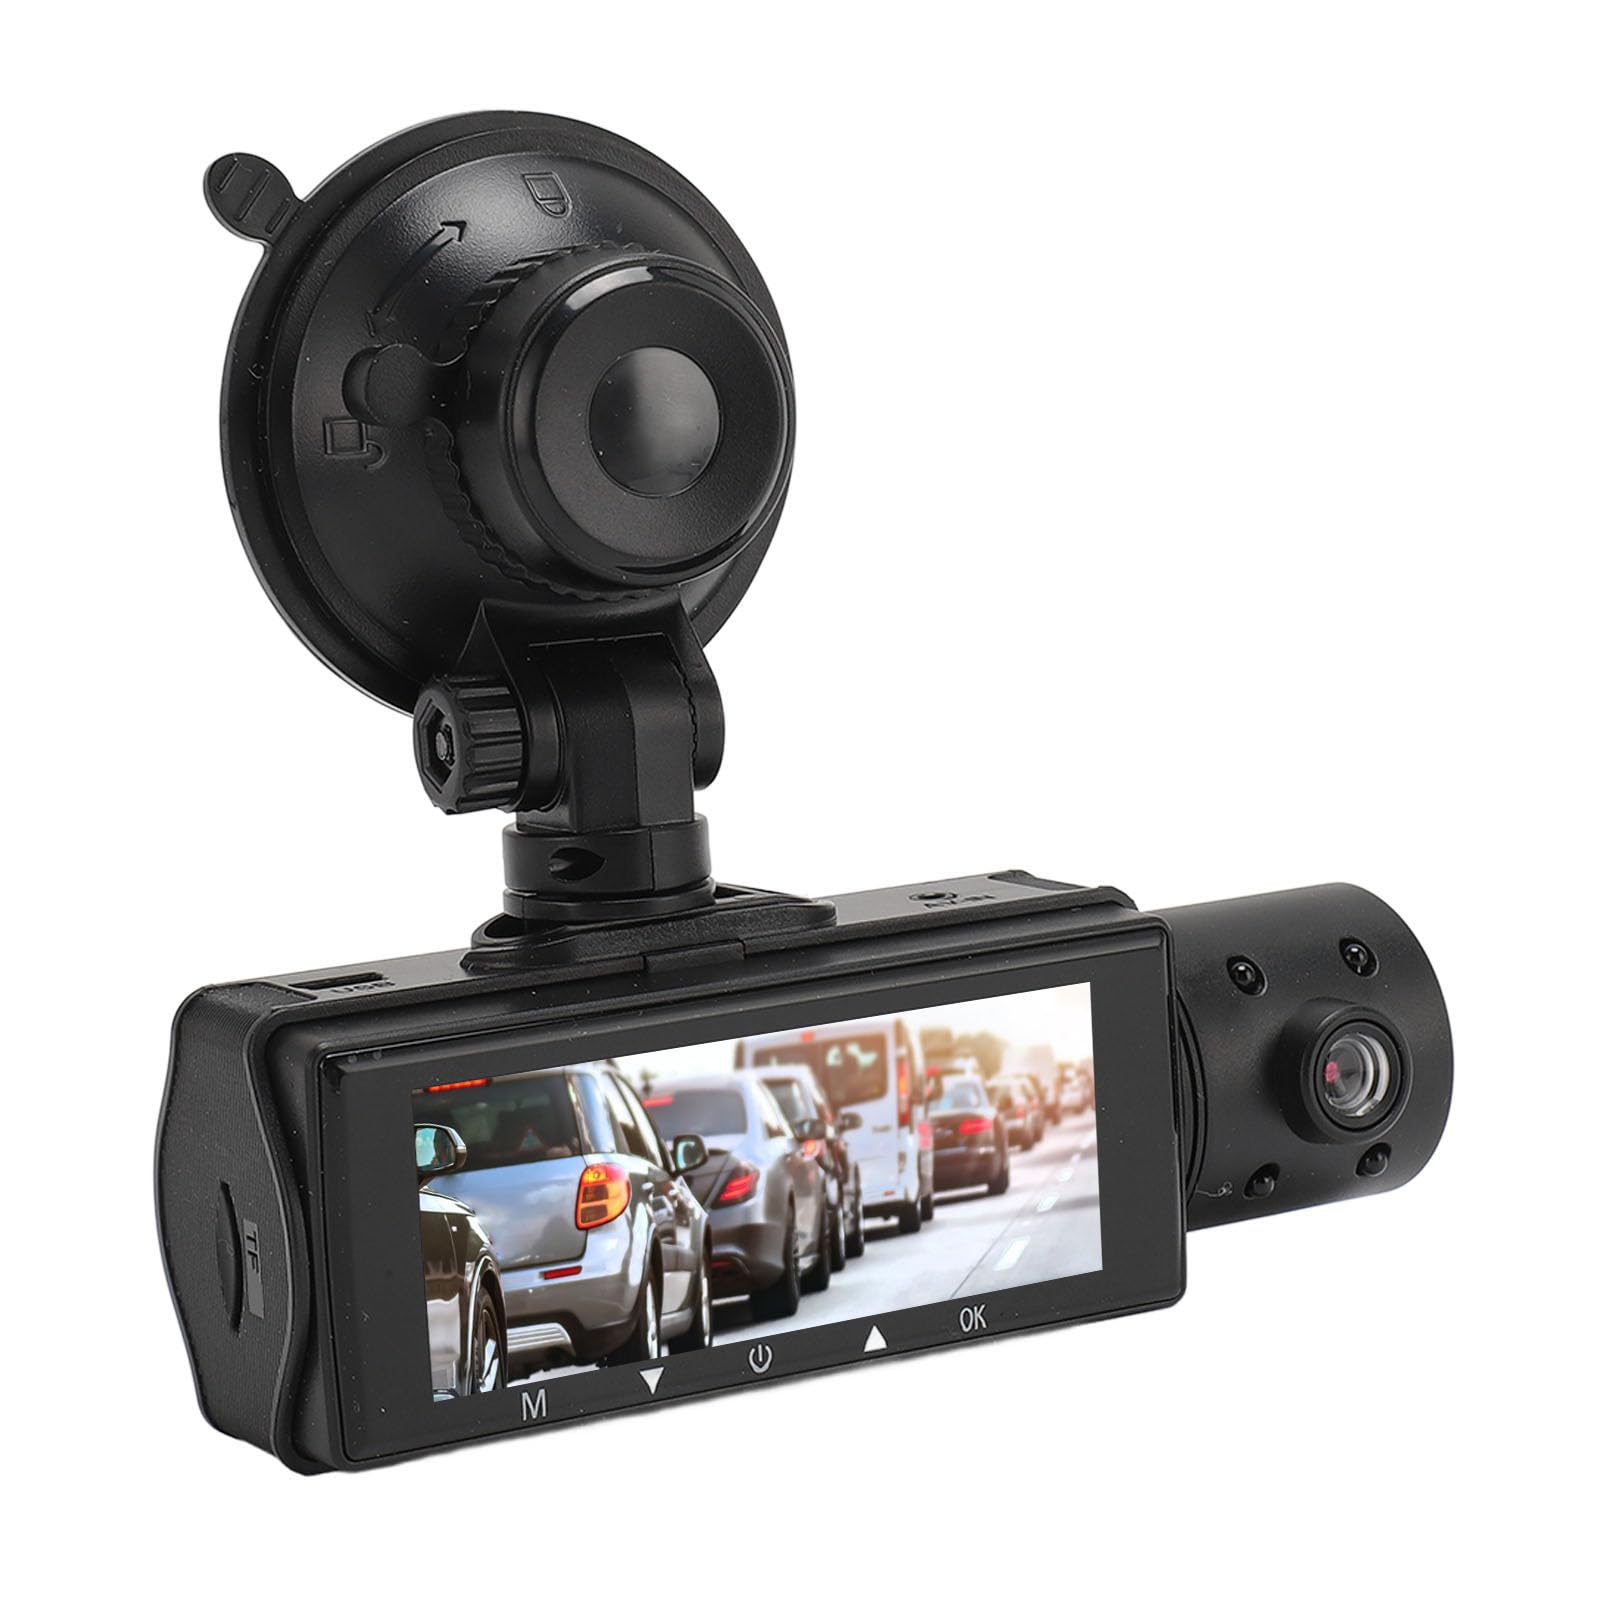
Image: Front view of the SUNGOOYUE Dash Camera, mounted with a suction cup, showing the display screen with a road scene and control buttons below.

Image: Rear view of the SUNGOOYUE Dash Camera, highlighting the speaker grille, various ports (e.g., USB, AV-IN), and the main camera lens.
Key Components:
- Main Camera Lens: Records the front view.
- Display Screen: Shows live view, menu, and playback.
- Control Buttons: For navigation and function selection (e.g., Menu, Up, Down, OK, Power).
- Microphone: Records audio inside the vehicle.
- Speaker: For audio playback.
- USB Port: For power supply and data transfer.
- AV-IN Port: For connecting the rear camera.
- MicroSD Card Slot: For memory card insertion.
- Reset Button: To reset the device (usually a small pinhole).
5. Setup
5.1 Inserting the MicroSD Card
- Ensure the dash camera is powered off.
- Locate the MicroSD card slot on the side of the device.
- Insert a Class 10 or higher MicroSD card (up to 32GB, not included) into the slot until it clicks into place.
- To remove, gently push the card in until it clicks, then release.
5.2 Mounting the Dash Camera
Choose a location on your windshield that does not obstruct your view. Clean the area thoroughly before mounting.
- Using the Suction Cup Mount:
Attach the suction cup mount to the dash camera. Press the suction cup firmly against the windshield and flip the lever to secure it. Adjust the camera angle as needed. - Using the Double-Sided Adhesive Mount:
Attach the adhesive mount to the dash camera. Peel off the protective film and firmly press the mount onto the desired location on the windshield for at least 30 seconds. Allow 24 hours for the adhesive to fully cure before driving.

Image: The SUNGOOYUE Dash Camera securely mounted on a windshield using the suction cup, showing the front lens and display screen.
5.3 Connecting the Power
- Plug the car charger into your vehicle's cigarette lighter socket.
- Connect the other end of the power cord to the USB port on the dash camera.
- Route the cable neatly along the windshield trim to avoid obstruction.
5.4 Connecting the Rear Camera (Optional)
- Locate the AV-IN port on the dash camera.
- Connect the rear camera cable to the AV-IN port.
- Mount the rear camera at the back of your vehicle, typically above the license plate or on the rear window, ensuring a clear view. Use the provided screws or adhesive.
- Route the cable carefully to the front dash camera, avoiding interference with vehicle components.

Image: A compact, square-shaped rear camera unit with four LED lights, designed to be connected to the main dash camera for recording the rear view.
6. Operating Instructions
6.1 Power On/Off
- The dash camera will automatically power on and begin recording when connected to power and the vehicle ignition is turned on.
- It will automatically power off when the vehicle ignition is turned off (if connected to a switched power source).
- To manually power on/off, press and hold the Power button.
6.2 Basic Recording
- Once powered on, the camera will automatically start loop recording. Video files are saved in segments (e.g., 1, 3, or 5 minutes) to the MicroSD card.
- When the memory card is full, the oldest unlocked files will be overwritten by new recordings.
- The display will show the live view from the front camera, or a split view if the rear camera is connected.
6.3 Menu Navigation
- Press the Menu button to enter the settings menu.
- Use the Up/Down buttons to navigate through options.
- Press the OK button to confirm a selection.
- Press the Menu button again to exit the menu.
6.4 Key Features
- Loop Recording: Records continuously, overwriting the oldest files when the card is full. Set segment length in the menu.
- Night Vision: Equipped with enhanced low-light capabilities to ensure clear recordings in dark environments. This feature activates automatically.
- Motion Detection: When enabled, the camera will automatically start recording if it detects movement in front of the vehicle while parked. This helps capture incidents when you are away from the car.
- G-Sensor (Emergency Lock): Detects sudden impacts or collisions. When triggered, the current video segment is automatically locked and protected from being overwritten. The sensitivity can be adjusted in the settings.
- 24-Hour Parking Monitoring: Provides continuous surveillance of your parked vehicle. This feature typically requires a hardwire kit (not included) to draw power directly from the car battery, or it uses the internal battery for short periods.
6.5 Video Playback
- Stop recording by pressing the OK button (if currently recording).
- Enter playback mode via the menu or a dedicated button (refer to device specific button layout).
- Use the Up/Down buttons to select the desired video file.
- Press OK to play the video.
- To exit playback, press the Menu button.
7. Maintenance
7.1 Cleaning the Device
- Use a soft, dry cloth to clean the camera body.
- For the lens, use a specialized lens cleaning cloth and solution to avoid scratches.
- Do not use harsh chemicals or abrasive cleaners.
7.2 MicroSD Card Management
- It is recommended to format the MicroSD card regularly (e.g., once a month) within the camera's settings to ensure optimal performance and prevent data corruption.
- Replace the MicroSD card if you notice frequent errors or degraded performance.
8. Troubleshooting
- Camera not powering on: Check the power connection to the car charger and the camera. Ensure the vehicle's cigarette lighter socket is working.
- Camera not recording: Ensure a MicroSD card is inserted and formatted. Check if the card is full or corrupted.
- Video quality is poor: Clean the camera lens. Check the video resolution settings in the menu. Ensure there is no condensation on the windshield.
- Camera freezes or crashes: Press the reset button (usually a small pinhole) with a paperclip. If the issue persists, try formatting the MicroSD card.
- G-Sensor is too sensitive/not sensitive enough: Adjust the G-Sensor sensitivity setting in the menu.
- Parking Monitor not working: Ensure the feature is enabled in the settings. For continuous 24-hour monitoring, a hardwire kit may be required.
9. Specifications
| Feature | Specification |
|---|---|
| Brand | SUNGOOYUE |
| Video Capture Resolution | 1080p |
| Display Resolution | 640x320 |
| Storage | Supports MicroSD cards up to 32 GB (not included) |
| Battery Type | 150 mAh lithium ion battery |
| Mounting Type | Suction Cup / Adhesive (wall mount listed, but for vehicle use) |
| Product Dimensions (D x W x H) | 5.91" x 4.33" x 2.76" |
| Special Features | Three-camera recording (if applicable), Loop Recording, Night Vision, Motion Detection, Wide Angle Recording, G-Sensor, Emergency Lock, 24-Hour Parking Monitoring |
10. Warranty and Support
10.1 Warranty Information
This product comes with a manufacturer's warranty for 90 days from the date of purchase. This warranty covers manufacturing defects. It does not cover damage caused by misuse, accidents, unauthorized modifications, or normal wear and tear. Please retain your proof of purchase for warranty claims.
10.2 Customer Support
If you encounter any issues or have questions regarding your SUNGOOYUE Dash Camera, please refer to the retailer's support channels or contact SUNGOOYUE customer service for assistance. Contact information can typically be found on the product packaging or the brand's official website.