
1. Introduction
The EPOMAKER EK21 is a versatile and highly functional numeric keypad designed for enhanced productivity and gaming. It features a 20-key layout with an aluminum alloy knob, hot-swappable switches, and customizable RGB lighting. The EK21 supports triple connectivity modes (wired, Bluetooth 5.0, and 2.4GHz wireless) and is programmable via VIA software, offering seamless compatibility across Windows, Mac, and Android operating systems.
2. Package Contents
Please verify that all items are present in your package:
- EPOMAKER EK21 VIA Gasket Number Pad
- 2-in-1 Keycap-and-Switch Puller
- 1.8m Detachable USB A-to-C Braided Cable
- 2.4Ghz Wireless Dongle
- User Manual
- Extra “Back” Keycap
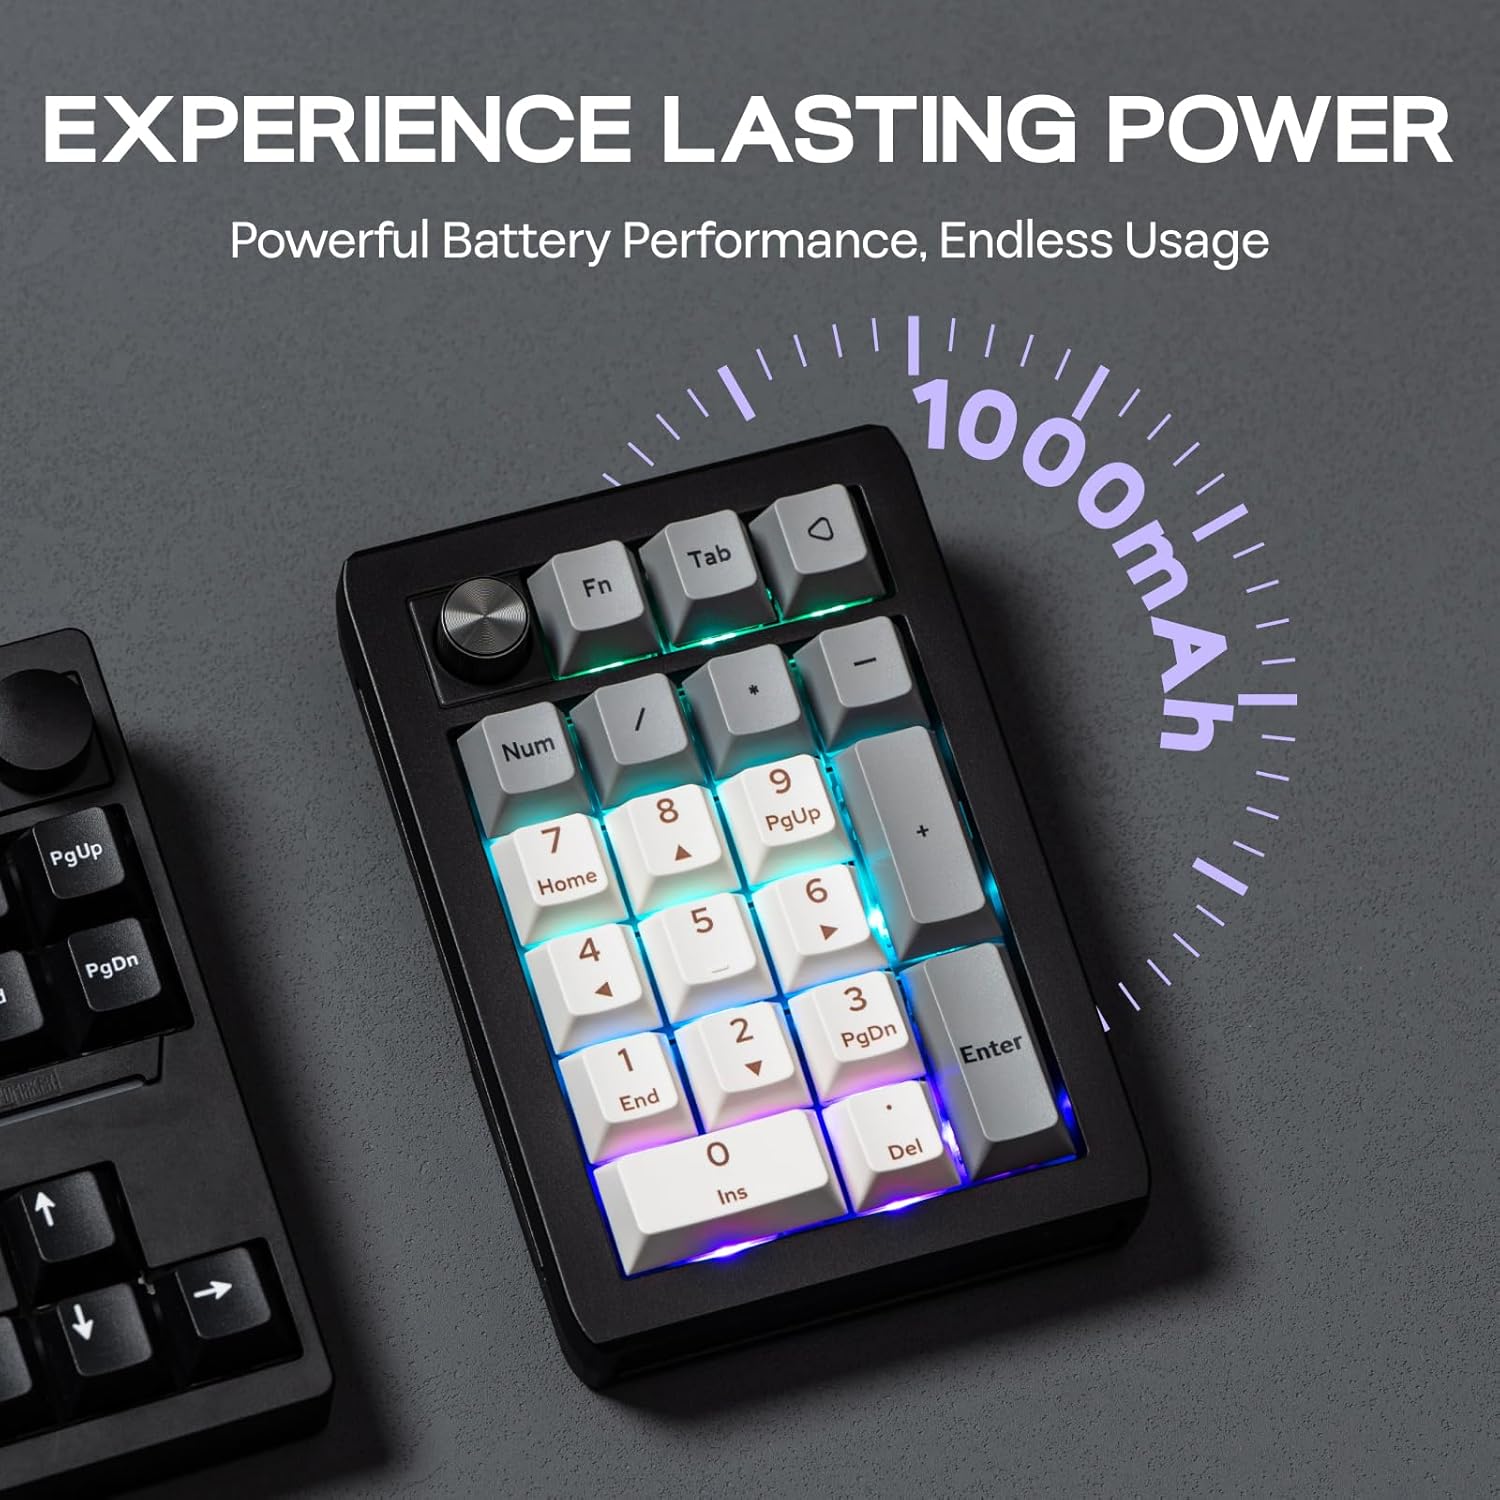
Figure 2.1: Contents included in the EPOMAKER EK21 package.
3. Product Overview
The EK21 is a 20-key mechanical number pad featuring a gasket-mounted design for a comfortable typing experience. It includes an aluminum alloy knob for versatile control and per-key RGB backlighting. The device supports hot-swappable switches, allowing users to easily change switches without soldering.

Figure 3.1: Overview of the EPOMAKER EK21 Number Pad and its key features.
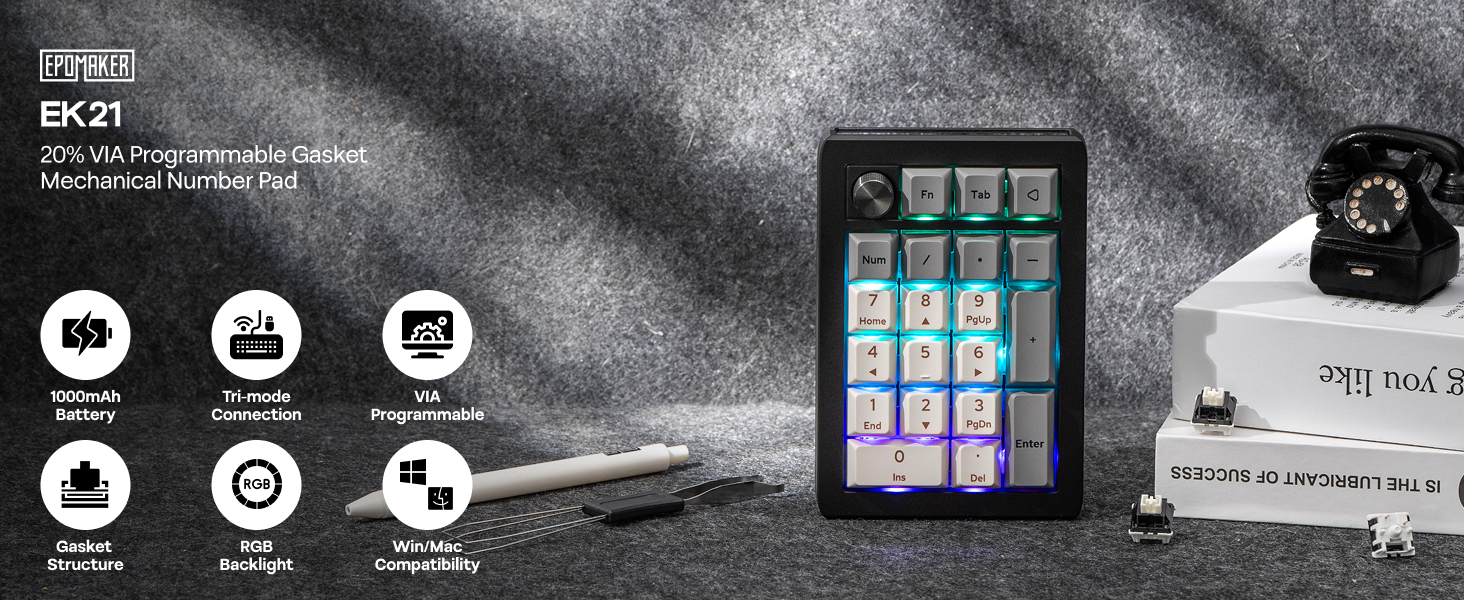
Figure 3.2: EPOMAKER EK21 VIA Mechanical Numpad.
4. Setup
The EK21 offers three connectivity options: wired, 2.4GHz wireless, and Bluetooth. Choose the method that best suits your needs.
4.1. Wired Connection
- Connect the provided USB A-to-C cable to the USB-C port on the EK21.
- Plug the USB-A end of the cable into an available USB port on your computer.
- Ensure the mode switch on the side of the numpad is set to 'USB'. The device will be recognized automatically.
4.2. 2.4GHz Wireless Connection
- Locate the 2.4GHz wireless dongle in the package.
- Plug the dongle into an available USB port on your computer.
- Set the mode switch on the side of the numpad to '2.4G'. The device should connect automatically.
4.3. Bluetooth 5.0 Connection
- Set the mode switch on the side of the numpad to 'BT'.
- On your computer or device, enable Bluetooth and search for new devices.
- Select 'EPOMAKER EK21' from the list of available devices to pair.
- The EK21 supports up to three Bluetooth devices. Switch between paired devices using Fn + Q/W/E.

Figure 4.1: Tri-Mode Connectivity options for the EK21.

Figure 4.2: Convenient Connectivity Hub on the EK21.
5. Operating Instructions
5.1. Basic Key Functions
The EK21 functions as a standard numeric keypad. Keys are pre-programmed for numerical input, arithmetic operations, and navigation (Home, End, PgUp, PgDn, Ins, Del).
5.2. Multi-functional Aluminum Alloy Knob
The aluminum alloy knob provides quick access to various functions. By default, it controls volume:
- Rotate clockwise: Volume Up
- Rotate counter-clockwise: Volume Down
- Press: Mute/Unmute
The knob's functionality can be customized using the VIA software (see Section 6).

Figure 5.1: Functions of the Multi-functional Aluminum Alloy Knob.
5.3. Function Key Combinations
Utilize the 'Fn' key for additional controls:
- Fn + . (dot key): Battery Check
- Fn + Enter: Toggle Backlight Effect
- Fn + - / +: Adjust Backlight Brightness

Figure 5.2: Dynamic RGB Backlight and Function Key Combinations.
6. Customization with VIA Software
The EK21 is fully programmable via VIA software, allowing you to customize key assignments, create macros, and fine-tune the knob's functionality. This feature enables you to adapt the numpad to your specific workflow or gaming setup.
- Download VIA Software: Visit the official EPOMAKER website or the VIA website to download the latest version of the VIA software.
- Download JSON File: Obtain the specific JSON keymap file for the EK21 from the EPOMAKER website. This file is necessary for VIA to recognize and configure your numpad.
- Load Keymap: Open the VIA software. If the EK21 is not automatically detected, load the downloaded JSON file manually within the software.
- Customize: Once recognized, you can remap any key, create complex macros, and assign custom functions to the aluminum alloy knob. Changes are applied in real-time.
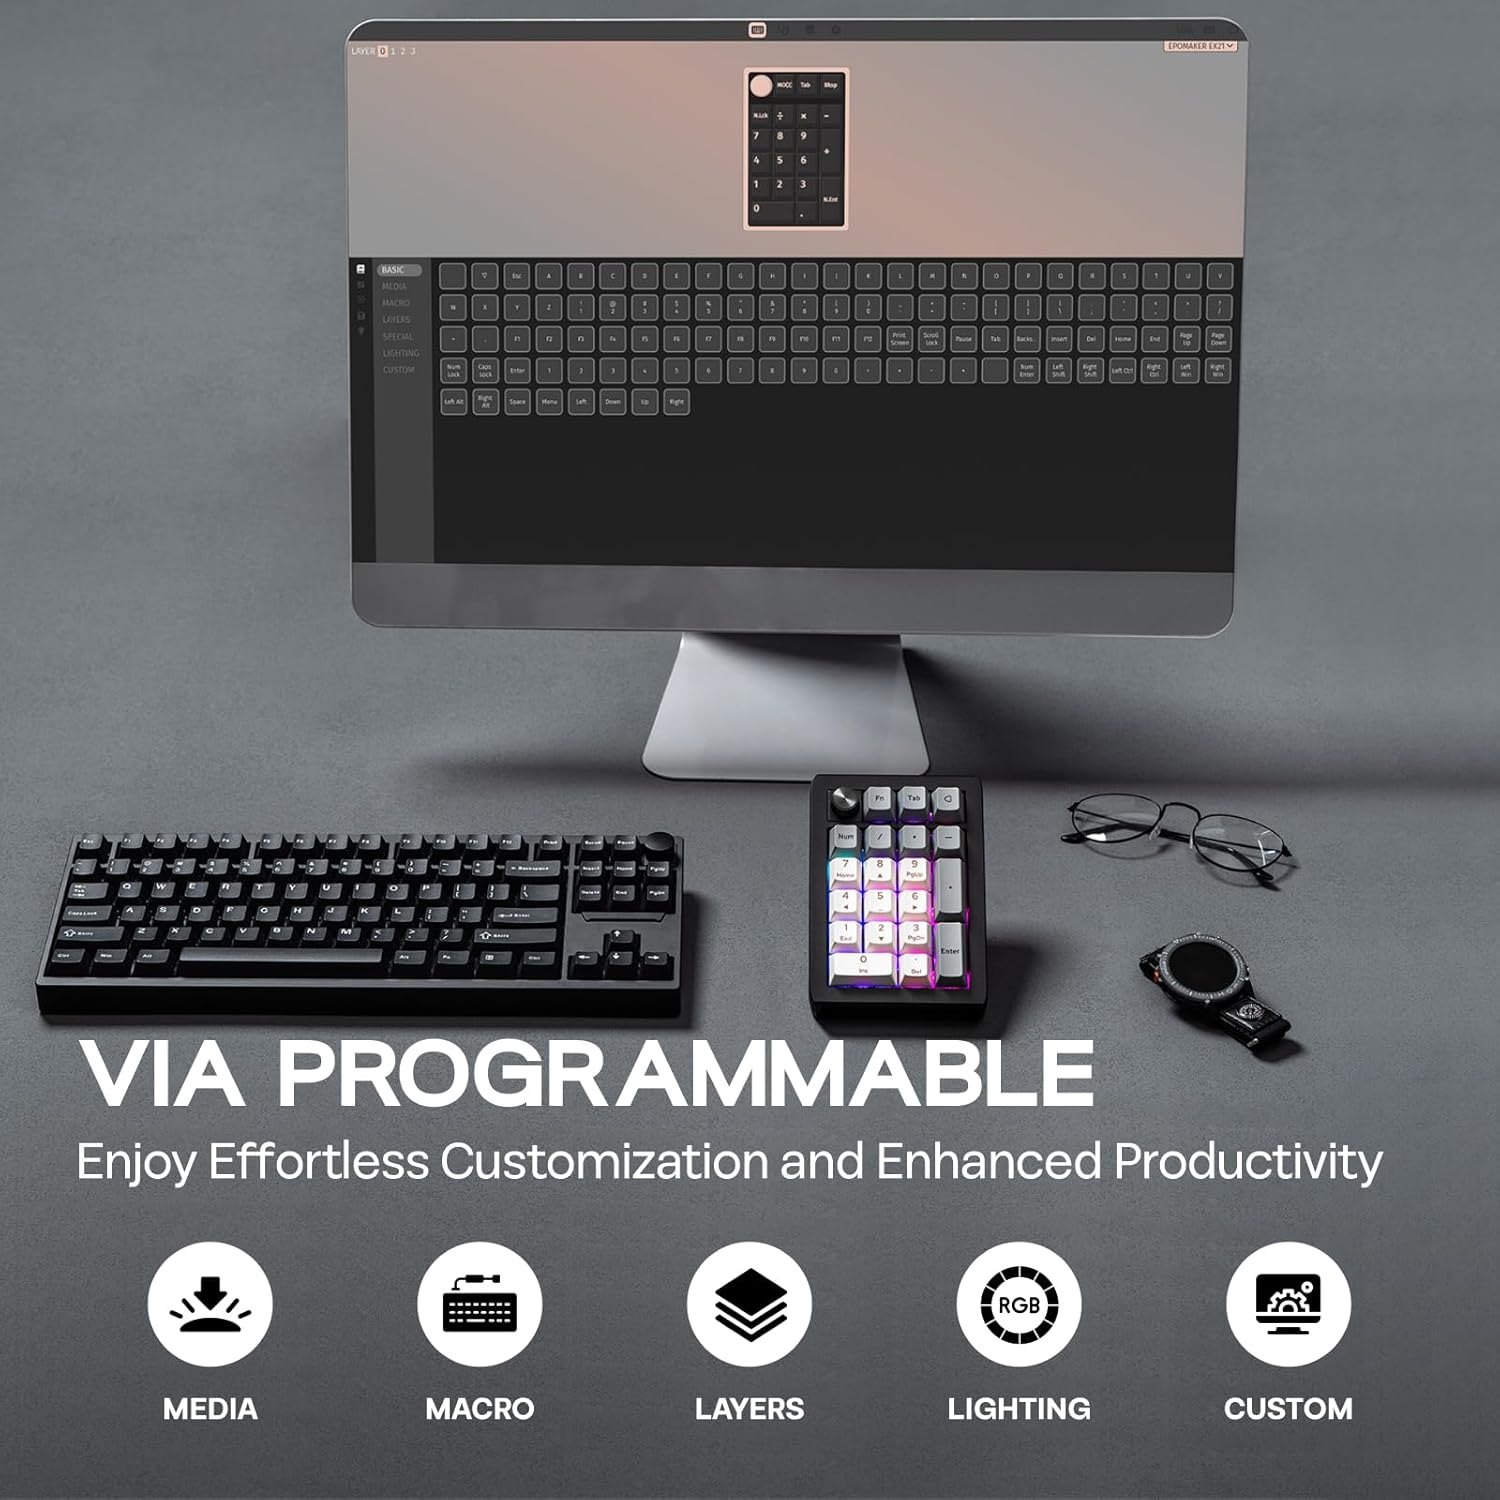
Figure 6.1: VIA Programmable features for effortless customization.
7. Dynamic RGB Backlight
The EK21 features per-key RGB backlighting, allowing for various lighting effects and colors. You can adjust these settings directly on the numpad using function key combinations or through the VIA software for more advanced customization.
- Toggle Effects: Use Fn + Enter to cycle through different backlight effects.
- Adjust Brightness: Use Fn + - (minus) and Fn + + (plus) to increase or decrease backlight brightness.

Figure 7.1: Per-Key RGB Backlight in action.
Video 7.1: Demonstration of the EK21 VIA Numeric Keypad's lighting display.
8. Battery Management
The EK21 is equipped with a 1000mAh battery, providing extended usage in wireless modes. The battery status can be checked using a function key combination.
- Battery Check: Press Fn + . (dot key) to check the current battery level. The RGB lighting may indicate the charge status.
- Charging: Connect the numpad to a power source using the provided USB-C cable. The device can be used while charging.

Figure 8.1: The EK21 features a 1000mAh battery for extended use.

Figure 8.2: The 1000mAh battery ensures powerful and lasting performance.
9. Comfort and Ergonomics
The EK21 is designed with user comfort in mind, incorporating several features to enhance the typing experience and reduce fatigue.
- Gasket Structure: The gasket-mounted design provides a cushioned and flexible typing feel, reducing harsh impacts and improving sound profile.
- Poron Bottom Layer & Sandwich Foam: These internal layers absorb sound and vibrations, contributing to a quieter and more pleasant typing sound.
- IXPE Switch Pad: Further enhances the typing feel by providing a soft landing for switches.
- Finely Tuned Stabilizers: Ensures consistent and stable key presses, especially for larger keys like 'Enter' and '0'.
- PC Plate with CNC Cutting: Offers a robust and aesthetically pleasing finish, contributing to the overall durability.

Figure 9.1: Internal structure and components contributing to comfort and sound.
Figure 9.2: Exploded view of the EK21's gasket-mount construction.
10. Maintenance
10.1. Cleaning
To maintain the longevity and appearance of your EK21, regular cleaning is recommended:
- Use a soft, dry cloth to wipe the surface of the numpad.
- For deeper cleaning, remove keycaps using the provided keycap puller.
- Use compressed air to remove dust and debris from between the switches.
- Keycaps can be cleaned with mild soap and water, ensuring they are completely dry before reattaching.
10.2. Hot-Swapping Switches
The EK21 features hot-swappable sockets, allowing you to change mechanical switches without soldering. Use the provided switch puller for this process:
- Gently grip the switch with the switch puller and pull upwards until it detaches from the PCB.
- Align the pins of the new switch with the holes on the PCB.
- Press down firmly until the switch clicks into place. Ensure the pins are not bent during insertion.

Figure 10.1: Hot-swappable switches allow for easy customization and maintenance.
11. Troubleshooting
If you encounter issues with your EK21, try the following troubleshooting steps:
- Connectivity Issues:
- Ensure the mode switch is set correctly (USB, 2.4G, or BT).
- For 2.4GHz, ensure the dongle is securely plugged in.
- For Bluetooth, ensure your device's Bluetooth is enabled and the numpad is paired. Try re-pairing if necessary.
- Try connecting via USB-C cable to rule out wireless issues.
- VIA Software Not Recognizing Device:
- Ensure the numpad is connected via USB-C cable. VIA typically requires a wired connection for initial setup and flashing.
- Verify you have downloaded and loaded the correct EK21 JSON file in the VIA software.
- Restart the VIA software and/or your computer.
- RGB Backlight Not Working:
- Check backlight brightness using Fn + + (plus).
- Toggle backlight effects using Fn + Enter.
- Ensure the numpad is sufficiently charged if in wireless mode.
- Keys Not Responding:
- If only specific keys are affected, try hot-swapping the switch with a known working one to check if the switch is faulty.
- Ensure switches are fully seated in their sockets.
12. Specifications
| Feature | Detail |
|---|---|
| Product Dimensions | 3.66 x 5.43 x 1.14 inches (9.3 x 13.8 x 2.9 cm) |
| Item Weight | 13.4 ounces (0.38 kg) |
| Connectivity Technology | 2.4Ghz Wireless, Bluetooth 5.0, USB-C Wired |
| Battery Capacity | 1000mAh |
| Keyboard Description | Mechanical |
| Special Features | Backlit (RGB), Ergonomic, Hot-Swappable PCB, Lightweight, VIA Programmable |
| Compatible Devices | Laptop, PC, Smartphone, Tablet (Windows, Mac, Android) |
| Keycap Material | Dye-sub PBT |
| Plate Material | PC (Polycarbonate) with CNC Cutting |
| Internal Structure | Gasket Mount with Poron bottom layer, sandwich foam, IXPE switch pad |

Figure 12.1: Dimensions and Weight of the EK21 Number Pad.

Figure 12.2: Switch Specifications for the EK21.
13. Warranty and Support
EPOMAKER products come with a standard manufacturer's warranty. For specific warranty details, duration, and terms, please refer to the warranty information provided with your purchase or visit the official EPOMAKER website. If you encounter any issues or require technical assistance, please contact EPOMAKER customer support through their official channels.
EPOMAKER Support: https://www.epomaker.com/pages/contact-us


