
1. Introduction
This manual provides comprehensive instructions for the assembly, operation, and maintenance of your HOSTACK Kitchen Island Cart, Model 257. Please read this manual thoroughly before assembly and use to ensure safe and efficient operation. Keep this manual for future reference.
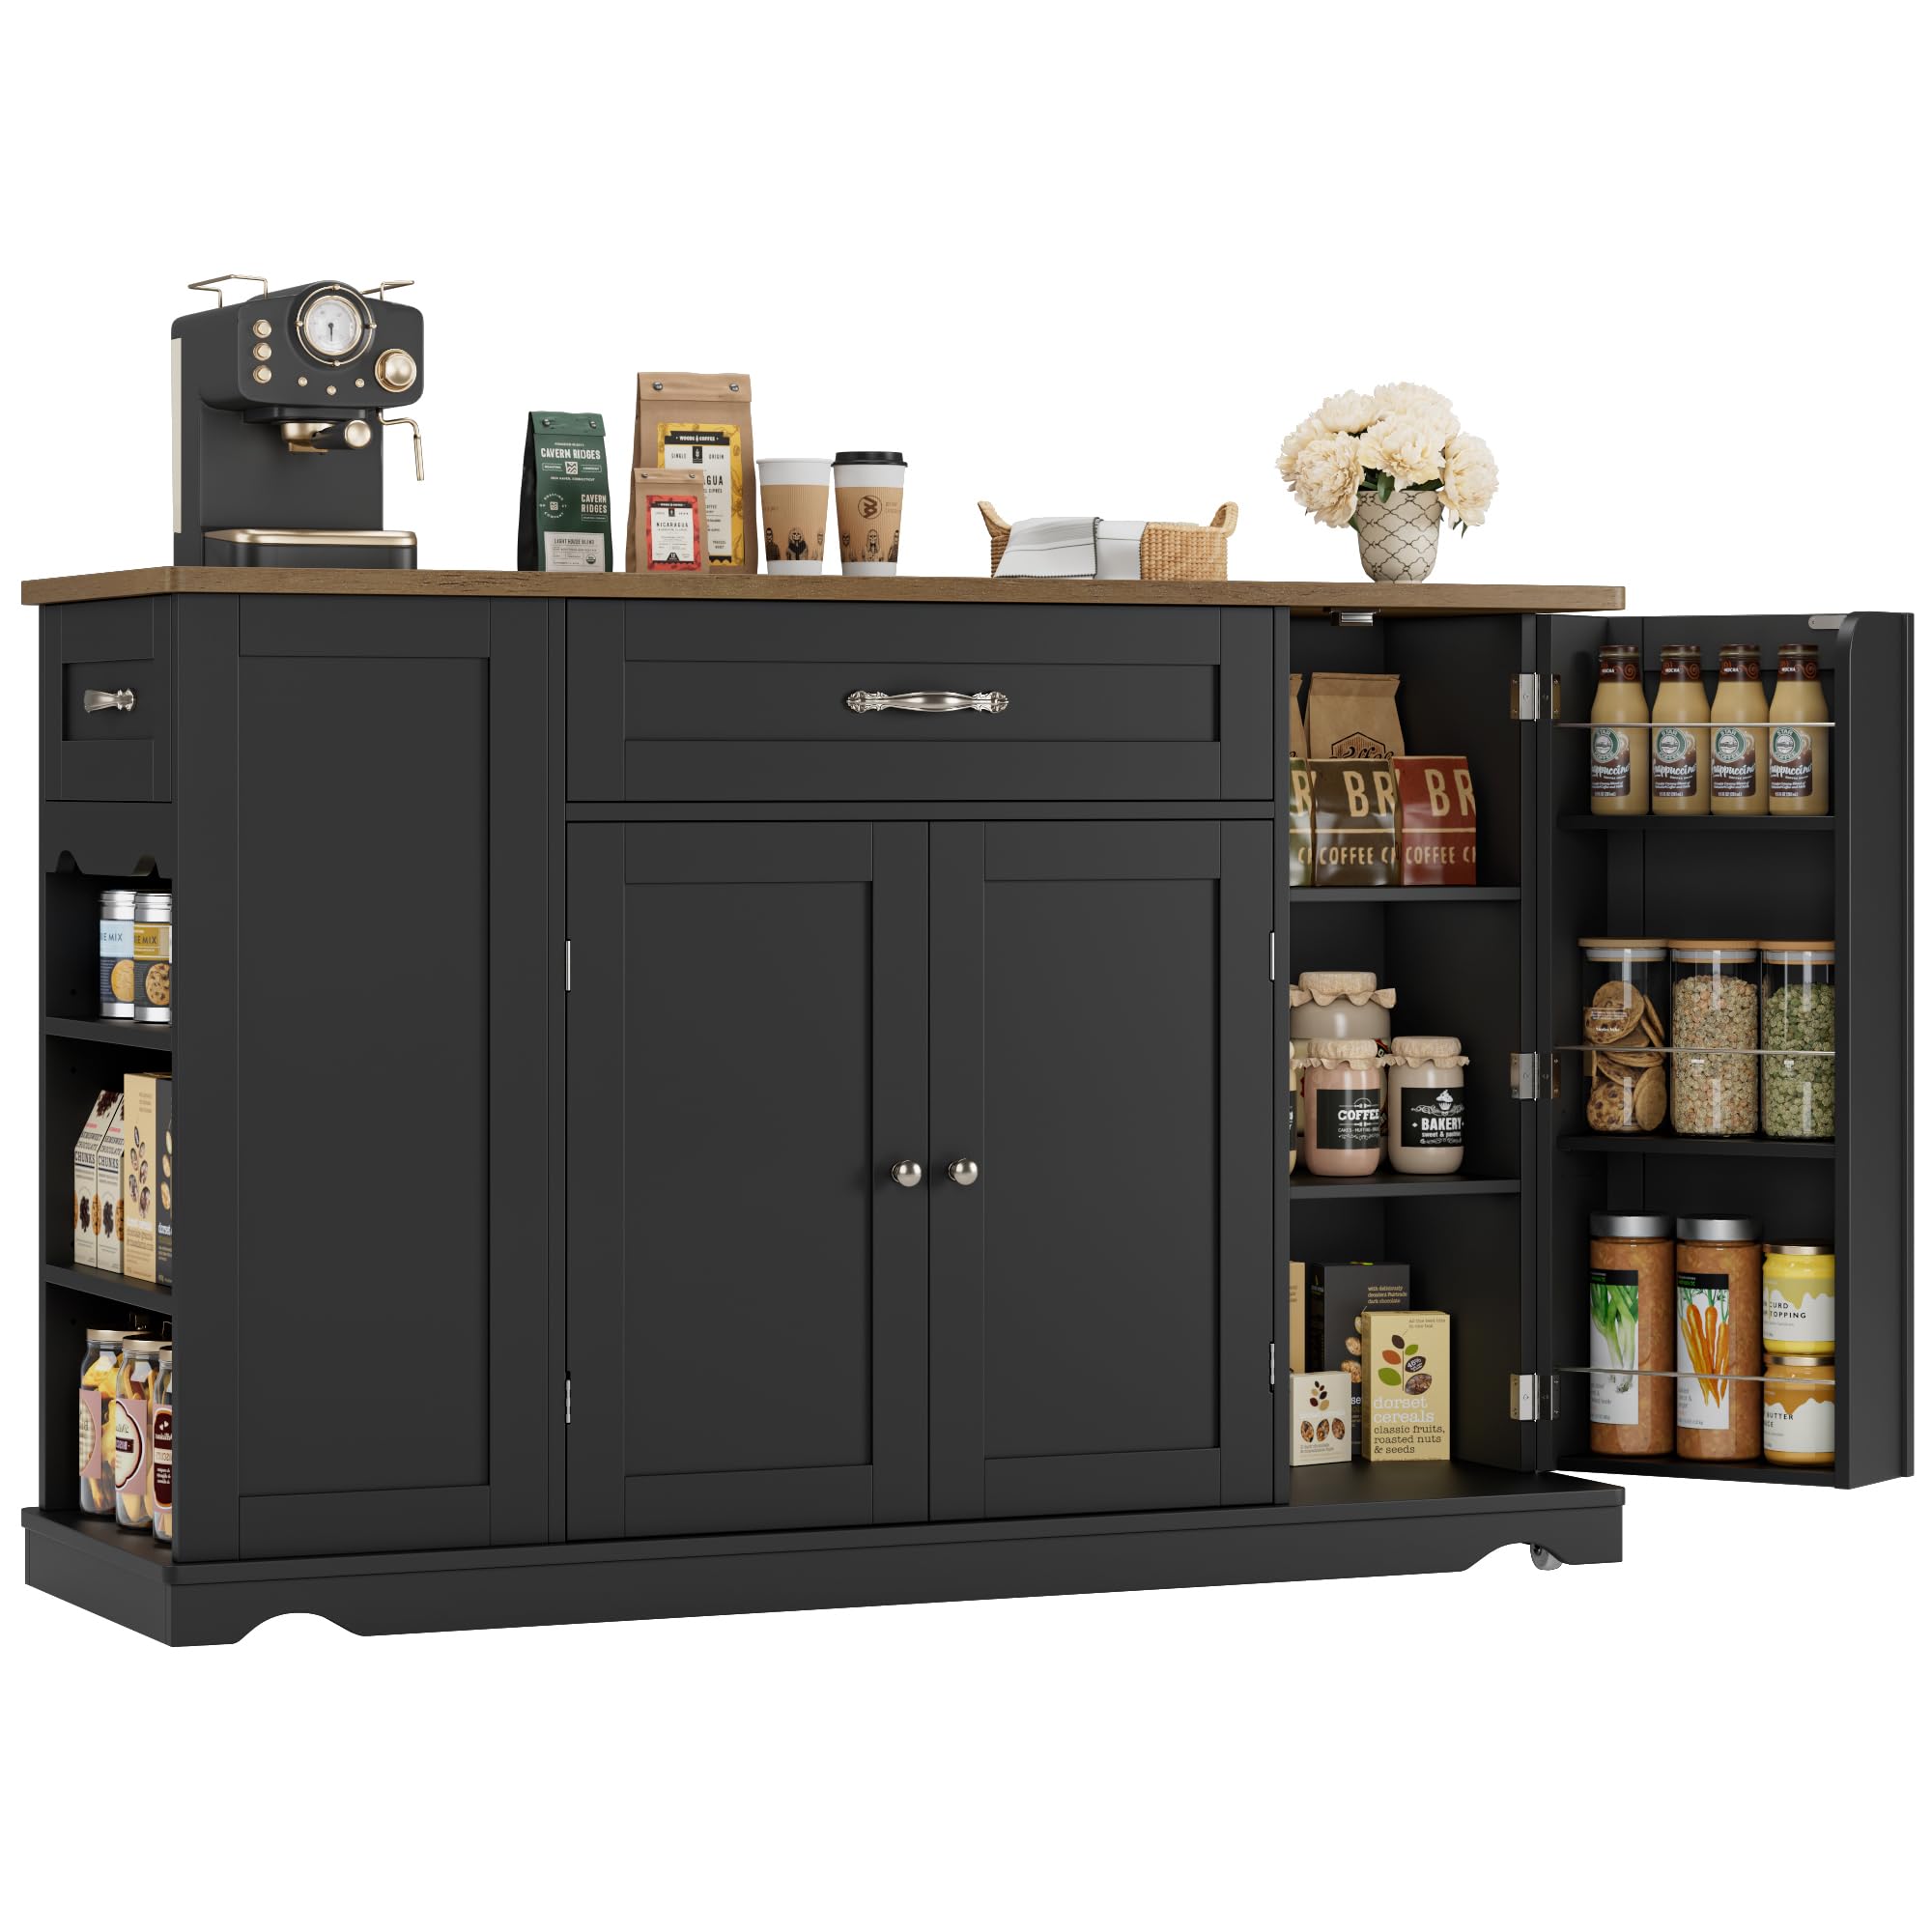
Figure 1: HOSTACK Kitchen Island Cart, Model 257.
2. Safety Information
To prevent injury and damage to the product, please adhere to the following safety guidelines:
- Always keep the casters locked when the island is not in motion to ensure stability.
- Keep storage spaces clear of sharp objects to prevent injury.
- Do not overload shelves or drawers to maintain stability and prevent tipping.
- Keep the product away from direct heat sources or open flames to prevent warping or damage to materials.
- Ensure all screws and fasteners are tightened securely during assembly and periodically check for looseness.
- Use on a flat, stable surface.
3. Package Contents
Before beginning assembly, verify that all parts listed in the assembly instructions are present and undamaged. If any parts are missing or damaged, please contact customer support.
- All wooden panels (labeled with numbers)
- Hardware kit (screws, eccentric rods, slide rails, casters, handles, etc.)
- Assembly tools (e.g., screwdriver, utility knife - user provided)
4. Setup and Assembly
Assembly requires two adults. It is recommended to assemble the unit on a soft, clean surface (like a carpet) to prevent scratches. Follow the numbered steps in the provided assembly video for detailed guidance.
4.1 Preparation
Unpack all components and lay them out on a clean, soft surface. Identify each part by its number as indicated in the assembly guide.
Video 1: Kitchen Island Installation Video. This video demonstrates the step-by-step assembly process for the kitchen island.
4.2 Assembly Steps (Refer to Video 1 for visual guidance)
- Step 1: Prepare Boards and Hardware. Identify boards No.4, No.20, No.21, No.24, No.25, No.26, No.27, No.28, and No.29. Fix eccentric rods (B) into the designated positions on these boards.
- Step 2: Assemble Drawer Rails. Identify boards No.6, No.7, and No.8. Disassemble the sliding rail (V). Place and secure the slide rail (V) onto boards No.7 and No.8 using screws (I). Place and secure slide rail (CL) onto board No.6 and slide rail (CR) onto board No.8 using screws (I).
- Step 3: Construct Internal Frame. Identify boards No.9, No.20, and No.21. Insert corks (D) into the holes. Assemble boards No.9, No.20, and No.21, securing them with screws (E). Fix cam (A) into position.
- Step 4: Attach Side Panels. Identify boards No.6, No.8, No.13, and No.14. Insert corks (D) into the holes. Fix screws (E) into boards No.6 and No.13. Attach boards No.6, No.8, and No.21 to the internal frame.
- Step 5: Install Top Panel. Identify plates No.11 and No.47. Fix screws (E) into boards No.6, No.11, and No.22. Attach boards No.7 and No.11. Fix screws (E) into position.
- Step 6: Install Casters and Back Panels. Place casters (P) and (O) onto the bottom panel (No.12) and secure with screws (H). Attach back panels (L) to the main structure using screws (M).
- Step 7: Assemble Drawers. Identify boards No.24, No.34, No.35, No.36, and No.37. Place hinges (G) onto board No.24 and secure with screws (H). Place J3 into position and secure with screws (I). Place F1 into position and secure with F2. Insert corks (D) into boards No.37. Assemble boards No.36 and No.37, securing with screws (E). Assemble boards No.34 and No.36, securing with screws (E).
- Step 8: Install Drawer Slides and Handles. Fix eccentric wheels (A) into boards No.35 and No.34. Fix the U part into boards No.34 and No.35.
- Step 9: Final Assembly of Drawers. Identify boards No.2, No.26, No.41, No.42, No.43, No.44, No.45, and No.46. Insert corks (D) into the holes. Assemble boards No.41, No.43, No.44, and No.45. Fix eccentric wheels (A) into position. Assemble boards No.26, No.41, No.42, and No.43. Fix the S part into position. Place F1 into position and secure with F2. Place V into position and secure with I.
- Step 10: Insert Drawers and Attach Drop Leaf. Insert the assembled drawers into the cabinet. Attach the drop leaf (No.5) to the main structure using hinges (Q) and screws (H).
- Step 11: Secure Eccentric Wheels. After reinforcing eccentric wheel A, for aesthetic purposes, attach sticker C on top.
5. Operating Instructions
5.1 Storage Compartments
The kitchen island features two different-sized drawers for culinary tools, a 3-door cabinet, and a side storage rack. The side open cabinet has two adjustable shelves, allowing customization for various-sized items. The storage rack on the swing-out door provides convenient access to spices and beverages.
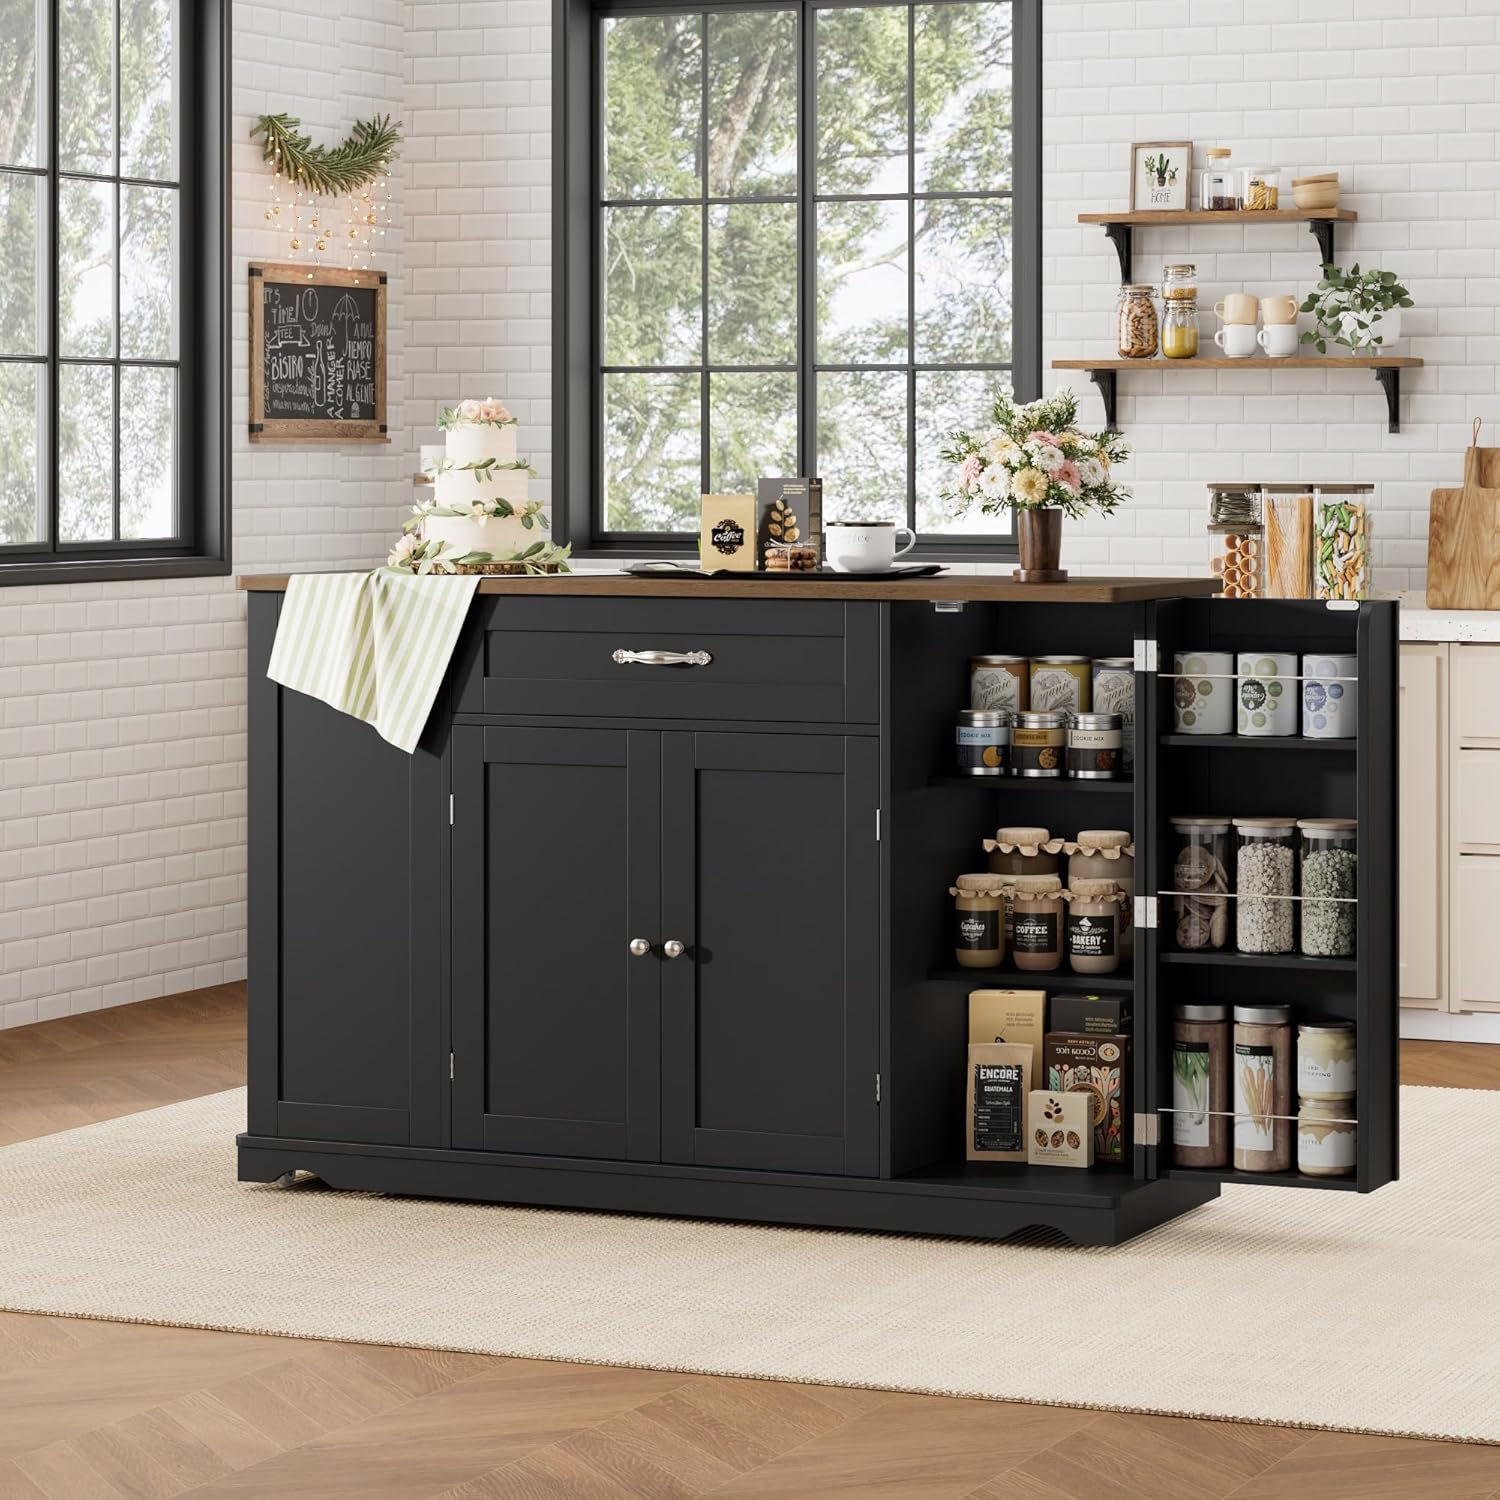
Figure 2: Spacious storage compartments and drawers.
5.2 Mobility
The island is equipped with 5 smooth swivel casters, one in the middle for enhanced stability. To move the island, unlock the casters. To secure it in place, lock the casters.

Figure 3: Hidden wheels design for easy movement and elegant appearance.
6. Maintenance
- Clean the surfaces with a soft, damp cloth. Avoid harsh chemicals or abrasive cleaners.
- Wipe up spills immediately to prevent staining or damage to the engineered wood.
- Periodically check all fasteners and tighten them if necessary to ensure the stability and longevity of the unit.
- Lubricate casters if they become stiff to ensure smooth mobility.
7. Troubleshooting
- Issue: Island is wobbly.
Solution: Check all assembly screws and eccentric wheels to ensure they are fully tightened. Ensure the island is on a flat, even surface.
- Issue: Drawers do not slide smoothly.
Solution: Verify that the drawer slides are correctly installed and aligned. Ensure no objects are obstructing the slides. Lubricate the slides if needed.
- Issue: Doors do not close properly.
Solution: Check the hinges for proper installation and alignment. Adjust the hinges if necessary to ensure the doors are level and close securely.
8. Specifications
| Brand | HOSTACK |
| Model Number | 257 |
| Product Dimensions | 15.75"D x 47.24"W x 34.06"H |
| Material | Engineered Wood |
| Color | Black + Rustic Brown |
| Special Features | Open storage space, Hidden storage space, Durable, Sturdy, Space Saving, 1 Large Drawer & 1 Small Drawer, 1 2-Door Cabinet, 1 Side Cabinet, 1 Door Storage Rack, Spacious Tabletop, Multifunctional, Large capacity, Hidden wheels, Suitable for small kitchen |
| Number of Shelves | 3 |
| Assembly Required | Yes |
9. Warranty and Support
For warranty information or technical support, please refer to the product packaging or contact HOSTACK customer service directly. Keep your purchase receipt for warranty claims.