1. Introduction
This manual provides comprehensive instructions for the installation, operation, and maintenance of your ZWNAV Digital AC Panel, designed specifically for Land Rover Range Rover Vogue L405 models manufactured between 2013 and 2017. Please read this manual thoroughly before installation and use to ensure proper function and longevity of the product.
2. Product Overview
The ZWNAV Digital AC Panel is an advanced climate control system upgrade, featuring a 9-inch QLED touchscreen display. It integrates seamlessly with your vehicle's existing systems, preserving original functions while offering enhanced digital control.
Key Features:
- Vehicle Compatibility: Specifically designed for Land Rover Range Rover Vogue L405 models (2013-2017) with an original factory-style interface.
- Fast Boot Technology: Utilizes a Linux T5 operating system for quick system response, typically booting within 2-5 seconds.
- High-Resolution Display: Features a 9-inch QLED screen for clear and crisp visuals.
- Original Function Preservation: Fully retains the original climate control and vehicle settings of your Land Rover.

Figure 2.1: Front view of the ZWNAV Digital AC Panel, showcasing the 9-inch QLED display and integrated control knobs.
Included Components:
- ZWNAV Digital AC Panel
- Necessary connection cables
- Mounting frame components

Figure 2.2: The ZWNAV Digital AC Panel shown with its accompanying frame and small mounting clips, essential for secure installation.
3. Setup and Installation
Installation of the ZWNAV Digital AC Panel requires careful attention to detail. It is recommended that installation be performed by a qualified automotive technician. Incorrect installation may damage the product or vehicle systems.
Preliminary Steps:
- Ensure the vehicle's ignition is off and the battery is disconnected to prevent electrical shorts.
- Carefully remove the existing AC control panel and any associated trim pieces from the dashboard. Refer to your vehicle's service manual for specific removal procedures.
Connecting the Panel:
- Connect the provided cables from the ZWNAV Digital AC Panel to the corresponding ports in the vehicle's wiring harness. Ensure all connections are secure and correctly oriented.
- Utilize the included mounting frame components to secure the new panel within the dashboard opening.
Finalizing Installation:
- Once all connections are made and the panel is securely mounted, reattach any removed trim pieces.
- Reconnect the vehicle's battery.
- Turn on the ignition and test the functionality of the new AC panel.
4. Operating Instructions
The ZWNAV Digital AC Panel offers intuitive control over your vehicle's climate system via its touchscreen interface and physical knobs.
Climate Control Functions:

Figure 4.1: The main climate control interface, displaying temperature, fan speed, air distribution, and AC settings. The 'Auto' button activates automatic climate control.
- Temperature Adjustment: Use the left rotary knob or the touchscreen controls to set the desired temperature.
- Fan Speed: Use the right rotary knob or touchscreen controls to adjust the fan speed.
- Air Distribution: Tap the icons on the screen to direct airflow to the desired zones (e.g., face, feet, defrost).
- AC On/Off: Tap the 'A/C' button to activate or deactivate the air conditioning compressor.
- Auto Mode: Press the 'Auto' button for the system to automatically regulate temperature and fan speed.
- Seat Heating/Cooling: If your vehicle supports it, access seat controls via the 'Seat' icon on the top menu.
Vehicle Settings:
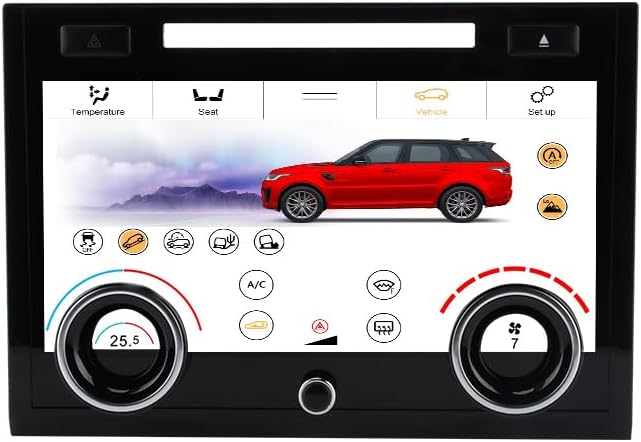
Figure 4.2: The vehicle settings interface, allowing access to various car-specific functions and driving modes. This screen maintains original vehicle functionalities.
Access vehicle-specific settings by tapping the 'Vehicle' icon on the top menu. This section allows you to control various original vehicle functions, such as driving modes, suspension settings, and other customizable options, depending on your vehicle's original capabilities.
System Settings:

Figure 4.3: The system settings menu, where users can adjust display brightness, color settings, vehicle model configuration, and touch feedback. This section also provides version information.
The 'Set up' icon provides access to the system settings menu. Here you can adjust:
- Brightness Setting: Adjust the display brightness.
- Color Setting: Customize the interface color scheme.
- Model Setting: Confirm or adjust the vehicle model configuration (e.g., "Vogue").
- Touch Feedback: Enable or disable haptic feedback for touchscreen interactions.
- Version Information: View software and hardware details.
5. Maintenance
To ensure optimal performance and longevity of your ZWNAV Digital AC Panel, follow these maintenance guidelines:
- Cleaning the Screen: Use a soft, lint-free cloth specifically designed for electronic screens. Do not use abrasive cleaners, solvents, or harsh chemicals, as these can damage the display.
- Software Updates: Periodically check the manufacturer's website or contact support for available software updates. Updates can improve performance and add new features.
- Environmental Conditions: Avoid exposing the panel to extreme temperatures or direct sunlight for prolonged periods, as this can affect display performance and component lifespan.
6. Troubleshooting
This section addresses common issues you might encounter with your ZWNAV Digital AC Panel. For problems not listed here, please contact customer support.
| Problem | Possible Cause | Solution |
|---|---|---|
| Panel does not power on. | Loose power connection or vehicle battery issue. | Check all cable connections. Ensure vehicle battery is properly connected and charged. |
| Touchscreen is unresponsive. | Software glitch or screen calibration issue. | Restart the vehicle. If the issue persists, check for system updates or perform a factory reset (refer to system settings). |
| Original AC functions are not working. | Incorrect wiring or software incompatibility. | Verify all wiring connections according to the installation guide. Ensure the panel's model setting matches your vehicle. |
| Display is dim or flickering. | Brightness setting or power supply issue. | Adjust brightness in system settings. Check power connections. |
7. Specifications
| Feature | Detail |
|---|---|
| Model Compatibility | Land Rover Range Rover Vogue L405 (2013-2017) |
| Display Size | 9 Inches |
| Display Type | QLED Touchscreen |
| Operating System | Linux T5 |
| Boot Time | 2-5 seconds (Fast Boot Technology) |
| Product Dimensions | 6.5 x 2 x 8 inches (16.51 x 5.08 x 20.32 cm) |
| Item Weight | 2.86 pounds (1.3 kg) |
| Connectivity | USB (for updates/accessories, if applicable) |
8. Warranty and Support
ZWNAV provides a standard warranty for this product. Please refer to the warranty card included with your purchase or visit the official ZWNAV website for detailed warranty terms and conditions. For technical assistance, troubleshooting, or warranty claims, please contact ZWNAV customer support through their official channels.
Manufacturer: ZW-LDS1317A
Date First Available: September 18, 2021
Brand: ZWNAV
ASIN: B0FCSQVRYJ


