1. Introduction
This manual provides essential information for the assembly, operation, and maintenance of your SpeedyBee Master3X Modular Frame. The Master3X is a high-performance modular frame designed for 3-3.6 inch FPV racing and freestyle drones. It offers flexibility and durability for custom drone builds.
2. Product Overview
The SpeedyBee Master3X frame is engineered for FPV enthusiasts seeking a robust and adaptable platform. Its modular design allows for easy component integration and maintenance. The frame is constructed from high-quality materials to withstand the rigors of FPV flight.
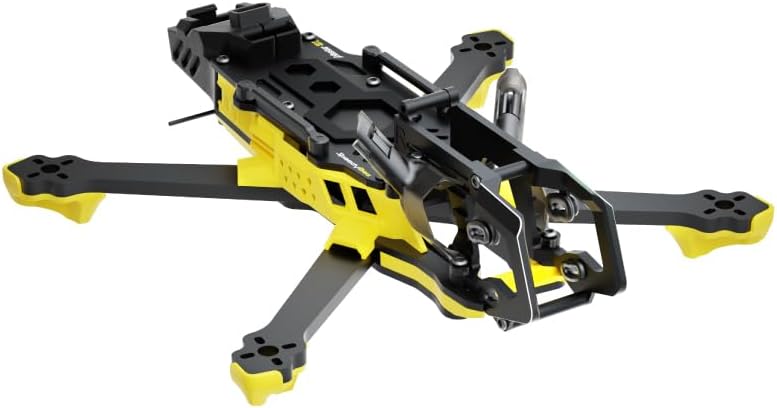
Image 1: The SpeedyBee Master3X Modular Frame. This image displays the frame's yellow and black components, highlighting its robust carbon fiber arms, central body, and front camera mounting structure. The modular design is evident in the separate arm and body sections.
3. Package Contents
Please verify that all components are present upon opening the package. If any parts are missing or damaged, contact your retailer or SpeedyBee support.
- Master3X Carbon Fiber Frame Plates (Top, Middle, Bottom)
- Carbon Fiber Arms (4x)
- Aluminum Standoffs (various sizes)
- Hardware Kit (screws, nuts, washers)
- TPU Parts (e.g., camera mounts, antenna mounts, arm protectors)
- Battery Strap
Note: Electronic components such as motors, Electronic Speed Controllers (ESCs), Flight Controller (FC), camera, Video Transmitter (VTX), receiver, battery, propellers, and remote control are NOT included with the frame and must be purchased separately.
4. Setup and Assembly
Assembling the Master3X frame requires careful attention to detail. It is recommended to have basic knowledge of FPV drone construction.
- Prepare Workspace: Ensure a clean, well-lit workspace with appropriate tools (e.g., hex drivers, tweezers).
- Attach Arms: Securely attach the carbon fiber arms to the bottom plate using the provided screws. Ensure proper orientation.
- Install Standoffs: Mount the aluminum standoffs to the bottom plate. These will support the middle and top plates, and house your electronics.
- Mount Electronics (Optional during frame assembly): While assembling the frame, consider the placement of your Flight Controller, ESCs, and other components. It is often easier to mount some electronics before fully closing the frame. Refer to your specific component manuals for installation.
- Attach Middle Plate: Secure the middle plate to the standoffs.
- Install TPU Parts: Attach any TPU parts such as camera mounts, antenna mounts, or arm protectors as per your build requirements.
- Attach Top Plate: Finally, secure the top plate to the remaining standoffs.
- Final Inspection: Double-check all screws for tightness. Ensure no carbon fiber edges are sharp and that all components fit securely.
For detailed visual guides, refer to community build videos or the SpeedyBee official website.
5. Operating Considerations
The Master3X frame itself does not operate; it is the structural foundation for your FPV drone. Proper operation relies on the correct installation and configuration of all electronic components.
- Pre-Flight Checks: Before each flight, inspect the frame for any signs of damage, loose screws, or cracks in the carbon fiber. Ensure all electronic components are securely mounted.
- Center of Gravity (CG): Proper CG is crucial for stable flight. Aim to position your battery and other heavy components to achieve a balanced drone.
- Propeller Clearance: Verify that propellers have adequate clearance from the frame and other components.
- Flight Environment: Always operate your FPV drone in a safe and legal environment, away from people, animals, and property.
6. Maintenance
Regular maintenance extends the lifespan of your Master3X frame and ensures safe operation.
- Post-Flight Inspection: After every flight, visually inspect the frame for any stress marks, cracks, or damage, especially after hard landings or crashes.
- Screw Tightness: Periodically check and tighten all screws, as vibrations can cause them to loosen over time. Use thread-locking compound (e.g., blue Loctite) on metal-to-metal screws where appropriate, avoiding plastic parts.
- Cleaning: Clean the frame with a soft, dry cloth. Avoid harsh chemicals that could damage carbon fiber or TPU parts.
- Component Replacement: Replace any damaged carbon fiber plates, arms, or TPU parts immediately to maintain structural integrity.
7. Troubleshooting
Issues related to the frame are typically structural. Here are common frame-related problems and their solutions:
- Excessive Vibrations:
- Cause: Loose screws, cracked arm, bent motor shaft (not frame related but can cause vibrations).
- Solution: Check all frame screws for tightness. Inspect arms for cracks and replace if necessary. Ensure motors are securely mounted.
- Unstable Flight Characteristics:
- Cause: Uneven weight distribution, damaged frame part affecting rigidity.
- Solution: Re-evaluate component placement for optimal Center of Gravity. Replace any compromised frame components.
- Camera Jello/Vibrations in FPV Feed:
- Cause: Loose camera mount, vibrations from motors transferring to the camera.
- Solution: Ensure camera is securely mounted in its TPU holder. Check for loose frame parts. Consider soft-mounting motors if vibrations persist.
8. Specifications
| Feature | Detail |
|---|---|
| Brand | SPEEDY BEE |
| Model Name | Master3X |
| Product Type | Modular FPV Drone Frame |
| Supported Propeller Size | 3-3.6 Inch |
| Material | Carbon Fiber, Aluminum, TPU |
| Item Weight | 5.6 ounces (approx. 159g) |
| Product Dimensions | 9.84"L x 8.66"W x 2.56"H (approx. 25cm L x 22cm W x 6.5cm H) |
| Manufacturer Part Number | SB-Master3X-FRM-NH |
9. Warranty and Support
For warranty information and technical support, please refer to the official SpeedyBee website or contact your authorized retailer. Keep your proof of purchase for warranty claims.
Official SpeedyBee Website: www.speedybee.com


