
1. Introduction
This manual provides essential information for the installation, operation, and maintenance of your SPEDWHEL Original Dashboard for Kugoo KuKirin G2 PRO Electric Scooter. Please read these instructions carefully before installation and use to ensure proper function and safety.
Important Compatibility Note:
Before proceeding with installation, it is crucial to verify that this dashboard model (TFM13-FEIMI-4) is compatible with your specific Kugoo KuKirin G2 PRO Electric Scooter. Inconsistencies in model versions or connector types can lead to malfunction. Please refer to the images below to confirm your scooter's existing dashboard model and connector type.

Image 1.1: Comparison of model labels for TFM13-FEIMI Old and TFM13-FEIMI-4 New. Verify your existing dashboard's label matches 'TFM13-FEIMI-4'.
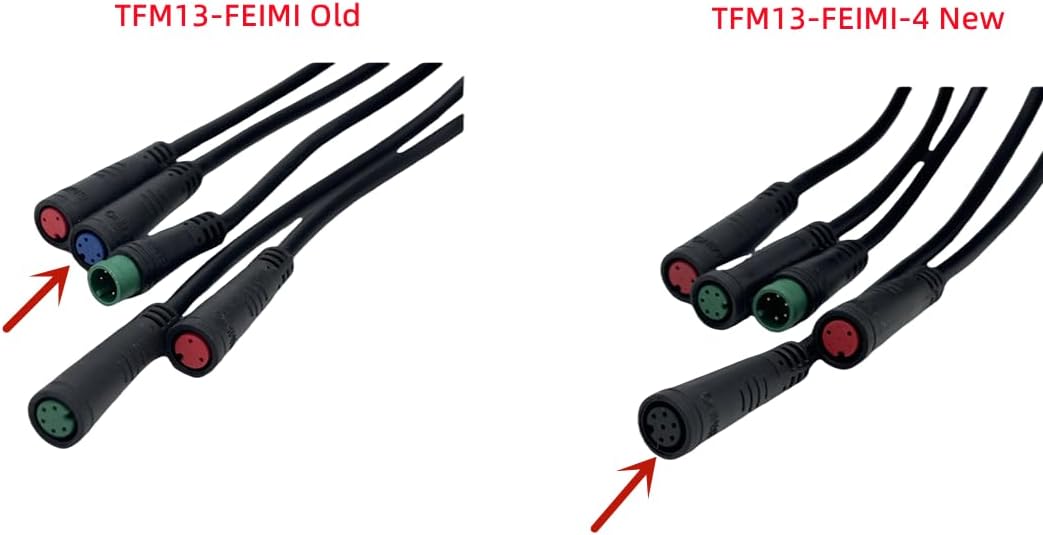
Image 1.2: Comparison of connector types for TFM13-FEIMI Old and TFM13-FEIMI-4 New. Ensure your scooter's connectors match the 'TFM13-FEIMI-4' version shown on the right.
2. Product Overview
The SPEDWHEL LCD Dashboard is designed as a direct replacement or upgrade for the Kugoo KuKirin G2 PRO Electric Scooter. It provides real-time information about your scooter's performance and status.
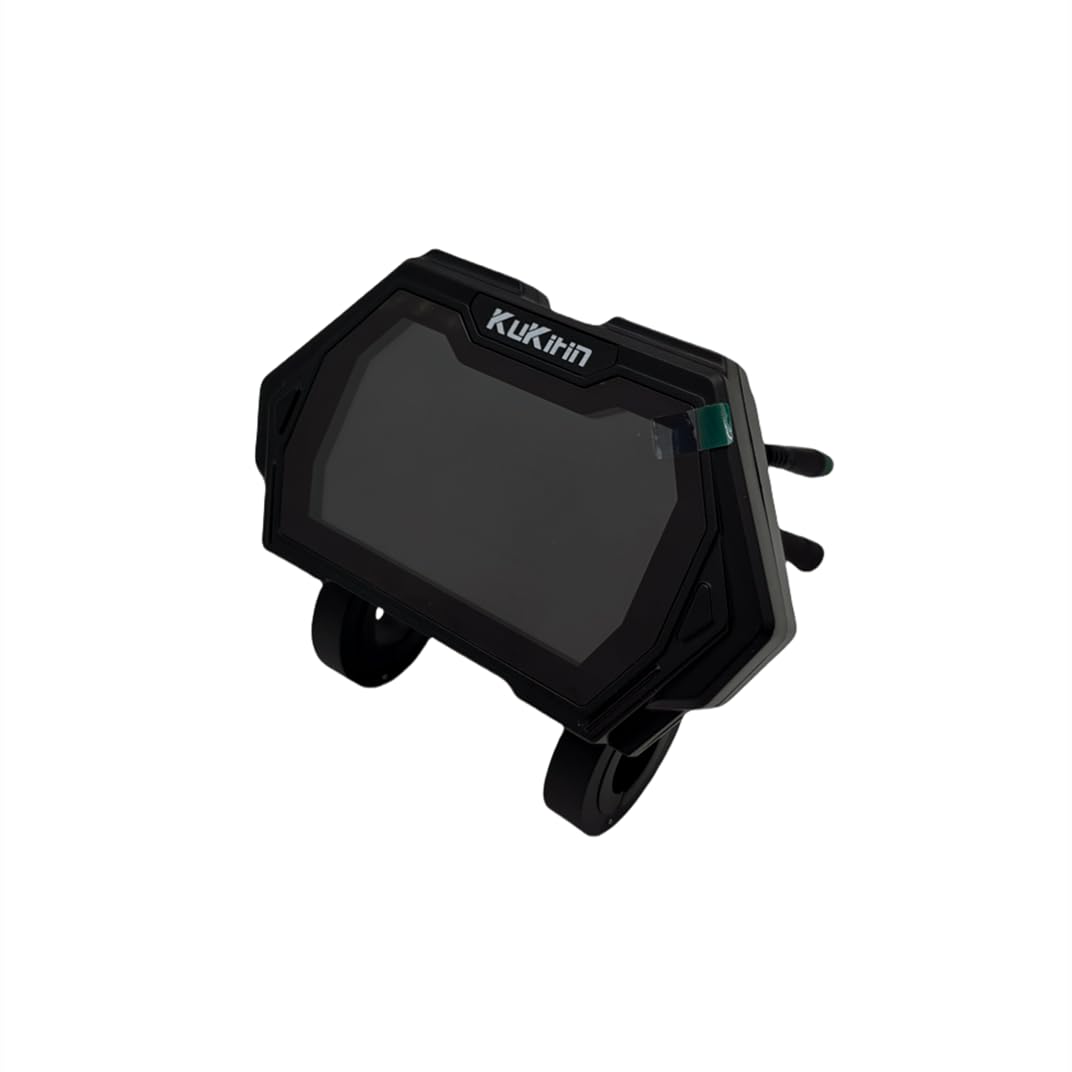
Image 2.1: Front view of the LCD Dashboard, showing the display screen and mounting brackets.
Key Components:
- LCD Display Screen: Shows speed, battery level, mode, and other operational data.
- Control Buttons: Typically located on the dashboard for power, mode selection, and settings adjustment.
- Integrated Cables: For connection to the scooter's main wiring harness.
- Mounting Brackets: Designed for secure attachment to the scooter's handlebars.

Image 2.2: Rear view of the dashboard, illustrating the various integrated cables for connection.
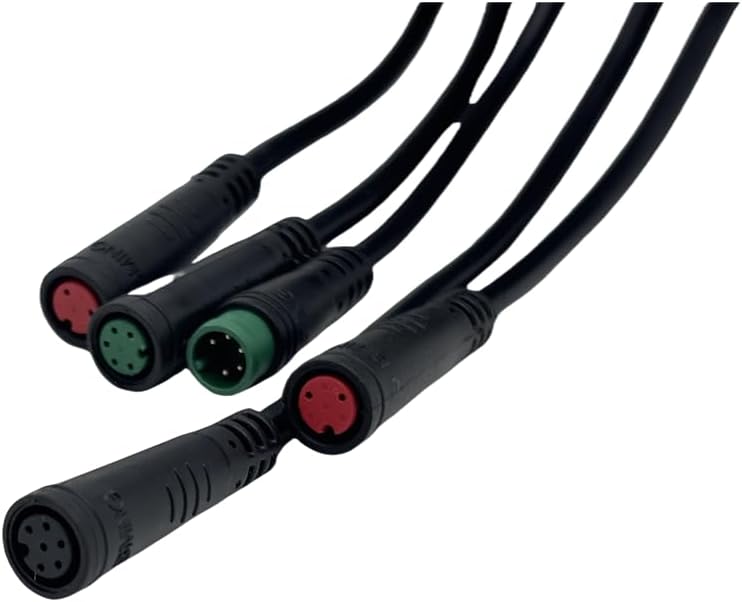
Image 2.3: Detailed view of the electrical connectors, which must match your scooter's wiring harness.
3. Setup and Installation
Installation of the dashboard requires basic mechanical and electrical understanding. If you are unsure, it is recommended to seek professional assistance.
Tools Required:
- Screwdriver set (Phillips and/or Allen keys, depending on scooter model)
- Wire cutters/strippers (if custom wiring is needed, generally not for direct replacement)
- Zip ties or cable management clips
Installation Steps:
- Power Off: Ensure your electric scooter is completely powered off and the battery is disconnected before starting any installation.
- Remove Old Dashboard (if applicable): Carefully unmount the existing dashboard from the handlebars. Disconnect all electrical connectors by gently pulling them apart. Note the routing of the cables.
- Mount New Dashboard: Position the new SPEDWHEL dashboard on the handlebars. Secure it using the provided clamps and screws. Do not overtighten.
- Connect Wiring: Match the connectors from the new dashboard to the corresponding connectors on your scooter's wiring harness. Ensure each connection is firm and secure. The connectors are typically color-coded or uniquely shaped to prevent incorrect connections.
- Cable Management: Route the cables neatly and secure them with zip ties or clips to prevent them from snagging or interfering with steering.
- Test Functionality: Reconnect the scooter's battery and power on the scooter. Verify that the dashboard powers on, displays information correctly, and responds to button presses. Check all functions, including lights, speed modes, and throttle response.
- Final Check: Before riding, ensure all screws are tightened, cables are secure, and the dashboard is firmly mounted.
4. Operating Instructions
The LCD dashboard provides essential information and control over your electric scooter. Specific button functions may vary slightly, but general operations are as follows:
Basic Functions:
- Power On/Off: Press and hold the power button (usually marked with a power symbol) for a few seconds to turn the dashboard on or off.
- Speed Display: The main screen typically shows your current speed in real-time.
- Battery Level: An icon or percentage indicates the remaining battery charge.
- Mode Selection: Use the mode button (often 'M' or a similar symbol) to cycle through different riding modes (e.g., Eco, Standard, Sport) or display information (e.g., Odometer, Trip Distance).
- Headlight Control: Some dashboards integrate headlight control. A short press of a specific button might toggle the headlights.
- Settings Menu: Long-pressing certain buttons or specific button combinations may access a settings menu for advanced configurations (e.g., wheel size, voltage, cruise control). Refer to your scooter's main user manual for detailed settings adjustments.
5. Maintenance
Proper maintenance ensures the longevity and optimal performance of your dashboard.
Cleaning:
- Wipe the display screen and housing with a soft, damp cloth.
- Avoid using abrasive cleaners, solvents, or harsh chemicals, as these can damage the screen or plastic components.
- Ensure no water enters the dashboard's internal components.
Protection:
- Protect the dashboard from direct sunlight for prolonged periods when not in use, as this can degrade the LCD.
- Avoid exposing the dashboard to extreme temperatures or heavy rain. While designed for outdoor use, excessive moisture can cause damage.
- Regularly check the mounting screws for tightness to ensure the dashboard remains securely attached.
6. Troubleshooting
If you encounter issues with your dashboard, refer to the following common problems and solutions:
| Problem | Possible Cause | Solution |
|---|---|---|
| Dashboard does not power on | Loose or disconnected power cable; Scooter battery low or off; Faulty dashboard. | Check all cable connections; Ensure scooter battery is charged and on; Test with another compatible dashboard if possible; Contact support if issue persists. |
| Incorrect speed reading | Incorrect wheel size setting; Sensor issue. | Access settings menu to verify wheel size (refer to scooter manual); Check speed sensor connection. |
| Display flickering or distorted | Loose connection; Water ingress; Internal damage. | Check all connections; Ensure dashboard is dry; If issue persists, contact support. |
| Buttons unresponsive | Stuck buttons; Internal fault. | Gently press buttons to ensure they are not stuck; If unresponsive, contact support. |
If you cannot resolve the issue using the troubleshooting guide, please contact SPEDWHEL customer support or your scooter manufacturer for further assistance.
7. Specifications
| Feature | Detail |
|---|---|
| Product Name | Original Dashboard for Kugoo KuKirin G2 PRO Electric Scooter |
| Model Number | TFM13-FEIMI-4 (Internal Model: A1) |
| Brand | SPEDWHEL |
| Material | Plastic |
| Input Voltage | 48V-72V (Standard Version, as per image) |
| Parcel Dimensions | 10.16 x 10.16 x 5.08 cm |
| Item Weight | 45.4 g |
| UPC | 761850630044 |
8. Warranty and Support
For warranty information, please refer to the terms and conditions provided by your retailer or the SPEDWHEL official website at the time of purchase. Keep your proof of purchase for any warranty claims.
For technical support, troubleshooting assistance beyond this manual, or inquiries about replacement parts, please contact SPEDWHEL customer service through the contact information provided with your product or on the official SPEDWHEL website.
