
1. Product Overview
The TRIGKEY Key i13 Mini PC is a compact and powerful computing solution designed for various applications, from gaming and content creation to business and educational use. It features a 13th Gen Intel Core i9-13900HK processor, high-speed DDR5 RAM, and PCIe 4.0 SSD storage, offering robust performance in a small form factor.

Figure 1: The TRIGKEY Key i13 Mini PC, showcasing its compact design and various ports on the front and rear.
Key Features:
- Processor: 13th Gen Intel Core i9-13900HK (14 Cores/20 Threads, up to 5.4 GHz)
- Memory: 32GB DDR5 RAM (expandable)
- Storage: 1TB PCIe 4.0 SSD (expandable with dual M.2 2280 slots)
- Graphics: Intel Iris Xe Graphics (96EU)
- Display Output: Triple display support via HDMI (4K 60Hz), DisplayPort 1.4 (4K 144Hz), and Thunderbolt 4 (40Gbps/DP1.4)
- Connectivity: WiFi 6 (Intel AX200), Bluetooth 5.2, 2.5G LAN
- Ports: Thunderbolt 4, USB-C 3.2, USB-A 3.2, DP1.4, HDMI, 2.5G LAN, 3.5mm audio jacks
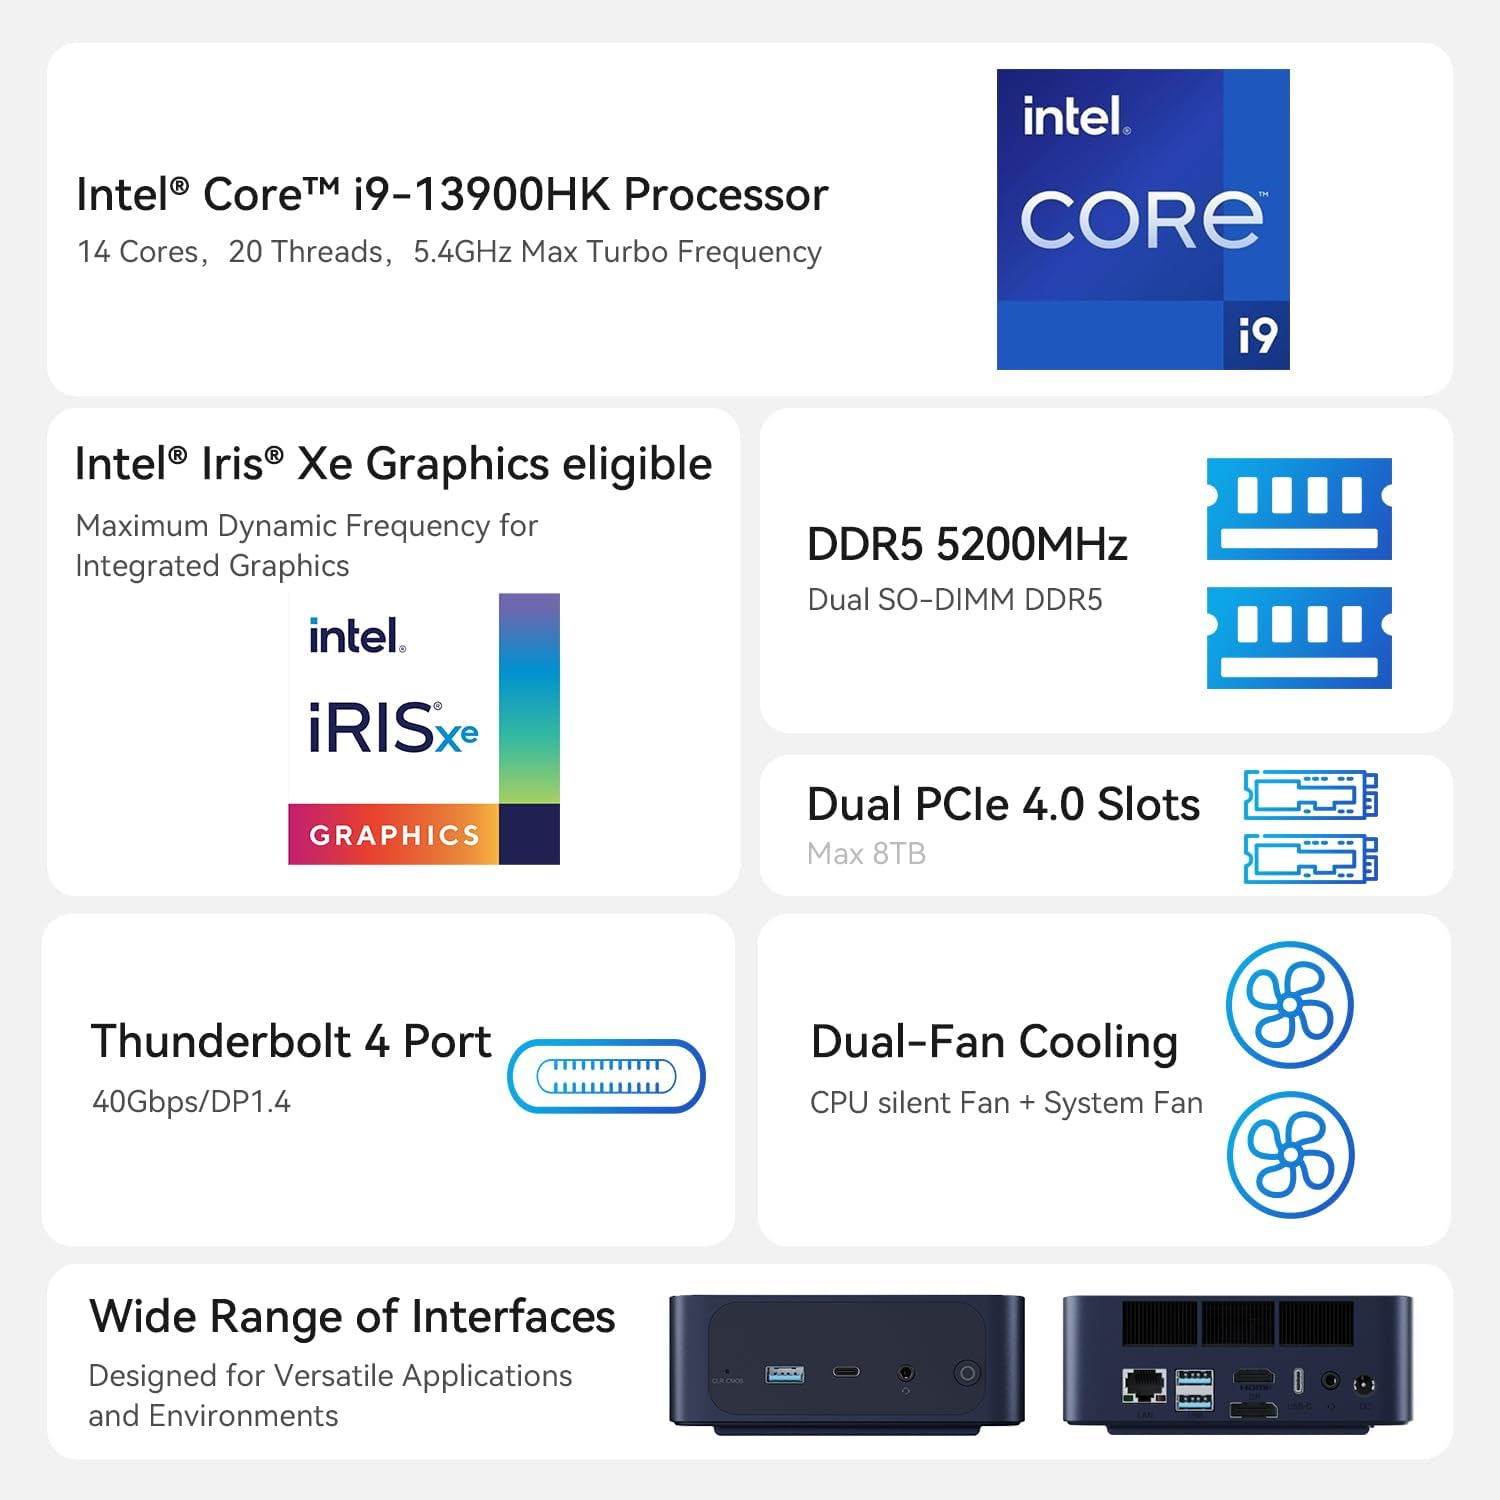
Figure 2: An illustration of the Intel Core i9-13900HK processor, emphasizing its core count, threads, and turbo frequency.
2. Setup Guide
2.1 What's in the Box
Before proceeding with the setup, please ensure all components are present:
- 1 x TRIGKEY Key i13 Mini PC
- 1 x HDMI Cable (100CM)
- 1 x User Manual
- 1 x Power Adapter (19V/5.26A)
2.2 Connecting Your Mini PC
Follow these steps to connect your TRIGKEY Key i13 Mini PC:
- Connect Display: Use the provided HDMI cable or a DisplayPort/Thunderbolt cable to connect your monitor(s) to the corresponding ports on the mini PC. The device supports up to three independent displays.
- Connect Peripherals: Plug in your USB keyboard, mouse, and any other USB devices into the available USB-A or USB-C ports.
- Connect Network: For a wired connection, connect an Ethernet cable from your router or modem to the 2.5G LAN port on the mini PC. For wireless, ensure the WiFi antennas are properly positioned (if external) or that the internal antenna has clear signal access.
- Connect Power: Insert the power adapter into the DC IN port on the mini PC, then plug the adapter into a power outlet.
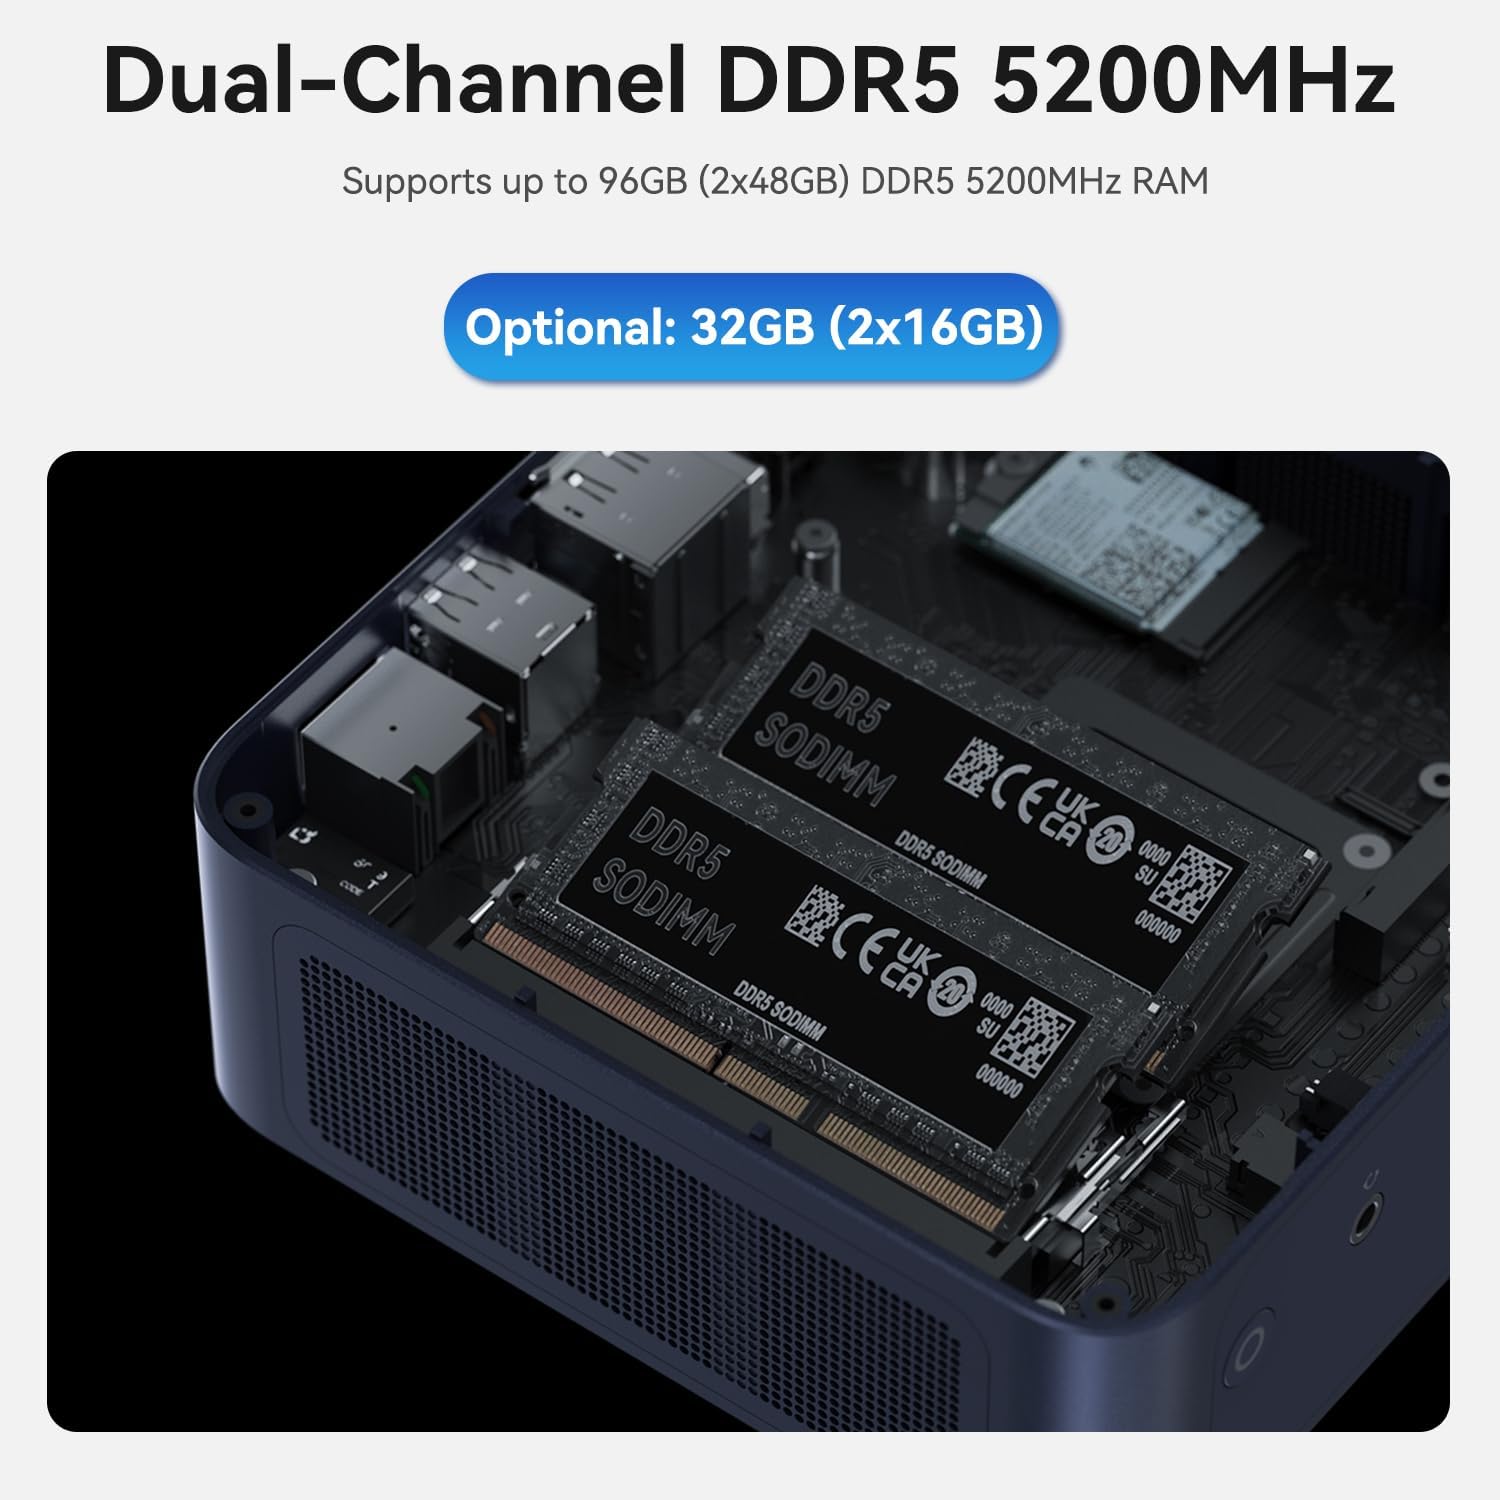
Figure 3: A diagram illustrating the various ports on the TRIGKEY Key i13 Mini PC, including Thunderbolt 4, USB-C, USB-A, DP1.4, HDMI, LAN, and audio jacks.
2.3 Initial Power On
After connecting all necessary cables, press the power button located on the front of the mini PC. The system will boot up, and you should see the operating system loading on your connected display.
3. Operating Instructions
3.1 Power Management
- Power On: Press the power button once.
- Shut Down: Access the operating system's power options to perform a proper shutdown.
- Restart: Access the operating system's power options to restart the system.
- Sleep Mode: Access the operating system's power options to put the system into sleep mode.
3.2 Display Configuration
The TRIGKEY Key i13 supports up to three independent displays. To configure multiple displays:
- Connect your monitors to the HDMI, DisplayPort, and Thunderbolt 4 ports.
- Once connected, the operating system (e.g., Windows) should automatically detect the displays.
- Navigate to your display settings (e.g., right-click on desktop > Display settings) to arrange, extend, or duplicate your displays as needed.
3.3 Network and Wireless Connectivity
The mini PC offers advanced connectivity options:
- Wired Network (2.5G LAN): For optimal speed and stability, use the 2.5G Ethernet port. Ensure your router and network infrastructure support 2.5G speeds for full performance.
- Wireless Network (WiFi 6): The integrated WiFi 6 (Intel AX200) module provides high-speed wireless connectivity. To connect, open your operating system's network settings, select your desired WiFi network, and enter the password.
- Bluetooth (BT 5.2): Use Bluetooth 5.2 to connect wireless peripherals such as keyboards, mice, headphones, or speakers. Access your operating system's Bluetooth settings to pair devices.

Figure 4: An overview of the mini PC's connectivity options, including WiFi 6, Bluetooth 5.2, and 2.5G LAN.
3.4 Storage and Memory Expansion
The TRIGKEY Key i13 Mini PC is designed for easy upgrades:
- RAM: The device comes with 32GB DDR5 RAM (2x16GB) and supports up to 96GB (2x48GB) DDR5 5200MHz SO-DIMM memory. To upgrade, carefully open the chassis and replace the existing SO-DIMM modules.
- SSD: It includes a 1TB PCIe 4.0 SSD. The mini PC features dual M.2 2280 PCIe 4.0 slots, each supporting up to 4TB, for a total of 8TB storage. To add or upgrade SSDs, open the chassis and install M.2 2280 NVMe SSDs into the available slots.

Figure 5: An internal view of the mini PC, displaying the dual DDR5 SO-DIMM slots for memory installation.

Figure 6: An internal view of the mini PC, illustrating the dual M.2 2280 PCIe 4.0 slots for storage expansion.
4. Maintenance
4.1 Cleaning
To ensure optimal performance and longevity, regularly clean your mini PC:
- Use a soft, dry cloth to wipe the exterior of the device.
- For dust accumulation in vents, use compressed air. Ensure the device is powered off and unplugged before cleaning.
- Avoid using liquid cleaners directly on the device.
4.2 Software Updates
Keep your operating system and drivers updated to ensure system stability, security, and performance. Regularly check for updates through your operating system's settings.
4.3 Cooling System
The TRIGKEY Key i13 features a dual-fan cooling system to manage internal temperatures. Ensure the vents are not obstructed to allow for proper airflow. If you notice excessive fan noise or overheating, ensure the device is in a well-ventilated area.

Figure 7: A diagram demonstrating the airflow and cooling mechanism within the TRIGKEY Key i13 Mini PC, highlighting the system fan and SSD heatsink.
5. Troubleshooting
This section addresses common issues you might encounter with your TRIGKEY Key i13 Mini PC.
5.1 No Power
- Ensure the power adapter is securely connected to both the mini PC and a working power outlet.
- Verify the power outlet is functional by plugging in another device.
- Check the power adapter for any visible damage.
5.2 No Display Output
- Confirm that the display cable (HDMI, DP, Thunderbolt) is securely connected to both the mini PC and the monitor.
- Ensure the monitor is powered on and set to the correct input source.
- Try connecting to a different display or using a different cable to rule out display or cable issues.
5.3 Network Connectivity Issues
- Wired: Check if the Ethernet cable is properly connected. Verify your router/modem is working correctly.
- Wireless: Ensure WiFi is enabled in your operating system settings. Confirm you are connected to the correct network and have entered the password accurately. Restart your router/modem if necessary.
- Update network drivers if issues persist.
5.4 System Performance Issues
- Close unnecessary applications running in the background.
- Check for and install any pending operating system or driver updates.
- Ensure the mini PC has adequate ventilation and is not overheating.
- Run a system diagnostic or antivirus scan to check for software conflicts or malware.
If you encounter issues not covered here or require further assistance, please contact TRIGKEY customer support.
6. Specifications
| Feature | Specification |
|---|---|
| Processor | Intel Core i9-13900HK (14C/20T, up to 5.4 GHz) |
| RAM | 32GB DDR5 5200MHz (2x16GB), Max 96GB |
| Storage | 1TB PCIe 4.0 SSD (Dual M.2 2280 slots, Max 8TB) |
| Graphics | Intel Iris Xe Graphics (96EU) |
| Max Screen Resolution | 3840x2160 (4K) |
| Operating System | OS (Pre-installed, typically Windows 11 Pro) |
| Wireless Connectivity | WiFi 6 (Intel AX200), Bluetooth 5.2 |
| Wired Network | 2.5G LAN |
| Ports | 1x Thunderbolt 4 (40Gbps/DP1.4), 1x USB-C 3.2 (10Gbps), 3x USB-A 3.2 (10Gbps), 1x DP1.4 (4K 144Hz), 1x HDMI (4K 60Hz), 1x 2.5G LAN, 2x 3.5mm audio jack, 1x DC IN |
| Item Weight | 2.38 pounds |
| Package Dimensions | 5.67 x 5.51 x 4.29 inches |
| Design Type | Mini PC |
7. Warranty and Support
7.1 Warranty Information
The TRIGKEY Key i13 Mini PC comes with a one-year warranty from the date of purchase. This warranty covers manufacturing defects and hardware malfunctions under normal use conditions. Please retain your proof of purchase for warranty claims.
7.2 Customer Support
TRIGKEY is committed to providing excellent customer service. For any technical assistance, troubleshooting, or warranty inquiries, please utilize the following support options:
- Online Support: Visit the official TRIGKEY store on Amazon for FAQs and product information: TRIGKEY Amazon Store
- Technical Support: We offer 24/7 one-to-one customer service and lifelong technical support. Refer to the contact information provided with your product packaging or on the official TRIGKEY website for direct support channels.


