
Introduction
This manual provides detailed instructions for the installation, operation, and maintenance of your Zomolither 7-inch Double Din Car Stereo. Please read this manual thoroughly before using the product to ensure proper function and safety. Keep this manual for future reference.
Package Contents
Verify that all items listed below are included in your package:
- 1 x Car MP5 Player
- 1 x Backup Camera
- 1 x Power Cable
- 1 x Horn Cable
- 2 x Mounting Brackets
- 1 x User Manual
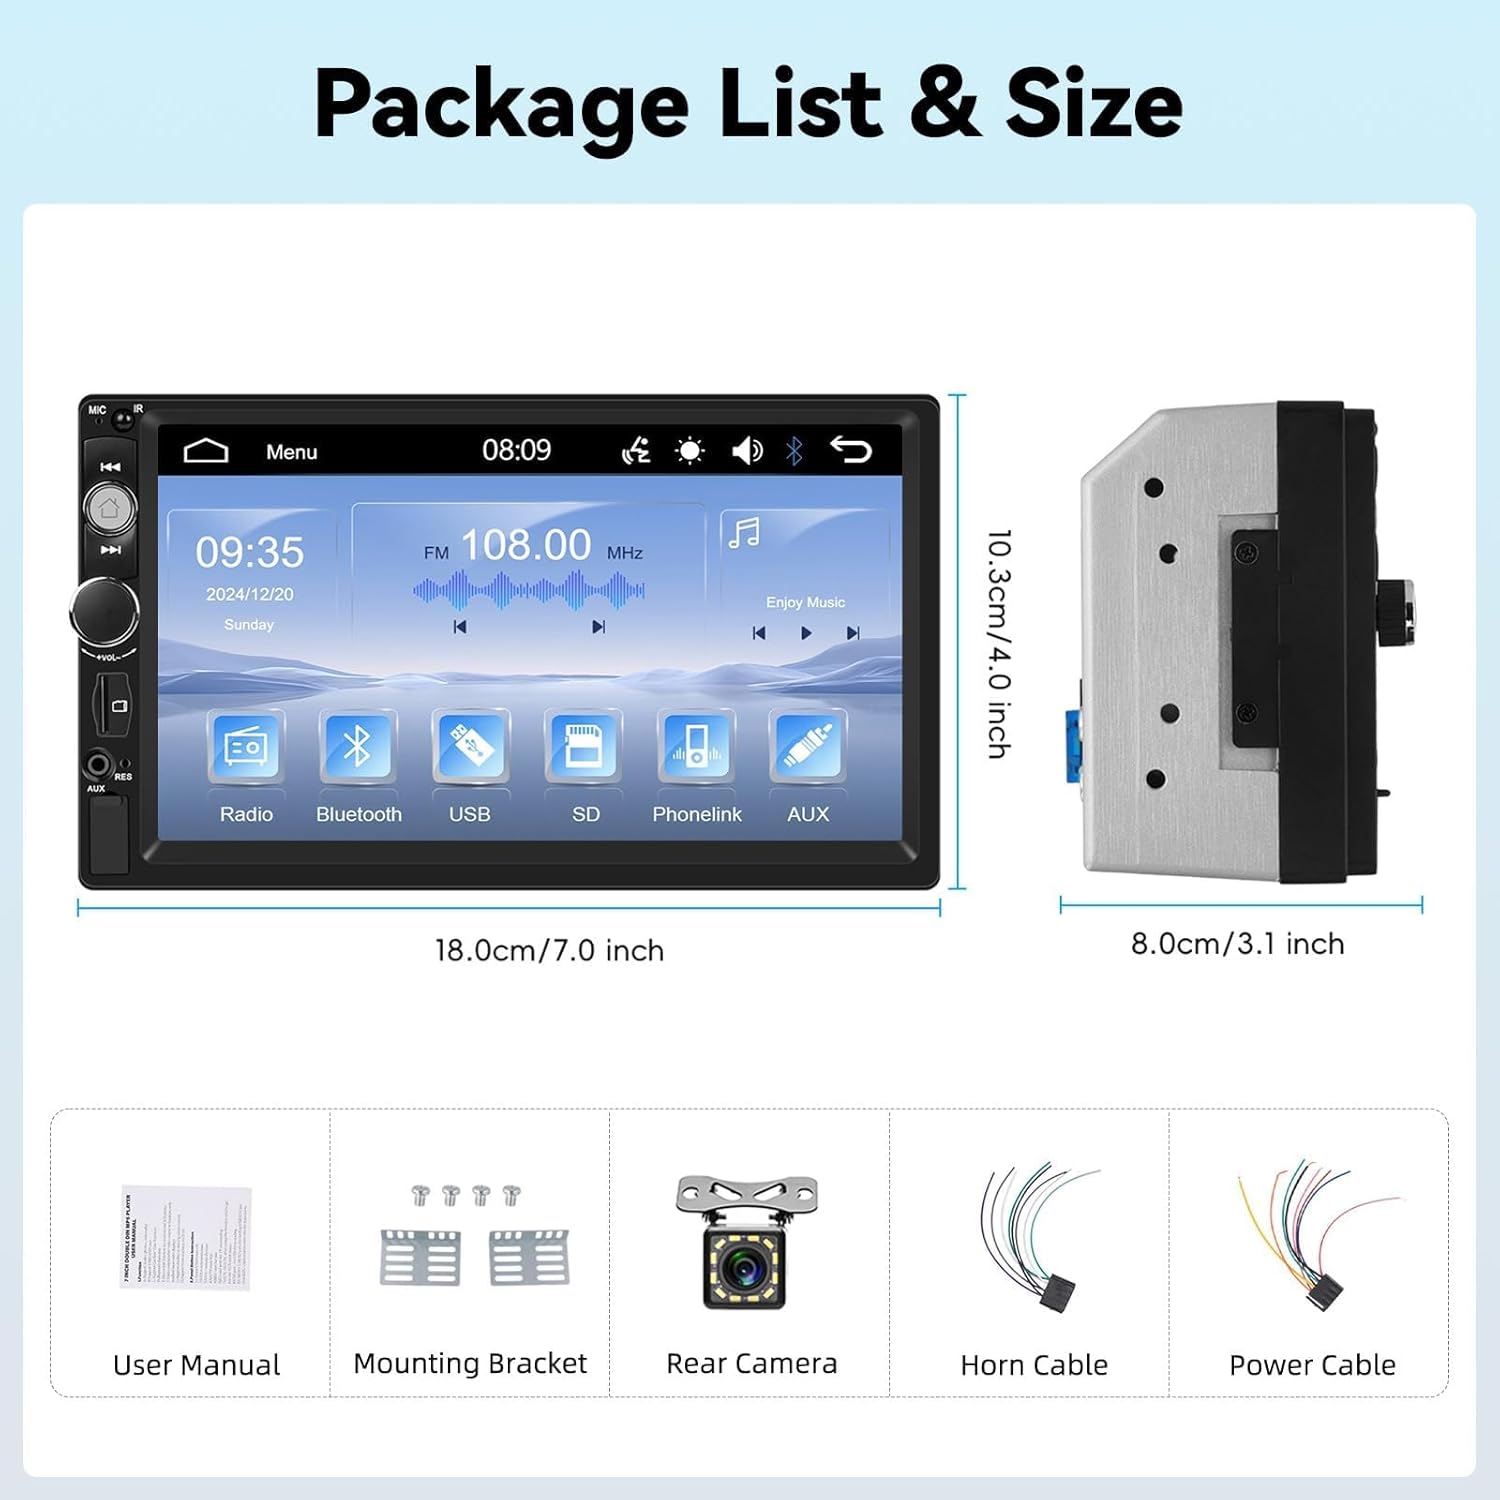
Image: Illustration of the package contents including the car stereo, backup camera, cables, mounting brackets, and user manual, along with the stereo's dimensions.
Specifications
| Feature | Detail |
|---|---|
| System | 8600 |
| Voltage | 12 V |
| Screen Type | Resistive Touch Screen |
| Screen Resolution | 800 x 480 |
| Maximum Power Output | 4*45W |
| Mirror Link | Supports wired connection for Android/iOS phones |
| Radio Band | FM |
| FM Radio Frequency | 87.5-108MHz |
| Audio Formats | MP3/AAC/OGG/FLAC/APE |
| Video Formats | AVI/3GP/MP4/MOV/MPG/MKV/VOB/RMVB/RM |
| Connectivity | Bluetooth, USB, AUX, TF Card |
| Product Dimensions | 7.0 inch (W), 4.0 inch (H), 3.1 inch (D) / 3.9"D x 7"W x 4"H |
| Item Weight | 1.68 pounds |
Setup and Installation
Important: Professional installation is recommended. Ensure the vehicle's power is disconnected before beginning installation.
- Preparation: Confirm your car's dashboard opening matches the double din standard size (7.0" W x 4.0" H x 3.1" D). A dash kit may be required for some vehicle models for a perfect fit.
- Wiring Connections:
- Connect the provided Power Cable and Horn Cable to the corresponding ports on the car stereo and your vehicle's wiring harness.
- Connect the Backup Camera cable to the designated input on the stereo. Ensure the camera is mounted securely at the rear of the vehicle.
- For steering wheel control functionality, connect the appropriate wires from your vehicle's steering wheel control interface to the stereo's SWC input.
- Mounting: Use the included mounting brackets to secure the car stereo into the dashboard opening.
- Power On: Reconnect the vehicle's power. Turn on the car stereo to test all functions.
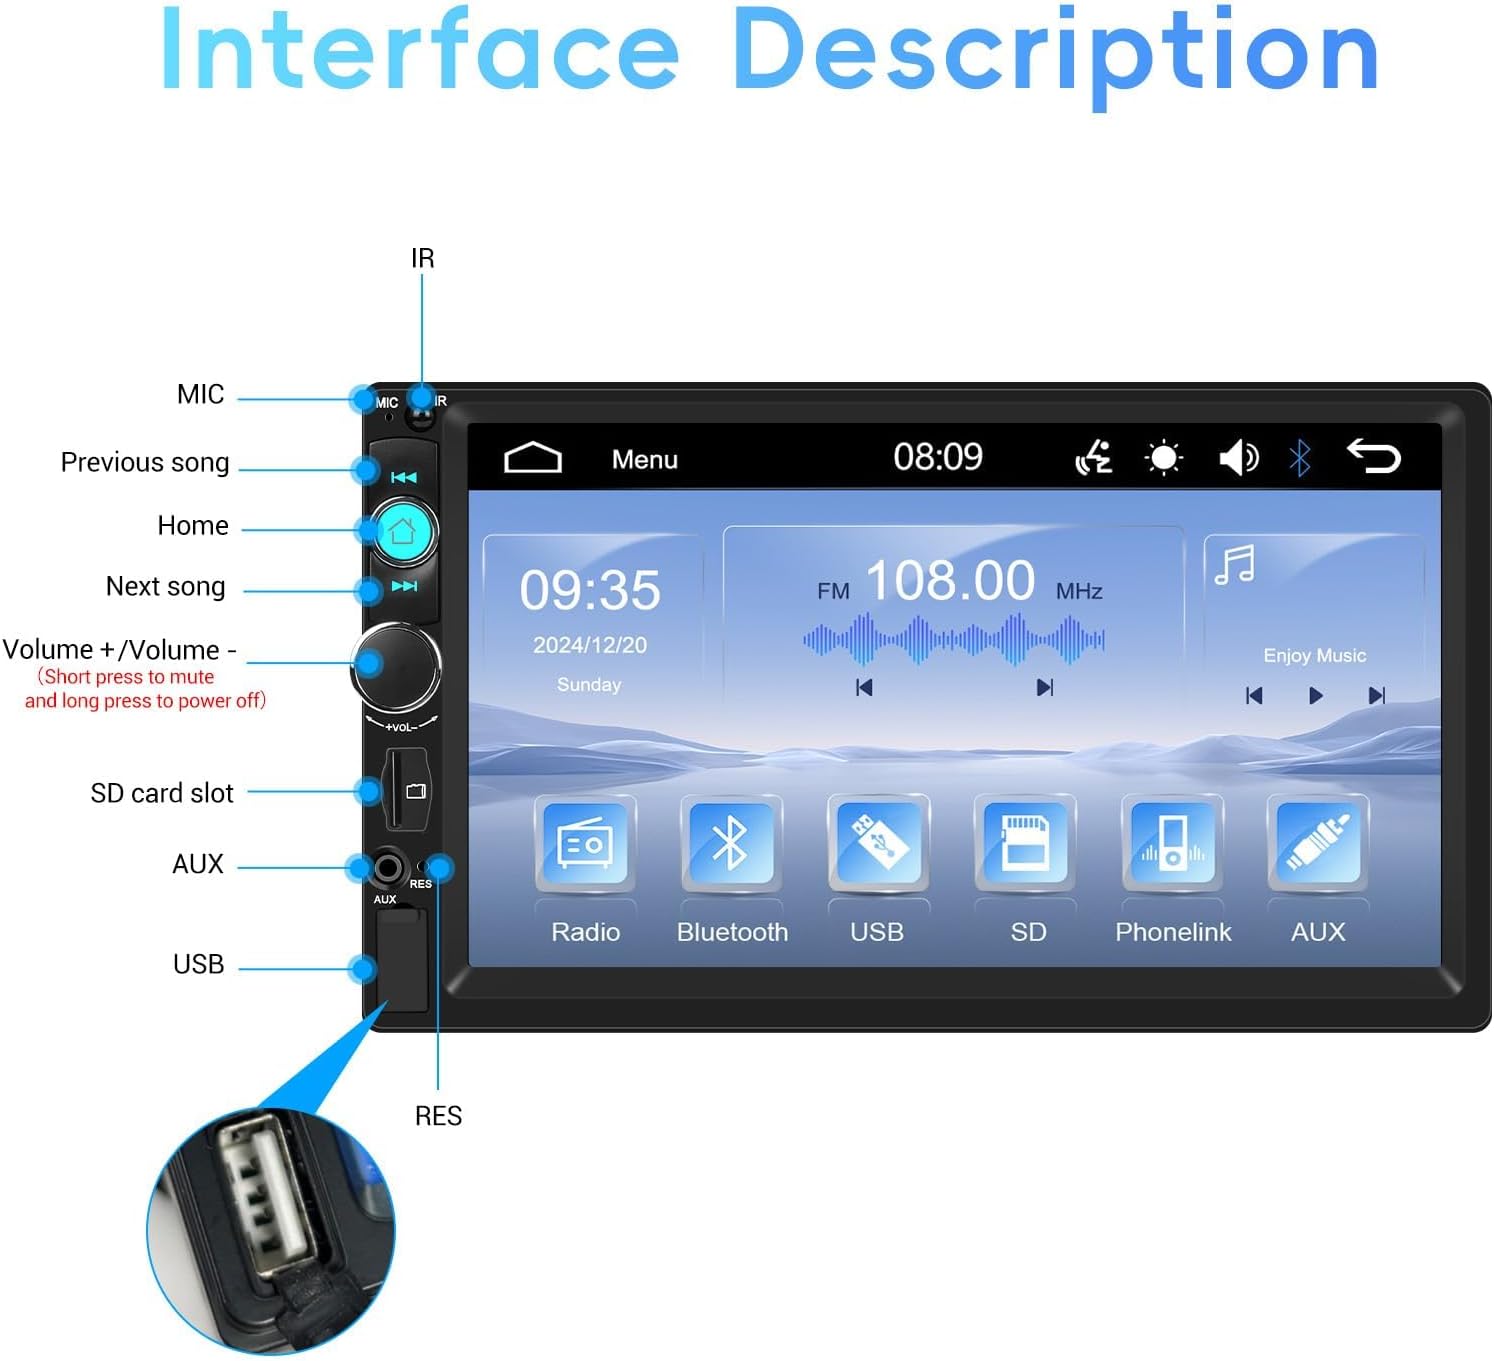
Image: Detailed diagram illustrating the various ports and buttons on the car stereo, including MIC, IR, Home, Previous/Next Song, Volume, SD card slot, AUX, and USB.
Operating Instructions
1. Basic Controls
- Power On/Off: Press and hold the volume knob to power the unit on or off.
- Volume Adjustment: Rotate the volume knob to increase or decrease the volume. Short press to mute.
- Menu/Home: Press the Home button to return to the main menu.
2. Bluetooth Functionality
The built-in Bluetooth allows for hands-free calling and wireless audio streaming.
- Enable Bluetooth on your mobile device.
- On the car stereo, navigate to the Bluetooth menu.
- Search for available devices and select "Zomolither 8600" (or similar name).
- Confirm pairing on both devices.
- Once connected, you can make/receive calls and stream music wirelessly.

Image: Depiction of the Bluetooth hands-free calling screen and the FM radio interface, showing frequency and preset stations.
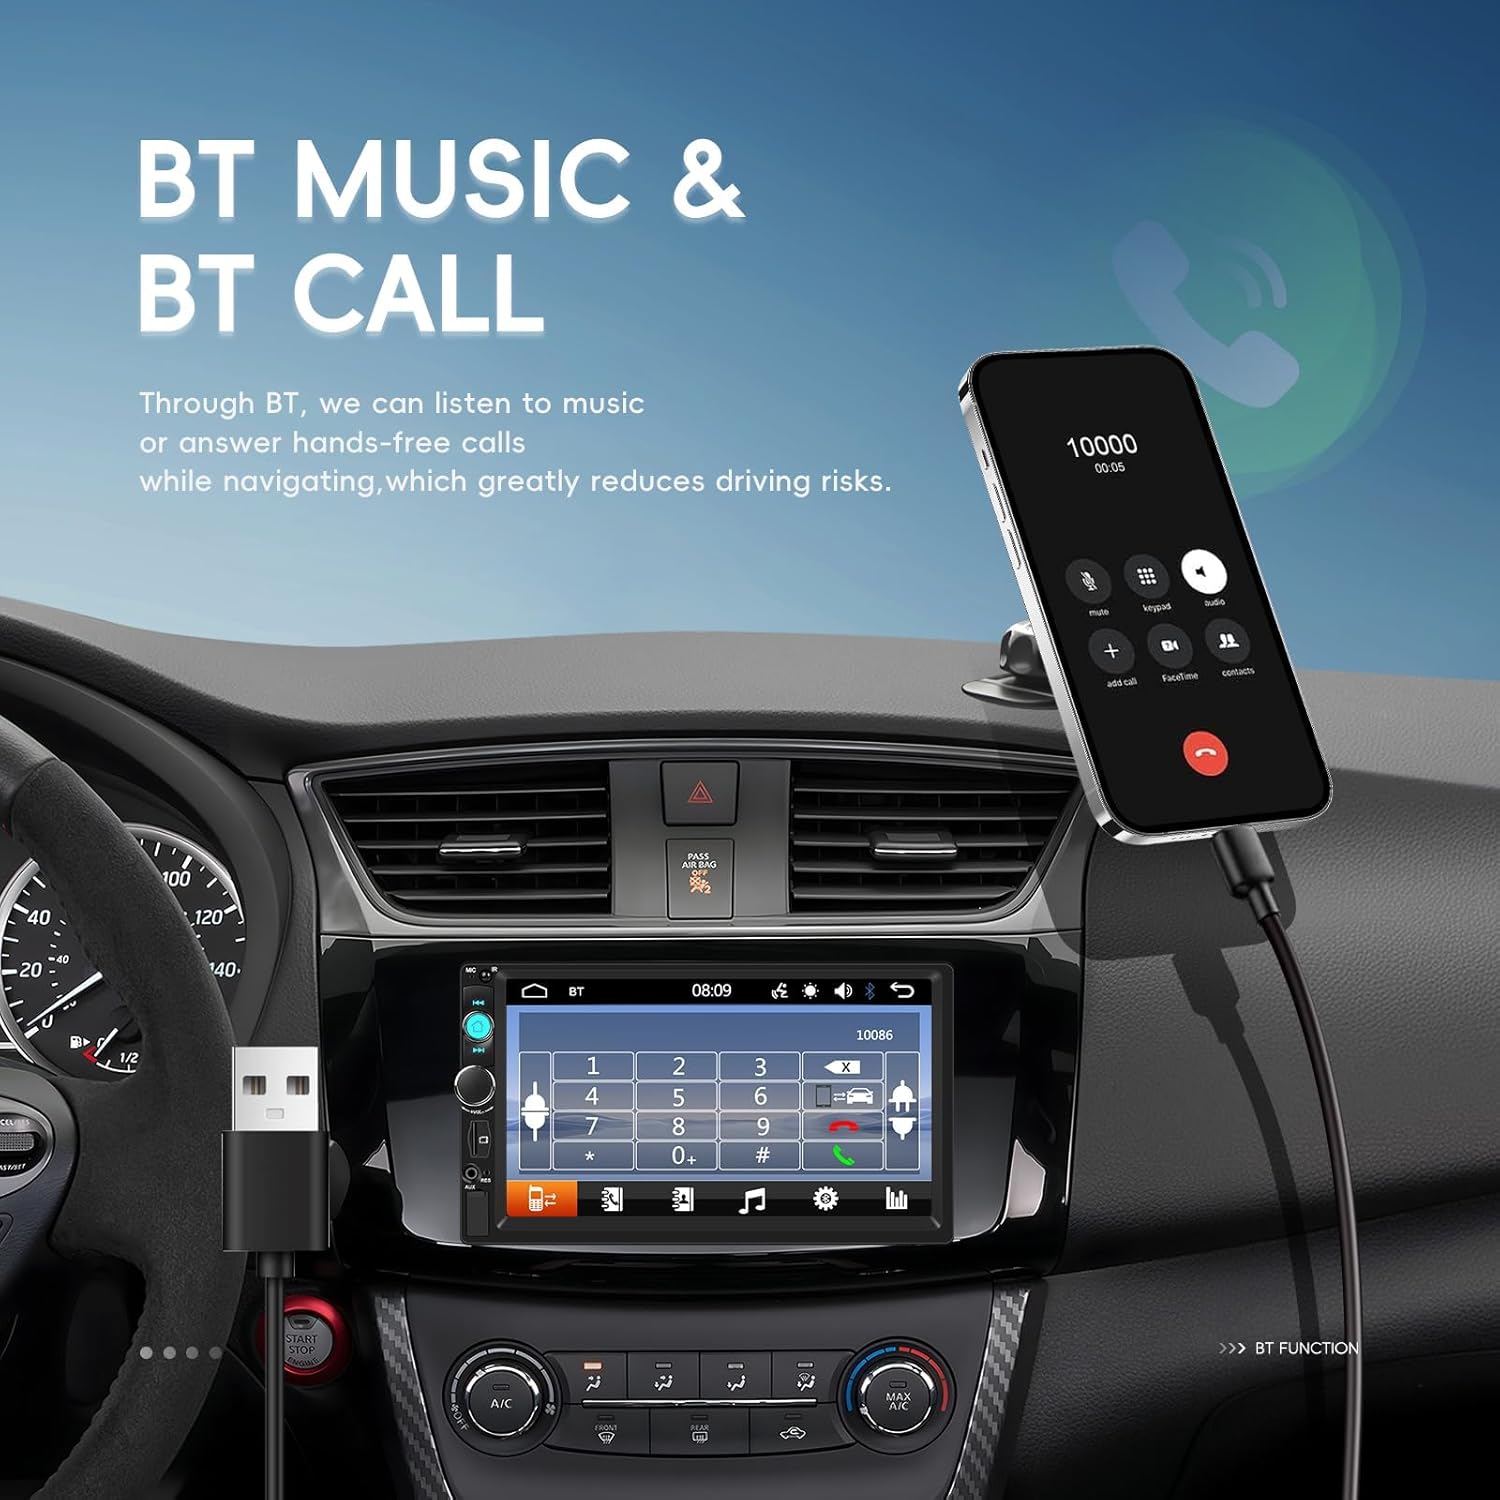
Image: An in-car view demonstrating Bluetooth music playback and call handling on the stereo, with a smartphone connected via USB.
3. FM Radio
Access the FM Radio function from the main menu.
- Auto Scan: Use the auto-scan feature to find and save available stations.
- Manual Tuning: Manually adjust the frequency to tune into specific stations.
- Presets: Save up to 18 favorite stations for quick access.
4. Mirror Link & Video Output
Mirror Link allows you to display your smartphone's screen on the stereo. Video Output enables sharing content to external displays.
- Mirror Link (Wired): Connect your Android or iOS phone to the stereo via a USB cable. Follow the on-screen prompts to activate Mirror Link. This allows navigation, video, and games from your phone to be displayed on the stereo screen.
- Video Output: Connect an external display (e.g., headrest monitor) to the stereo's video output port to share video content.
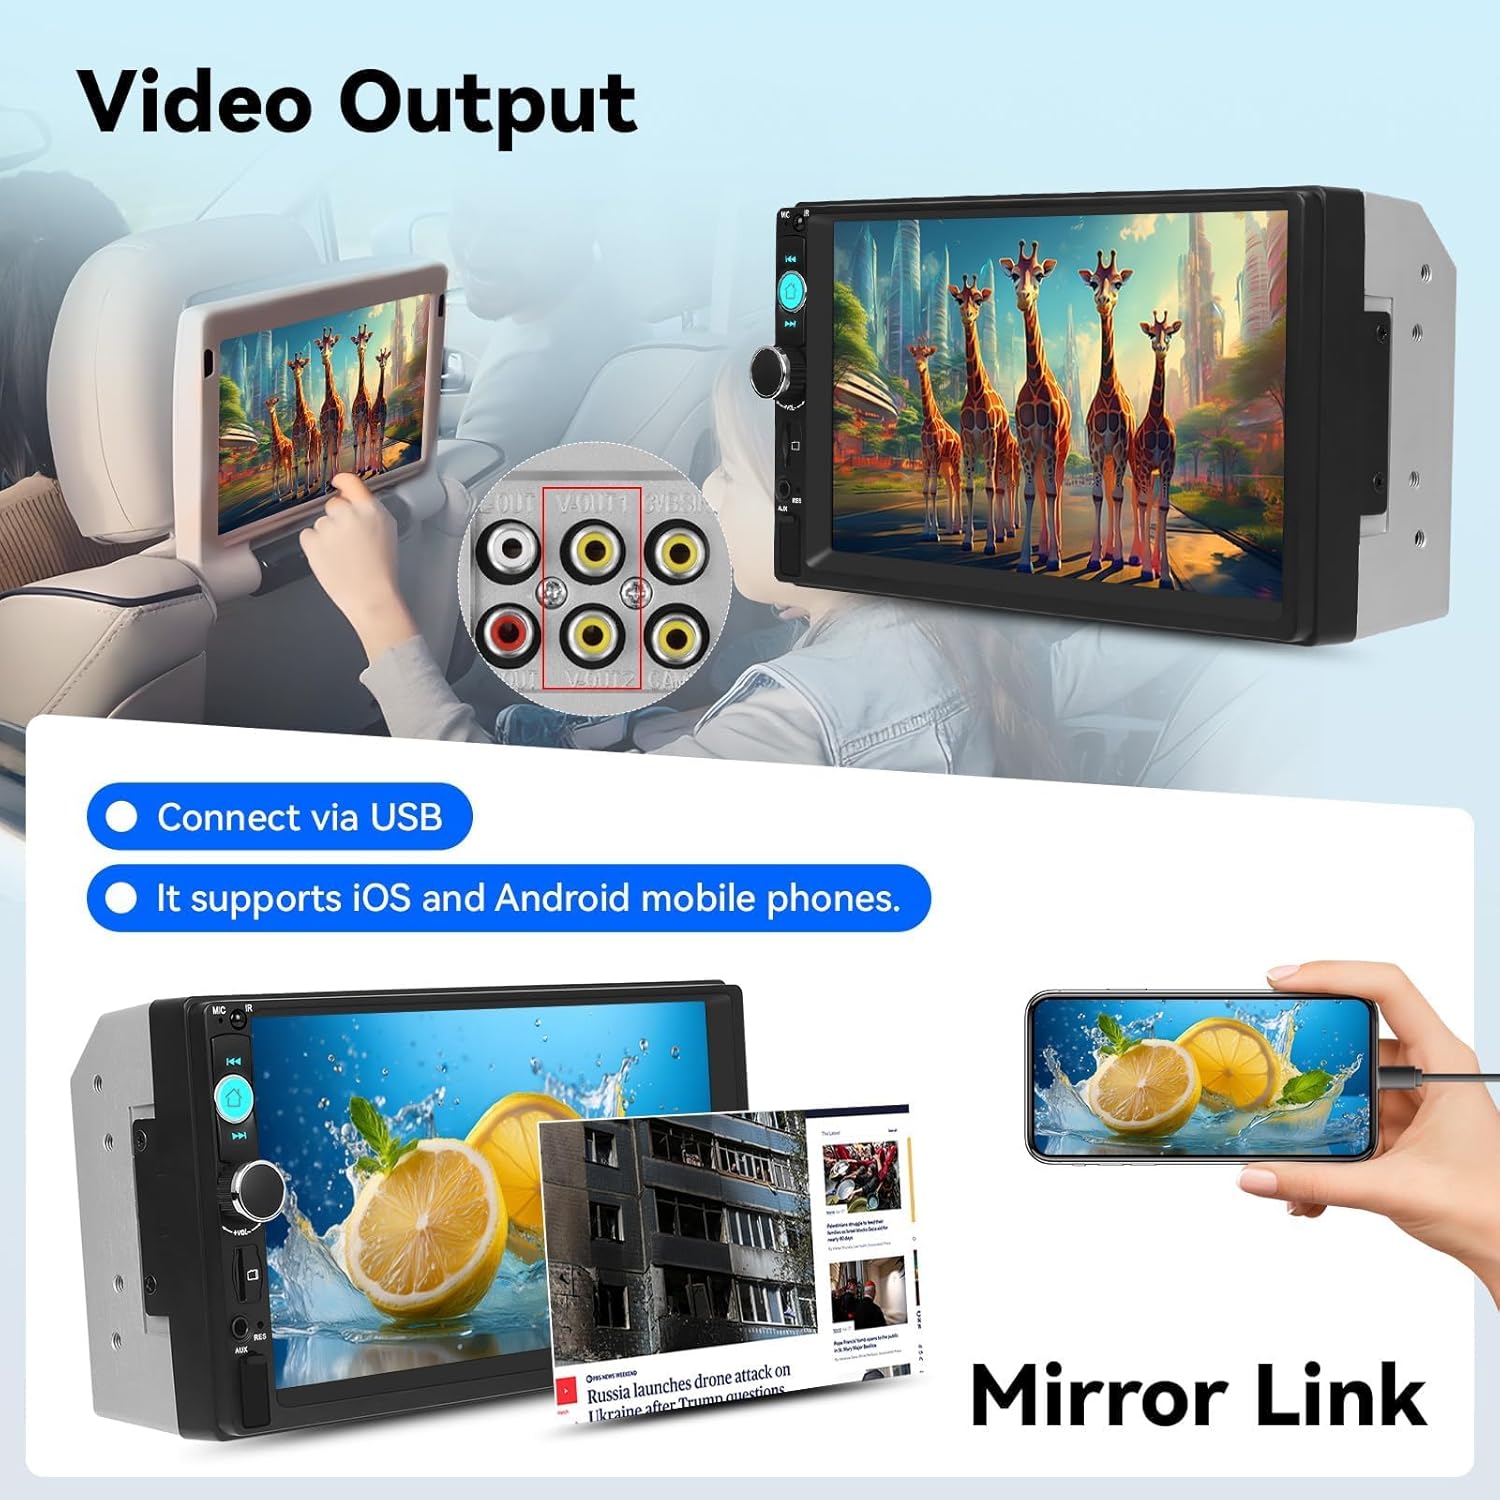
Image: Illustration showing the car stereo connected to a headrest monitor for video output and a smartphone connected via USB for Mirror Link functionality.
5. Media Playback (USB/AUX/TF Card)
The stereo supports various media inputs for audio and video playback.
- USB: Insert a USB flash drive into the USB port to play audio (MP3/AAC/OGG/FLAC/APE) and video (AVI/3GP/MP4/MOV/MPG/MKV/VOB/RMVB/RM) files.
- TF Card: Insert a TF (MicroSD) card into the TF card slot for media playback.
- AUX Input: Connect external audio devices using a 3.5mm AUX cable to the AUX port.

Image: Visual representation of the multiple playback options (TF card, AUX, USB) and the USB charging capability for smartphones.
6. EQ Settings and Backlight
Customize your audio experience and display aesthetics.
- EQ Settings: Access the Equalizer (EQ) menu to adjust audio output settings for various sound profiles (e.g., Pop, Rock, Jazz) or custom settings.
- 7 Colorful Backlight: The unit features 7 customizable backlight colors. Navigate to the display settings to choose a fixed color or cycle through the options.

Image: Display of the EQ settings interface with various frequency adjustments and the 7-color backlight options for the stereo buttons.
7. Steering Wheel Control
If properly connected during installation, you can control basic stereo functions directly from your vehicle's steering wheel buttons.
- Functions typically include volume adjustment, track skipping, and answering/ending calls.
- Refer to your vehicle's manual for specific steering wheel control button assignments.
8. Backup Camera
When the vehicle is shifted into reverse gear, the stereo display will automatically switch to the backup camera view.
- The camera provides a wide-angle, night vision view for safer parking and reversing.
- Ensure the camera lens is clean and unobstructed for clear visibility.

Image: Illustration showing the steering wheel control interface and the clear, wide-angle view from the waterproof night vision rear view camera.
Maintenance
- Cleaning the Screen: Use a soft, lint-free cloth to gently wipe the touch screen. Do not use abrasive cleaners or solvents.
- General Cleaning: Keep the unit free from dust and debris. Use a soft, dry cloth for cleaning the exterior.
- Cable Connections: Periodically check all cable connections to ensure they are secure.
Troubleshooting
| Problem | Possible Cause | Solution |
|---|---|---|
| No power | Incorrect wiring, blown fuse, vehicle power issue. | Check power cable connections. Inspect vehicle fuses. Consult a professional if issues persist. |
| No sound | Volume too low, mute activated, incorrect speaker wiring. | Increase volume. Check if mute is active. Verify speaker connections. |
| Bluetooth not connecting | Bluetooth not enabled on device, incorrect pairing. | Ensure Bluetooth is active on your phone. Re-attempt pairing. Forget device and pair again. |
| Mirror Link not working | Incorrect USB cable, phone settings, app compatibility. | Use a high-quality USB cable. Check phone's USB debugging or Mirror Link settings. Ensure phone OS is compatible. |
| Backup camera not displaying | Camera cable disconnected, camera power issue, reverse trigger wire not connected. | Check camera cable connection to stereo. Verify camera power supply. Ensure reverse trigger wire is correctly connected. |
| Touch screen unresponsive | System freeze, screen calibration issue. | Restart the unit (power off and on). If issue persists, a factory reset might be needed (refer to advanced settings). |
Warranty and Support
Zomolither offers a 30-day refund policy, 24-hour after-sales support, and lifetime technical support for this product.
- For technical assistance or warranty claims, please contact Zomolither customer support.
- Online Support Email: Zomolither@126.com
- Please provide your model number (8600) and purchase details when contacting support.

Image: Zomolither brand image highlighting 30-day refund, 24-hour after-sales, and lifetime tech support.