
1. Introduction
Thank you for choosing the Generic JKSST0605 Solar-Powered Triple-Lens WiFi Security Camera. This advanced outdoor surveillance system offers comprehensive monitoring with its unique triple-lens design, solar power capabilities, and smart AI features. This manual will guide you through the installation, operation, and maintenance of your new security camera.

Image 1.1: The JKSST0605 camera unit with its solar panel, shown alongside a smartphone displaying its multi-view monitoring interface.
Key Features:
- Triple-Lens 12MP Ultra HD: Three 4MP lenses provide simultaneous 1080P HD images, covering multiple areas without blind spots.
- 360° Pan & Tilt: 355° horizontal and 90° vertical rotation for flexible monitoring.
- Solar-Powered & WiFi Connectivity: High-efficiency solar panel and 16,000mAh battery for continuous operation, connecting via WiFi (router required).
- AI Human Detection & Tracking: Advanced PIR motion sensors and AI algorithms accurately identify human intruders, reducing false alarms.
- Dual Night Vision: Infrared stealth mode and full-color mode with LED fill light for clear nighttime surveillance.
- Two-Way Audio: Built-in microphone and speaker for remote communication.
- IP66 Waterproof: Durable design for harsh outdoor conditions.
- Local Storage: Supports up to 128GB SD card for loop recording.
2. Product Components
Before installation, please verify that all components are present in the package:
- Camera Body (with integrated solar panel)
- Mounting Screws
- Stand

Image 2.1: An illustration of the camera's triple-lens configuration, indicating two fixed lenses (left and right) and one PTZ (Pan-Tilt-Zoom) camera at the bottom.
3. Setup
3.1 Installation Location
Choose a location that receives ample direct sunlight for the solar panel and is within range of your WiFi network. Ensure the camera has a clear line of sight to the areas you wish to monitor.
3.2 Mounting the Camera
- Position the camera stand against the desired mounting surface (wall, pole, etc.).
- Mark the drill holes through the stand.
- Drill pilot holes if necessary.
- Secure the stand using the provided mounting screws.
- Attach the camera body to the secured stand. Adjust the angle of the solar panel to maximize sun exposure.
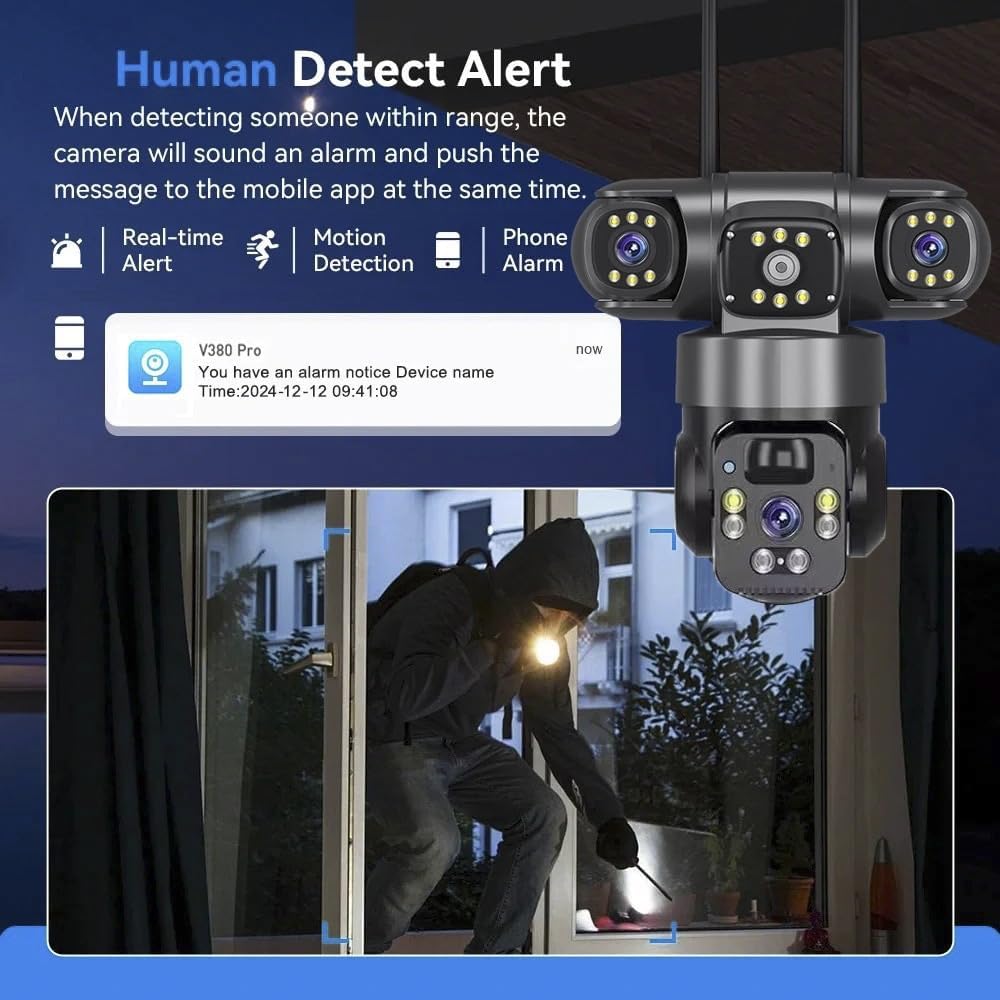
Image 3.1: The camera is designed for outdoor use and is IP66 waterproof, suitable for various weather conditions.
3.3 Initial Power-Up and App Connection
- Ensure the camera's battery is sufficiently charged. The solar panel will begin charging upon exposure to sunlight.
- Download the designated mobile application (e.g., V380 Pro, if indicated by product packaging or quick start guide) from your smartphone's app store.
- Register an account and log in.
- Follow the in-app instructions to add your camera. This typically involves scanning a QR code on the camera or connecting to its temporary WiFi hotspot.
- Connect the camera to your home or office 2.4GHz WiFi network. (5GHz networks are not supported).
4. Operating the Camera
4.1 Live View and PTZ Control
Once connected, open the app to access the live feed. The triple-lens design allows for simultaneous viewing of three distinct areas. The bottom lens supports Pan-Tilt-Zoom (PTZ) functionality.
- Multi-Screen View: The app displays feeds from all three lenses concurrently.
- PTZ Control: Use the directional controls within the app to rotate the bottom camera lens 355° horizontally and 90° vertically.

Image 4.1: The camera's three lenses enable simultaneous monitoring of different areas, displayed on a single app interface.

Image 4.2: The PTZ camera offers 320-degree pan and 90-degree tilt control via the mobile application.
4.2 AI Human Detection and Alerts
The camera uses advanced AI to distinguish human movement from other objects like animals or vehicles, minimizing false alarms.
- Enable Detection: In the app settings, activate AI Human Detection.
- Set Detection Zones: Define specific areas within the camera's view where you want motion detection to be active.
- Receive Alerts: When a human is detected, the camera will send instant notifications to your smartphone with real-time snapshots.
- Siren Alarm: Configure the built-in siren alarm to activate upon detection, deterring intruders. This can be scheduled for specific times.

Image 4.3: Human detection triggers real-time alerts and phone notifications, enhancing security.
4.3 Night Vision Modes
The camera offers versatile night vision options for clear monitoring in low-light conditions.
- Infrared Night Mode: Provides clear black-and-white video in complete darkness using infrared LEDs.
- Full-Color Night Mode: Utilizes built-in warm LED lights to provide full-color video at night.
- Smart Night Mode (Double Light Mode): By default, the camera operates in infrared mode. When motion is detected, the warm lights automatically turn on to provide full-color video and act as a deterrent.

Image 4.4: Different night vision settings, including full-color with continuous light, infrared, and smart double light mode that activates color vision upon detection.
4.4 Two-Way Audio
Communicate directly through the camera using the integrated microphone and speaker.
- Speak: Tap the microphone icon in the app to speak. Your voice will be projected through the camera's speaker.
- Listen: The camera's microphone captures audio from its surroundings, which can be heard through the app.

Image 4.5: The two-way audio feature allows for remote communication, such as speaking to visitors or family members.
4.5 Storage
The camera supports local storage via a Micro SD card (up to 128GB, not included).
- Installation: Insert the Micro SD card into the designated slot on the camera.
- Loop Recording: The camera will automatically record and overwrite older footage once the SD card is full.
- Video Locking: Critical footage can be locked with one click in the app to prevent it from being overwritten.
5. Maintenance
- Solar Panel Cleaning: Regularly wipe the solar panel with a soft, damp cloth to remove dust, dirt, or debris that may reduce charging efficiency.
- Lens Cleaning: Gently clean the camera lenses with a microfiber cloth to ensure clear image quality. Avoid abrasive materials.
- Firmware Updates: Check the mobile application periodically for available firmware updates. Keeping the firmware updated ensures optimal performance and security.
- Battery Health: While designed for continuous solar power, ensure the camera receives adequate sunlight to maintain battery charge, especially during prolonged cloudy periods.
6. Troubleshooting
- Camera Not Connecting to WiFi:
- Ensure your WiFi network is 2.4GHz.
- Check WiFi signal strength at the camera's location.
- Restart your router and the camera.
- Verify the WiFi password entered in the app is correct.
- Poor Image Quality:
- Clean the camera lenses.
- Ensure there are no obstructions in the camera's field of view.
- Check your internet connection speed.
- Solar Panel Not Charging:
- Ensure the solar panel is clean and free of debris.
- Verify the panel is positioned to receive direct sunlight for several hours daily.
- Check the connection cable between the solar panel and the camera.
- False Motion Alerts:
- Adjust the detection sensitivity in the app.
- Refine detection zones to exclude areas with frequent non-human movement (e.g., trees swaying).
- Ensure AI Human Detection is enabled.
- Two-Way Audio Issues:
- Check the volume settings on your phone and in the app.
- Ensure your phone's microphone is not blocked.
- Verify network stability.
7. Specifications
| Feature | Detail |
|---|---|
| Model Name | JKSST0605 |
| Indoor/Outdoor Usage | Outdoor |
| Video Capture Resolution | 4K (Effective 4096.0) |
| Lenses | Three (4MP each) |
| Viewing Angle | 355 Degrees (Pan), 90 Degrees (Tilt) |
| Power Source | Solar Panel + 16,000mAh Battery |
| Connectivity Technology | Wireless (WiFi 2.4GHz) |
| Connectivity Protocol | WiFi |
| Controller Type | APP (Smartphone) |
| Night Vision Range | 82 Inches (approx.) |
| Storage | Micro SD Card (up to 128GB) |
| Waterproof Rating | IP66 |
| Item Dimensions (L x W x H) | 24 x 25 x 20 inches |
| Item Weight | 3.4 pounds |
| Included Components | Camera Body, Mounting Screws, Solar panels, Stand |
8. Warranty and Support
For warranty information, please refer to the product packaging or contact your retailer. For technical support or further assistance, please reach out to the manufacturer's customer service department. Contact details are typically provided on the product packaging or the official brand website.