
1. Introduction
The ZLLJMETER ZL116 is a 9999-count rechargeable intelligent digital multimeter designed for precise electrical measurements. It features a large LCD screen, automatic range selection, data hold, temperature measurement, automatic shutdown, backlight, and a flashlight. This device is suitable for professionals, industrial applications, educational settings, home use, and electronics enthusiasts. It can measure AC/DC voltage, AC/DC current, resistance, capacitance, diode, continuity, temperature, live line indication, and Non-Contact Voltage (NCV).
2. Safety Information
Always adhere to the following safety precautions to prevent electric shock or personal injury and to avoid damage to the multimeter or the equipment under test.
- Ensure the test leads are in good condition, free from damage or exposed wiring.
- Do not exceed the maximum input values specified for each measurement function.
- Do not use the multimeter if it appears damaged or if the case is open.
- Disconnect power to the circuit and discharge all high-voltage capacitors before measuring resistance, capacitance, or continuity.
- Exercise extreme caution when working with voltages above 30V AC RMS, 42V peak, or 60V DC. These voltages pose a shock hazard.
- Always use the correct function and range for your measurement.
- Keep fingers behind the finger guards on the test probes during measurements.
- Replace the battery or charge the device when the low battery indicator appears to ensure accurate readings.
3. Product Overview
The ZL116 Digital Multimeter is designed for ease of use and versatility. Below are its key features and a visual representation of its interface.
Key Features:
- LCD display with 9999 counts
- Automatic Range selection
- Live Wire test function
- Non-Contact Voltage (NCV) detection
- Diode Test
- Data Hold function
- True RMS measurement
- Automatic power off
- Built-in Flashlight
- Rechargeable Lithium Battery
- Full range overload protection
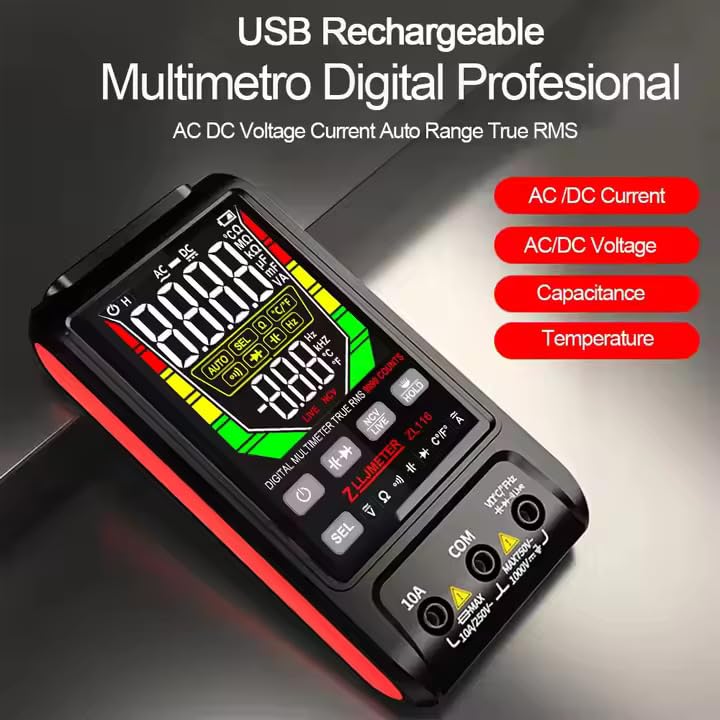
Figure 1: Front view of the ZL116 Digital Multimeter, highlighting its display and function buttons.

Figure 2: Overview of the ZL116's measurement capabilities and features, including AC/DC voltage, current, resistance, capacitance, temperature, True RMS, NCV, and more.
4. Initial Setup
4.1 Unpacking
Carefully unpack the ZL116 Digital Multimeter and check for all included components:
- 1 x ZL116 Digital Multimeter
- 1 x User Manual
- 1 x USB Charging Cable
- 1 x Pair of Test Leads
- 1 x Thermocouple (for temperature measurement)
4.2 Charging the Multimeter
The ZL116 is equipped with a 1000mAh rechargeable lithium battery. Before first use, or when the low battery indicator appears, charge the multimeter using the provided USB cable.
- Connect the small end of the USB charging cable to the multimeter's charging port.
- Connect the other end of the USB cable to a standard USB power adapter (not included) or a computer's USB port.
- The charging indicator on the multimeter will show the charging status. Charge until the indicator shows a full charge.
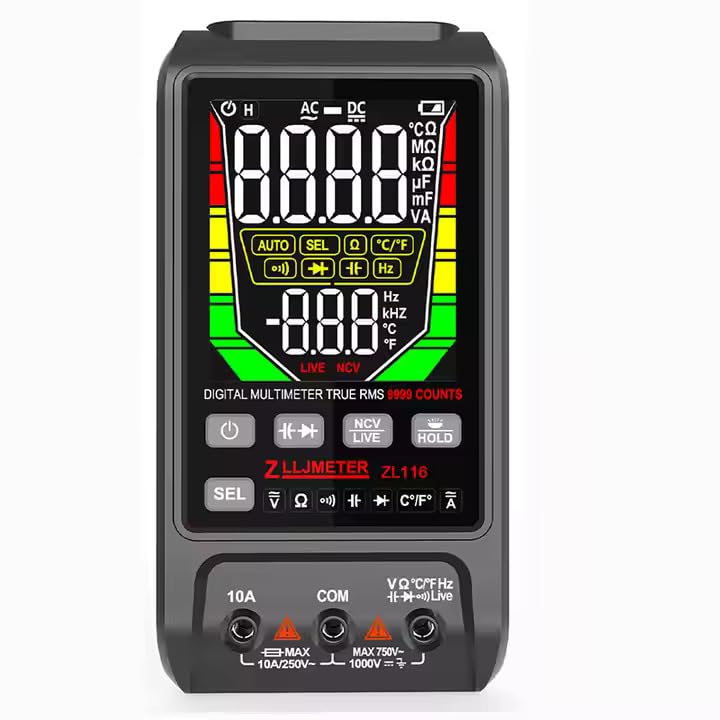
Figure 3: The ZL116 Multimeter connected to a USB cable for charging its internal 1000mAh battery.
5. Operating Instructions
5.1 Power On/Off
Press and hold the power button (usually marked with a power symbol) to turn the multimeter on or off.
5.2 Auto Range Function
The ZL116 features an automatic ranging function, which simplifies operation by automatically selecting the appropriate measurement range. This is indicated by 'AUTO' on the display.
5.3 AC/DC Voltage Measurement
To measure AC or DC voltage:
- Turn on the multimeter. It will typically default to auto-ranging voltage measurement.
- Insert the red test lead into the 'VΩHz' input jack and the black test lead into the 'COM' input jack.
- Connect the test probes across the circuit or component you wish to measure.
- Read the voltage value on the display. The meter will automatically detect AC or DC voltage.
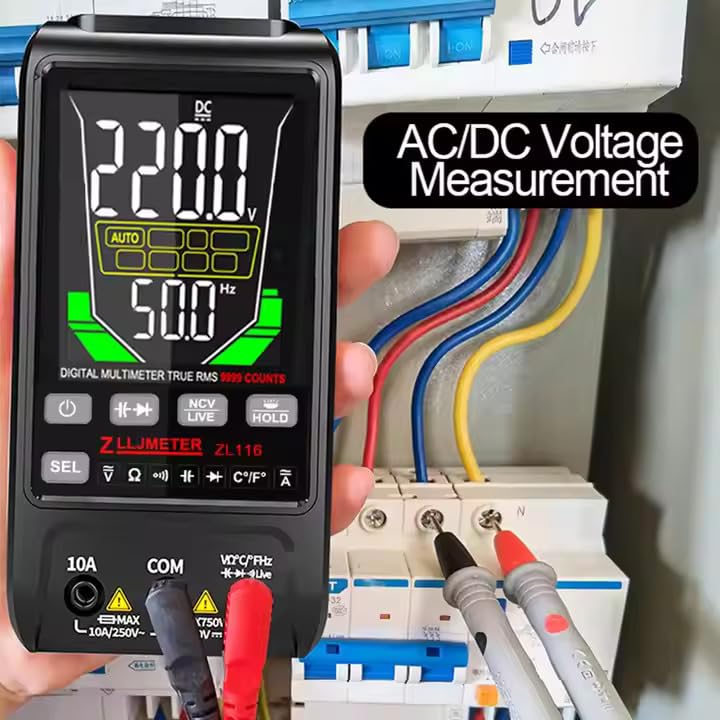
Figure 4: Measuring AC/DC voltage in an electrical circuit using the ZL116 Multimeter.
5.4 AC/DC Current Measurement
To measure AC or DC current:
- Turn on the multimeter and select the current measurement function (usually by pressing the 'SEL' button until the appropriate current symbol is displayed).
- For currents up to 10A, insert the red test lead into the '10A' input jack. For mA currents, insert the red test lead into the 'mA' input jack. Insert the black test lead into the 'COM' input jack.
- WARNING: To measure current, the multimeter must be connected in series with the circuit. Never connect the multimeter in parallel across a voltage source when in current mode, as this can damage the meter and the circuit.
- Break the circuit and connect the test probes in series with the load.
- Read the current value on the display.
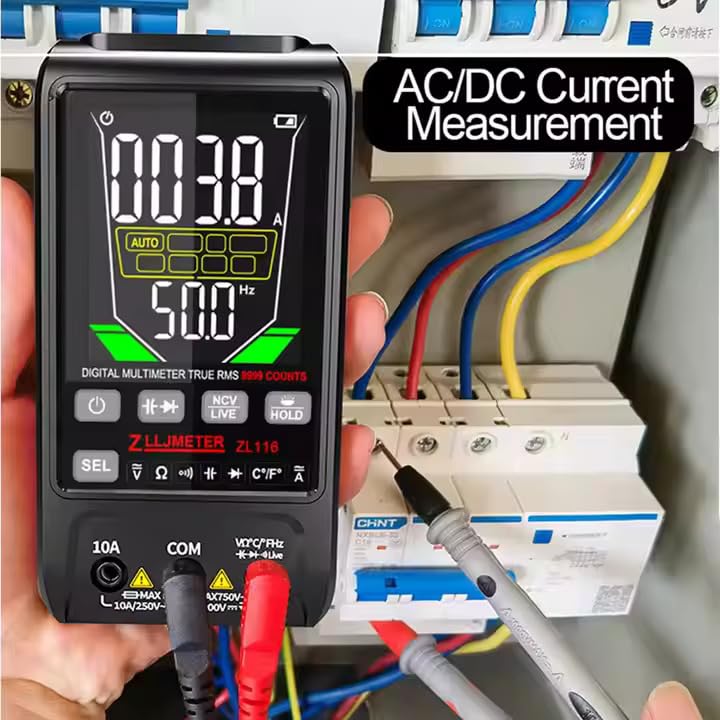
Figure 5: Measuring AC/DC current by connecting the ZL116 Multimeter in series with a circuit.
5.5 Resistance Measurement
To measure resistance:
- Turn on the multimeter and select the resistance function (Ω).
- Insert the red test lead into the 'VΩHz' input jack and the black test lead into the 'COM' input jack.
- WARNING: Ensure the circuit or component is completely de-energized before measuring resistance.
- Connect the test probes across the component.
- Read the resistance value on the display.

Figure 6: Measuring resistance on a circuit board using the ZL116 Multimeter.
5.6 Capacitance Measurement
To measure capacitance:
- Turn on the multimeter and select the capacitance function (F).
- Insert the red test lead into the 'VΩHz' input jack and the black test lead into the 'COM' input jack.
- WARNING: Ensure the capacitor is fully discharged before measurement to prevent damage to the meter.
- Connect the test probes across the capacitor terminals.
- Read the capacitance value on the display.
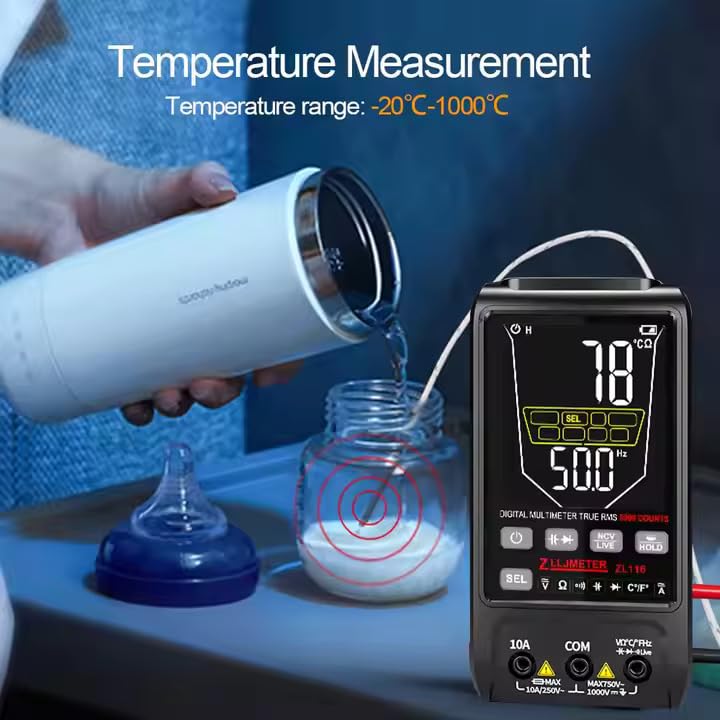
Figure 7: Measuring capacitance on a circuit board with the ZL116 Multimeter.
5.7 Temperature Measurement
To measure temperature:
- Turn on the multimeter and select the temperature function (°C/°F).
- Connect the provided thermocouple to the appropriate input jacks (usually marked for temperature).
- Place the tip of the thermocouple on or near the object whose temperature you wish to measure.
- Read the temperature value on the display.
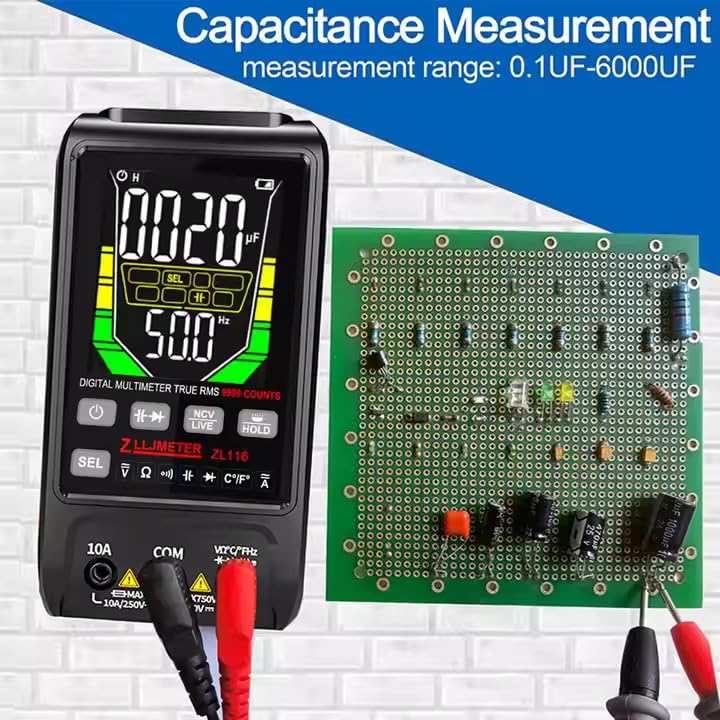
Figure 8: Using the ZL116 Multimeter to measure temperature with the included thermocouple.
5.8 Diode Test
To test a diode:
- Turn on the multimeter and select the diode test function (usually indicated by a diode symbol).
- Insert the red test lead into the 'VΩHz' input jack and the black test lead into the 'COM' input jack.
- Connect the red probe to the anode and the black probe to the cathode of the diode. A forward voltage drop (e.g., 0.5V to 0.8V for silicon diodes) should be displayed.
- Reverse the probes. The display should show 'OL' (Open Loop) for a good diode.
5.9 Live Wire Test (NCV)
The NCV (Non-Contact Voltage) function allows for detection of AC voltage without direct contact. Press the NCV button and bring the top of the multimeter near a live wire. The meter will indicate the presence of AC voltage through an audible alarm and/or visual indicator.
5.10 Data Hold Function
Press the 'HOLD' button to freeze the current reading on the display. Press it again to release the hold function.
5.11 Flashlight Function
The ZL116 includes a built-in flashlight for illuminating dark work areas. Activate the flashlight by pressing the dedicated flashlight button or a combination of buttons as indicated in the manual (often a long press of a specific button). The flashlight is visible in Figure 6, located at the top of the multimeter.
6. Maintenance
Proper maintenance ensures the longevity and accuracy of your ZL116 Digital Multimeter.
- Cleaning: Wipe the meter's case with a damp cloth and mild detergent. Do not use abrasives or solvents. Ensure the meter is completely dry before use.
- Battery Care: Recharge the internal lithium battery regularly, especially if the meter will not be used for an extended period, to maintain battery health.
- Storage: Store the multimeter in a cool, dry place, away from direct sunlight and extreme temperatures.
- Test Leads: Inspect test leads for any damage before each use. Replace them if the insulation is cracked or the conductors are exposed.
7. Troubleshooting
If you encounter issues with your ZL116 Multimeter, refer to the following table for common problems and solutions.
| Problem | Possible Cause | Solution |
|---|---|---|
| No display or dim display | Low battery or discharged battery. | Charge the multimeter using the USB cable. |
| Incorrect readings | Incorrect function selected, poor test lead connection, or outside measurement range. | Verify the correct function is selected. Ensure test leads are securely connected. Check if the measurement is within the meter's specified range. |
| Meter automatically turns off | Automatic power-off feature activated (to save battery). | This is normal operation. Press any button to reactivate the meter. |
| 'OL' (Overload) displayed | Measurement exceeds the selected range or maximum input. | Switch to a higher range if available, or ensure the input does not exceed the meter's maximum specifications. |
8. Technical Specifications
The ZL116 Digital Multimeter offers the following technical specifications:
| Measurement Function | Range | Accuracy | Resolution |
|---|---|---|---|
| AC Voltage | 1V/10V 100V/600V | ±(0.5%+5) ±(0.8%+10) | 0.001V 0.1V |
| DC Voltage | 1V/10V 100V/600V | ±(0.5%+3) ±(0.8%+3) | 0.001V 0.1V |
| AC Current | 600mA 10A | ±(3.0%+10) ±(3.0%+10) | 0.1mA 0.01A |
| DC Current | 600mA 10A | ±(3.0%+10) ±(3.0%+10) | 0.1mA 0.01A |
| Resistance | 9999Ω/100kΩ/1MΩ 10MΩ | ±(0.8%+3) ±(1.0%+5) | 0.1Ω/kΩ/MΩ 0.001MΩ |
| Capacitance | 1uF ~ 1000uF 6000uF | ±(4.0%+10) ±(5.0%+10) | 0.1uF 1uF |
| Temperature | -20℃ ~ 1000℃ | ±(2%+2) | 1℃ |
General Specifications:
- Display: LCD, 9999 Counts
- Power Source: Rechargeable Lithium Battery (1000mAh)
- Dimensions (L x W x H): 17.3 x 7.3 x 2.7 cm
- Item Weight: 400 Grams
- Safety Standard: IEC 61010-1
- Color: Black
9. Warranty and Support
9.1 Warranty Information
The ZLLJMETER ZL116 Digital Multimeter comes with a 1-year warranty from the date of purchase, covering manufacturing defects. Please retain your proof of purchase for warranty claims. The warranty does not cover damage caused by misuse, accidents, unauthorized repairs, or normal wear and tear.
9.2 Customer Support
For technical assistance, warranty claims, or any other inquiries, please contact the importer/packer:
MDS Automech Solutions
Q-106, Phase 3, Shivalik Nagar, BHEL, Haridwar, Uttarakhand-249403
Contact: +91-9870694636
Email: mohit@mdsautomech.in
