
1. Product Overview
The MSI MPG B550 Gaming Plus V1 is a high-performance gaming motherboard designed to support AMD Ryzen AM4 processors. It features advanced thermal solutions, high-speed connectivity, and robust power delivery for an optimal computing experience.

Figure 1.1: MSI MPG B550 Gaming Plus V1 Motherboard and Retail Packaging.
Key Features:
- Support for 3rd Gen AMD Ryzen processors and future AMD Ryzen processors with BIOS update.
- Supports dual channel DDR4 memory up to 128 GB (4400 MHz).
- Lightning Fast Game experience: PCIe 4.0, Lightning Gen 4 M.2 with M.2 Shield Frozr, AMD Turbo USB 3.2 GEN 2.
- MYSTIC LIGHT: RGB LED lighting and extendable pin headers – 16.8 million colors / 29 effects.
- Premium Thermal Solution: Extended heatsink with additional choke thermal pad rated for 7W/mk and PCB with 2oz thickened copper.

Figure 1.2: Premium Thermal Solution features including Extended Heatsink Design and M.2 Shield Frozr.
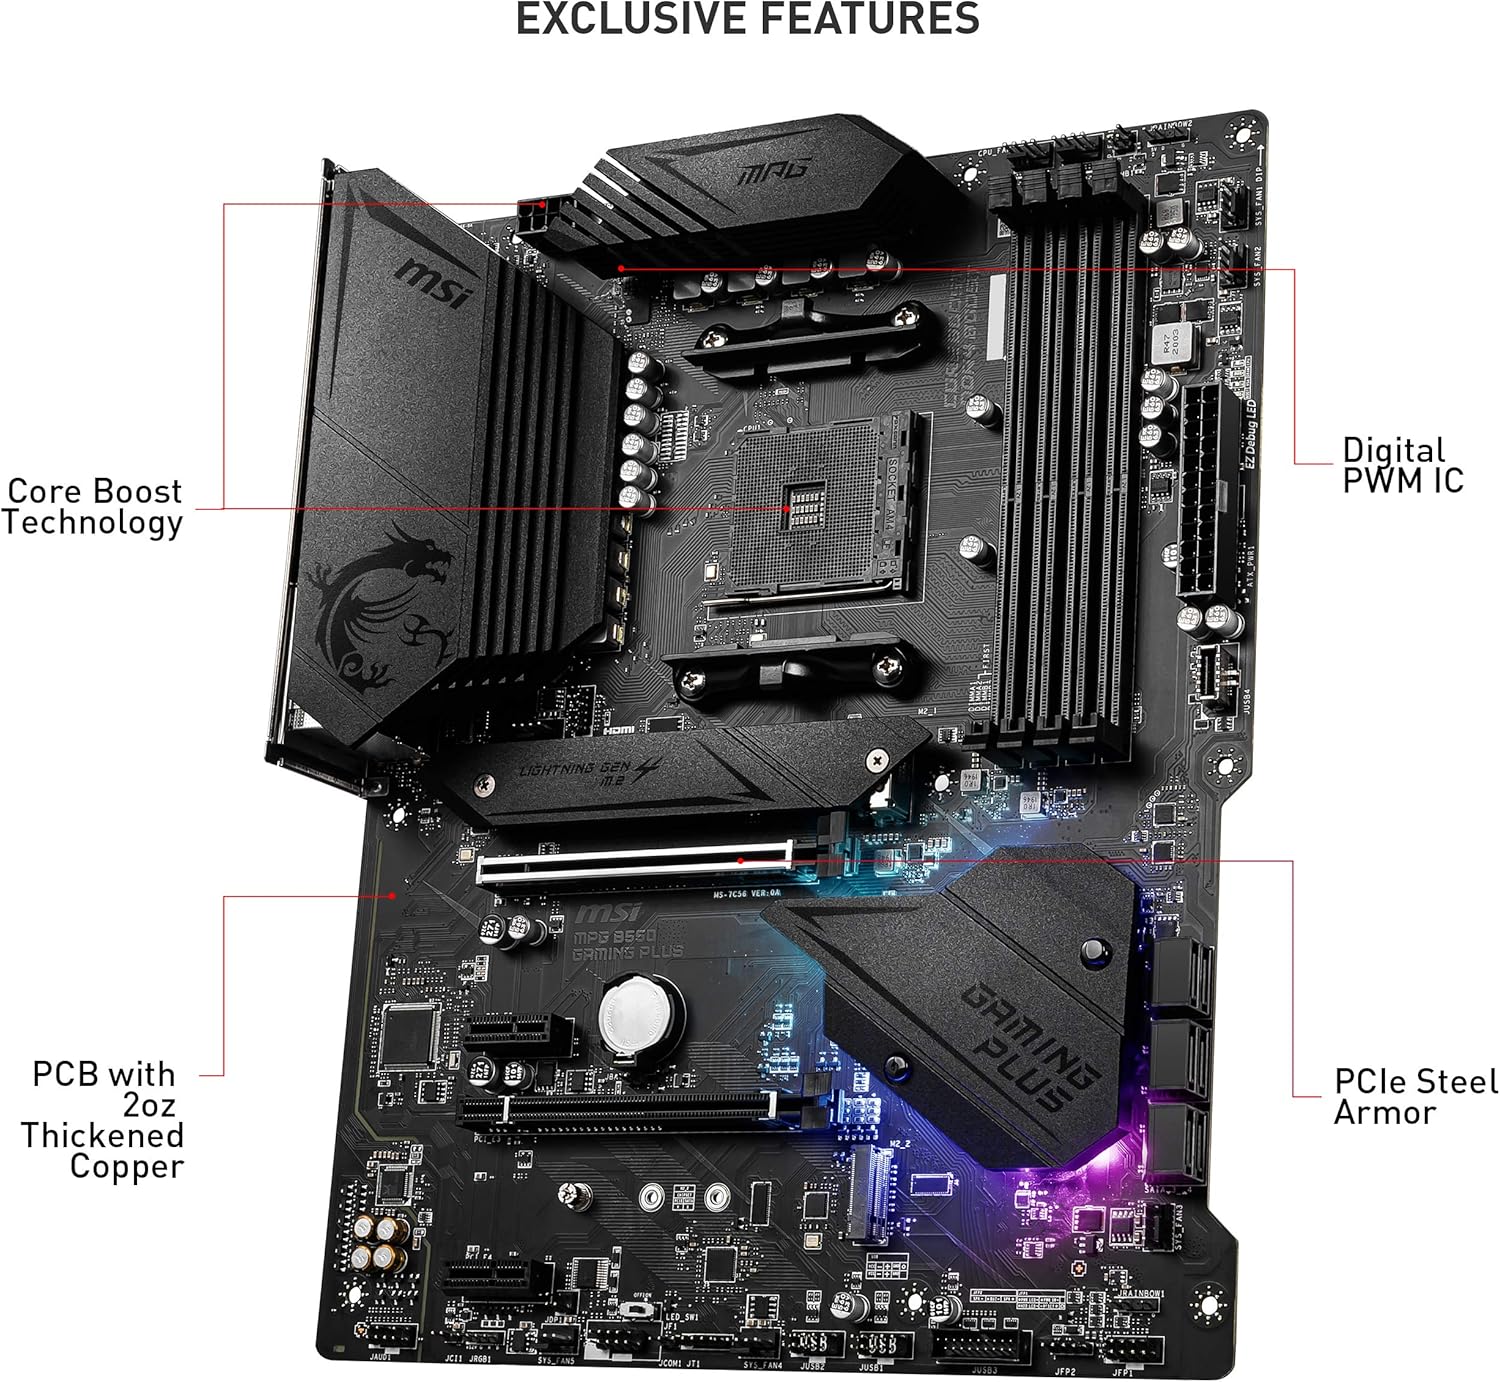
Figure 1.3: Exclusive Features such as Core Boost Technology, 2oz Thickened Copper PCB, and PCIe Steel Armor.

Figure 1.4: High-Speed Transmission features including USB 3.2 Gen 2 10Gbps, Lightning Gen 4 Solution, and DDR4 Boost.
2. Setup and Installation
2.1 Pre-installation Checklist
Before beginning the installation process, ensure you have all necessary components and tools. Refer to the contents of your motherboard package:
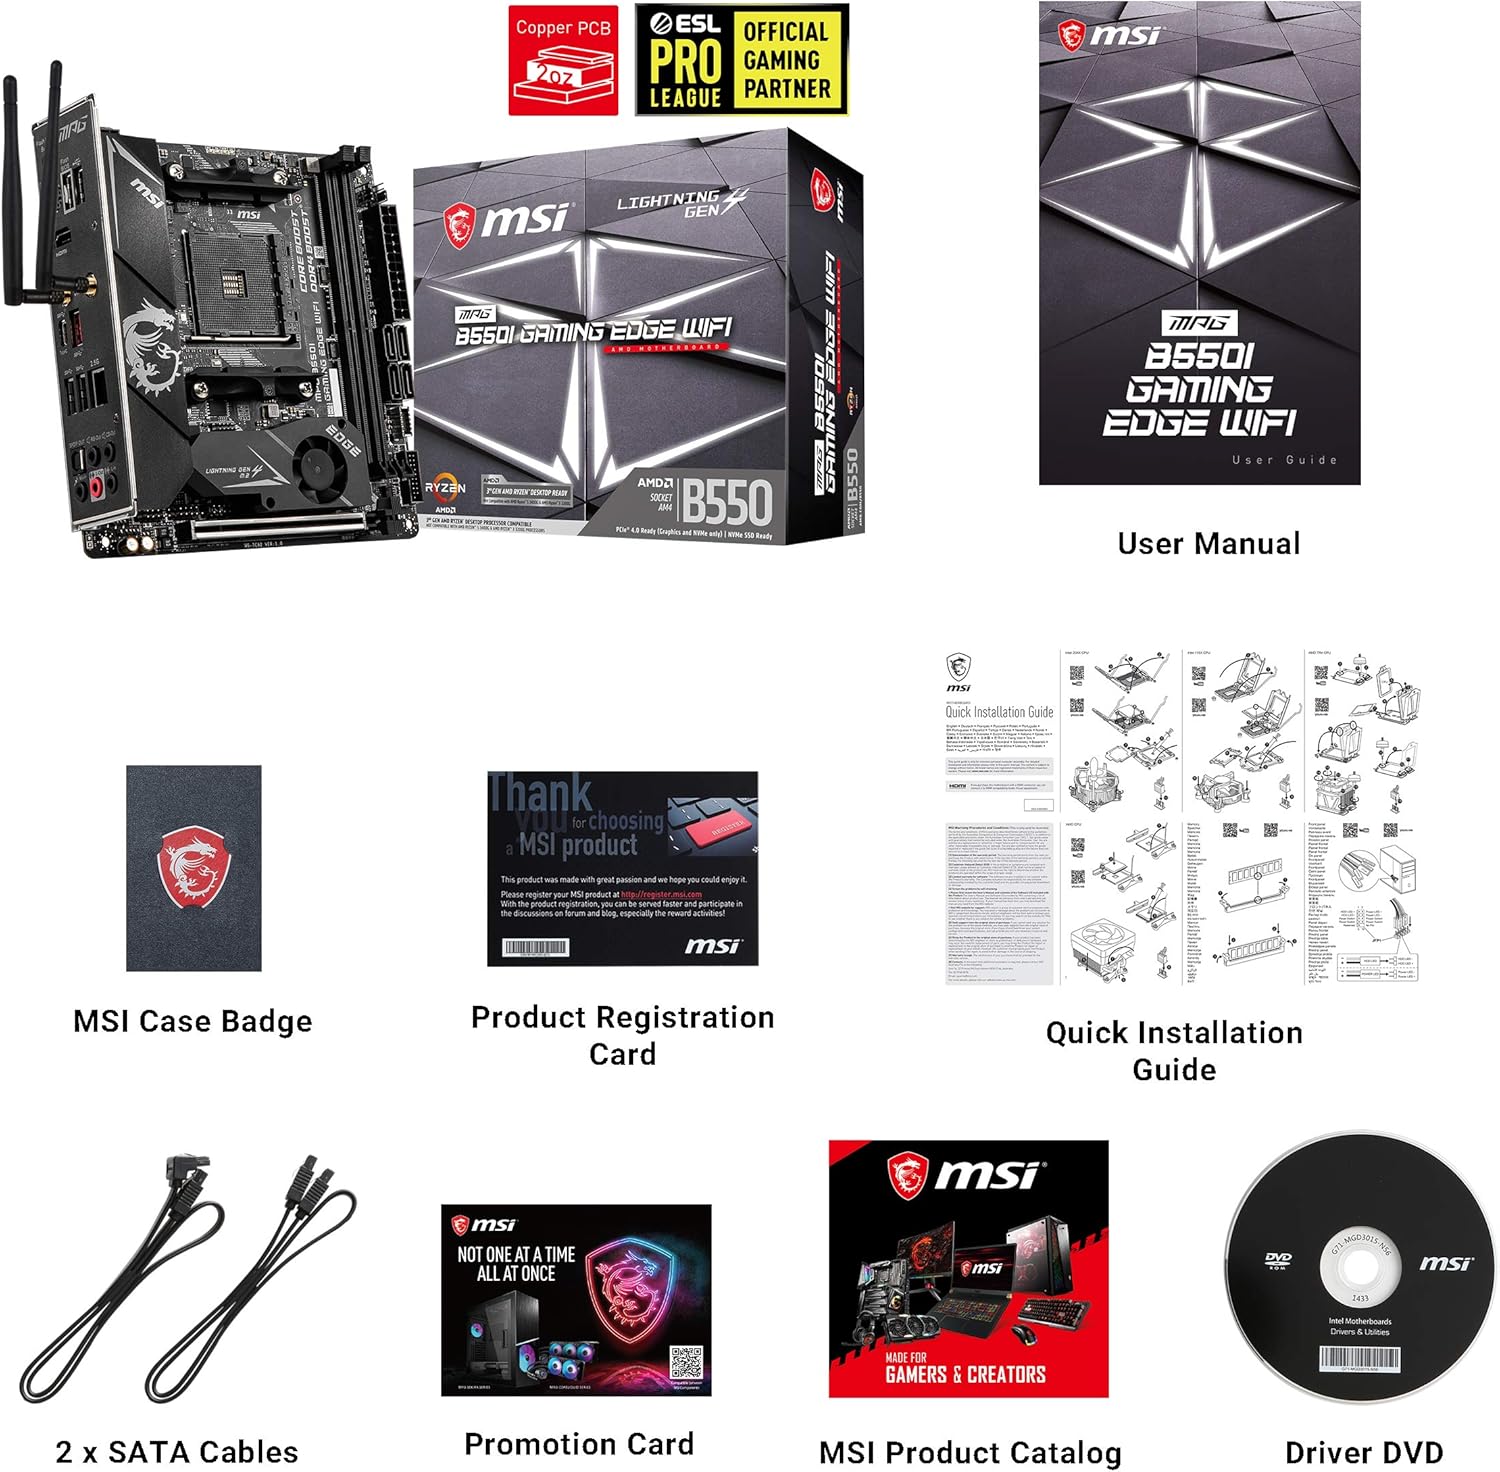
Figure 2.1: Typical package contents including motherboard, SATA cables, manuals, and driver DVD.
- MSI MPG B550 Gaming Plus V1 Motherboard
- CPU (AMD Ryzen AM4 compatible)
- CPU Cooler
- DDR4 RAM Modules
- Graphics Card (PCIe x16)
- Storage Devices (M.2 SSDs, SATA HDDs/SSDs)
- Power Supply Unit (PSU)
- PC Case
- Screwdriver, zip ties, anti-static wrist strap (recommended)
2.2 Physical Installation Steps
- Prepare the Case: Install the motherboard standoffs in your PC case according to the ATX form factor.
- Install the CPU: Carefully open the CPU socket lever, align the triangular mark on the CPU with the mark on the socket, and gently place the CPU into the socket. Close the lever to secure the CPU.
- Install the CPU Cooler: Follow the cooler manufacturer's instructions to install the CPU cooler. Ensure proper thermal paste application.
- Install RAM: Open the clips on the DDR4 memory slots. Align the notch on the RAM module with the key in the slot and press firmly until the clips snap into place. For dual-channel performance, refer to the motherboard manual for recommended slot configurations.
- Install M.2 SSDs: Locate the M.2 slots. Remove the M.2 Shield Frozr heatsink if present. Insert the M.2 SSD at an angle, then push it down and secure it with the provided screw. Reattach the M.2 Shield Frozr.
- Install Motherboard into Case: Carefully place the motherboard into the case, aligning the screw holes with the standoffs. Secure the motherboard with screws.
- Install Graphics Card/PCIe Devices: Insert your graphics card into the primary PCIe 4.0 x16 slot. Secure it with the case screw. Install any other PCIe expansion cards as needed.
- Connect Power Cables: Connect the 24-pin ATX main power connector and the 8-pin (or 4+4-pin) CPU power connector from your PSU to the motherboard. Connect SATA power cables to your storage devices.
- Connect Front Panel Cables: Connect the power switch, reset switch, HDD LED, and USB/audio headers from your case to the corresponding pins on the motherboard. Refer to the motherboard manual for pinout diagrams.
- Connect SATA Devices: Connect SATA data cables from your SATA storage devices to the SATA ports on the motherboard.
2.3 Rear I/O Panel Overview
The rear I/O panel provides various ports for connecting external devices:

Figure 2.2: Detailed view of the Rear I/O Panel.
- Flash BIOS Button: For updating BIOS without a CPU/RAM installed.
- USB 2.0 Ports: For connecting peripherals like keyboard and mouse.
- DisplayPort: Video output (requires compatible APU).
- PS/2 Combo Port: For legacy keyboard or mouse.
- HDMI Port: Video output (requires compatible APU).
- USB 3.2 Gen 1 5Gbps (Type-A) Ports: High-speed USB ports.
- 2.5G LAN Port: High-speed wired network connection.
- USB 3.2 Gen 2 10Gbps (Type-A) Ports: Ultra-high-speed USB ports.
- USB 3.2 Gen 2 10Gbps (Type-C) Port: Reversible USB-C port.
- Optical S/PDIF Out: Digital audio output.
- HD Audio Connectors: Analog audio input/output.
2.4 Initial BIOS Setup
Upon first boot, you may need to enter the BIOS/UEFI setup to configure settings or update the BIOS. For newer AMD Ryzen processors (e.g., Ryzen 5000 series), a BIOS update may be required for full compatibility and stability. Visit the official MSI website for the latest BIOS versions and instructions.
3. Operating Instructions
3.1 First Boot and OS Installation
After completing the physical installation, connect your monitor, keyboard, and mouse. Power on the system. If all components are correctly installed, the system should boot to the BIOS or prompt for an operating system installation. Install your preferred operating system (e.g., Windows 10) following its installation guide.
3.2 Driver Installation
Once the operating system is installed, install the necessary drivers for the motherboard components. These include chipset drivers, LAN drivers, audio drivers, and any other specific drivers for integrated peripherals. Drivers can be found on the included driver DVD or downloaded from the official MSI support website for your specific motherboard model.
3.3 Software Utilities
MSI provides various software utilities to enhance your experience:
- MSI Dragon Center: A comprehensive utility for system monitoring, performance tuning, fan control, and RGB lighting customization (Mystic Light).
- Mystic Light: Control the RGB LED lighting on the motherboard and compatible peripherals, offering 16.8 million colors and 29 effects.
- AMD Ryzen Master Utility: For advanced users, this utility allows for real-time monitoring and tuning of AMD Ryzen processors, including core optimization.
4. Maintenance
4.1 System Cleaning
Regular cleaning of your PC components is crucial for longevity and performance. Use compressed air to remove dust from heatsinks, fans, and other components. Ensure the system is powered off and unplugged before cleaning.
4.2 BIOS and Driver Updates
Periodically check the MSI support website for updated BIOS versions and drivers. BIOS updates can improve compatibility, stability, and performance, especially with new CPU releases. Driver updates ensure optimal performance and resolve potential issues with hardware components.
5. Troubleshooting
This section provides solutions to common issues you might encounter.
5.1 Common Issues and Solutions
- No Power/No Boot:
- Ensure all power cables (24-pin ATX, 8-pin CPU) are securely connected to the motherboard and PSU.
- Verify the power supply is switched on and the wall outlet is functional.
- Check front panel power switch connections to the motherboard.
- No Display:
- Ensure the monitor is connected to the graphics card (or motherboard if using an APU) and is powered on.
- Reseat the graphics card and RAM modules.
- If using an APU, ensure your monitor is connected to the motherboard's video output (HDMI/DisplayPort).
- System Instability/Crashes (e.g., during gaming):
- Check RAM compatibility and ensure it is seated correctly. Try running with one RAM stick to isolate issues.
- Ensure CPU cooler is properly installed and making good contact. Monitor CPU temperatures.
- Update BIOS and chipset drivers to the latest versions.
- For Ryzen processors, if experiencing reboots or instability, consider adjusting CPU core optimization settings in BIOS or using AMD Ryzen Master Utility. Some users have found stability by setting 'All Cores' to a positive offset (e.g., +10) in the Curve Optimizer if default settings cause issues.
- Peripheral Not Detected:
- Try a different USB port.
- Ensure necessary drivers for the peripheral are installed.
- Check BIOS settings for USB port enablement.
5.2 Contacting Support
If you encounter issues that cannot be resolved using the troubleshooting steps above, please contact MSI customer support or visit their official website for further assistance. Provide your motherboard model and a detailed description of the problem.
6. Specifications
Detailed technical specifications for the MSI MPG B550 Gaming Plus V1 Motherboard:
| Feature | Specification |
|---|---|
| Brand | MSI |
| Model | MPG B550 GAMING PLUS V1 |
| CPU Socket | Socket AM4 |
| Chipset Type | AMD B550 |
| Compatible Processors | AMD Ryzen 3rd Gen and future AMD Ryzen processors |
| RAM Memory Technology | DDR4 |
| Memory Slots Available | 4 |
| Max Memory Speed | Up to 4400 MHz (OC) |
| PCIe Version | PCIe 4.0 |
| M.2 Slots | 2 (Lightning Gen 4 M.2 with M.2 Shield Frozr) |
| USB Ports | USB 3.2 Gen 2 (10Gbps), USB 3.2 Gen 1 (5Gbps), USB 2.0 |
| LAN | 2.5G LAN |
| Video Output | HDMI, DisplayPort (requires compatible APU) |
| Form Factor | ATX |
| Item Weight | 3.74 pounds |
| Package Dimensions | 13.5 x 10.8 x 3.4 inches |
| Platform | Windows 10 |
| First Available | June 4, 2025 |
7. Warranty and Support
7.1 Product Warranty
MSI products typically come with a manufacturer's warranty. Please refer to the warranty card included in your product packaging or visit the official MSI website for detailed warranty terms and conditions specific to your region and product model. Keep your proof of purchase for warranty claims.
7.2 Technical Support
For technical assistance, driver downloads, BIOS updates, and FAQs, please visit the official MSI support website. You can also find contact information for customer service and technical support teams there.
MSI Official Website: www.msi.com
7.3 Protection Plans
Extended protection plans may be available for your product, offering additional coverage beyond the standard manufacturer's warranty. These plans can provide peace of mind against unexpected issues. Examples of such plans include:
- 3-Year Protection Plan
- 4-Year Protection Plan
- Complete Protect (monthly billing option)
Availability and terms of these plans may vary by retailer and region. Please consult with your point of purchase for details on available protection plans.


