
1. Introduction
This manual provides detailed instructions for the safe and efficient installation, operation, and maintenance of your ELIVED EV3421B Monitor Wall Mount. This heavy-duty monitor arm is designed to support ultrawide screens up to 43 inches and 15 kg, offering flexible adjustment and an ergonomic viewing experience.

Image 1.1: ELIVED EV3421B Monitor Wall Mount with a curved monitor attached, illustrating the product's design and included VESA plate adapters.
2. Safety Information
Please read all instructions carefully before installation and use. Keep this manual for future reference.
- Ensure the wall structure can safely support the combined weight of the mount and your monitor.
- Do not install on drywall alone. This mount is suitable for concrete, brick, and wood stud walls.
- Use only the provided hardware. If any parts are missing or damaged, contact ELIVED customer support.
- Do not overtighten screws during installation to prevent damage to the mount or wall.
- Keep children and pets away during installation.
- Always ensure the monitor is securely attached to the VESA plate before releasing it.
- Adjust the gas spring tension carefully to match your monitor's weight. Incorrect tension can cause the monitor to drop or spring up unexpectedly.
3. Package Contents
Verify that all components are present before beginning installation:
- 1 x ELIVED EV3421B Monitor Wall Mount Arm
- 1 x VESA Mounting Plate (pre-attached or separate)
- All necessary screws and tools for assembly
- Installation Instructions (this manual)
Note: Specific screw sizes and types are detailed in the installation section.
4. Specifications
| Feature | Specification |
|---|---|
| Model | EV3421B |
| Material | High-quality Steel + Gas Spring Mechanism |
| Color | Black |
| Screen Size Compatibility | 17-43 inches (including ultrawide and curved monitors) |
| Weight Capacity | 1-15 kg |
| VESA Compatibility | 75x75 mm, 100x100 mm, 200x100 mm, 200x200 mm |
| Tilt Angle | ±90° |
| Swivel Angle | 180° (at arm joints), 90° (at VESA plate) |
| Rotation | 360° (portrait to landscape) |
| Height Adjustment | 335 mm (via gas spring) |
| Distance from Wall | 104.5 mm (retracted) to 702.5 mm (extended) |
| Wall Compatibility | Concrete, Brick, Wood Studs (Not for drywall alone) |

Image 4.1: Overview of the ELIVED EV3421B monitor mount's universal compatibility, including supported monitor sizes, weight, and VESA standards.
5. Setup and Installation
Follow these steps carefully to install your ELIVED EV3421B Monitor Wall Mount.
5.1. Choose Your Wall Type
The mount is compatible with concrete, brick, and wood stud walls. It is not suitable for drywall installation without proper reinforcement.

Image 5.1: Wall compatibility guide for the ELIVED EV3421B mount, detailing suitable wall types and warning against drywall-only installation.
5.2. Prepare the Wall Plate
- Determine the desired height for your monitor. Mark the drilling points for the wall plate.
- Drill pilot holes according to your wall type and the provided hardware.
- Secure the wall plate to the wall using the appropriate screws and anchors. Ensure it is level and firmly attached.
5.3. Attach VESA Plate to Monitor
The ELIVED EV3421B supports VESA patterns 75x75 mm, 100x100 mm, 200x100 mm, and 200x200 mm.
- Identify the VESA mounting holes on the back of your monitor.
- Select the correct screws from the provided hardware kit that fit your monitor's VESA holes.
- Attach the VESA mounting plate to the back of your monitor. Do not overtighten.

Image 5.2: Supported VESA mounting patterns for the ELIVED EV3421B, demonstrating compatibility with various monitor types.
5.4. Mount Monitor to Arm
- Carefully slide the monitor (with the attached VESA plate) onto the arm's VESA head.
- Ensure the monitor is securely seated and engage any locking mechanisms if present.
- Tighten the security screw to prevent accidental dislodgement.
6. Operating Instructions and Adjustments
The ELIVED EV3421B offers extensive flexibility for optimal viewing comfort.
6.1. Height Adjustment (Gas Spring)
The gas spring mechanism allows for smooth, fingertip height adjustment over a range of 335 mm.
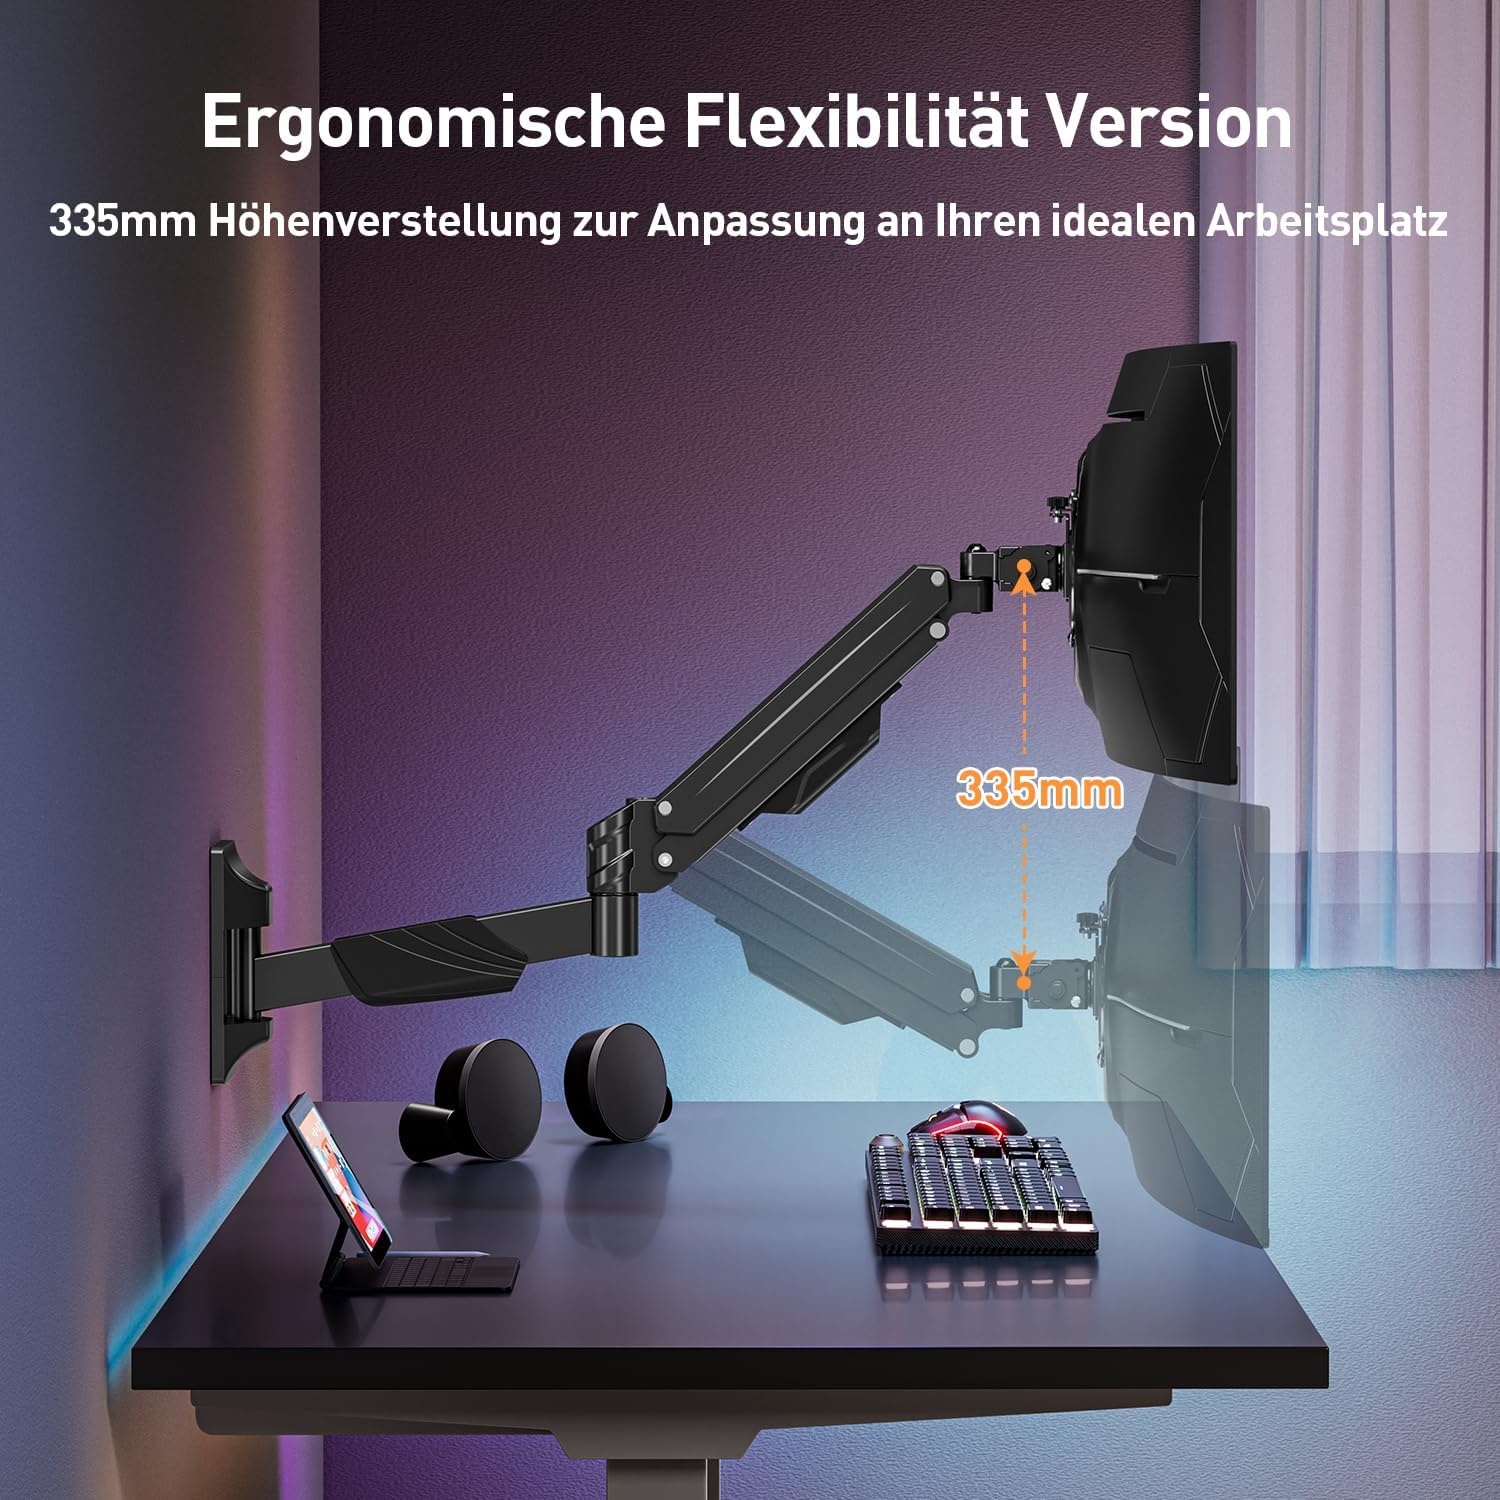
Image 6.1: Illustration of the 335mm height adjustment capability of the ELIVED EV3421B monitor arm.
6.2. Gas Spring Tension Adjustment
Adjust the gas spring tension to match your monitor's weight for stable positioning.
- If the monitor rises too easily or does not stay down: Turn the adjustment screw (usually located on the arm joint) clockwise ("+") to increase tension for a heavier monitor.
- If the monitor falls or is difficult to raise: Turn the adjustment screw counter-clockwise ("-") to decrease tension for a lighter monitor.
- Important: Keep the arm in a horizontal position while adjusting tension.

Image 6.2: Instructions for adjusting gas spring tension and monitor tilt on the ELIVED EV3421B mount.
6.3. Tilt Adjustment
The monitor can be tilted ±90° (up/down).
- Loosen the tilt screw (usually on the VESA plate connection) by turning it counter-clockwise ("-").
- Adjust the monitor to your desired tilt angle.
- Tighten the tilt screw by turning it clockwise ("+") to secure the position.
6.4. Swivel and Rotation
The arm allows for 180° swivel at the wall joint and 90° swivel at the monitor joint. The VESA plate allows for 360° rotation, enabling easy switching between landscape and portrait modes.

Image 6.3: Illustration of the extensive swivel and rotation capabilities of the ELIVED EV3421B monitor arm.

Image 6.4: Detailed view of the ELIVED EV3421B's extension range (104.5mm to 702.5mm) and tilt adjustment.
6.5. Cable Management
Integrated cable management channels within the arm help keep your workspace tidy and organized. Route your monitor cables through these channels for a clean setup.

Image 6.5: The ELIVED EV3421B mount in use, illustrating its space-saving design and cable management features.
7. Maintenance
- Regularly check all screws and connections to ensure they remain tight and secure.
- Clean the mount with a soft, damp cloth. Avoid abrasive cleaners or solvents.
- Do not lubricate the gas spring mechanism.
8. Troubleshooting
| Problem | Possible Cause | Solution |
|---|---|---|
| Monitor does not stay at desired height or drifts down. | Gas spring tension is too low for monitor weight. | Increase gas spring tension by turning the adjustment screw clockwise ("+"). Refer to Section 6.2. |
| Monitor springs up too easily or is difficult to push down. | Gas spring tension is too high for monitor weight. | Decrease gas spring tension by turning the adjustment screw counter-clockwise ("-"). Refer to Section 6.2. |
| Monitor tilts freely or does not hold tilt angle. | Tilt screw is loose. | Tighten the tilt screw. Refer to Section 6.3. |
| Mount feels unstable on the wall. | Wall plate not securely fastened or incorrect wall type. | Re-check wall plate installation. Ensure all screws are tight and the wall type is appropriate. Consult a professional if unsure. Refer to Section 5.1. |
9. Warranty and Support
ELIVED products are manufactured with quality and durability in mind. While specific warranty details are not provided in this manual, please retain your proof of purchase. For any questions, technical assistance, or to report missing/damaged parts, please contact ELIVED customer support through your retailer or the official ELIVED website.
For further assistance, please visit the ELIVED Brand Store on Amazon.

