
1. Introduction
This manual provides essential information for the safe and efficient operation of your Stariver 7L Electric Hot Pot with Divider, Model U31A. This appliance is designed for various cooking methods, including hot pot, shabu shabu, stewing, and sautéing, featuring a dual-compartment design with independent temperature controls.
2. Important Safety Instructions
When using electrical appliances, basic safety precautions should always be followed to reduce the risk of fire, electric shock, and injury.
- Read all instructions before use.
- Do not touch hot surfaces. Use handles or knobs.
- To protect against electrical shock, do not immerse the cord, plugs, or the main unit in water or other liquid.
- Close supervision is necessary when any appliance is used by or near children.
- Unplug from outlet when not in use and before cleaning. Allow to cool before putting on or taking off parts, and before cleaning the appliance.
- Do not operate any appliance with a damaged cord or plug, or after the appliance malfunctions or has been damaged in any manner. Contact customer support for assistance.
- The use of accessory attachments not recommended by the appliance manufacturer may cause injuries.
- Do not use outdoors.
- Do not let the cord hang over the edge of a table or counter, or touch hot surfaces.
- Do not place on or near a hot gas or electric burner, or in a heated oven.
- Extreme caution must be used when moving an appliance containing hot oil or other hot liquids.
- Always attach the plug to the appliance first, then plug the cord into the wall outlet. To disconnect, turn any control to "OFF", then remove the plug from the wall outlet.
- Do not use the appliance for other than intended use.
- Ensure the appliance is placed on a stable, heat-resistant surface during operation.
- The appliance features automatic overheat protection. If the unit overheats, it may temporarily shut off. Allow it to cool before resuming operation.
3. Product Overview
3.1 Components
The Stariver Electric Hot Pot consists of the following main components:
- Main Pot Unit: Features a 7-liter capacity with a built-in, one-piece molded divider creating two independent cooking zones. The interior has a non-stick coating.
- Control Panel: Located on the front of the main unit, it includes two independent rotary knobs for temperature control of each zone.
- Transparent Glass Lid: Allows monitoring of cooking progress.
- Detachable Power Cord: For connecting the appliance to a power source.
3.2 Features
- 7-Liter Capacity: Suitable for preparing meals for groups of various sizes.
- Dual-Independent Control: Two separate control knobs allow for individual temperature settings for each compartment (300W/600W).
- One-Piece Molded Divider: Ensures no flavor transfer between the two cooking zones.
- Non-Stick Coating: Facilitates cooking and simplifies cleaning.
- 1200W Power: Provides efficient and rapid heating.
- Automatic Overheat Protection: Enhances safety during operation.
- Stable Base: Equipped with non-slip rubberized feet for stability.
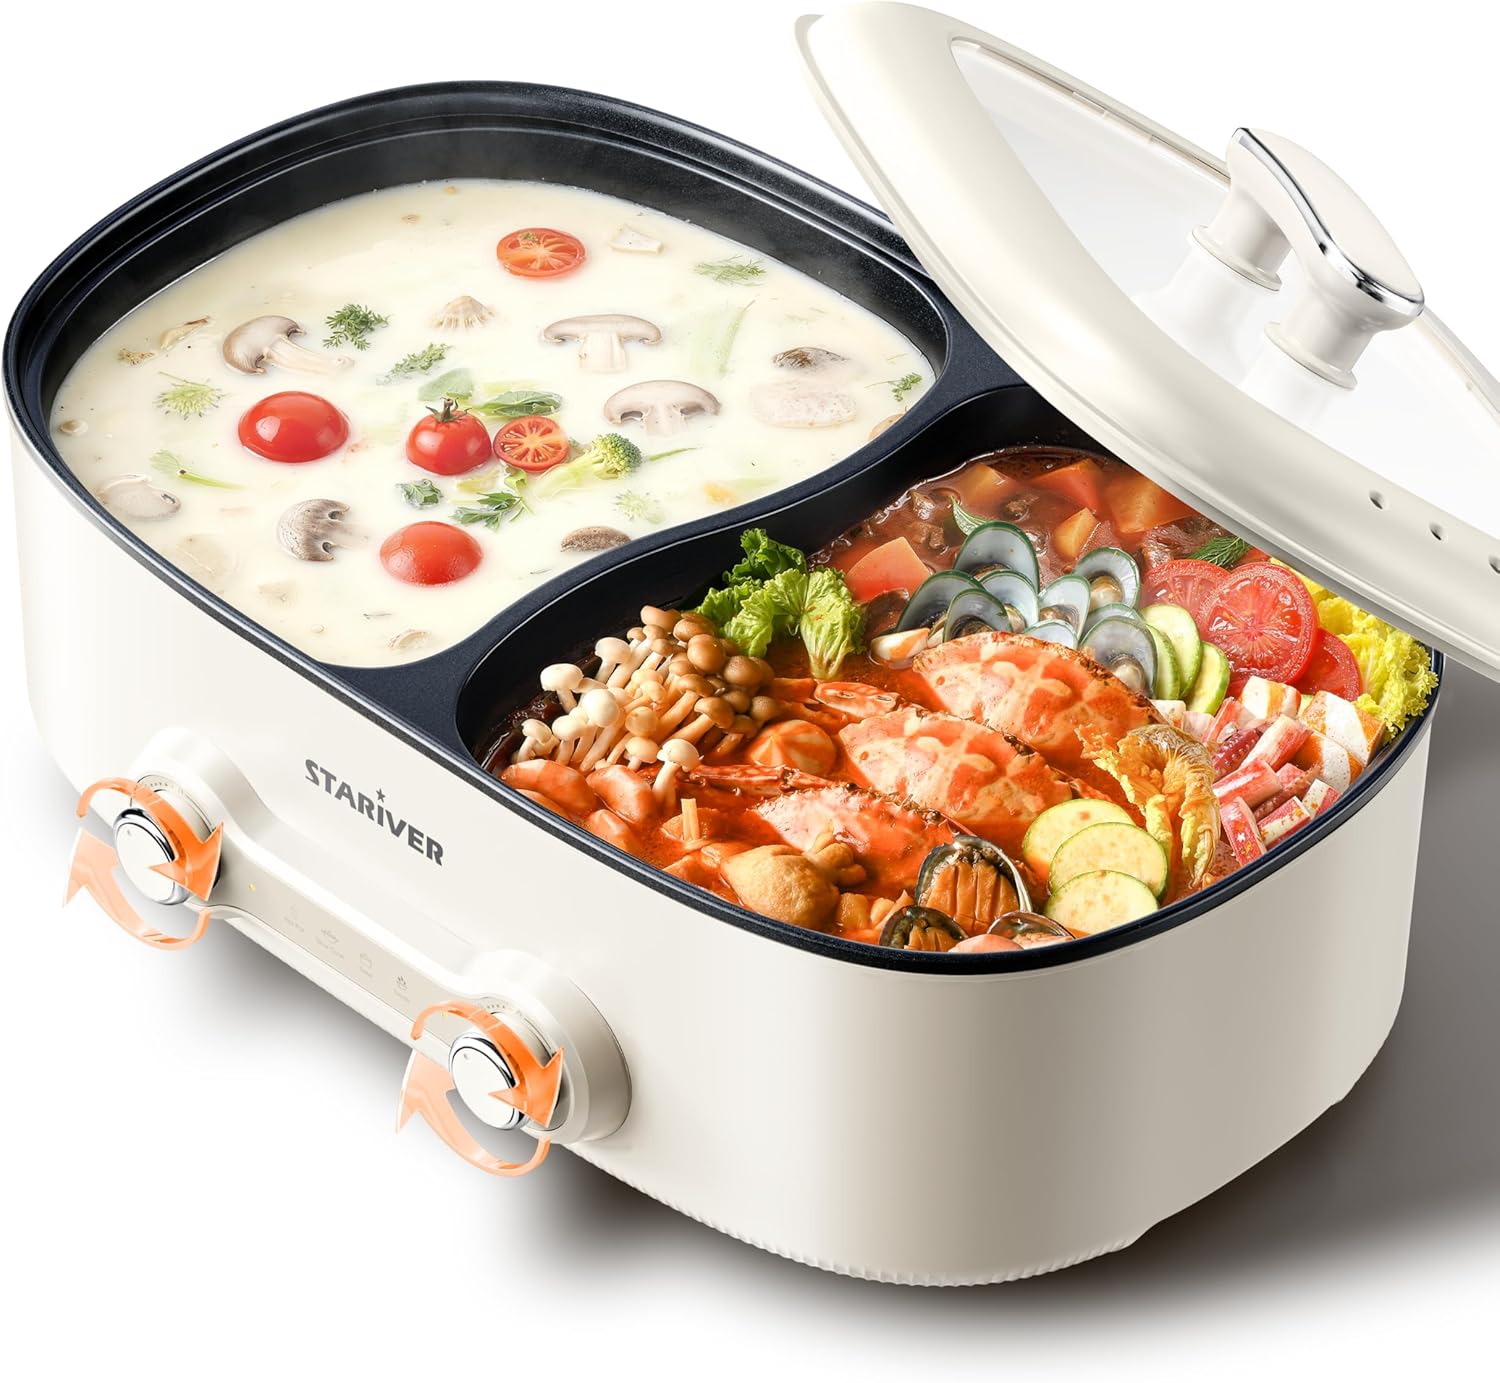
Figure 1: Stariver 7L Electric Hot Pot with Divider. This image displays the Stariver 7L Electric Hot Pot, showcasing its dual compartments filled with various ingredients for hot pot cooking. One side contains a creamy broth with mushrooms and tomatoes, while the other holds a spicier broth with seafood and vegetables. The transparent lid is partially open, revealing the contents.

Figure 2: Dual Knob Control System. This diagram highlights the dual knob control feature of the Stariver Electric Hot Pot. It shows two independent control knobs, one for each cooking zone, allowing separate temperature adjustments. The diagram also indicates the maximum power of 1200W and the low (300W) and high (600W) settings for each side.

Figure 3: Seamless One-Piece Molded Interior. This image provides a close-up of the hot pot's interior, emphasizing its seamless one-piece molded design. This construction eliminates crevices, contributing to easier cleaning and preventing food from getting stuck.
4. Setup
- Unpacking: Carefully remove all components from the packaging. Retain packaging materials for future storage or transport.
- Initial Cleaning: Before first use, wash the interior of the pot and the glass lid with warm, soapy water. Rinse thoroughly and dry completely. Do not immerse the main unit in water.
- Lid Assembly: If the lid handle is not pre-assembled, attach it to the glass lid using the provided screws and screwdriver. Ensure it is securely fastened.
- Placement: Place the hot pot on a stable, flat, and heat-resistant surface, away from flammable materials. Ensure adequate ventilation around the appliance.
- Power Connection: Insert the detachable power cord into the power inlet on the appliance. Then, plug the other end into a standard electrical outlet. Ensure the control knobs are in the "OFF" position before plugging in.
5. Operating Instructions
- Prepare Ingredients: Cut and prepare all ingredients for your hot pot, shabu shabu, stew, or sauté dishes.
- Fill the Pot: Add liquids (broth, water) and desired ingredients into the two separate compartments. Do not overfill; ensure the liquid level is below the rim to prevent boiling over.
- Secure the Lid: Place the transparent glass lid securely on the pot.
- Power On: Plug the detachable power cord into a suitable electrical outlet.
- Select Temperature: Turn the independent control knobs for each side to your desired setting. The appliance offers two power settings per side: Low (300W) for simmering or keeping warm, and High (600W) for rapid boiling or sautéing. The control panel also features icons for "Hot Pot", "Slow Cook", "Stew", and "Saute" to guide your selection.
- Cooking: Allow the pot to heat up. The 1200W system heats quickly. Adjust the temperature as needed during cooking. The dual compartments allow for simultaneous preparation of different dishes or broths, such as a spicy broth on one side and a mild broth on the other, or searing meat on the high setting while simmering vegetables on the low setting.
- Serving: Use appropriate utensils to serve food from the hot pot.
- Power Off: After cooking, turn both control knobs to the "OFF" position and unplug the appliance from the wall outlet.

Figure 4: Versatile Use for Various Group Sizes. This image illustrates the flexibility of the Stariver Electric Hot Pot, showing it in use for both a larger group gathering and a single-person meal, highlighting its adaptability.
6. Maintenance and Cleaning
Proper maintenance ensures the longevity and optimal performance of your Stariver Electric Hot Pot.
- Cool Down: Always allow the appliance to cool completely before cleaning.
- Unplug: Ensure the power cord is unplugged from the wall outlet and the appliance before cleaning.
- Cleaning the Pot: The non-stick interior can be cleaned with a soft sponge, warm water, and mild dish soap. Due to its one-piece molded construction, there are no hard-to-reach crevices. Avoid using abrasive cleaners, scouring pads, or metal utensils, as these can damage the non-stick coating. Do not immerse the main unit in water.
- Cleaning the Lid: The glass lid can be washed with warm, soapy water and rinsed thoroughly.
- Exterior Cleaning: Wipe the exterior of the appliance with a damp cloth. The glossy finish is designed to resist fingerprints and stains.
- Drying: Ensure all parts are completely dry before storing or next use.
- Storage: Store the clean and dry appliance in a cool, dry place. The detachable power cord can be stored separately for convenience.

Figure 5: Hassle-Free Features. This image collage illustrates several user-friendly features. It shows the transparent glass lid, the multi-vent heat dissipation system on the base, the detachable power cord for convenient storage, and a hand cleaning the non-stick interior under a faucet, demonstrating effortless cleaning.
7. Troubleshooting
If you encounter issues with your Stariver Electric Hot Pot, refer to the following common problems and solutions:
| Problem | Possible Cause | Solution |
|---|---|---|
| Appliance does not turn on. | Power cord not properly connected or no power from outlet. | Ensure the power cord is securely plugged into both the appliance and a working electrical outlet. Check the circuit breaker. |
| Uneven heating or food not cooking thoroughly. | Insufficient liquid, overcrowding of ingredients, or localized heating. | Ensure adequate liquid levels. Avoid overcrowding the pot; cook in batches if necessary. Stir ingredients periodically to promote even cooking. |
| Food sticking to the bottom. | Non-stick coating damaged or insufficient oil/liquid. | Ensure the non-stick coating is not scratched. Use a small amount of cooking oil or sufficient liquid. Avoid using metal utensils. |
| Appliance suddenly stops heating. | Overheat protection activated. | Unplug the appliance and allow it to cool down completely (approximately 30 minutes). Check for any blockages in the ventilation. Plug back in and resume operation. |
8. Specifications
- Brand: Stariver
- Model Number: U31A
- Capacity: 7 Liters (3.5 Liters per zone)
- Material: Non-Stick
- Color: Beige
- Finish Type: Non-Stick
- Product Dimensions: 10.43"D x 14.49"W x 6.5"H
- Special Feature: Dual-Independent Control
- Control Method: Push Button (Rotary Knobs)
- Operation Mode: Manual
- Item Weight: 5.99 pounds
- Power: 1200W (300W/600W per side)
9. Warranty and Support
For information regarding the product warranty, please refer to the warranty card included with your purchase or visit the official Stariver website. If you require technical support, have questions about operation, or need assistance with troubleshooting beyond what is covered in this manual, please contact Stariver customer service through the contact information provided on your purchase documentation or the manufacturer's website.