
BLUETTI Elite 200 V2
BLUETTI Elite 200 V2 Solar Generator User Manual
Model: Elite 200 V2
Includes 200W Solar Panel and Charger 1
Introduction
The BLUETTI Elite 200 V2 is a versatile and powerful portable power station designed to provide reliable energy for various applications, including RV trips, camping, and emergency home backup. Featuring a robust LiFePO4 battery, it offers exceptional durability and a long lifespan. This manual provides essential information for the safe and efficient use of your BLUETTI Elite 200 V2, 200W Solar Panel, and Charger 1.
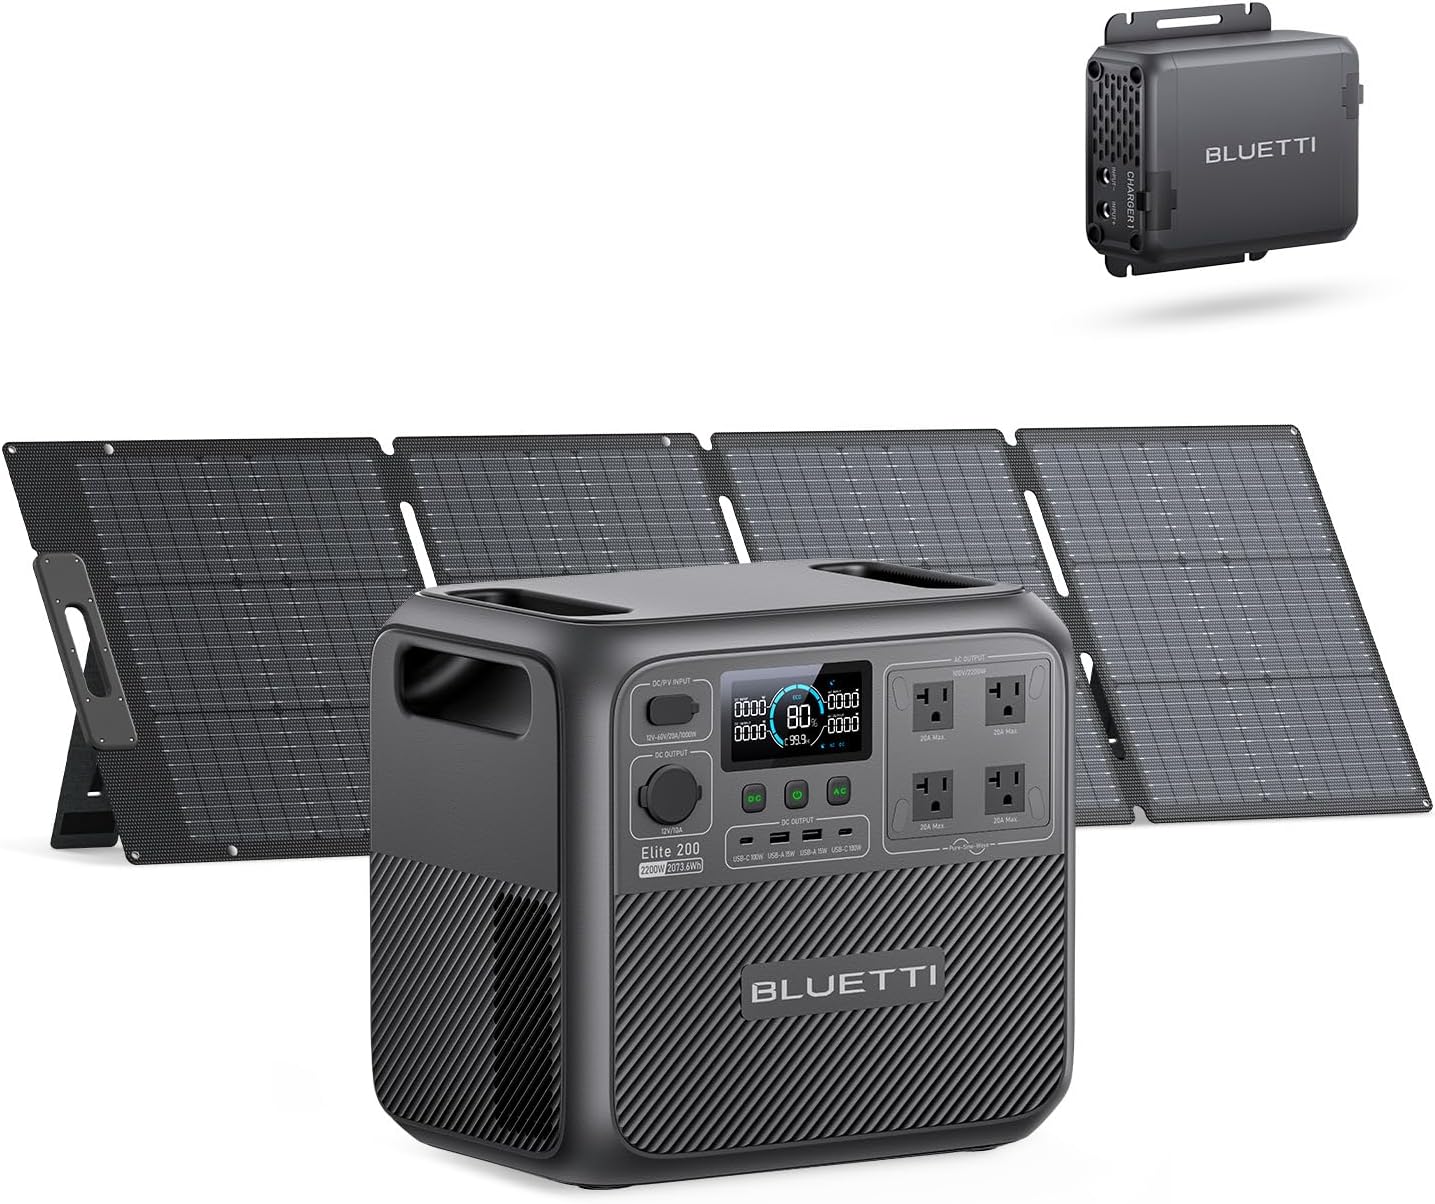
Figure 1: BLUETTI Elite 200 V2 Power Station with Solar Panels and Charger 1
The BLUETTI Elite 200 V2 portable power station, shown here with its accompanying 200W solar panels and Charger 1, is designed for efficient and reliable power generation and storage. This comprehensive kit ensures you have power wherever and whenever you need it.
What's Included
Please verify that all components are present upon unboxing:
- BLUETTI Elite 200 V2 Power Station
- 200W Solar Panel
- Charger 1
- 6AWG DC Input Cable (ships separately)
- AC Charging Cable
- Solar Charging Cable
- Car Charging Cable
- User Manual (this document)
Setup Guide
Follow these steps to set up your BLUETTI Elite 200 V2 and Charger 1 for optimal performance.
1. Prepare Your Installation
Ensure you have all necessary components and tools before beginning the installation process. All accessories shown are included.

Figure 2: Installation Components
This image displays the BLUETTI Charger 1 unit, various cables including the 6AWG DC input cable, and tools required for installation. Ensure all these items are accounted for before proceeding.
2. Connect to Charger 1
Connect the necessary cables to the Charger 1 unit.
- Switch off the circuit breaker on the 6AWG DC input cable.
- Connect the 6AWG input cable and the MC4 output cable to the Charger 1.
- Connect the output cable to your power station via a solar charging cable.

Figure 3: Connecting Cables to Charger 1
This image shows the process of connecting the 6AWG DC Input Cable and the MC4 Output Cable to the BLUETTI Charger 1, which then connects to the power station.
3. Connect to Car Battery
Connect the Charger 1 to your vehicle's battery.
- Run the input cable through your car to the car battery.
- Attach the cable to the car battery terminals: red to the positive (+), black to the negative (-).

Figure 4: Connecting to Car Battery
This image illustrates the proper connection of the Charger 1 cables to a car battery, with the red cable connected to the positive terminal and the black cable to the negative terminal.
4. Start Charging
Initiate charging and secure the Charger 1.
- Switch on the circuit breaker. Set the proper voltage before turning on the Charger 1 on the BLUETTI App.
- Find a place to secure the Charger 1 properly within your vehicle.

Figure 5: Initiating Charging via BLUETTI App
This image shows the BLUETTI power station and Charger 1 set up in a truck bed, with a smartphone screen demonstrating the BLUETTI app's interface for controlling and monitoring the charging process.
Operating Instructions
The BLUETTI Elite 200 V2 offers multiple charging methods and versatile power output options for various devices.
Charging Your Power Station
The Elite 200 V2 can be recharged efficiently using AC power, solar panels, or the included Charger 1 via your car's electrical system.
- AC Charging: Fully recharge the 2073.6Wh power station in approximately 4.2 hours using the Charger 1.
- Solar Charging: Utilize the 200W solar panel to fully recharge the power station in about 7 hours under optimal sunlight conditions.
- Car Charging (with Charger 1): The Charger 1 provides up to 560W max input, significantly faster than a standard car cigarette lighter charger (96W max). This allows for rapid charging on the go.
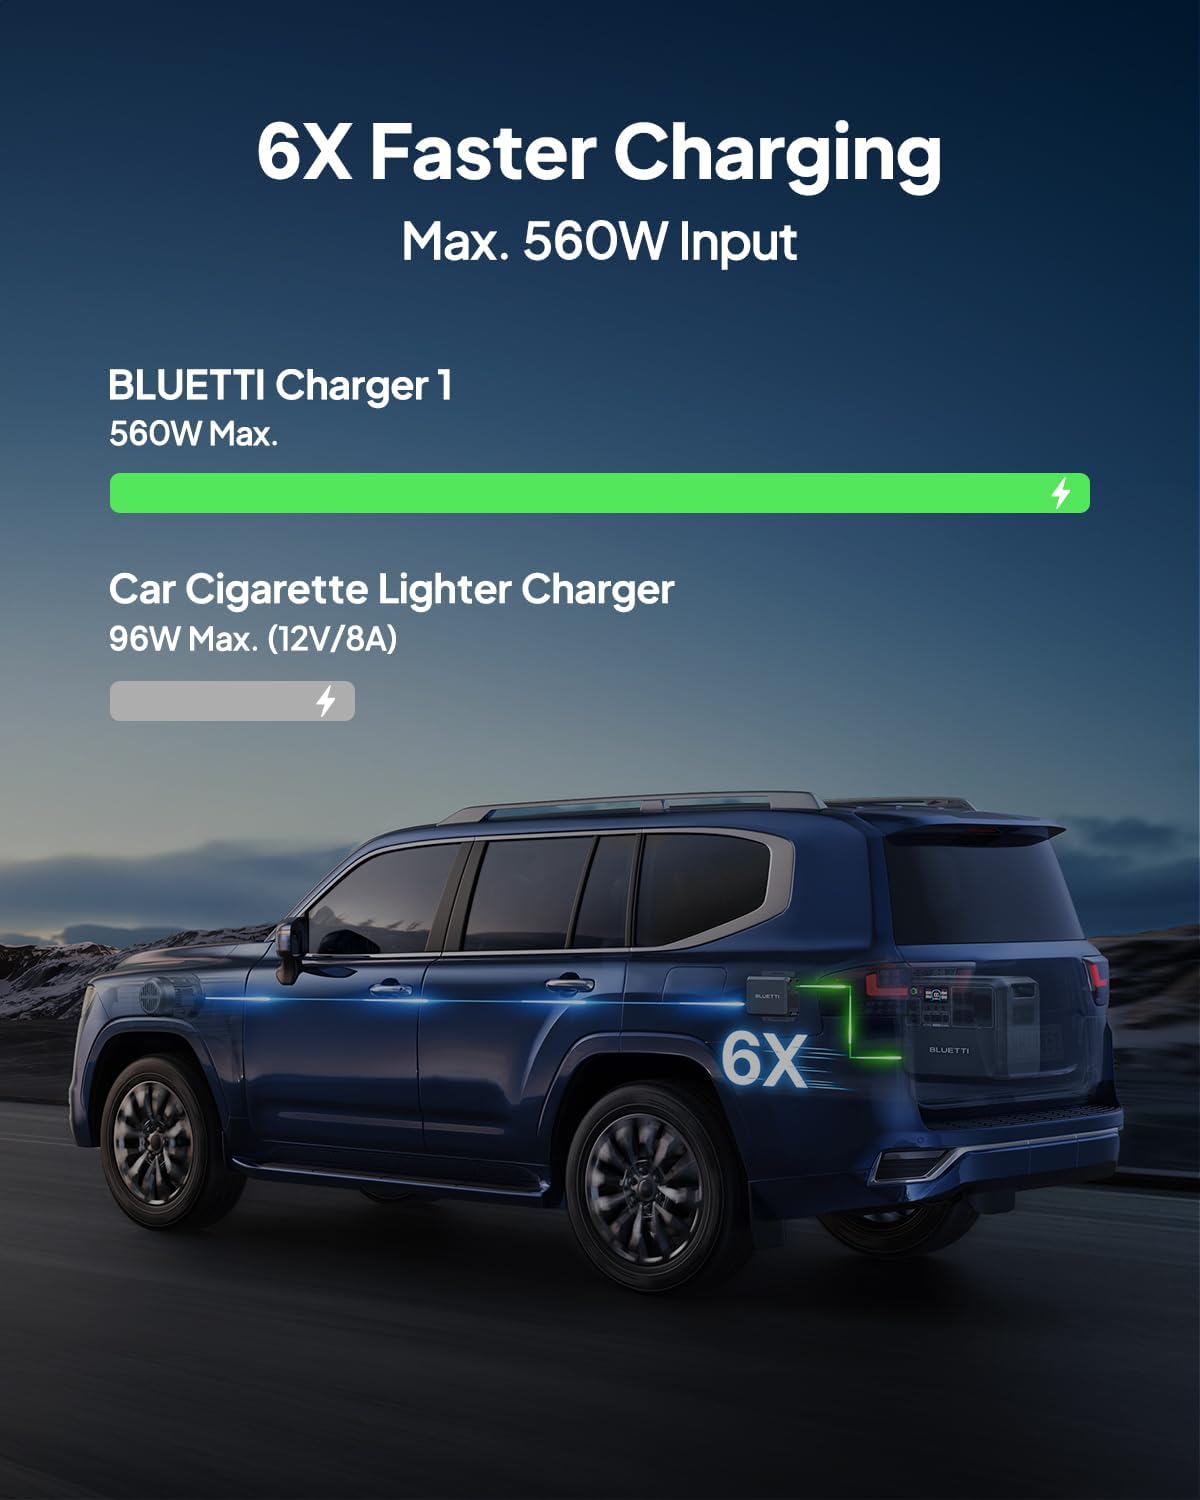
Figure 6: Faster Car Charging with Charger 1
This graphic highlights the significant speed advantage of using the BLUETTI Charger 1 for in-vehicle charging compared to a traditional car cigarette lighter adapter.
Video: BLUETTI Charger 1 - Road Trip Charging Buddy (0:32)
This video demonstrates the BLUETTI Charger 1 in action, showcasing its utility for charging your power station during road trips, ensuring continuous power availability.
Powering Your Devices
With a 2073.6Wh capacity and 2600W (5200W peak) AC output, the Elite 200 V2 can power up to 9 devices simultaneously. It is ideal for a wide range of electronics and appliances.
- Outputs: 1x Car Port (120W), 2x USB-C (100W), 2x USB-A (15W), 4x AC Outputs (2600W).
- Typical Usage Examples: Powers laptops for 21.8 times (60Wh), runs a 40W fan for 31.7 hours, boils a 1000W kettle for 1.6 hours, or operates a 3000W griddle for 0.5 hours.
- Power Lifting Mode: Provides up to 3900W for pure resistive loads like kettles, electric blankets, and hair dryers.

Figure 7: All-in-One Power Station Capabilities
This image highlights the BLUETTI Elite 200 V2's substantial capacity and output, demonstrating its ability to power various devices for extended periods, from laptops to kitchen appliances.
BLUETTI App Control
The upgraded BLUETTI App offers intuitive control and real-time power insights, allowing you to monitor energy usage, adjust settings, and optimize performance directly from your smartphone.

Figure 8: BLUETTI App Interface
This image shows the BLUETTI mobile application, which provides detailed energy statistics, real-time status updates, and various working mode controls for your power station.
Maintenance
Proper maintenance ensures the longevity and optimal performance of your BLUETTI Elite 200 V2.
- Storage: If storing for extended periods, recharge the unit to 50-80% every 3-6 months to preserve battery health. Store in a cool, dry place away from direct sunlight and extreme temperatures.
- Cleaning: Use a dry, soft cloth to wipe the exterior of the unit. Do not use harsh chemicals or abrasive materials. Ensure all ports are free of dust and debris.
- Battery Care: The Elite 200 V2 features automotive-grade LiFePO4 batteries with 6000+ cycles, offering a 17-year lifespan. Avoid fully discharging the battery frequently to maximize its lifespan.
- Ventilation: Ensure proper ventilation around the unit during operation and charging to prevent overheating. The built-in fan provides active cooling.

Figure 9: LiFePO4 Battery Lifespan
This diagram emphasizes the exceptional durability and long cycle life of the LiFePO4 battery technology used in the BLUETTI Elite 200 V2, contributing to its extended operational lifespan.
Troubleshooting
This section addresses common issues you might encounter with your BLUETTI Elite 200 V2.
| Problem | Possible Cause | Solution |
|---|---|---|
| Unit not turning on | Battery fully discharged; Power button not pressed correctly; Internal fault. | Charge the unit; Press and hold the power button for 3 seconds; Contact customer support. |
| AC output not working | AC output not enabled; Overload protection triggered; Inverter fault. | Enable AC output on the display/app; Reduce load; Restart unit; Contact customer support. |
| Solar charging not working | Incorrect solar panel connection; Insufficient sunlight; MPPT controller fault. | Check solar cable connections (MC4); Ensure panels are in direct sunlight and angled correctly; Contact customer support. |
| Charger 1 not charging from car | Circuit breaker off; Incorrect wiring to car battery; Car battery voltage too low; Alternator not active. | Switch on circuit breaker; Verify positive/negative connections; Ensure car engine is running; Check car battery health. |
| App connection issues | Bluetooth/Wi-Fi off; App not updated; Unit not in pairing mode. | Ensure Bluetooth/Wi-Fi is on; Update BLUETTI App; Follow app instructions for pairing. |
For issues not listed here or if solutions do not resolve the problem, please contact BLUETTI customer support.

Figure 10: Comprehensive Protection System
The BLUETTI Elite 200 V2 is equipped with multiple layers of protection, including safeguards against short-circuits, reverse polarity, undervoltage, and over-temperature, ensuring safe operation.
Specifications
| Feature | Detail |
|---|---|
| Brand | BLUETTI |
| Model Name | BLUETTI Elite 200 V2+200W+Charger 1 |
| Item Model Number | Elite 200 V2 |
| Wattage | 2073.6 Watt-hours |
| AC Output | 2600W (5200W Peak) |
| Power Lifting Mode | 3900W |
| Voltage | 110 Volts (AC) |
| Battery Type | Automotive-Grade LiFePO4 |
| Battery Cycles | 6000+ cycles to 80% capacity |
| Lifespan | Approx. 17 years (based on 1 cycle/day) |
| Power Source | Solar Powered, AC, Car |
| Item Weight | 53.4 Pounds |
| Product Dimensions | 13.8"L x 9.8"W x 12.7"H |
| Special Feature | Quiet Operation, App Control, UPS Functionality (<15ms switching) |
| Included Components | Power station, solar panel, Charger 1, AC/Solar/Car charging cables, user manual |
Warranty and Support
BLUETTI stands behind the quality of its products. The BLUETTI Elite 200 V2 comes with a 5-year coverage, ensuring peace of mind for your investment.
Customer Support
For any questions, technical assistance, or warranty claims, please contact BLUETTI customer service. Our widespread sales and after-service networks are ready to assist you.
Please refer to the official BLUETTI website or your purchase documentation for the most up-to-date contact information.
Related documentsElite 200 V2


Ask a question about this manual
Ask about setup, troubleshooting, compatibility, parts, safety, or missing instructions. Manuals+ will review the question and use this page’s manual context to help answer it.