
1. Safety Instructions
Read all instructions carefully before operating the Newhai Jewelry Rolling Mill Machine. Failure to follow these instructions may result in injury or damage to the machine.
- Always wear appropriate personal protective equipment, including safety glasses and gloves, to prevent injury from moving parts or metal shards.
- Ensure the machine is securely mounted to a workbench before use to prevent tipping or movement during operation. Pre-drilled screw holes on the base are provided for this purpose.
- Keep hands and loose clothing away from the rollers and gears while the machine is in operation.
- Do not attempt to roll materials thicker than the specified maximum thickness (7mm).
- Only use the machine for cold-rolling high-ductility metals such as gold, silver, copper, and aluminum. Do not attempt to roll hardened or brittle materials.
- Regularly inspect the machine for any signs of damage or wear. Do not operate if any parts are damaged.
- Keep children and unauthorized personnel away from the machine during operation.
- Ensure the work area is well-lit and free from obstructions.
Important Safety Note:
Always wear gloves to avoid potential injuries. Regularly inspect and lubricate moving parts.
2. Package Contents
Verify that all components are present and undamaged upon unpacking.
- Newhai Jewelry Rolling Mill Machine (Main Unit)
- 3 Sets of Rollers (Flat, Square, Semi-circular)
- T-shaped Lever (Crank Handle)
- Screwdriver
- Gaskets
- Polishing and Buffing Tools (as included)
- Instruction Manual

Image: Package contents including the rolling mill, various rollers, T-shaped lever, and other tools.
3. Setup and Installation
The Newhai Jewelry Rolling Mill Machine is designed for simple and smooth installation.
- Unpack Components: Carefully remove all items from the packaging and verify against the package contents list.
- Secure Mounting: Place the rolling mill on a sturdy workbench. Use the pre-drilled screw holes on the base to securely fix the machine to the workbench using appropriate fasteners (not included). This ensures stability during operation.
- Install Crank Handle: Attach the T-shaped lever (crank handle) to the designated shaft on the side of the machine. Ensure it is securely fastened.
- Roller Selection and Installation: The machine comes with 3 sets of rollers (flat, square, semi-circular).
- To change rollers, use a screwdriver to loosen the retaining screws and remove the current rollers.
- Select the desired roller set for your task (e.g., flat for sheets, square for wires, semi-circular for half-round shapes).
- Insert the new rollers and secure them with the screws and gaskets. Ensure they are properly aligned and seated.
- Initial Adjustment: Before first use, rotate the T-bar (thickness adjustable gear) to ensure the rollers move smoothly. Adjust the gap between the rollers to a wider setting initially.

Image: Visual guide for installing the T-bar and crank handle, highlighting the ease of assembly.
4. Operating Instructions
This section details how to effectively use your Newhai Jewelry Rolling Mill Machine for various metalworking tasks.
4.1. Understanding the 3-in-1 Roller System
The machine features three types of rolling areas to accommodate different metal shapes:
- Semi-circular Rollers: Provides 9 sizes (2-10mm) for creating half-round wires or shapes.
- Flat Rolling Area: A 75mm wide area for creating metal sheets.
- Square Rollers: Offers 7 sizes (1-6mm) for producing square wires.

Image: The 3-in-1 roller system showing semi-circular, flat, and square rolling capabilities.
4.2. Adjusting Thickness
The rolling thickness can be adjusted from 0.1mm to 7mm using the T-shaped lever.
- Initial Setting: Begin with a wider roller gap than your material's current thickness.
- Adjusting the T-bar: Rotate the T-shaped lever (thickness adjustable gear) clockwise to decrease the gap between the rollers (thinner material) or counter-clockwise to increase the gap (thicker material). Make small adjustments.
- Precision Control: The ergonomic T-bar design allows for precise adjustments in seconds.
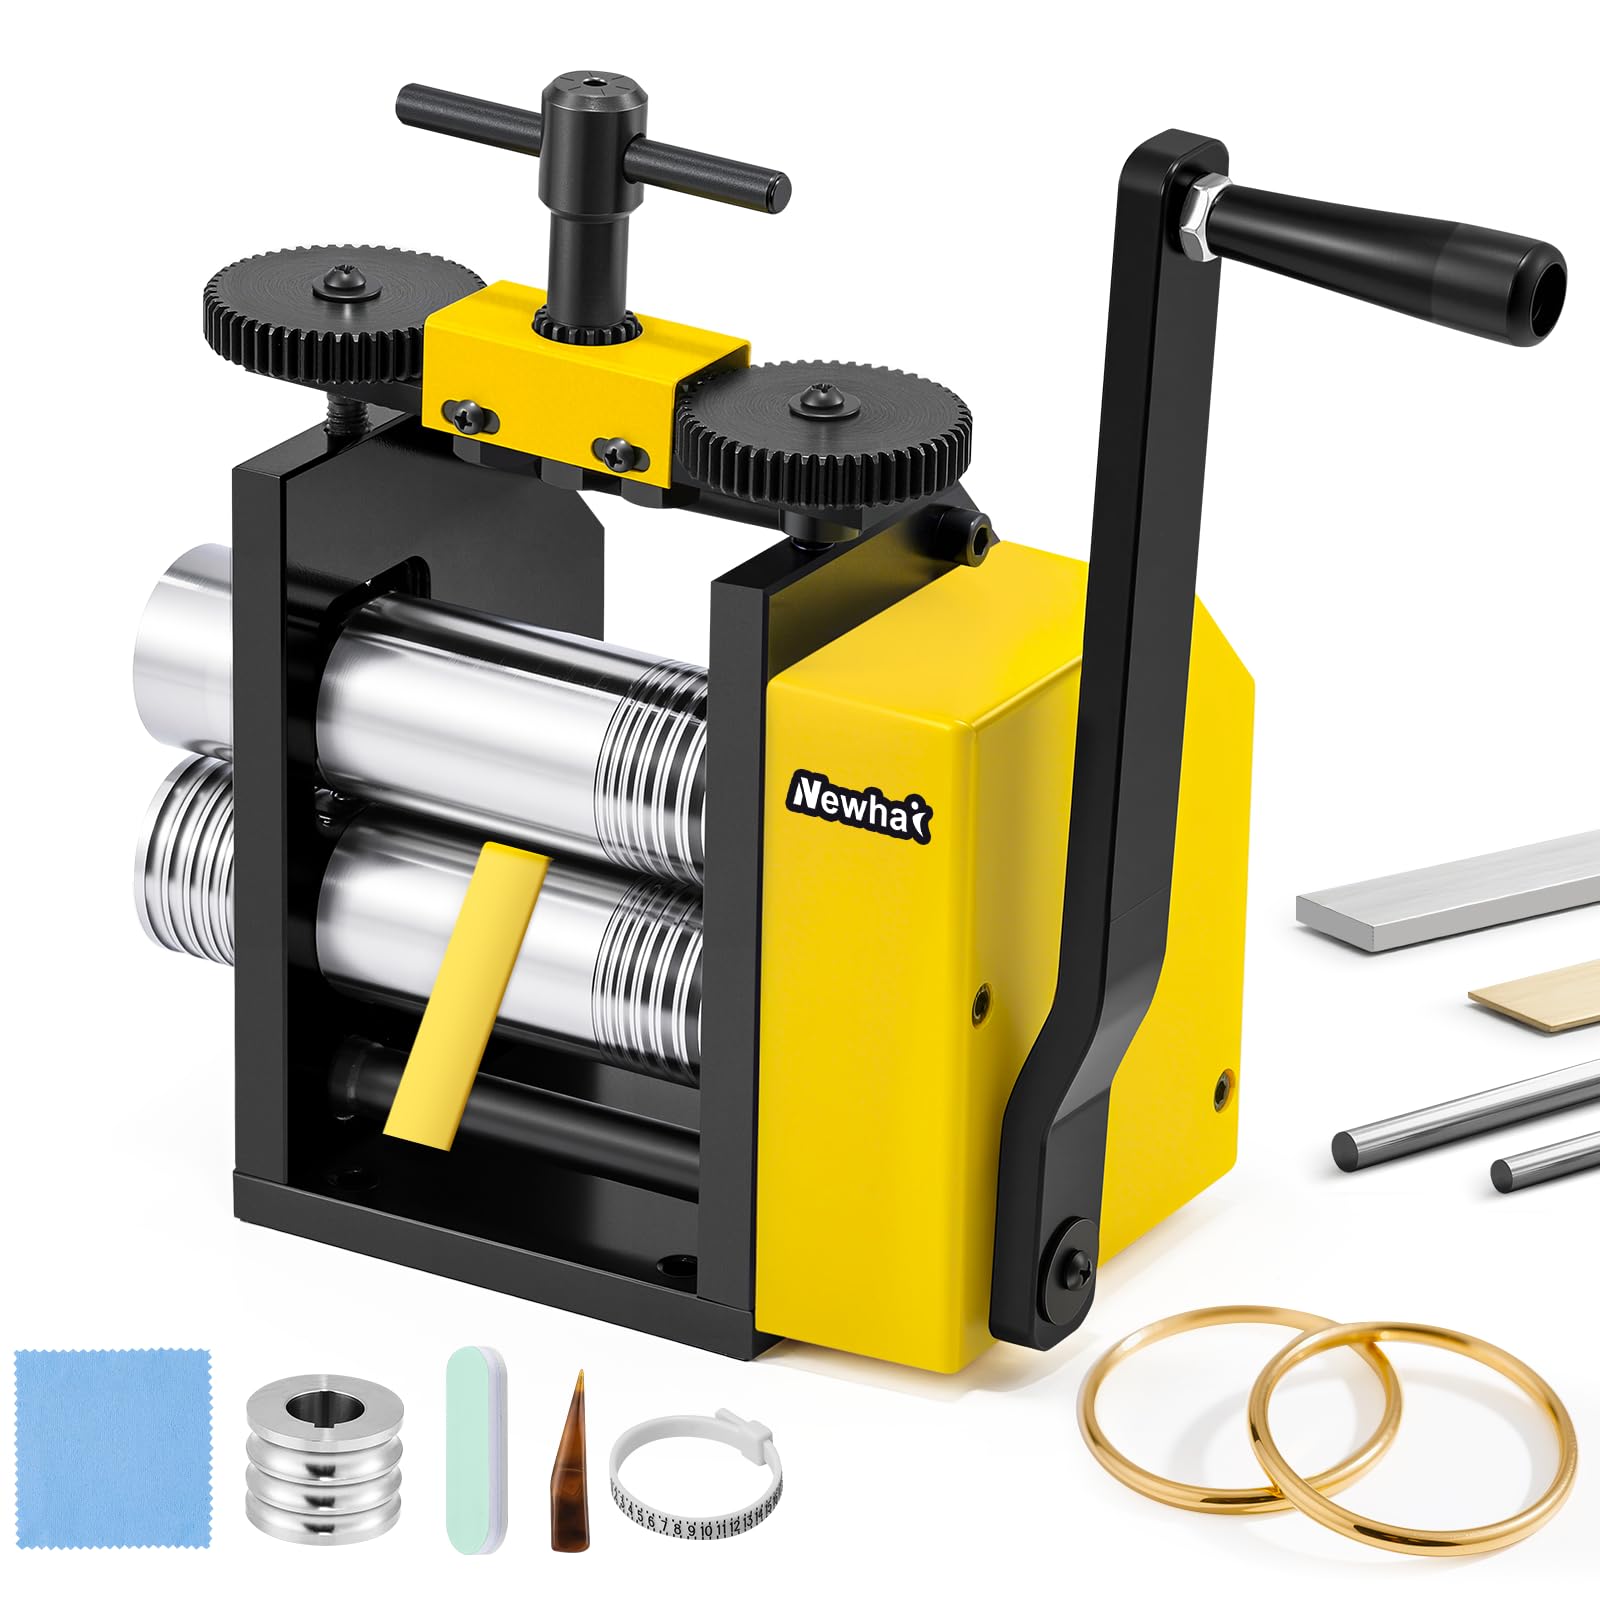
Image: Precision thickness control mechanism, illustrating adjustment from 0.1mm to 7mm.
4.3. Rolling Process
Follow these steps for effective metal rolling:
- Prepare Material: Ensure your metal (gold, silver, copper, aluminum) is clean and annealed if necessary. Always roll fully dry annealed pieces.
- Select Roller: Choose the appropriate roller type (flat, square, or semi-circular) and size for your desired output.
- Insert Metal: Place the metal strip or wire onto the corresponding roller section.
- Turn Crank Handle: Slowly and steadily turn the crank handle to drive the rollers. The metal will be drawn through the gap, reducing its thickness or changing its shape.
- Gradual Reduction: For significant thickness reductions, make several passes, gradually decreasing the roller gap with each pass. Do not attempt to reduce thickness too much in a single pass, as this can damage the material or the machine.
- Check Progress: Periodically check the thickness or shape of your material using a caliper or micrometer to ensure accuracy.
Video: Demonstration of the Newhai Jewelry Rolling Mill Machine in operation, showing how to adjust the rollers and feed metal through for shaping.

Image: Examples of metals suitable for rolling, including gold, platinum, silver, brass, copper, and aluminum.
4.4. Embossing (Optional)
The rolling mill can also be used for embossing patterns onto metal sheets.
- Prepare Pattern: Place your desired texture plate or pattern (texture side down) on top of the base metal sheet.
- Insert into Mill: Carefully feed the layered material into the flat rolling area of the machine.
- Roll: Turn the crank handle to press the pattern onto the metal.

Image: Visual guide for rolling, shaping, and embossing metal using the machine.
5. Maintenance
Proper maintenance ensures the longevity and optimal performance of your rolling mill.
- Cleaning Rollers: Wipe rollers with a light oil after each use to prevent rust and maintain a smooth surface.
- Lubrication: Regularly inspect and lubricate all moving parts, especially the gears and roller bearings, with appropriate machine oil.
- Storage: When not in use, store the rollers slightly separated to prevent flat spots and maintain their integrity. Keep the machine in a dry, clean environment.
- Inspection: Periodically check for any loose screws, worn parts, or signs of damage. Tighten screws as needed and replace any damaged components.

Image: Visual guide for routine maintenance, including oiling and storage tips.
6. Troubleshooting
This section addresses common issues you might encounter during operation.
| Problem | Possible Cause | Solution |
|---|---|---|
| Metal curls laterally or unevenly. | Rollers may not be perfectly parallel; excessive reduction in one pass; material not properly annealed. | Ensure rollers are clean and free of debris. Make smaller, more gradual reductions. Anneal the metal properly before rolling. Check for any visible misalignment of rollers. |
| Difficulty turning the crank handle. | Roller gap is too small for the material; material is too hard or thick; lack of lubrication. | Increase the roller gap. Ensure the material is suitable for cold rolling and properly annealed. Apply lubrication to gears and bearings. Do not force the handle. |
| Rollers leave marks on the metal. | Rollers are dirty or damaged; material is not clean. | Clean rollers thoroughly with a soft cloth and light oil. Inspect rollers for any nicks or scratches. Ensure metal is clean before rolling. |
| Inconsistent thickness. | Uneven feeding of material; inconsistent pressure; material properties. | Feed material steadily and centered. Ensure the T-bar adjustment is stable. Consider annealing the material more uniformly. |
7. Specifications
| Feature | Detail |
|---|---|
| Model Number | YLD-20 |
| Rolling Thickness Range | 0.1 - 7 mm |
| Flat Rolling Area | 75 mm wide |
| Square Rolling Sizes | 7 sizes (1, 1.5, 2, 3, 4, 5, 6 mm) |
| Semi-circular Rolling Sizes | 9 sizes (2, 2.5, 3, 3.5, 4.5, 5, 7.5, 9, 10 mm) |
| Applicable Materials | Gold, Silver, Copper, Aluminum, and other high-ductility metals |
| Machine Dimensions (L x W x H) | 7.6" x 5.5" x 6.5" (approx. 19.3 cm x 14 cm x 16.5 cm) |
| Item Dimensions (L x W x H) | 14 x 11 x 13 inches (packaging/overall) |
| Weight | 36.8 lb (approx. 16.7 kg) / 18.75 kg (shipping weight) |
| Body Material | Precision Cast Steel |
| Roller Material | Stainless Steel |

Image: Diagram showing key components and dimensions of the rolling mill.
8. Warranty and Support
Warranty: The Newhai Jewelry Rolling Mill Machine YLD-20 comes with a 1-Year Manufacturer's Warranty.
For warranty claims, technical support, or any inquiries regarding your product, please contact Newhai customer service through the retailer where the product was purchased or visit the official Newhai store page.
Online Resources: For additional information and product updates, visit the Newhai Store on Amazon.