1. Introduction
The LONGER Ray5 Mini 2.5W is a compact and high-precision laser engraver designed for a wide range of creative and professional applications. This manual provides essential information for safe operation, setup, and maintenance of your device. Please read it thoroughly before use to ensure optimal performance and safety.
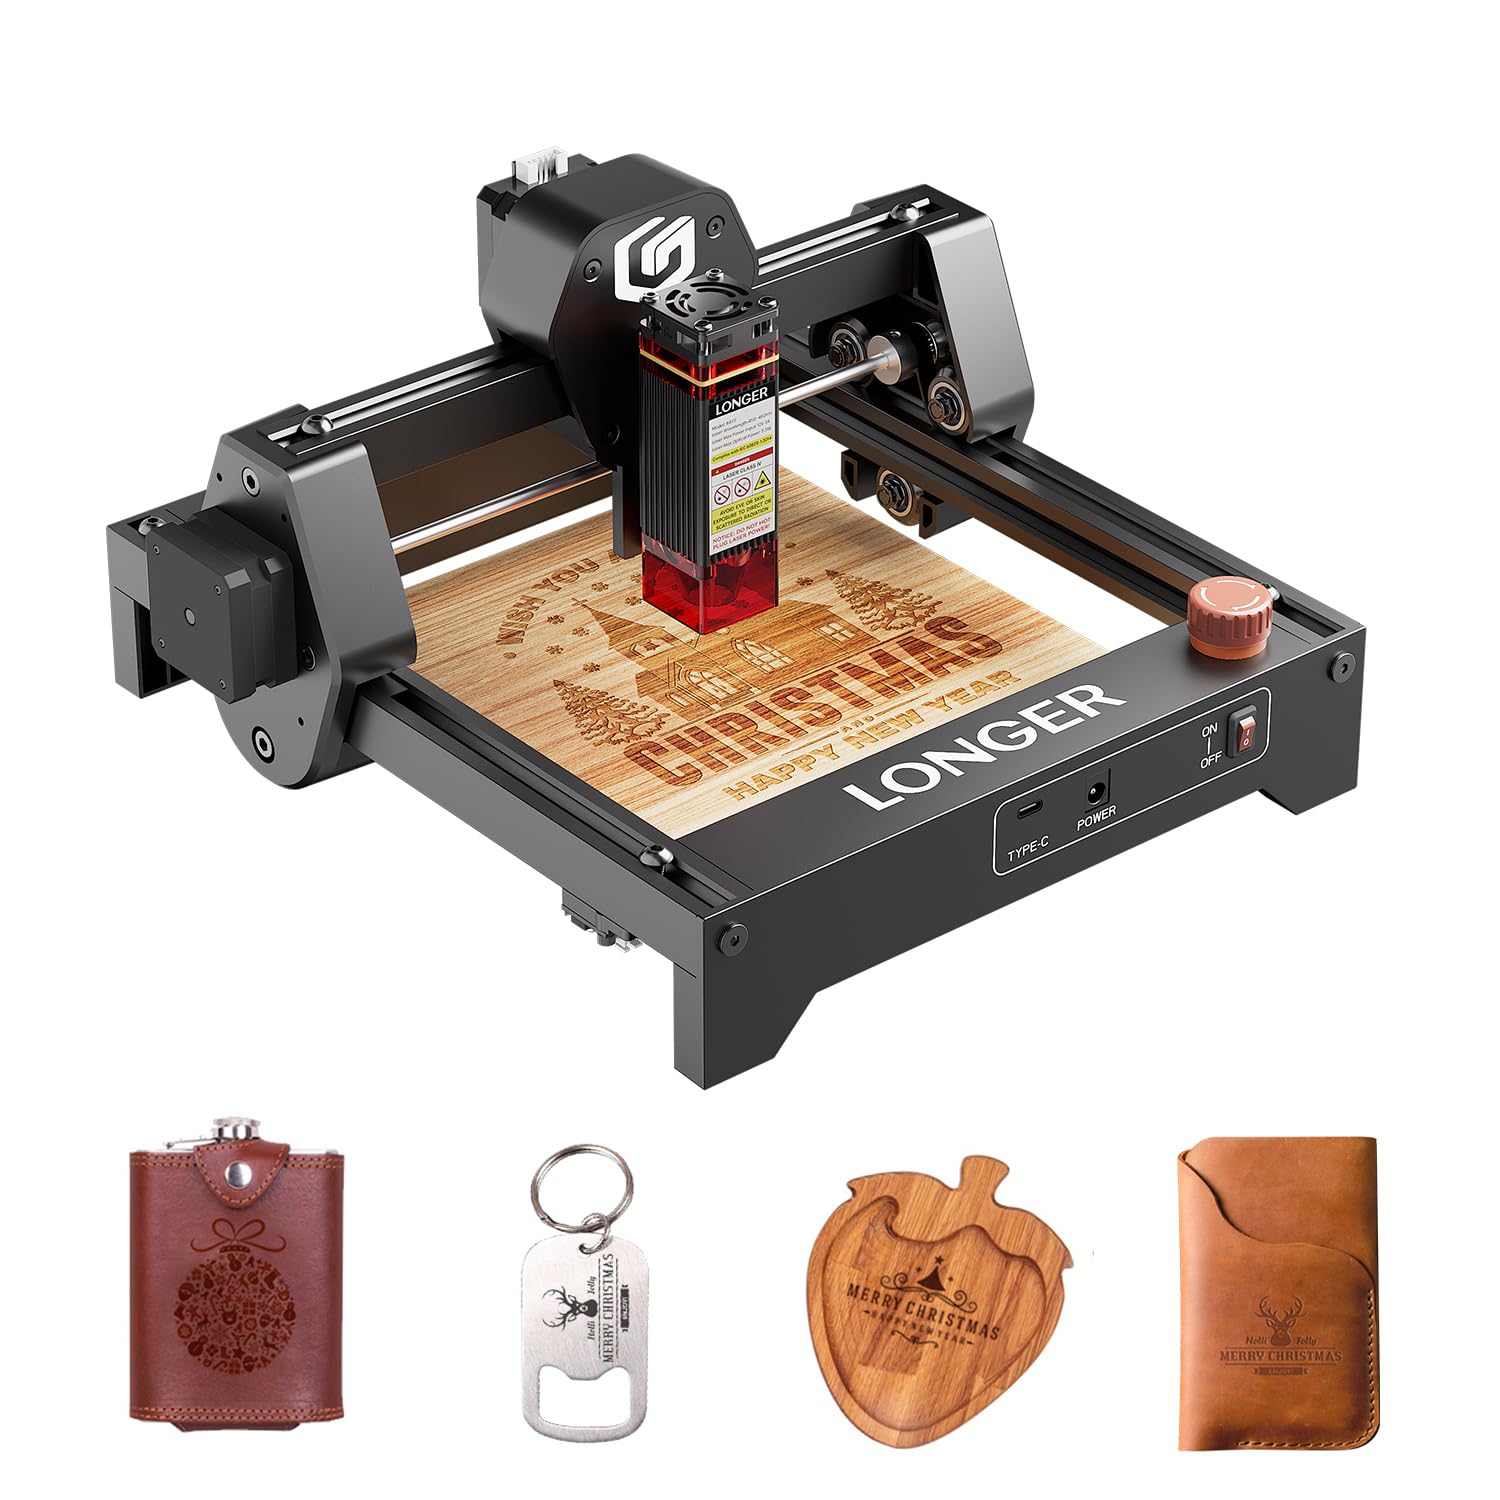
Image 1: The LONGER Ray5 Mini 2.5W Laser Engraver.
Key Features:
- High Precision Engraving: Features an ultra-fine laser spot of 0.04 × 0.04 mm for detailed designs with 0.01 mm accuracy.
- High Speed: Achieves engraving speeds of up to 12,000 mm/min.
- Compact Design: Lightweight (approx. 1.8 kg) and pre-assembled for easy setup and portability.
- Versatile Material Compatibility: Capable of engraving and cutting over 300 materials, including wood, leather, metal, and acrylic.
- Multiple Connectivity Options: Supports USB, Wi-Fi, and app connections, with an offline mode available.
- Software Compatibility: Works with LaserGRBL (free) and LightBurn (paid).
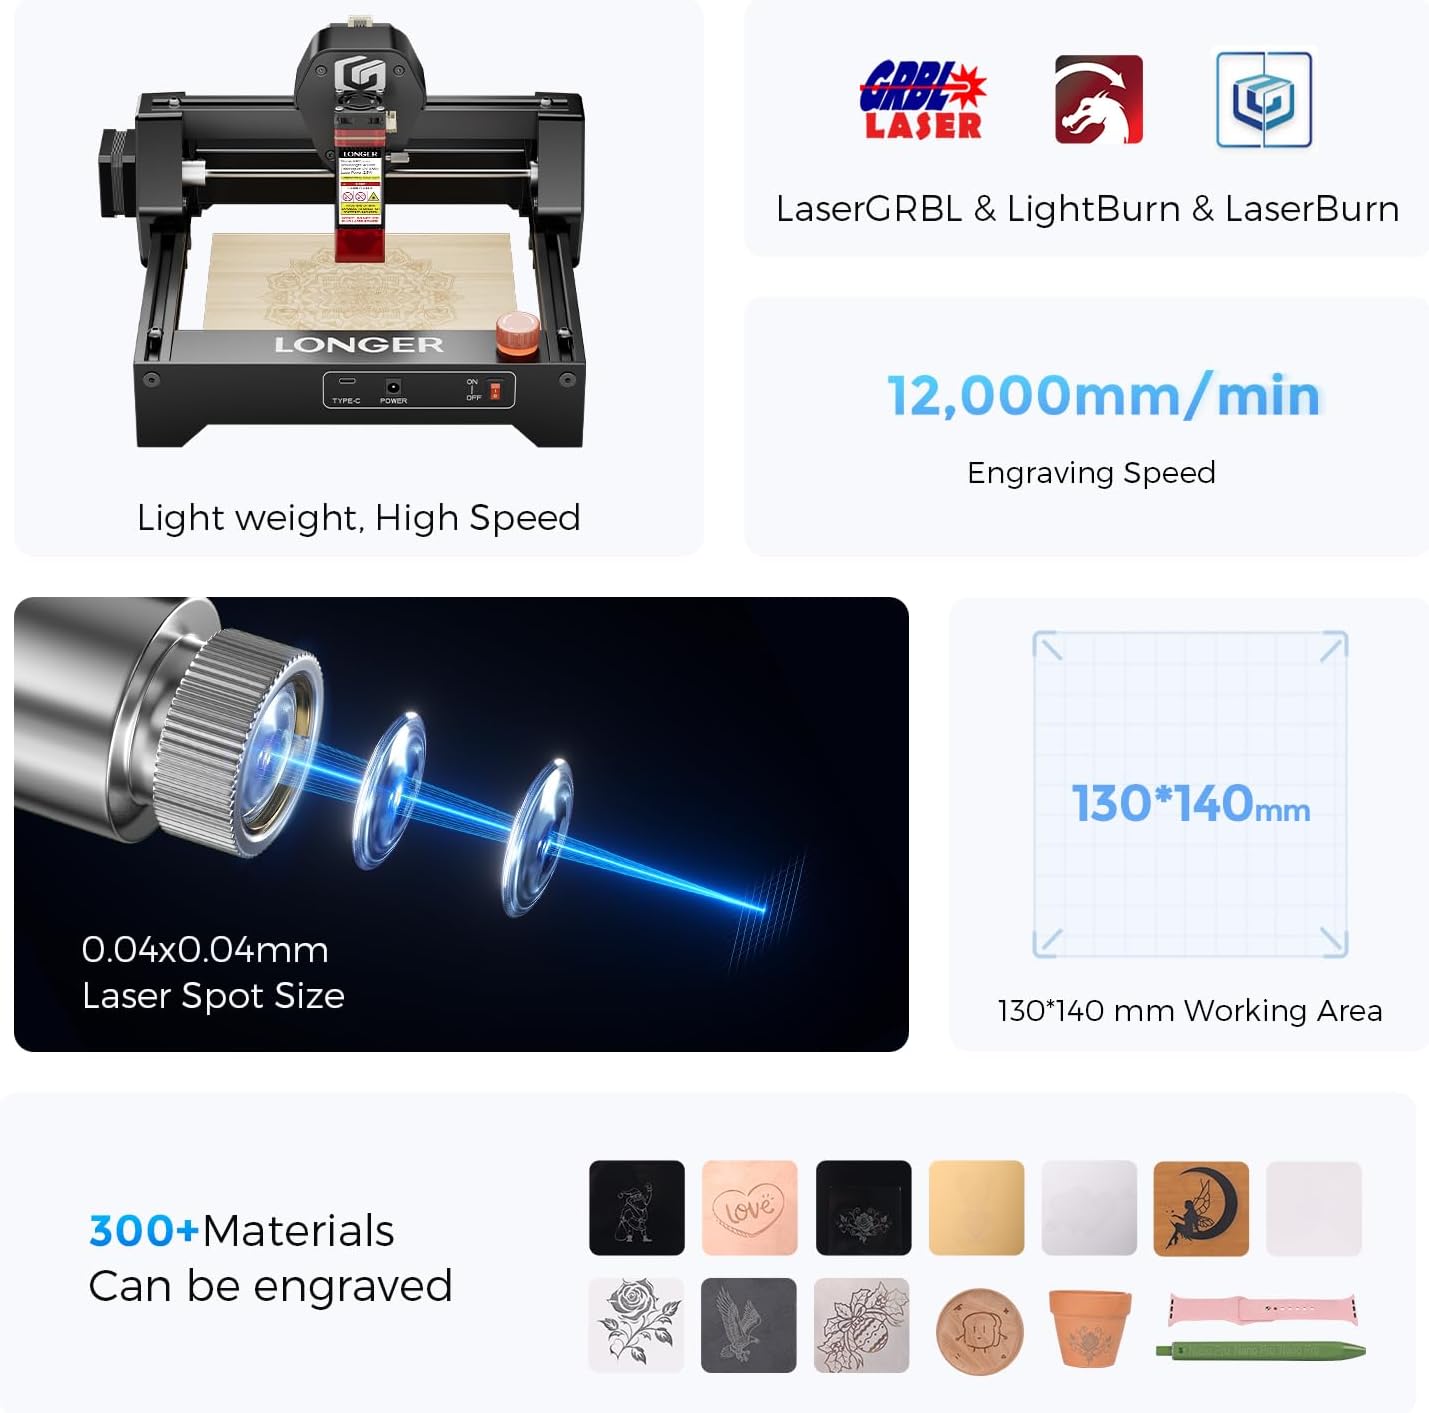
Image 2: Overview of the Ray5 Mini's key features: 0.04x0.04mm laser spot, 12,000mm/min engraving speed, 130x140mm working area, and compatibility with over 300 materials.
2. Safety Guidelines
Operating a laser engraver involves potential hazards. Adhere to all safety precautions to prevent injury or damage to property.
General Safety Rules:
- Eye Protection: Always wear the provided laser safety glasses during operation. Never look directly at the laser beam.
- Emergency Stop: Familiarize yourself with the emergency stop button and its location. Use it immediately in case of any malfunction or unexpected behavior.
- Ventilation: Operate the engraver in a well-ventilated area to dissipate fumes and smoke produced during engraving.
- Fire Safety: Keep a fire extinguisher or water source nearby. Do not leave the machine unattended during operation.
- Material Safety: Ensure the material being engraved is safe for laser processing. Avoid highly reflective, flammable, or toxic materials.
- Physical Barriers: The included acrylic cover helps contain the laser and reduce eye exposure. Ensure it is properly in place.
- Limit Switches: The X-Y axis limit switches provide an additional layer of safety by preventing the laser head from moving beyond the working area.
- Children and Pets: Keep children and pets away from the operating area.

Image 3: Multiple safety protections: Emergency Stop, X-Y Axis Limit Switches, Acrylic Cover, and Eye Protection.
3. Package Contents
Verify that all components are present and undamaged upon unpacking. If any items are missing or damaged, contact customer support.
- LONGER Ray5 Mini 2.5W Laser Engraver (pre-assembled)
- Laser Module
- Power Adapter and Cable
- USB Cable
- Laser Safety Glasses
- User Manual (this document)
- Small Material Samples (e.g., wood board)
- Tools (e.g., wrench, brush)

Image 4: All components included in the LONGER Ray5 Mini 2.5W package.
4. Setup Instructions
The Ray5 Mini comes largely pre-assembled, simplifying the setup process.
Initial Setup:
- Unpack: Carefully remove all components from the packaging.
- Placement: Place the engraver on a stable, level, and heat-resistant surface in a well-ventilated area.
- Connect Power: Connect the power adapter to the engraver and then plug it into a suitable power outlet.
- Connect to Computer (Optional): If using a computer for control, connect the engraver to your computer via the provided USB cable.
- Software Installation: Download and install the recommended engraving software (LaserGRBL or LightBurn) from the official LONGER website or the software provider's website.
- Focus Adjustment: Refer to the software instructions for initial laser focus adjustment. This is crucial for precise engraving.
5. Operating Instructions
Follow these steps for safe and effective operation of your laser engraver.
Software and Connectivity:
- The Ray5 Mini is compatible with LaserGRBL (Windows) and LightBurn (Windows, macOS, Linux).
- Connect via USB for direct computer control, Wi-Fi for wireless operation, or use the dedicated mobile app. An offline mode is also available for pre-loaded projects.

Image 5: Multiple modes and software compatibility for easy engraving.
Engraving Process:
- Prepare Material: Place your chosen material securely within the 140x130 mm working area. Ensure it is flat and stable.
- Design: Create or import your design into the engraving software.
- Settings: Adjust laser power, speed, and passes according to the material type and desired effect. Refer to material test guides for optimal settings.
- Preview: Use the software's preview function to ensure the design is correctly positioned on the material.
- Start Engraving: Initiate the engraving process. Always wear safety glasses and monitor the machine during operation.
Performance:
- The 0.04x0.04mm laser spot allows for intricate details and sharp edges.
- High-speed engraving at 12,000 mm/min reduces project completion time.
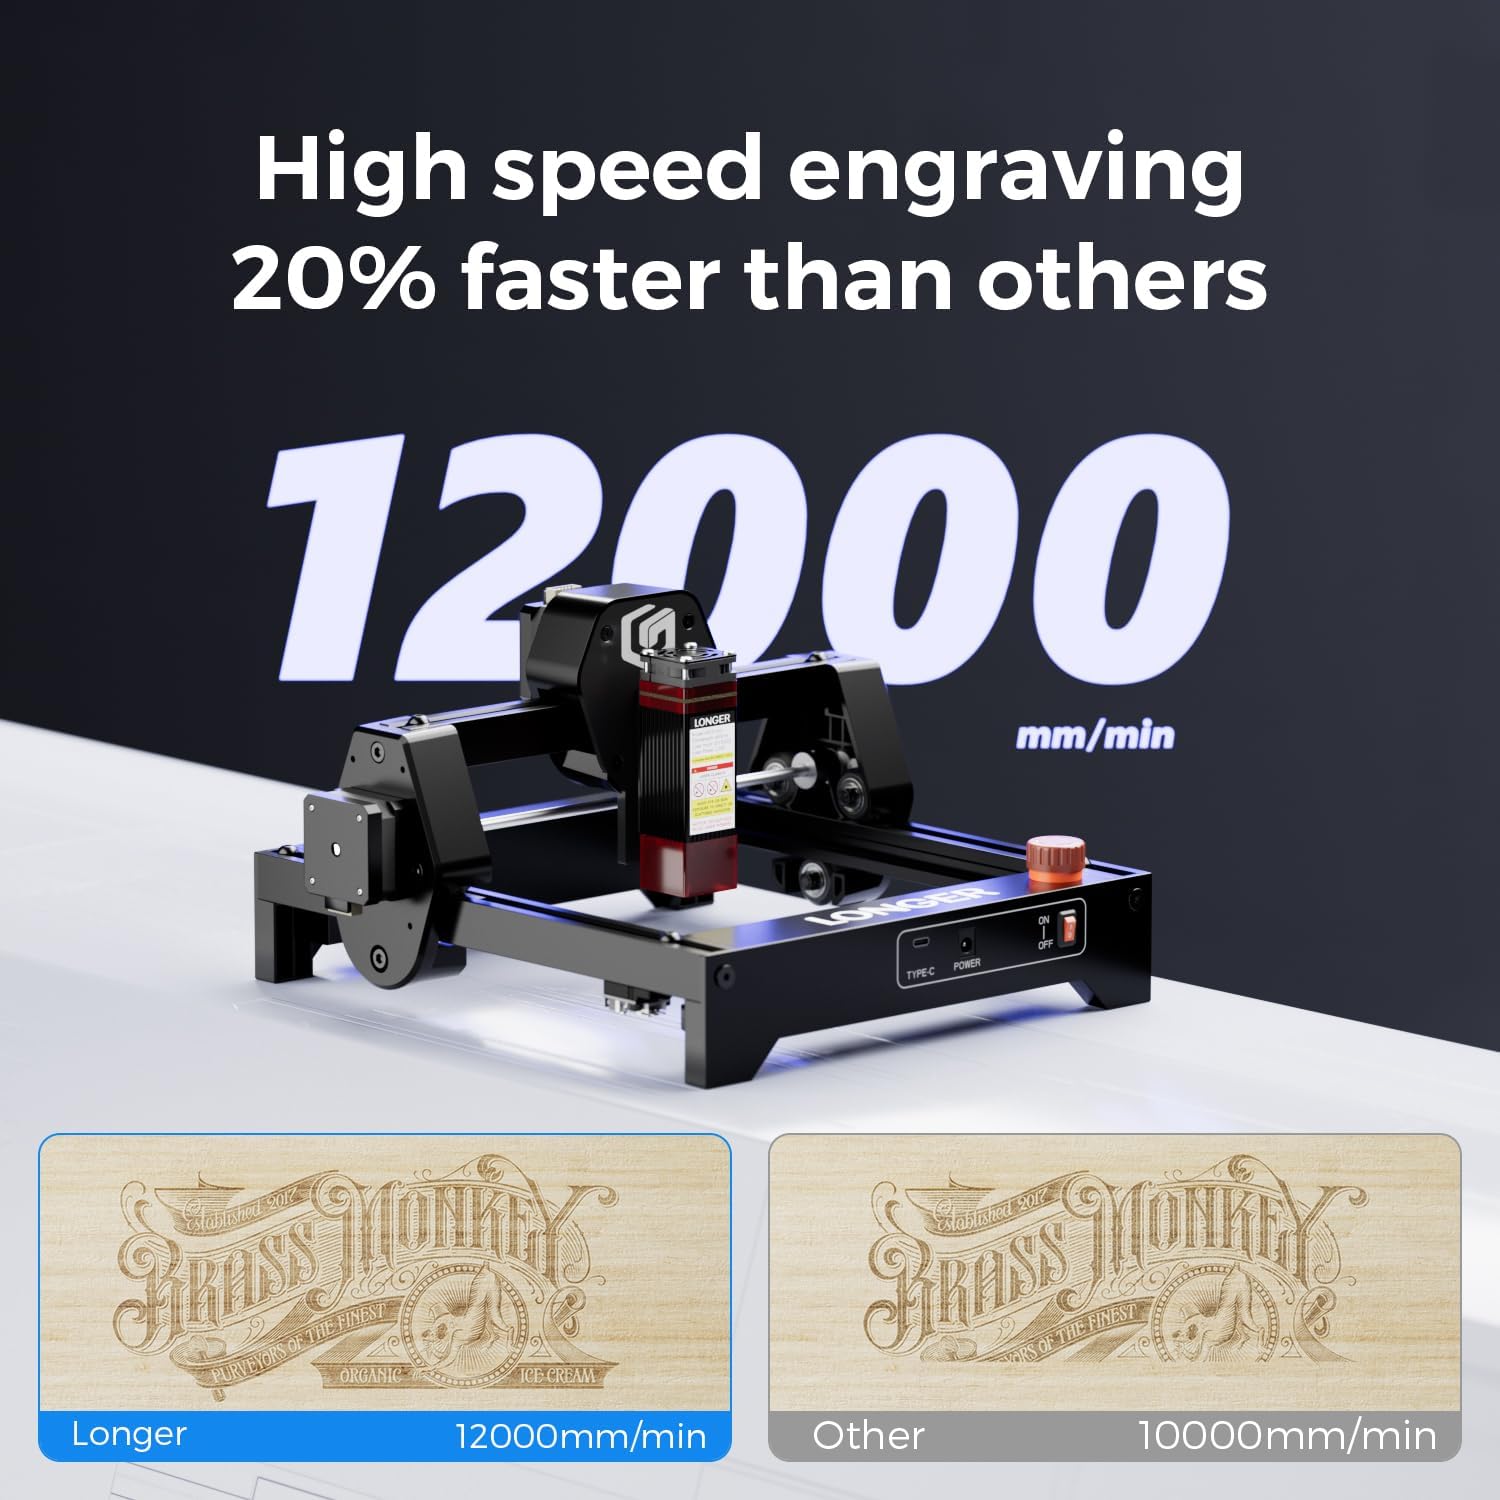
Image 6: High-speed engraving comparison.

Image 7: Outstanding engraving performance and precision.
Supported Materials:
The Ray5 Mini can engrave on a variety of materials. Examples include:
- Wood
- Leather
- Metal (with metallic paint or specific coatings)
- Acrylic
- Paper/Cardboard
- Fabric
- Food items
- Glass (with specific preparation)
- Rubber

Image 8: Examples of materials and customized items that can be engraved.
6. Maintenance
Regular maintenance ensures the longevity and optimal performance of your laser engraver.
Cleaning:
- Laser Lens: Periodically clean the laser lens with a soft, lint-free cloth and lens cleaning solution to maintain engraving quality.
- Working Area: Remove debris and dust from the working area after each use.
- Rails and Belts: Keep the guide rails and drive belts free from dust and debris to ensure smooth movement of the laser head.
Storage:
- Store the engraver in a dry, dust-free environment when not in use.
- Protect the laser module from direct sunlight and extreme temperatures.
7. Troubleshooting
This section addresses common issues you might encounter.
Common Issues and Solutions:
- Laser Not Firing: Check power connections, USB/Wi-Fi connection, and ensure the laser module is properly seated. Verify software settings for laser power.
- Poor Engraving Quality: Adjust laser focus, power, and speed settings. Ensure the material is clean and flat. Clean the laser lens if necessary.
- Machine Not Responding: Restart the engraver and your computer/app. Check all cable connections. Ensure the software is correctly configured for the machine.
- Movement Issues: Inspect X and Y axis belts for tension and debris. Ensure guide rails are clean and lubricated if needed.
- Emergency Stop Activated: Reset the emergency stop button by twisting or pulling it, then restart the machine. Investigate the cause of activation.
If you encounter issues not covered here, please refer to the official LONGER support resources or contact customer service.
8. Specifications
| Feature | Detail |
|---|---|
| Model | Ray5 Mini 2.5W |
| Laser Power | 2.5W |
| Laser Spot Size | 0.04 × 0.04 mm |
| Engraving Accuracy | 0.01 mm |
| Engraving Speed | Up to 12,000 mm/min |
| Working Area | 140 × 130 mm |
| Connectivity | USB, Wi-Fi, App, Offline |
| Compatible Software | LaserGRBL, LightBurn |
| Supported OS | Windows, macOS, Linux (for LightBurn) |
| Material | Metal frame |
| Dimensions (Package) | 33.9 x 33.9 x 20.4 cm |
| Weight (Package) | 2.19 kg |
| Power Type | AC/DC Adapter |
9. Warranty and Support
LONGER is committed to providing excellent products and customer service.
Spare Parts Availability:
Spare parts for the Ray5 Mini 2.5W are available for up to 10 years.
Technical Support:
For technical assistance, please contact LONGER customer support:
- Phone: +1 888-575-9099
- Operating Hours: Monday-Friday: 9:00 AM - 6:00 PM (EST, UTC-5)
- Email: sales@longer.net
- Website: www.longer3d.com

Image 9: LONGER provides comprehensive after-sales support.