
1. Introduction
Thank you for purchasing the HORLAT 1200 ANSI 4K Home Cinema Projector. This manual provides essential information for the safe and efficient operation of your new projector. Please read it thoroughly before use and retain it for future reference.
2. Safety Information
- Do not look directly into the projector lens when the lamp is on.
- Ensure proper ventilation around the projector to prevent overheating.
- Keep the projector away from water, moisture, and extreme temperatures.
- Use only the power adapter supplied with the projector.
- Do not attempt to disassemble or repair the projector yourself. Contact qualified service personnel.
- Keep out of reach of children.
3. Package Contents
Please check that all items are present and in good condition:
- HORLAT 4K Home Cinema Projector
- Remote Control
- Power Cable
- HDMI Cable
- User Manual (this document)
4. Product Overview
Familiarize yourself with the main components of your HORLAT projector.
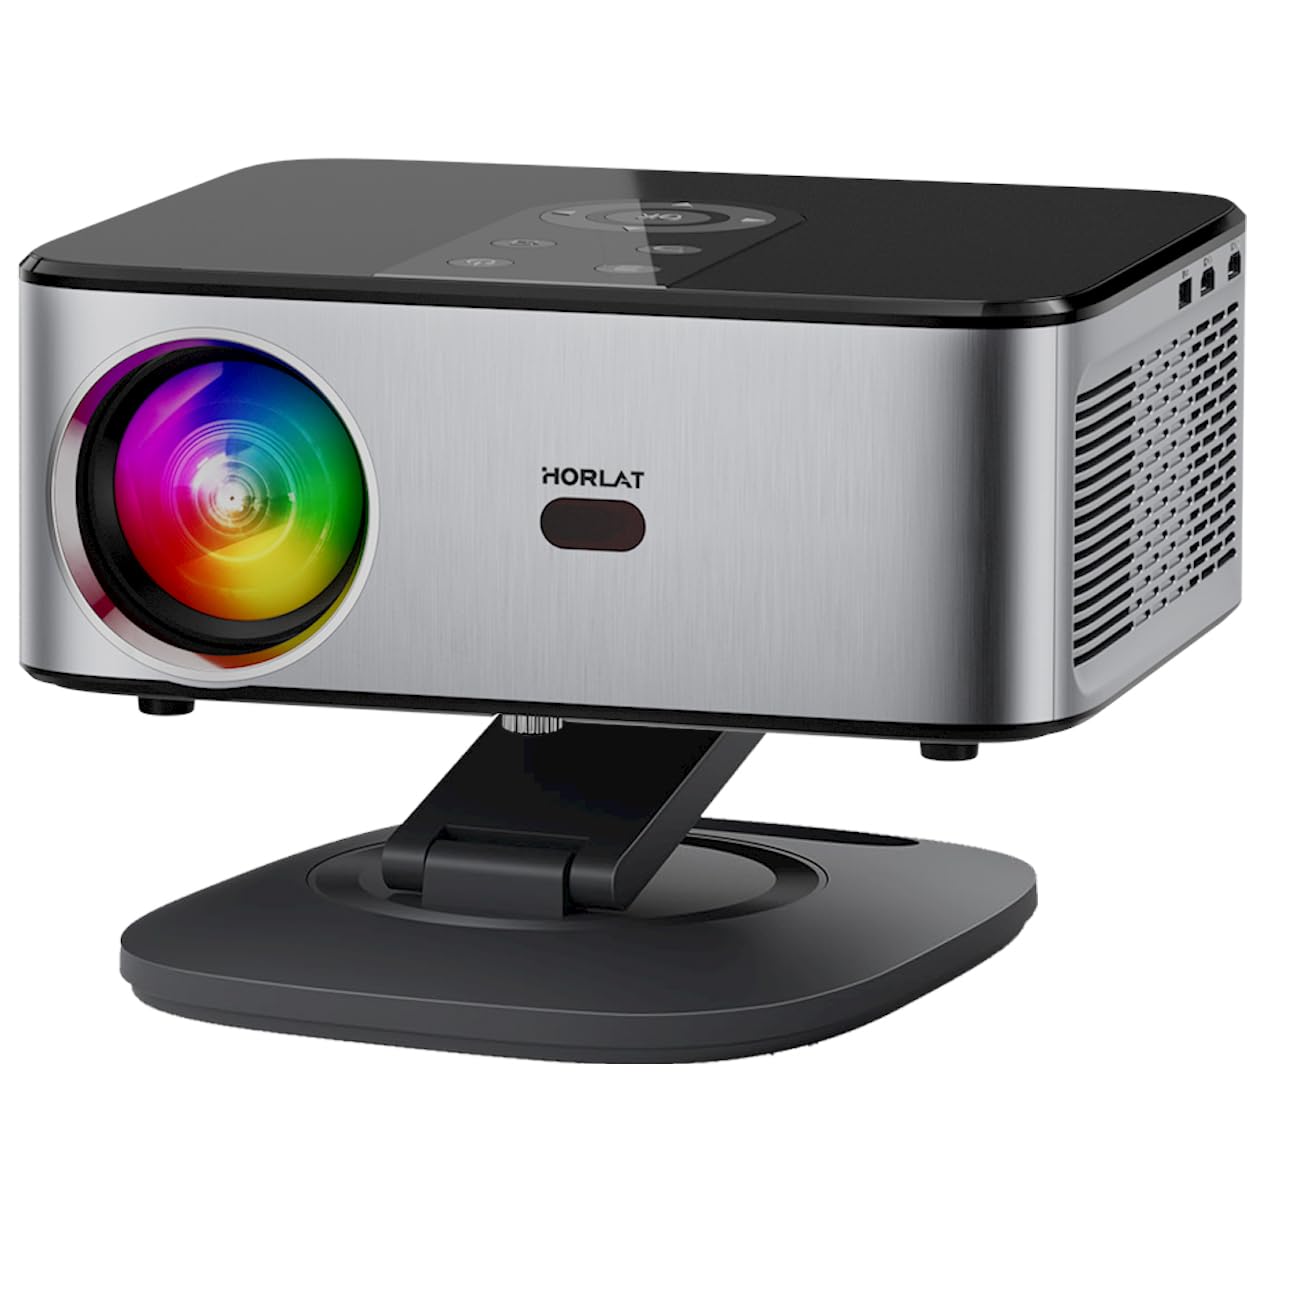
Figure 4.1: Front view of the HORLAT 4K Home Cinema Projector. This image shows the projector's main body, the projection lens, and ventilation grilles.
4.1. Front Panel
- Projection Lens: Emits the image onto the screen.
- Auto-Focus Sensor: Detects distance for automatic focus adjustment.
- Ventilation Grilles: For air intake and exhaust to cool the projector.
4.2. Rear Panel
- Power Input: Connects to the power cable.
- HDMI Port: Connects to HDMI-enabled devices (laptops, game consoles, TV sticks).
- USB Port: For connecting USB storage devices.
- 3.5mm Audio Output: For connecting external speakers or headphones.
4.3. Bottom Panel
- 360° Rotatable Stand: Allows for flexible projection angles and easy removal.
5. Setup
5.1. Placement
The HORLAT projector offers versatile placement options:
- Tabletop Projection: Place the projector on a stable, flat surface.
- Ceiling/Wall Projection: Utilize the detachable and foldable 360° rotatable stand for flexible projection onto walls or ceilings. Ensure the projector's tilt angle does not exceed 15° for optimal automatic correction.
5.2. Power Connection
- Connect the power cable to the projector's power input port.
- Plug the other end of the power cable into a power outlet.
- The projector will enter standby mode.
5.3. Initial Power On
Press the power button on the projector or the remote control to turn on the device. The projector will automatically perform focus and keystone correction.
6. Operating Instructions
6.1. Remote Control
Use the provided remote control to navigate menus and adjust settings. Ensure batteries are correctly inserted.
6.2. Automatic Focus and Keystone Correction
The projector features automatic focus and 6D keystone correction. It uses a high-precision sensor to detect movements and obstacles, adjusting the image for clarity and a perfect rectangular shape in real-time. This works for both front and ceiling/wall projections, provided the tilt angle is within 15°.
6.3. Zoom Function
Adjust the screen size from 100% down to 50% using the zoom function on the remote control without physically moving the projector.
7. Connectivity
7.1. WiFi 6 Mirroring
The projector supports dual-band WiFi 6 for faster and smoother screen mirroring. To mirror your smartphone screen:
- Navigate to the "Screen Mirroring" or "Wireless Projection" option in the projector's menu.
- Connect your iOS or Android device to the same WiFi network as the projector.
- Select the projector from your device's screen mirroring options.
Note: For copyrighted content from streaming services like Netflix and Disney+, a separate TV Stick (e.g., Amazon Fire Stick, Roku) connected via HDMI is required due to content protection protocols.
7.2. Bluetooth 5.2
Connect external Bluetooth audio devices such as headphones, speakers, or AirPods wirelessly.
- Go to the Bluetooth settings in the projector's menu.
- Enable Bluetooth and search for available devices.
- Select your desired audio device to pair.
7.3. Wired Connections (HDMI, USB, 3.5mm Audio)
- HDMI: Connect laptops, gaming consoles (PS5, Switch), TV sticks, and other HDMI-enabled devices.
- USB: Play media files directly from a USB flash drive.
- 3.5mm Audio: Connect external wired speakers or headphones for enhanced audio.
8. Key Features
- High Brightness & Resolution: 1200 ANSI Lumens, Native FHD 1080P, supports 4K input, 20,000:1 contrast ratio.
- HDR10 Technology: 10-bit color depth and AI brightness adjustment for richer, more realistic colors.
- 60Hz Refresh Rate: Ensures smooth motion and eliminates image lag.
- Integrated Audio: Equipped with 2 x 18W Hi-Fi stereo dual speakers and 2 passive diaphragms for deep bass and reduced distortion.
9. Maintenance
9.1. Cleaning
- Lens: Use a soft, lint-free cloth specifically designed for optical lenses. Do not use abrasive cleaners.
- Exterior: Wipe the projector's exterior with a soft, dry cloth. For stubborn marks, slightly dampen the cloth with water.
- Ventilation: Periodically check and clean the ventilation grilles to ensure unobstructed airflow.
9.2. Storage
When not in use for extended periods, store the projector in a cool, dry place, away from dust and direct sunlight. Use the original packaging or a protective case if available.
10. Troubleshooting
| Problem | Possible Cause | Solution |
|---|---|---|
| No image on screen | Power cable disconnected, incorrect input source, device not connected. | Check power connection. Select correct input source (HDMI, USB). Ensure source device is on and connected. |
| Image is blurry | Projector out of focus, lens dirty. | Allow auto-focus to adjust. Clean the projector lens. Ensure projector is within optimal projection distance. |
| No sound | Volume too low, incorrect audio output selected, external device muted. | Increase projector volume. Check audio settings. Unmute external device. Ensure Bluetooth device is paired correctly. |
| Screen mirroring issues | WiFi connection unstable, device compatibility. | Ensure both devices are on the same stable WiFi network. Restart projector and device. Check for software updates. |
11. Specifications
| Brand | HORLAT |
| Model | HORLAT Beamer 4K Home Cinema Projector |
| Display Technology | LCD |
| Native Resolution | 1920 x 1080 Pixels (Full HD) |
| Supported Resolution | Up to 4K input |
| Brightness | 1200 ANSI Lumens (32000 Lumens) |
| Contrast Ratio | 20,000:1 |
| Aspect Ratio | 16:9 |
| Refresh Rate | 60 Hz |
| Connectivity | WiFi 6 (Dual-band), Bluetooth 5.2, HDMI, USB, 3.5mm Audio |
| Special Features | Automatic Screen Alignment (Auto Focus & 6D Keystone), 50% Zoom, HDR10, 360° Rotatable Stand |
| Audio | 2 x 18W Hi-Fi Stereo Dual Speakers with 2 Passive Diaphragms |
| Noise Level | 35 Decibels |
| Power Consumption | 90 Watts |
| Dimensions | 22 x 25.5 x 15 cm |
| Weight | 3.47 kg |
12. Video Demonstration
Watch this official video for a visual guide on the projector's features and operation.
Video 12.1: A demonstration of the HORLAT 4K Home Cinema Projector's features and usage. This video provides a visual overview of the product's capabilities.
13. Warranty and Support
HORLAT is committed to providing high-quality products and customer satisfaction. If you encounter any issues or have questions regarding your projector, please do not hesitate to contact our customer support team.
- Customer Service: Available 24 hours a day via email. Refer to your purchase documentation for contact details.
- Warranty: Specific warranty terms and conditions may vary by region and retailer. Please refer to your purchase receipt or contact customer support for detailed warranty information.


