
OLIGHT Arkfeld Pro, Oclip Pro
OLIGHT Arkfeld Pro and Oclip Pro Flashlight Instruction Manual
Models: Arkfeld Pro, Oclip Pro
Brand: OLIGHT
1. Product Overview
This manual provides detailed instructions for the safe and effective use of your OLIGHT Arkfeld Pro Rechargeable EDC Flat Flashlight and Oclip Pro EDC Clip-on Light. Please read thoroughly before operation.
Key Features
- Arkfeld Pro: Three-in-one functionality with white light (up to 1300 lumens), UV light (900mW at 365nm), and a green beam (≤5mW, Class 3R).
- Oclip Pro: Versatile clip-on light with floodlight (500lm), spotlight (120-meter range), and red light (40/4lm).
- User-friendly UI design with a toggle selector for modes and a central battery indicator.
- Rechargeable design with magnetic charging.
- Durable aluminum construction.
2. Getting Started
2.1 Charging the Arkfeld Pro
The Arkfeld Pro features a magnetic charging port at its base. Use the provided magnetic charging cable to connect the flashlight to a USB power source. The battery indicator in the center of the switch will show the charging status.

Image: The Arkfeld Pro flashlight connected to its magnetic charging cable.
2.2 Attaching the Oclip Pro
The Oclip Pro is designed with a deep, versatile clip that can be opened and closed for secure attachment to various items such as clothing, hats, or bags. This allows for hands-free illumination.

Image: A detailed view of the Oclip Pro's clip, demonstrating its opening and closing mechanism.
3. Operation
3.1 Arkfeld Pro Light Modes
The Arkfeld Pro features a central toggle switch to select between its three primary light sources: white light, UV light, and green beam. Once a mode is selected, the central button controls power and brightness.

Image: Visual representation of the Arkfeld Pro's three light sources: UV, Green Beam, and White Light, with arrows indicating the toggle switch action.
- White Light: Press and hold the button to cycle through brightness levels (Moon, Low, Medium, High, Turbo). Quickly double-press the switch to activate Strobe mode.
- UV Light: Provides high-intensity 365nm UV light for specialized applications.
- Green Beam: A precise green laser for pointing or signaling.
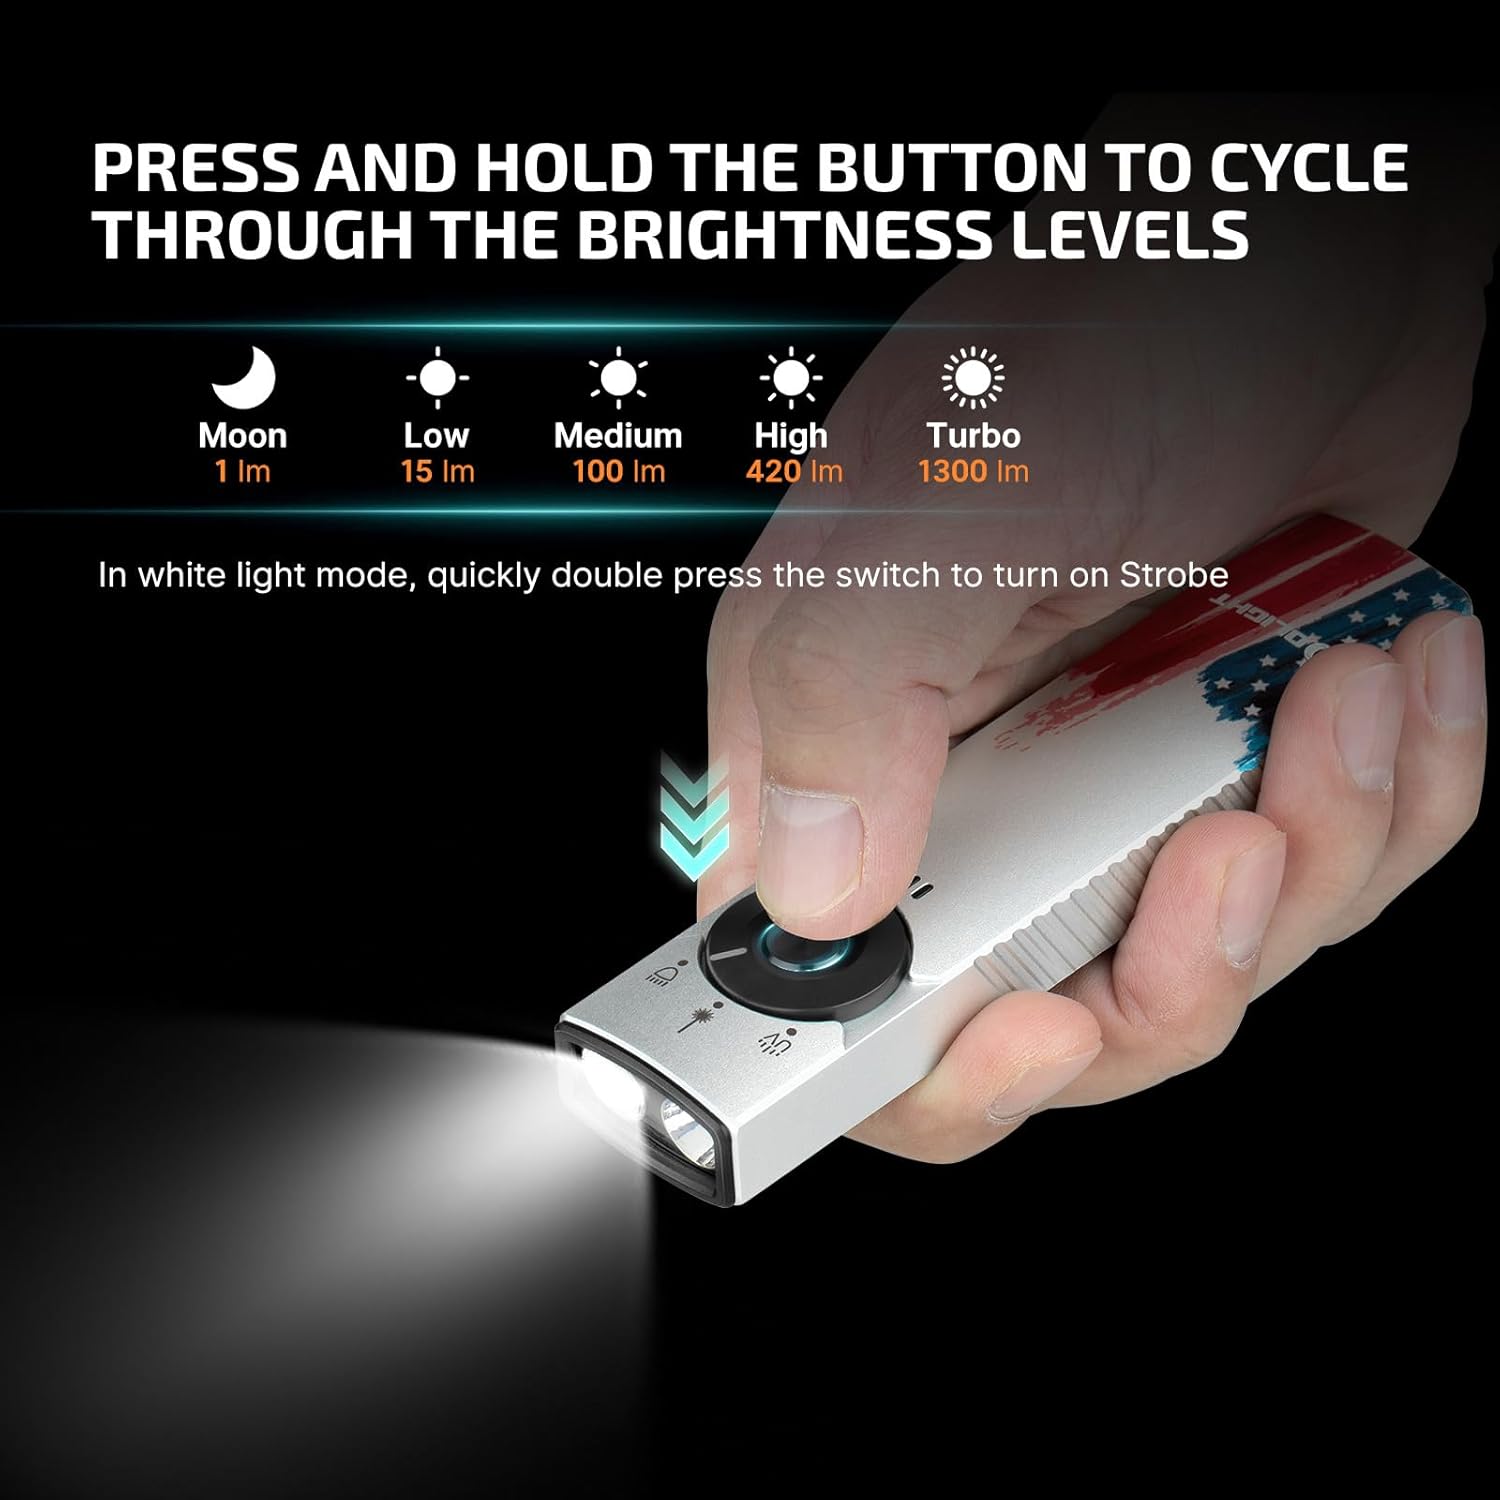
Image: A hand operating the Arkfeld Pro, illustrating the sequence of brightness levels for the white light mode.
3.2 Oclip Pro Light Modes
The Oclip Pro offers three distinct lighting solutions to meet diverse needs:
- Floodlight: Ideal for illuminating a wide area for daily routines.
- Spotlight: Provides focused illumination for specific tasks or longer distances.
- Red Light: Designed to preserve night vision or for signaling.

Image: Three panels showing the Oclip Pro's floodlight illuminating a path, spotlight on a distant object, and red light for night vision.
4. Care and Maintenance
To ensure the longevity and optimal performance of your OLIGHT flashlights, follow these care guidelines:
- Keep the flashlights clean and dry. Wipe with a soft, damp cloth as needed.
- Avoid dropping or subjecting the flashlights to severe impacts.
- Store in a cool, dry place away from direct sunlight and extreme temperatures.
- Regularly charge the Arkfeld Pro to maintain battery health, especially if not used for extended periods.
5. Troubleshooting
If you encounter issues with your OLIGHT Arkfeld Pro or Oclip Pro, refer to the following common troubleshooting steps:
- Flashlight not turning on: Ensure the battery is charged. Connect to the magnetic charger and check the indicator light.
- Low brightness or short runtime: The battery may be low. Fully charge the device.
- Mode switching issues: Ensure the toggle switch is fully engaged in the desired position.
- Green beam or UV light not working: Verify the toggle switch is correctly set to the respective mode.
If problems persist, please contact OLIGHT customer support for further assistance.
6. Technical Specifications
| Feature | Specification |
|---|---|
| Brand | OLIGHT |
| Special Feature | Rechargeable |
| Color | Silver (Stars & Stripes Edition) |
| Power Source | Battery Powered |
| Light Source Type | LED |
| Material | Aluminum |
| White Brightness (Arkfeld Pro) | 1300 Lumens (Max) |
| UV Intensity (Arkfeld Pro) | 900mW at 365nm |
| Green Beam Output (Arkfeld Pro) | ≤5mW, Class 3R |
| Oclip Pro Floodlight | 500lm |
| Oclip Pro Spotlight Range | 120-meter |
| Oclip Pro Red Light | 40/4lm |
| Battery Cell Composition | Lithium Ion |
| Water Resistance Level | Not Water Resistant |
| Style | Arkfeld Pro Stars & Stripes Edition with OCLIPPRO-SSE |
| Mounting Type | Clip-on Mount |
7. Warranty and Customer Support
OLIGHT products are backed by a comprehensive warranty. For specific warranty details, product registration, or technical support, please visit the official OLIGHT website or contact their customer service directly.
You can find more information and support at the OLIGHT Store on Amazon.
Related documentsArkfeld Pro, Oclip Pro


Ask a question about this manual
Ask about setup, troubleshooting, compatibility, parts, safety, or missing instructions. Manuals+ will review the question and use this page’s manual context to help answer it.