
1. Safety Information
Adhere to the following safety guidelines to ensure safe assembly and use of your console table:
- Follow all assembly steps outlined in this instruction manual strictly.
- Do not allow children to play on or climb around the product to prevent potential injury from tipping over.
- Ensure all hardware is securely tightened before placing items on the table or using the drawers.
- Do not overload drawers or shelves beyond their intended capacity.
- Place the table on a flat, stable, and level surface to prevent wobbling.
- Keep small parts and packaging materials away from children during assembly.
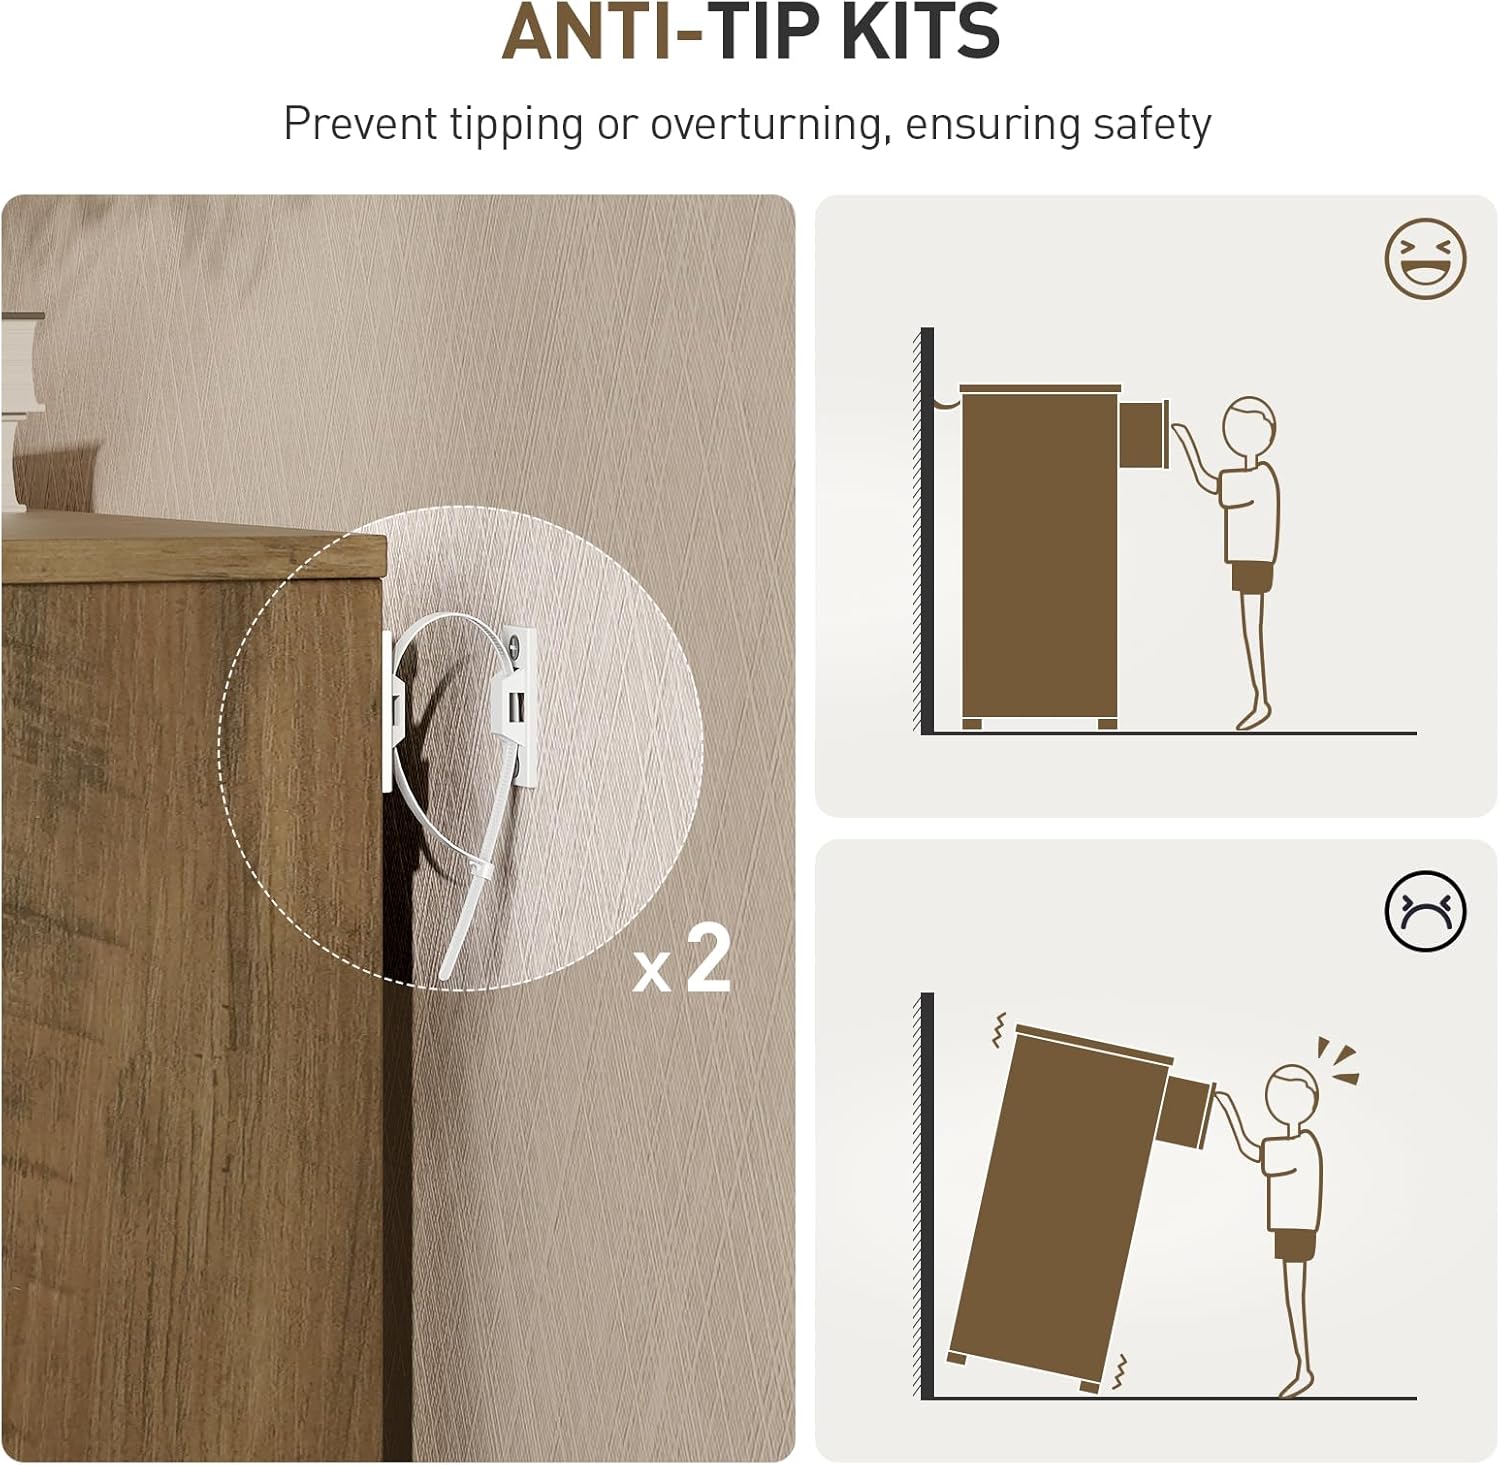
This image illustrates the proper installation of the anti-tip kits, which are crucial for securing the console table to a wall and preventing accidental tipping, thereby enhancing safety.
2. Parts List
Before beginning assembly, please verify that all components listed below are present and undamaged:
- 1 x Console Table (main structure components)
- 1 x Hardware Kit (includes screws, dowels, cam locks, etc.)
- 2 x Handle-less Drawers
- 4 x Non-slip Pads
- 1 x Anti-Tip Kit
- 1 x Instruction Manual (this document)

This diagram provides an overview of the console table's overall dimensions and illustrates the individual components, including the main frame and a drawer with its specific measurements.
3. Assembly Instructions
The console table includes all necessary installation parts and a detailed illustrated manual. Follow these steps carefully for proper assembly. Recommended tools: Hammer, Screwdriver, Wrench.
3.1. Unpack and Identify Components
Carefully unpack all contents from the box. Lay out all parts on a clean, soft surface to prevent scratches. Compare each part with the provided parts list to ensure nothing is missing or damaged.
3.2. Assemble the Main Frame
Connect the side panels to the top and bottom shelves using the designated hardware (e.g., dowels, cam locks, screws). Ensure all connections are snug but avoid overtightening to prevent damage to the engineered wood.
3.3. Install Drawers
Assemble the two handle-less drawers according to the manual's specific instructions. Once assembled, carefully insert them into their designated slots within the console table frame. Ensure they slide smoothly.

This composite image highlights the smooth glides of the handle-less drawers for effortless access and the non-slip pads at the base, which enhance stability and protect flooring.
3.4. Attach Anti-Tip Kits
For enhanced safety, attach the provided anti-tip kits to the back of the console table and secure them to a wall stud. This step is crucial to prevent the table from tipping, especially in households with children or pets.
3.5. Final Placement
Once fully assembled, carefully move the console table to its desired location. Ensure it is stable and level. You may place decorative items or store belongings as desired.

A view of the RALGEND Farmhouse Console Table fully assembled and placed in an entryway, showcasing its design and functionality.
4. Operating Instructions
This section provides guidance on the proper use of your RALGEND Farmhouse Console Table.
4.1. Drawer Usage
The two handle-less drawers are designed for discreet storage of small items such as keys, wallets, or electronic accessories. To open, gently pull the drawer front. To close, push firmly until it is flush with the table frame.
4.2. Shelf Usage
The open top surface and bottom shelf provide ample space for displaying decorative items like potted plants, vases, photo frames, or for storing books and baskets. Distribute weight evenly across surfaces.

This image displays the console table with various items arranged on its tabletop and open bottom shelf, illustrating its capacity for both display and storage.

A top-down perspective of the console table with its handle-less drawers pulled open, showcasing the hidden compartments suitable for organizing small personal belongings.
5. Maintenance
Proper care and maintenance will extend the life and appearance of your console table.
- Cleaning: Wipe surfaces with a soft, slightly damp cloth. Avoid using harsh chemicals, abrasive cleaners, or polishes that may damage the finish.
- Dusting: Regularly dust the table with a dry, soft cloth to prevent buildup.
- Spill Management: Immediately wipe up any spills with a dry cloth to prevent moisture from penetrating the engineered wood and causing damage or staining.
- Inspection: Periodically check all hardware connections (screws, bolts) and tighten them if they have become loose over time.
- Sunlight Exposure: Avoid prolonged exposure to direct sunlight, which can cause fading or discoloration of the finish.
6. Troubleshooting
This section addresses common issues you might encounter with your console table.
6.1. Table Wobbles After Assembly
- Ensure all screws and fasteners are fully tightened.
- Check if the floor surface is uneven. If so, use furniture shims under the table legs to stabilize it.
- Verify that the anti-tip kits are properly installed and secured to a wall stud.
6.2. Drawers Do Not Slide Smoothly
- Inspect the drawer glides for any obstructions or debris.
- Ensure the drawer is correctly aligned within its track. Remove and reinsert if necessary.
- Check that all screws holding the drawer glides to the table frame and the drawer box are secure.
6.3. Missing Parts or Damaged Components
If you discover any missing parts or damaged components upon opening the package, please contact RALGEND customer support immediately. Provide your purchase details and a description of the issue for prompt assistance.
7. Specifications
| Feature | Detail |
|---|---|
| Brand | RALGEND |
| Model Number | 2001XGBR |
| Product Dimensions (D x W x H) | 11.8" x 47.2" x 31.5" (30cm x 119.6cm x 80cm) |
| Item Weight | 52.9 Pounds (24 kg) |
| Frame Material | Engineered Wood |
| Color | Dark Brown |
| Number of Drawers | 2 |
| Assembly Required | Yes |
| Recommended Tools for Assembly | Hammer, Screwdriver, Wrench |
| Indoor/Outdoor Usage | Indoor Only |
8. Warranty and Support
For specific warranty details, product support, or to inquire about replacement parts, please visit the official RALGEND website or contact their customer service department directly. Keep your purchase receipt and model number (2001XGBR) handy for any warranty claims or support requests.
This video provides a brief overview and visual demonstration of the RALGEND Farmhouse Console Table, highlighting its features and design.