
1. Introduction
This manual provides detailed instructions for the assembly, operation, maintenance, and troubleshooting of your TRIUMPHKEY 3x9 Meter Outdoor Canopy Tent. Please read this manual thoroughly before attempting to set up or use the product to ensure safe and correct usage. This canopy tent is designed for temporary outdoor use, providing shelter for various events and activities.

2. Safety Information
- Always secure the canopy tent with all provided ropes and stakes to prevent wind damage or collapse.
- Do not use the canopy tent in severe weather conditions, including strong winds, heavy rain, snow, or thunderstorms. Disassemble and store the tent during such conditions.
- Keep all flame and heat sources away from the canopy fabric. The fabric is not fireproof.
- Ensure proper ventilation when using heating or cooking appliances inside or near the tent.
- Supervise children around the canopy tent.
- Regularly check all connections and components for wear or damage. Do not use if any parts are compromised.
- Clear any accumulated water or snow from the canopy roof promptly to prevent structural damage.
3. Package Contents
Before assembly, verify that all components are present and undamaged. If any parts are missing or damaged, please contact customer support.
- Steel Frame Poles (various lengths and types for legs, roof, and connectors)
- Connectors (plastic or metal joints)
- Canopy Top Fabric (PE fabric with silver coating)
- Side Walls (7 detachable walls, 6 with transparent windows)
- Ropes and Stakes for securing
- Instruction Manual

4. Setup Instructions
Assembly typically requires two people and takes approximately 15 minutes. No additional tools are required.
- Unpack Components: Lay out all frame poles, connectors, canopy fabric, and side walls in an open area.
- Assemble the Roof Frame: Connect the shorter poles and corner connectors to form the rectangular roof frame. Ensure all connections are secure.
- Attach Canopy Top: Drape the canopy top fabric over the assembled roof frame. Ensure it is centered and the corners align with the frame.
- Attach Leg Poles: Insert the longer leg poles into the corner connectors of the roof frame.
- Raise the Frame: With assistance, carefully lift the frame and extend the legs to the desired height. Press the central mechanism to lock the height in place.
- Secure the Frame: Attach the provided ropes to the canopy corners and stake them firmly into the ground. Use additional stakes for the leg bases if available.
- Install Side Walls: Attach the detachable side walls using the integrated fasteners (zippers, Velcro, or buckles). The 6 walls with transparent windows can be placed as desired, and one solid wall can be used for privacy or as an entrance.

5. Operating Instructions
5.1. Adjusting Side Walls
The canopy features 7 detachable side walls. These can be easily removed or attached to adapt to weather conditions or your specific needs. For increased ventilation, remove some or all side walls. To block cold air, sunlight, or rain, attach the walls securely using the zippers and connecting buckles.
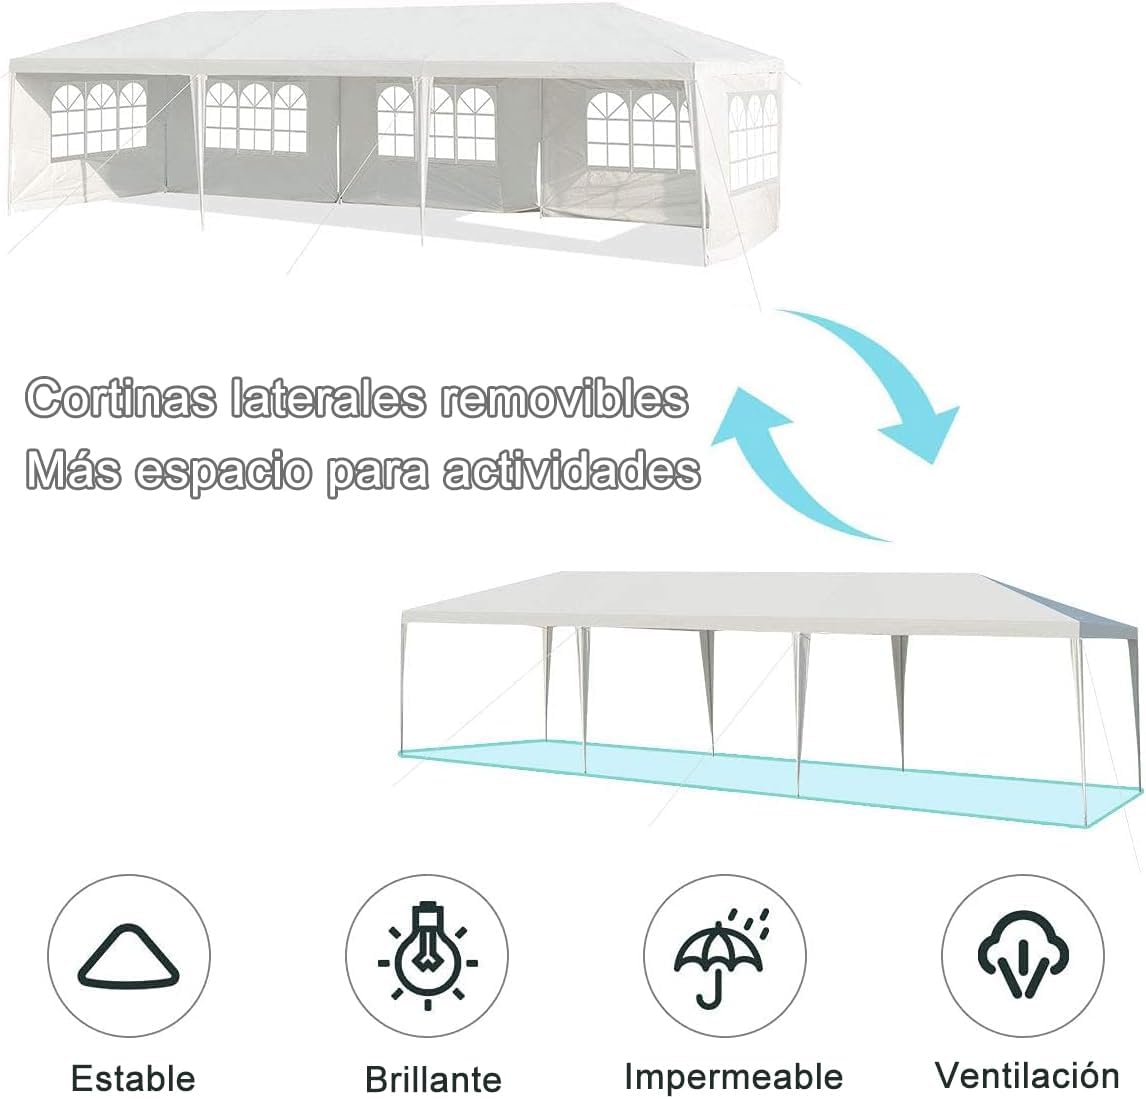
5.2. Height Adjustment
The canopy's height can be adjusted by pressing the central mechanism on the frame. Ensure all legs are adjusted to the same height for stability.
5.3. Securing the Tent
Always use the provided ropes and stakes to secure the tent, especially in windy conditions. For added stability, consider using sandbags or weights on the leg bases.

6. Maintenance
6.1. Cleaning
- Clean the canopy fabric with mild soap and water. Do not use harsh detergents or abrasive cleaners.
- Rinse thoroughly and allow the fabric to air dry completely before storage to prevent mildew.
- Wipe down the steel frame with a damp cloth.
6.2. Storage
- Disassemble the tent according to the reverse of the setup instructions.
- Ensure all components are clean and dry before packing.
- Store the tent in a cool, dry place, away from direct sunlight and extreme temperatures.
- The compact design allows it to fit in most car trunks for easy transport and storage.
7. Troubleshooting
- Tent instability: Ensure all ropes and stakes are properly secured. Check that all frame connections are tight and the legs are evenly extended.
- Water pooling on canopy: Verify that the canopy fabric is taut and properly stretched over the frame. The design is intended to prevent stagnation, but extreme conditions or improper setup can lead to pooling.
- Difficulty with assembly/disassembly: Ensure you have at least two people for setup. Refer to the setup instructions and check that poles and connectors are correctly oriented.
- Side walls not fitting: Check that the correct walls are being attached to the appropriate sections and that zippers or fasteners are aligned.
8. Specifications
| Feature | Detail |
|---|---|
| Model | TRIUMPHKEY 3x9 Meter Outdoor Canopy Tent |
| Dimensions (L x W x H) | 9 x 3 x 2.58 Meters (900 x 300 x 258 cm) |
| Weight | 21.44 kg |
| Frame Material | Steel Tube |
| Canopy Fabric | PE Fabric with Silver Coating |
| Color | White |
| Side Walls | 7 detachable (6 with transparent windows) |
| UV Protection | Yes (thick silver coating) |
| Water Resistance | Yes (heat-sealed technology) |

9. Warranty and Support
For warranty information, product support, or to inquire about replacement parts, please refer to the purchase documentation or contact your retailer. Keep your proof of purchase for any warranty claims.