
1. Introduction
This manual provides detailed instructions for the installation, operation, and maintenance of your Surakey Android 14 Car Stereo. This unit is designed for seamless integration into Jeep Grand Cherokee models manufactured between 2004 and 2007. It features a 10-inch touch screen, 4GB RAM, 64GB ROM, and supports advanced functionalities such as wireless CarPlay, Android Auto, GPS navigation, Bluetooth, and WiFi connectivity.
Please read this manual thoroughly before installation and use to ensure proper functionality and to prevent damage to the unit or your vehicle.

Image 1.1: Surakey Android 14 Car Stereo main unit.
2. Vehicle Compatibility
This car stereo is specifically designed for:
- Jeep Grand Cherokee: 2004, 2005, 2006, 2007 models.
Please ensure your vehicle's dashboard configuration matches the installation requirements. Note: Model A will fit. Model B will not fit.
3. Package Contents
The package includes the following items:
- 1 x Car Stereo Radio Unit
- Necessary wiring harnesses
- GPS module
- USB cables
- Installation accessories
4. Technical Specifications
| Feature | Specification |
|---|---|
| Operating System | Android 14 |
| Screen Size | 10 Inches |
| Screen Resolution | 1280x720 (HD IPS) |
| Memory (RAM) | 4GB |
| Storage (ROM) | 64GB |
| Power Output | 4x45W |
| Work Temperature | -20℃ to 75℃ |
| Connectivity | Bluetooth, USB (Double interface), Wi-Fi |
| Navigation | Built-in offline maps (requires internet to download data), supports online navigation apps |
| Radio Band | Frequency Modulation (FM) / RDS |
| Video Output | Supported |
| Reversing Input | CVBS (for backup camera) |
| External Microphone | Supported |
| Split Screen | Supported |
| Steering Wheel Control | Supported |
| Audio Formats | APE/FLAC/WAV/MP3/WMA and more |
| Video Formats | MKV/RMVB/AVI/MP4/MDV and more |
| Picture Formats | PNG/JPEG/JPG/GIF/WBMP/BNP and more |
| Languages | Chinese, English, French, Italian, Korean, Japanese, Arabic, Spanish, Portuguese, Russian, Turkish, Vietnamese, Hebrew, Polish, German |

Image 4.1: High-definition 10.1-inch IPS screen with 1280x720 resolution.
5. Installation Guide
Professional installation is recommended. Ensure the vehicle's power is disconnected before beginning installation.
5.1. Pre-Installation Check
- Verify all package contents are present.
- Confirm compatibility with your Jeep Grand Cherokee (2004-2007).
- Familiarize yourself with your vehicle's dashboard layout and existing stereo removal process.
5.2. Removing the Old Stereo
Carefully remove the trim panels and screws securing the factory radio. Disconnect all wiring harnesses and the antenna cable from the old unit.
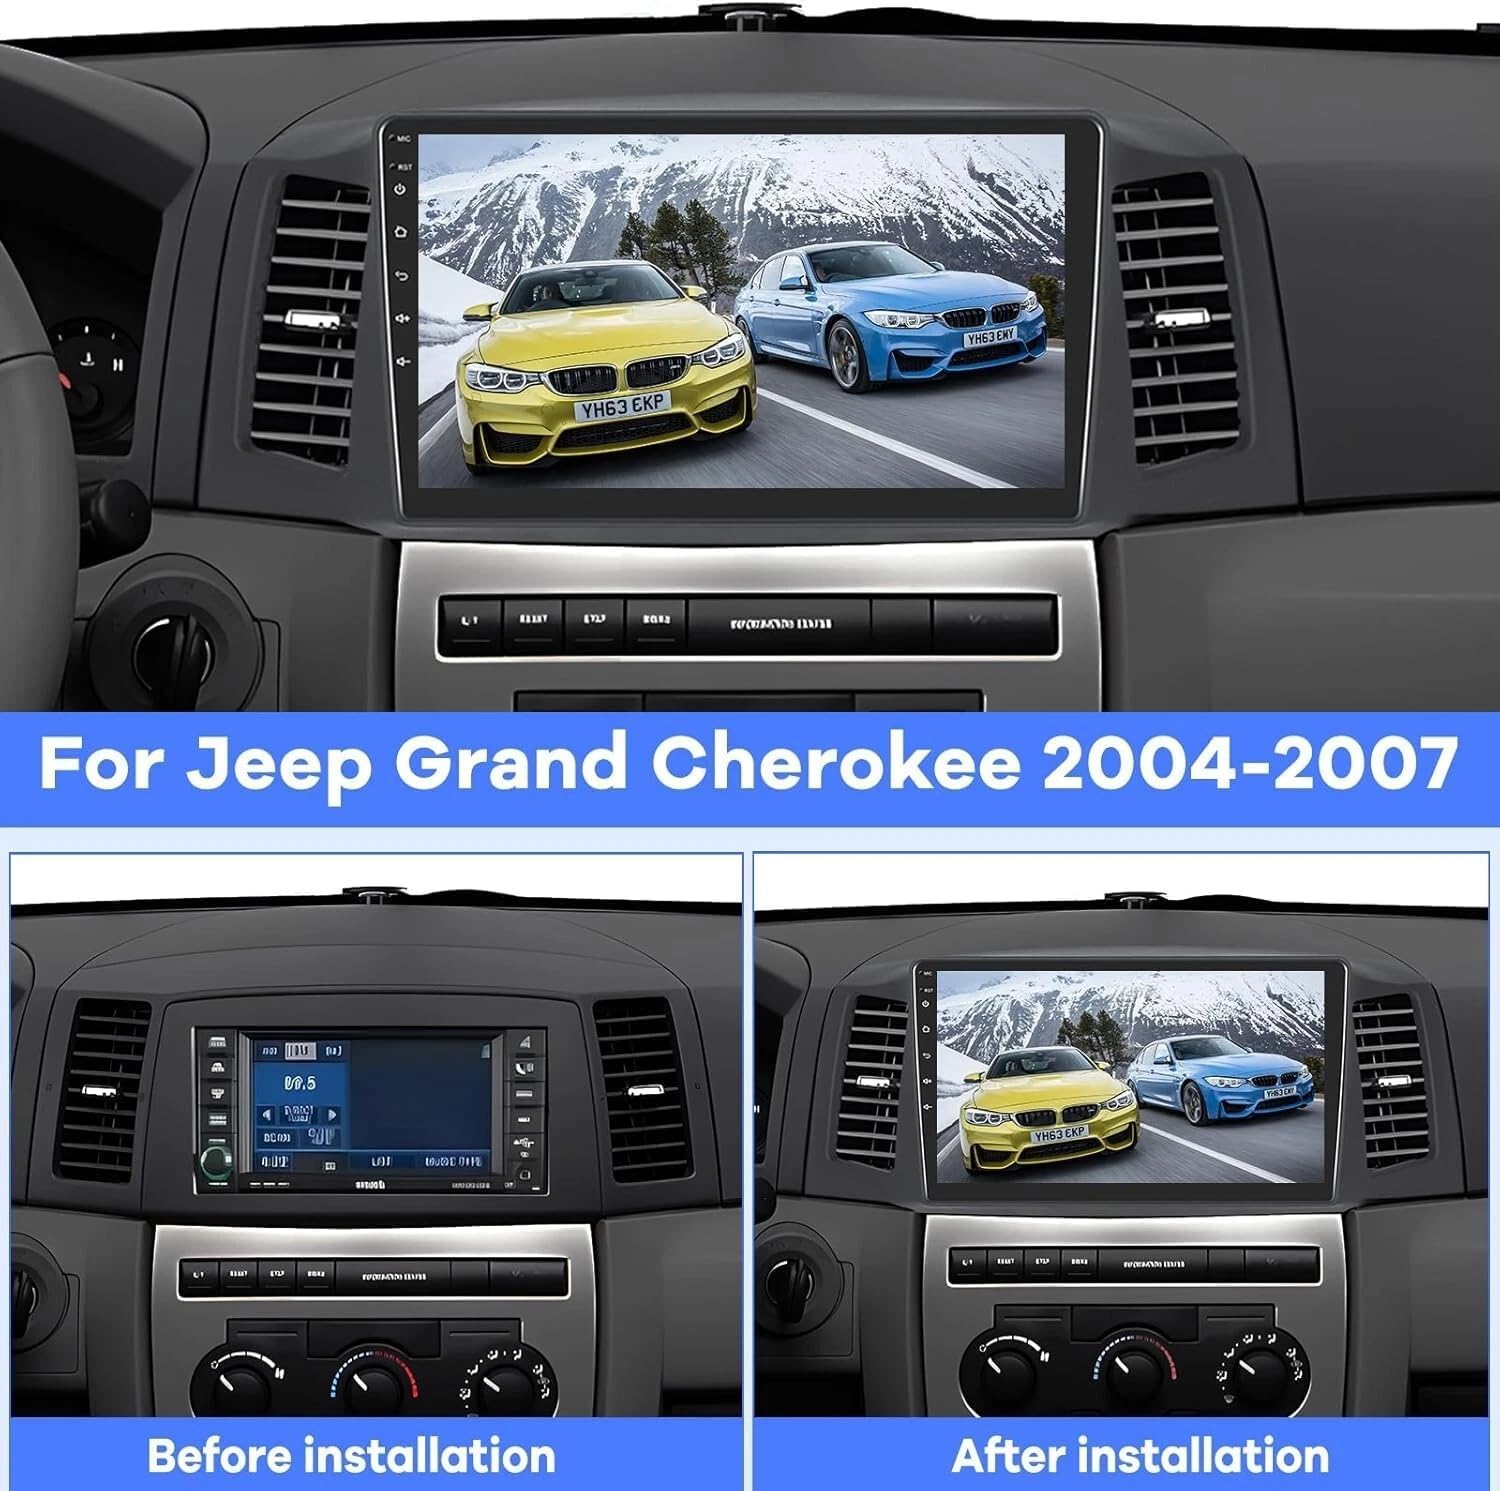
Image 5.1: Comparison of dashboard before and after installing the new car stereo.
5.3. Wiring Connections
- Connect the provided wiring harness to the new car stereo and then to the vehicle's factory harness.
- Connect the GPS module to the designated port on the stereo and position the antenna for optimal signal reception.
- If installing a backup camera, connect its video input (CVBS) to the stereo's reversing input.
- Connect any external USB devices or microphones as needed.
5.4. Mounting the New Stereo
Secure the new car stereo into the dashboard opening using the appropriate mounting brackets and screws. Reattach all trim panels.

Image 5.2: The car stereo unit seamlessly integrated into the vehicle's dashboard.
5.5. Initial Power-Up and Testing
Reconnect the vehicle's power. Turn on the stereo and perform initial tests:
- Check display functionality and touch response.
- Test audio output from all speakers.
- Verify radio reception.
- Test GPS signal acquisition.
- Test Bluetooth connectivity with a mobile device.
- If installed, test the backup camera functionality by engaging reverse gear.
6. Operating Instructions
6.1. Basic Navigation
- Touch Screen: The 10-inch touch screen allows for intuitive control of all functions.
- Home Screen: Access various applications and settings from the customizable home screen.
- Volume Control: Adjust volume using the on-screen controls or steering wheel buttons (if configured).
6.2. CarPlay and Android Auto
The unit supports both wireless and wired CarPlay and Android Auto. This allows integration with your iOS or Android smartphone for navigation, music, calls, and messaging.
- Wireless Connection: Enable Bluetooth and Wi-Fi on your smartphone and connect to the car stereo. Follow the on-screen prompts to initiate CarPlay or Android Auto.
- Wired Connection: Connect your smartphone to the stereo using a USB cable. The system will automatically detect and launch CarPlay or Android Auto.

Image 6.1: Display showing Wireless Apple CarPlay, Android Auto, and Mirror Link options.
6.3. GPS Navigation
The stereo comes with built-in offline maps. For online navigation, connect to Wi-Fi and download your preferred navigation applications.
- Offline Maps: Use the pre-installed maps for navigation without an internet connection. Initial data download may require internet.
- Online Maps: Connect to Wi-Fi and download apps like Waze, Google Maps, Sygic, or HereWeGo from the app store.

Image 6.2: The unit's built-in GPS and WiFi capabilities, demonstrating online map usage and music streaming.
6.4. Bluetooth Connectivity
Pair your smartphone via Bluetooth for hands-free calling and audio streaming.
- Go to the Bluetooth settings on the stereo and enable Bluetooth.
- Search for the stereo on your smartphone and pair the devices.
- Once connected, you can make/receive calls and play music wirelessly.
6.5. Split Screen Functionality
The split-screen feature allows you to run two applications simultaneously, such as navigation and music playback.
- To activate, open an application, then long-press the recent apps button or follow the specific gesture/button combination for split-screen mode on Android 14.
- Select a second application to display alongside the first.
6.6. Mirror Link
Mirror Link allows you to display your smartphone's screen directly onto the car stereo's display via Wi-Fi.
- Access the Mirror Link application on the stereo.
- Follow the instructions to connect your iOS or Android smartphone.
6.7. Steering Wheel Control (SWC)
The unit supports steering wheel control, allowing you to manage audio and calls without taking your hands off the wheel.
- Access the Steering Wheel Control settings in the stereo's menu.
- Follow the on-screen instructions to program each button on your steering wheel to the desired function (e.g., volume up/down, track skip, answer call).
6.8. Backup Camera Support
If a compatible backup camera is connected, the display will automatically switch to the camera view when the vehicle is put into reverse gear.

Image 6.3: Visual representation of backup camera, Bluetooth, GPS navigation, and steering wheel control functionalities.
6.9. Feature Demonstration Video
Video 6.1: A detailed demonstration of various features of the 4GB+64GB car stereo, including split-screen settings, speed unit switch, and memory clearing. This video is provided by the seller, Hodozzy Direct.
7. Maintenance
- Cleaning the Screen: Use a soft, lint-free cloth to gently wipe the touch screen. Avoid abrasive cleaners or solvents.
- Software Updates: Periodically check for software updates to ensure optimal performance and access to new features. Updates can typically be performed via Wi-Fi.
- Temperature: Operate the unit within the specified working temperature range (-20℃ to 75℃) to prevent damage.
8. Troubleshooting
8.1. No Power
- Check all power connections and fuses.
- Ensure the vehicle's ignition is on.
8.2. No Sound
- Verify the volume is not muted or set too low.
- Check speaker connections.
- Ensure the correct audio source is selected.
8.3. GPS Signal Issues
- Ensure the GPS antenna is properly connected and has a clear view of the sky.
- Move the vehicle to an open area away from tall buildings or dense foliage.
8.4. Bluetooth Connectivity Problems
- Ensure Bluetooth is enabled on both the stereo and your smartphone.
- Delete previous pairings and attempt to re-pair the devices.
- Restart both the stereo and your smartphone.
8.5. Touch Screen Unresponsive
- Perform a soft reset of the unit (refer to the device settings for reset options).
- Ensure the screen is clean and free of debris.
9. Safety Information
- Do not operate the unit in a way that distracts you from driving. Always prioritize road safety.
- Avoid exposing the unit to extreme temperatures, direct sunlight for prolonged periods, or excessive moisture.
- Do not attempt to disassemble or modify the unit. This may void the warranty and cause damage.
- Ensure all wiring is properly insulated and secured to prevent short circuits or electrical hazards.