
1. Important Safety Information
WARNING: Read and understand all safety precautions and instructions before operating this plasma cutter. Failure to do so may result in serious injury or death.
- Always wear appropriate Personal Protective Equipment (PPE), including a welding helmet with proper shade, flame-resistant clothing, heavy-duty gloves, and safety glasses.
- Ensure adequate ventilation to avoid inhaling fumes and gases produced during cutting.
- Keep flammable materials away from the cutting area. Sparks and hot metal can cause fires.
- Ensure the work area is dry and free from moisture to prevent electrical shock.
- Properly ground the plasma cutter and the workpiece.
- Do not operate the machine if any cables or components are damaged.
- Disconnect power before performing any maintenance or changing consumables.
2. Product Overview
The haxiaoer HXC550D is a 55A DC Inverter Plasma Cutter designed for efficient and precise cutting of various metals. It features a non-touch pilot arc for easy starting on painted or rusty surfaces, dual voltage capability (110V/220V) for versatile use, and a large LED display for clear monitoring of cutting parameters. The machine supports 2T/4T operation modes and includes a post-flow function for improved cut quality and consumable life.

Image 1: haxiaoer HXC550D Plasma Cutter and included accessories.
Key Features:
- Non-Touch Pilot Arc: High-frequency arc starting allows cutting through dirt, rust, or coatings without direct contact, extending electrode life.
- Dual Voltage (110V/220V): Automatic input voltage detection for flexible use in various power environments.
- Large LED Display: Centrally displays voltage, current, and other parameters for easy adjustment and monitoring.
- 2T/4T Function: 2T mode for flexible cutting, 4T mode for reduced fatigue during prolonged operations.
- Adjustable Post-Flow: 2-15 second post-flow time to ensure cleaner cuts and protect consumables.
- Cutting Thickness: Up to 3/4” (19mm) at 220V and 1/2” (12.7mm) at 110V. Ideal clean cut thickness: 1/3” (8.5mm) at 110V and 1/2” (12.7mm) at 220V.
3. What's in the Box
Upon unpacking, verify that all items listed below are present and undamaged:
- 1x haxiaoer HXC550D Plasma Cutter
- 1x Earth Clamp
- 1x Air Filter
- 1x AG60 Cutting Torch (5M)
- 1x Gas Tube
- 2x Torch Consumables (additional tips/electrodes)
- 1x Instruction Manual (this document)

Image 2: All components included in the haxiaoer HXC550D package.
4. Setup & Installation
4.1 Torch Assembly
Assemble the cutting torch components carefully. Ensure all parts are hand-tightened to avoid damage.
- Install the electrode into the torch head.
- Slide the swirl baffle over the electrode.
- Attach the corresponding nozzle.
- Screw on the shield cup.
Video 1: Detailed guide on assembling the plasma cutter torch, including electrode, swirl baffle, nozzle, and shield cup installation.
4.2 Machine Connections
Connect the torch, ground clamp, and air supply to the plasma cutter unit.
- Connect the cutting torch to the Gas-Electric Connector port on the front panel.
- Plug the pilot arc cable into the pilot arc terminal.
- Attach the control cable to the 2-pin control port.
- Connect the ground clamp to the positive terminal and secure it to the workpiece or metal workbench.
- Insert the air hose from your external air pump into the air filter regulator on the rear panel. Ensure the hose is inserted to the deepest point and secured with a hose clamp.
Video 2: Step-by-step instructions for connecting the plasma cutter components, including torch, ground clamp, and air hose.
4.3 Power Connection
The HXC550D supports dual voltage operation. Connect the appropriate power cord to a compatible 110V or 220V power outlet.
5. Operating Instructions
5.1 Power On and Initial Settings
- Ensure all connections are secure.
- Turn on the main power switch located on the rear panel.
- Adjust the air pressure using the regulator until the gauge reads approximately 0.4 MPa (60 PSI) for optimal cutting.
- Use the control knob on the front panel to set the desired cutting current (Amperage) based on the material thickness.
- Adjust the post-flow time (2-15 seconds) as needed.
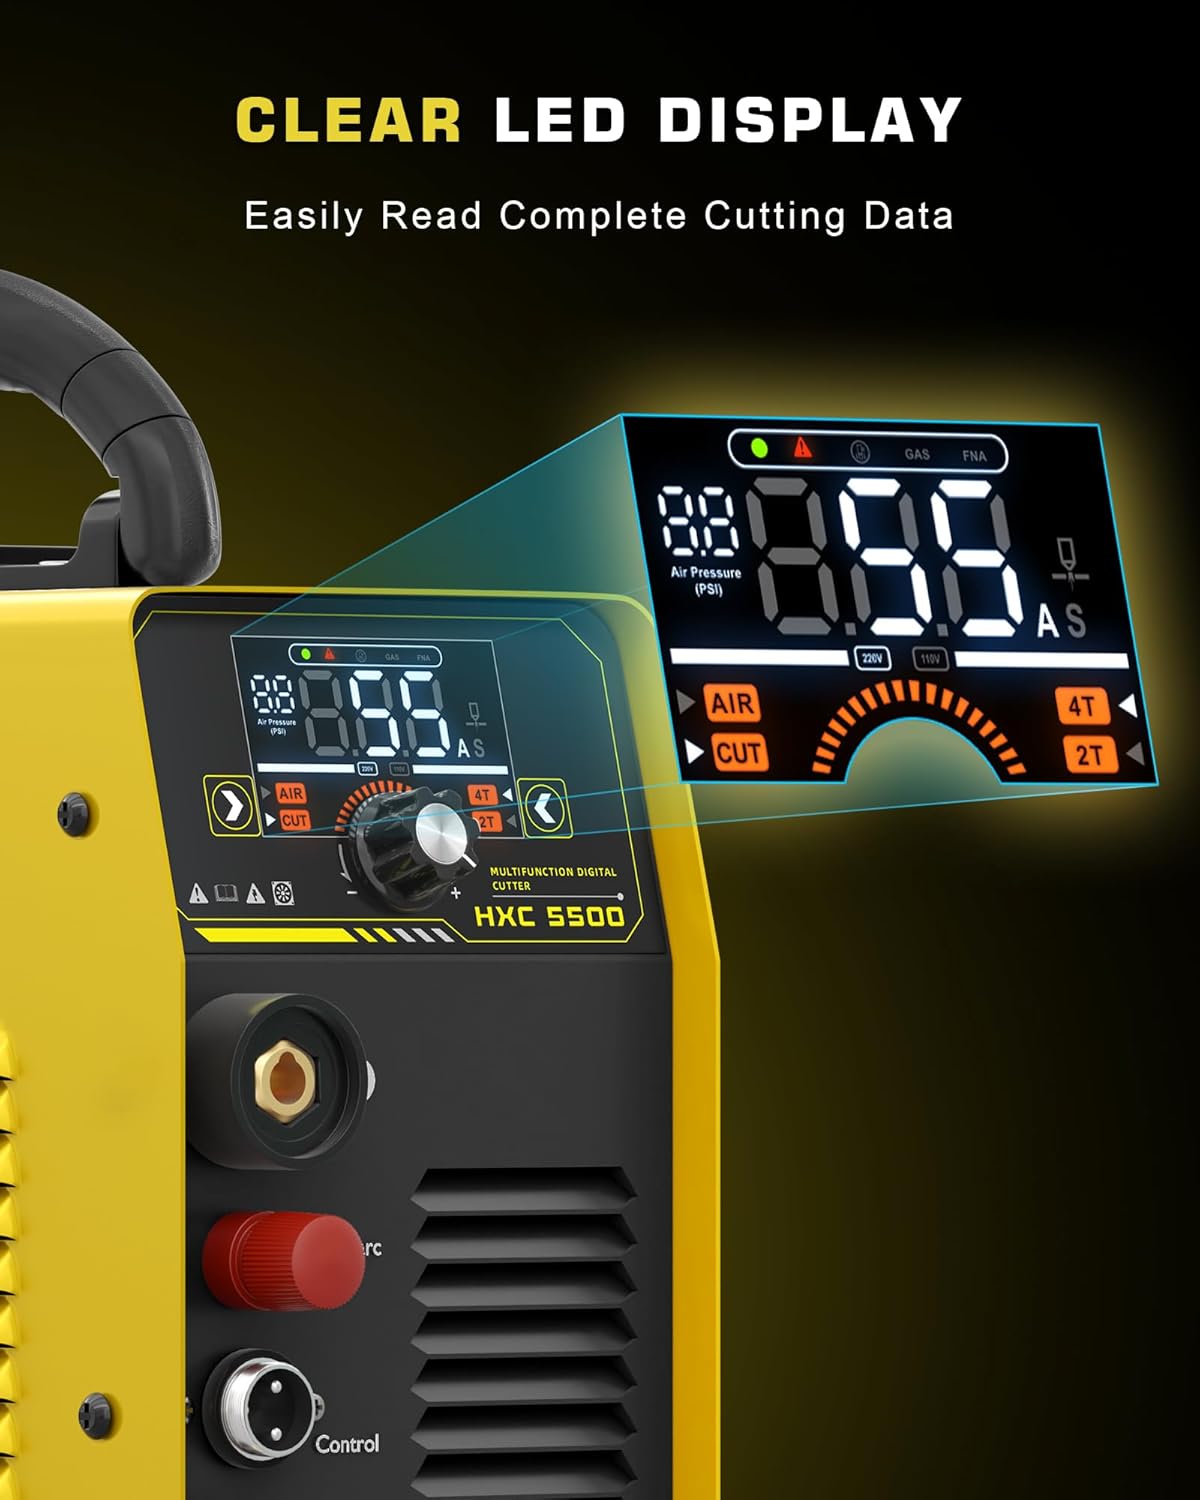
Image 3: The large LED display provides clear visibility of cutting parameters.
5.2 Cutting Modes (2T/4T)
- 2T Mode (Two-Touch): Press and hold the torch button to start cutting. Release the button to stop cutting. This mode is suitable for short, flexible cuts.
- 4T Mode (Four-Touch): Press and release the torch button to start cutting. The arc will remain active. Press and release the button again to stop cutting. This mode is ideal for prolonged cutting operations to reduce operator fatigue.

Image 4: The 2T/4T function allows for flexible cutting control.
5.3 Cutting Process
Position the torch over the workpiece. Due to the non-touch pilot arc, direct contact with the material is not required. Initiate the arc using the selected 2T or 4T mode and move the torch steadily along the desired cut line.

Image 5: The non-touch pilot arc allows for easy and efficient cutting.
Video 3: Demonstration of plasma cutting various materials and thicknesses using the non-touch pilot arc feature.
Video 4: Overview of the plasma cutter's features and cutting capabilities on different materials.
6. Maintenance
Regular maintenance ensures optimal performance and extends the lifespan of your plasma cutter.
- Consumables: Regularly inspect and replace torch consumables (electrode, nozzle, swirl baffle, shield cup) as they wear out. Worn consumables can lead to poor cut quality and damage to the torch.
- Air Filter: Periodically check and drain the water from the air filter. Replace the filter element if it becomes clogged or damaged.
- Cleaning: Keep the machine clean and free from dust and metal particles. Use compressed air to blow out the internal components, ensuring the cooling fan and vents are clear.
- Cables and Connections: Inspect all cables and connections for wear, cuts, or loose fittings before each use.
Video 5: Instructions on how to replace consumables to maintain and improve cutting results.
7. Troubleshooting
If you encounter issues, refer to the following common problems and solutions:
- No Arc: Check power supply, air pressure, ground clamp connection, and torch consumables. Ensure the torch button is fully pressed.
- Poor Cut Quality: Verify correct amperage and air pressure settings for the material. Inspect and replace worn consumables. Ensure proper torch travel speed.
- Machine Overheating: Allow the machine to cool down. Ensure adequate ventilation and clear any obstructions from the cooling vents. Check the duty cycle.
- Error Codes: The LED display may show error codes (e.g., E01-E06). Refer to the detailed error code table in the full manual for specific solutions.

Image 6: The machine features multiple protection functions and displays warning codes for troubleshooting.
For persistent issues or complex problems, contact customer support.
8. Specifications
| Specification | Detail |
|---|---|
| Model Number | HXC550D |
| Manufacturer | haxiaoer |
| Power Source | AC/DC Inverter, Dual Voltage 110V/220V |
| Max Cutting Current | 55A |
| Max Clean Cut Thickness (220V) | 1/2 inch (12.7mm) |
| Max Severance Cut Thickness (220V) | 3/4 inch (19mm) |
| Duty Cycle | 60% |
| Item Weight | 8.12 kg (17.9 lbs) |
| Parcel Dimensions | 38.1 x 30.48 x 20.32 cm (15 x 12 x 8 inches) |
| Material | Metal |
9. Warranty and Support
The haxiaoer HXC550D Plasma Cutter comes with a manufacturer's warranty. Please refer to the warranty card included in your package for specific terms and conditions.
For technical support, troubleshooting assistance, or warranty claims, please contact haxiaoer customer service through the retailer where the product was purchased or visit the official haxiaoer website for contact information.
Contact Information:
- Website: Visit the haxiaoer Store on Amazon
- Email: [Manufacturer's Email Address - if available, otherwise omit]
- Phone: [Manufacturer's Phone Number - if available, otherwise omit]