1. Introduction
This manual provides detailed instructions for the AceGamer C16 Mobile Gaming Controller. It covers setup, operation, advanced features, and troubleshooting to ensure an optimal gaming experience with your compatible mobile device.
The AceGamer C16 is designed for use with iPhone 15 series and Android devices featuring a USB-C connector. It offers a direct, low-latency connection, Hall Effect joysticks and triggers, mechanical microswitch buttons, and customizable features like macro programming and turbo functions.
2. Package Contents
Verify that all items are present in your package:
- 1x AceGamer C16 Mobile Gaming Controller
- 1x Type-C Charging Cable
- 1x User Manual (this document)
- 1x Replaceable D-pad
- 2x Rocker Cap
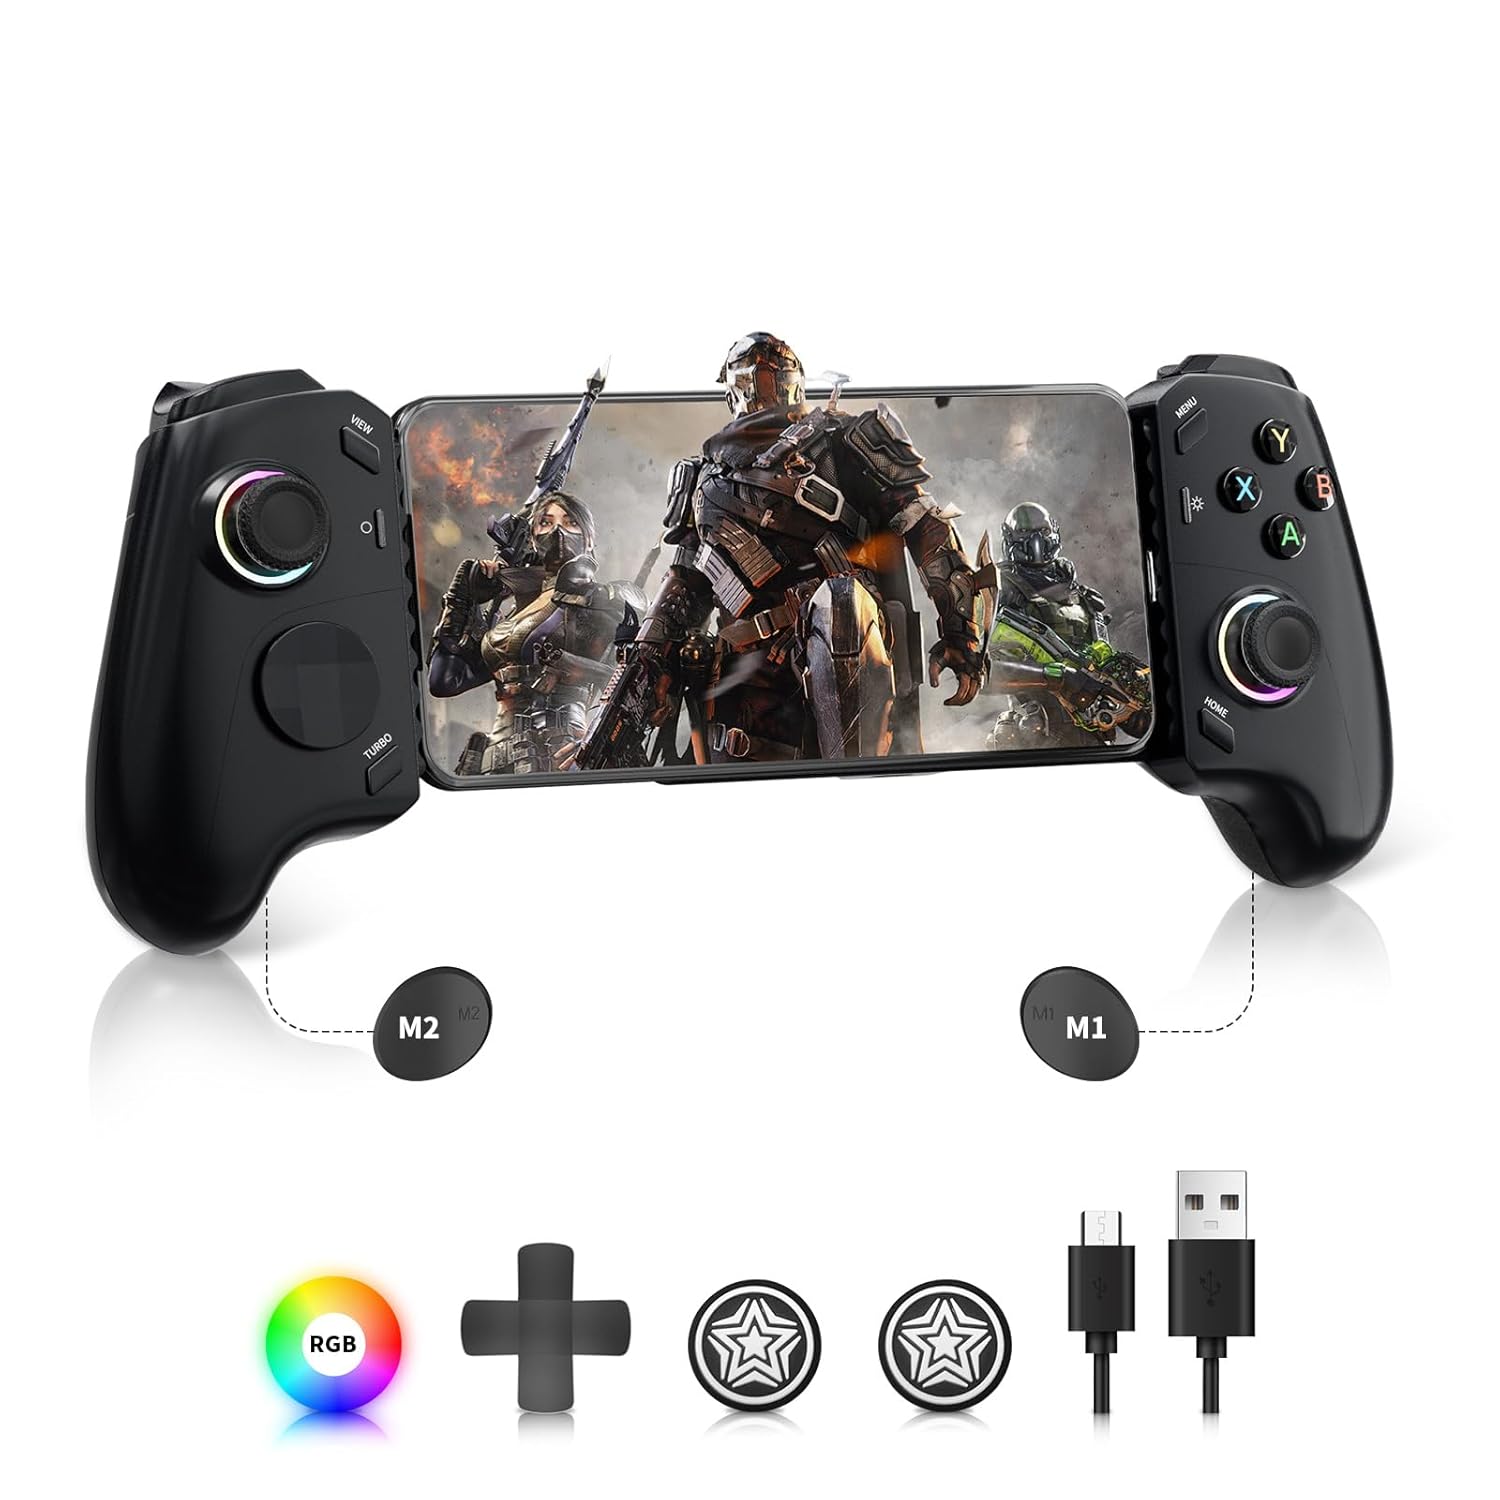
Image: AceGamer C16 Mobile Gaming Controller with included accessories, including the controller, Type-C cable, replaceable D-pad, and rocker caps.
3. Product Overview
Familiarize yourself with the controller's layout and components.

Image: Top-down and bottom-up views of the AceGamer C16 controller with labels for all buttons, joysticks, D-pad, triggers, and the USB-C charging jack.
Key Components:
- Left Stick (L3): Analog joystick with press function.
- Right Stick (R3): Analog joystick with press function.
- D-pad: Directional pad.
- ABXY Buttons: Action buttons.
- LB/RB: Left and Right Bumper buttons.
- LT/RT: Left and Right Linear Trigger buttons.
- View Button: Typically for menu or map functions.
- Menu Button: Typically for system menus.
- Home Button: Returns to the device's home screen or game menu.
- Screenshot Button: Captures a screenshot.
- Turbo Button: Activates turbo function.
- M1/M2 Buttons: Programmable macro buttons.
- USB-C Connector: For connecting your mobile device.
- USB Charging Jack: For pass-through charging.
4. Setup and Connection
4.1 Compatibility
The C16 controller is compatible with:
- Android Devices: USB-C port Android devices (Android 8.0 and above).
- iOS Devices: USB-C port Apple devices (iPhone 15 series, iOS 14 and above).
Note: Avoid using phone cases thicker than 1mm, as they may prevent proper connection to the USB-C port.
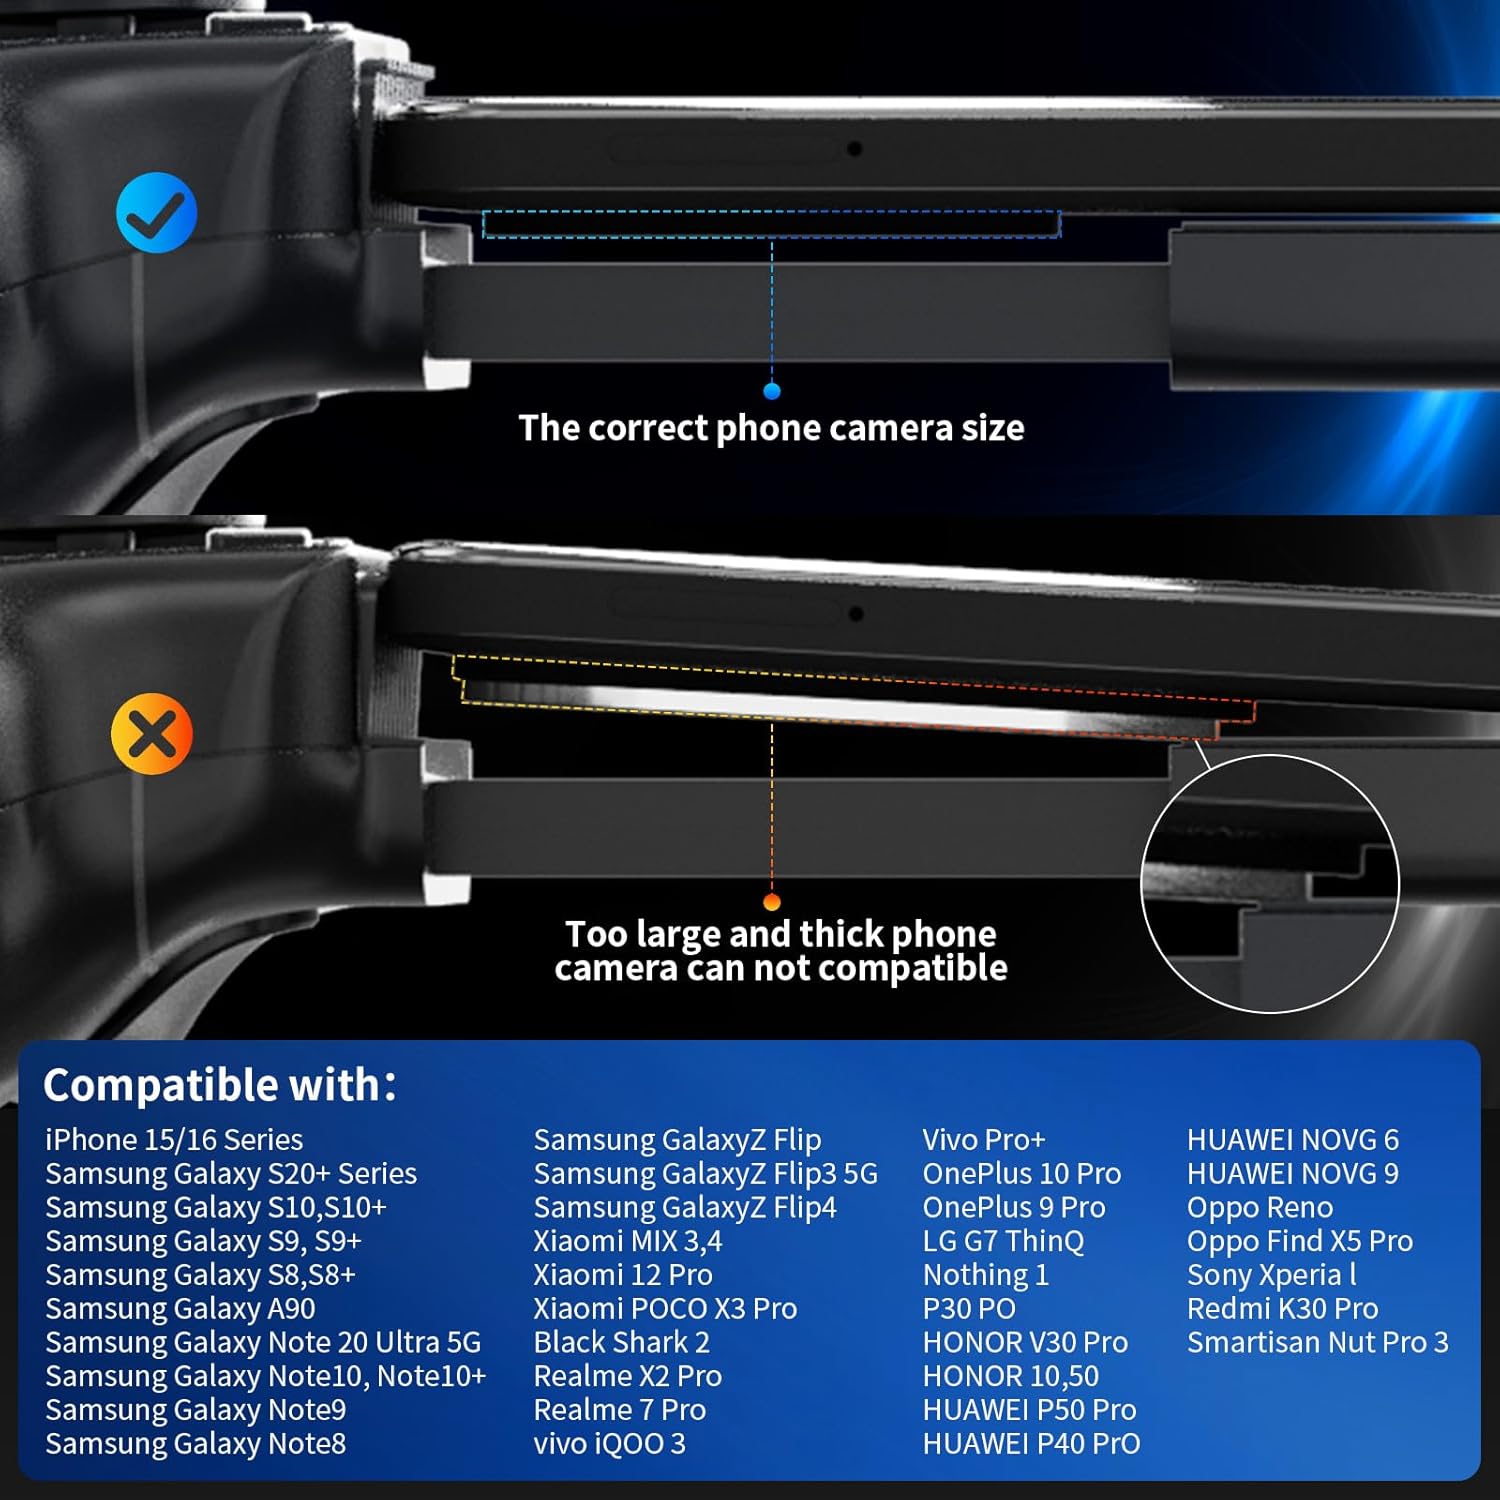
Image: A diagram illustrating the correct phone camera size and thickness for compatibility with the controller, contrasting it with a phone that is too large or has a thick camera module.
4.2 Connecting Your Device
- Gently extend the controller to fit your mobile phone. The adjustable stretchable design accommodates phones between 135-173mm in length.
- Align your phone's USB-C port with the controller's movable Type-C connector.
- Insert the phone firmly into the connector. The controller will automatically power on upon successful connection.
The direct Type-C connection ensures zero latency for responsive gameplay. The controller also supports pass-through charging, allowing you to charge your phone while playing by connecting a Type-C cable to the controller's USB Charging Jack (supports PD2.0 protocol).

Image: A phone securely connected to the AceGamer C16 controller, highlighting its silicon design for grip, adaptive Type-C connector, replaceable D-pad, and ergonomic non-slip grips.
5. Operating Instructions
5.1 Supported Platforms and Games
The C16 controller supports a wide range of gaming platforms and mobile games:
- Mobile Games: Compatible with popular titles such as Genshin Impact, Call of Duty Mobile, and many others.
- Cloud Gaming: Supports platforms like Steam Link, Moonlight, PS Remote Play, Xbox Cloud Gaming, Xbox Game Pass, Luna, Stadia, Rainway, and NVIDIA GeForce NOW.
- PC Gaming: Can be used with PC and other cloud platforms for seamless cross-device gaming.

Image: A visual representation of the AceGamer C16 controller with a phone, surrounded by logos of supported gaming platforms including PS Remote Play, Xbox Remote Play, Steam Link, Apple Arcade, Xbox Game Pass, Stadia, Luna, Moonlight, Rainway, and NVIDIA GeForce NOW.
5.2 Hall Effect Joysticks and Triggers
The C16 features Hall Effect joysticks and linear triggers for enhanced precision and durability.
- Hall Effect Joysticks: Provide flawless, long-lasting precision with no latency, extended lifespan, no dead zones, and anti-drift capabilities.
- Hall Effect Linear Triggers: Offer precise, contactless magnetic sensing, deepening immersion in driving, shooting, and action-adventure games. They support adjustable fast trigger mode.
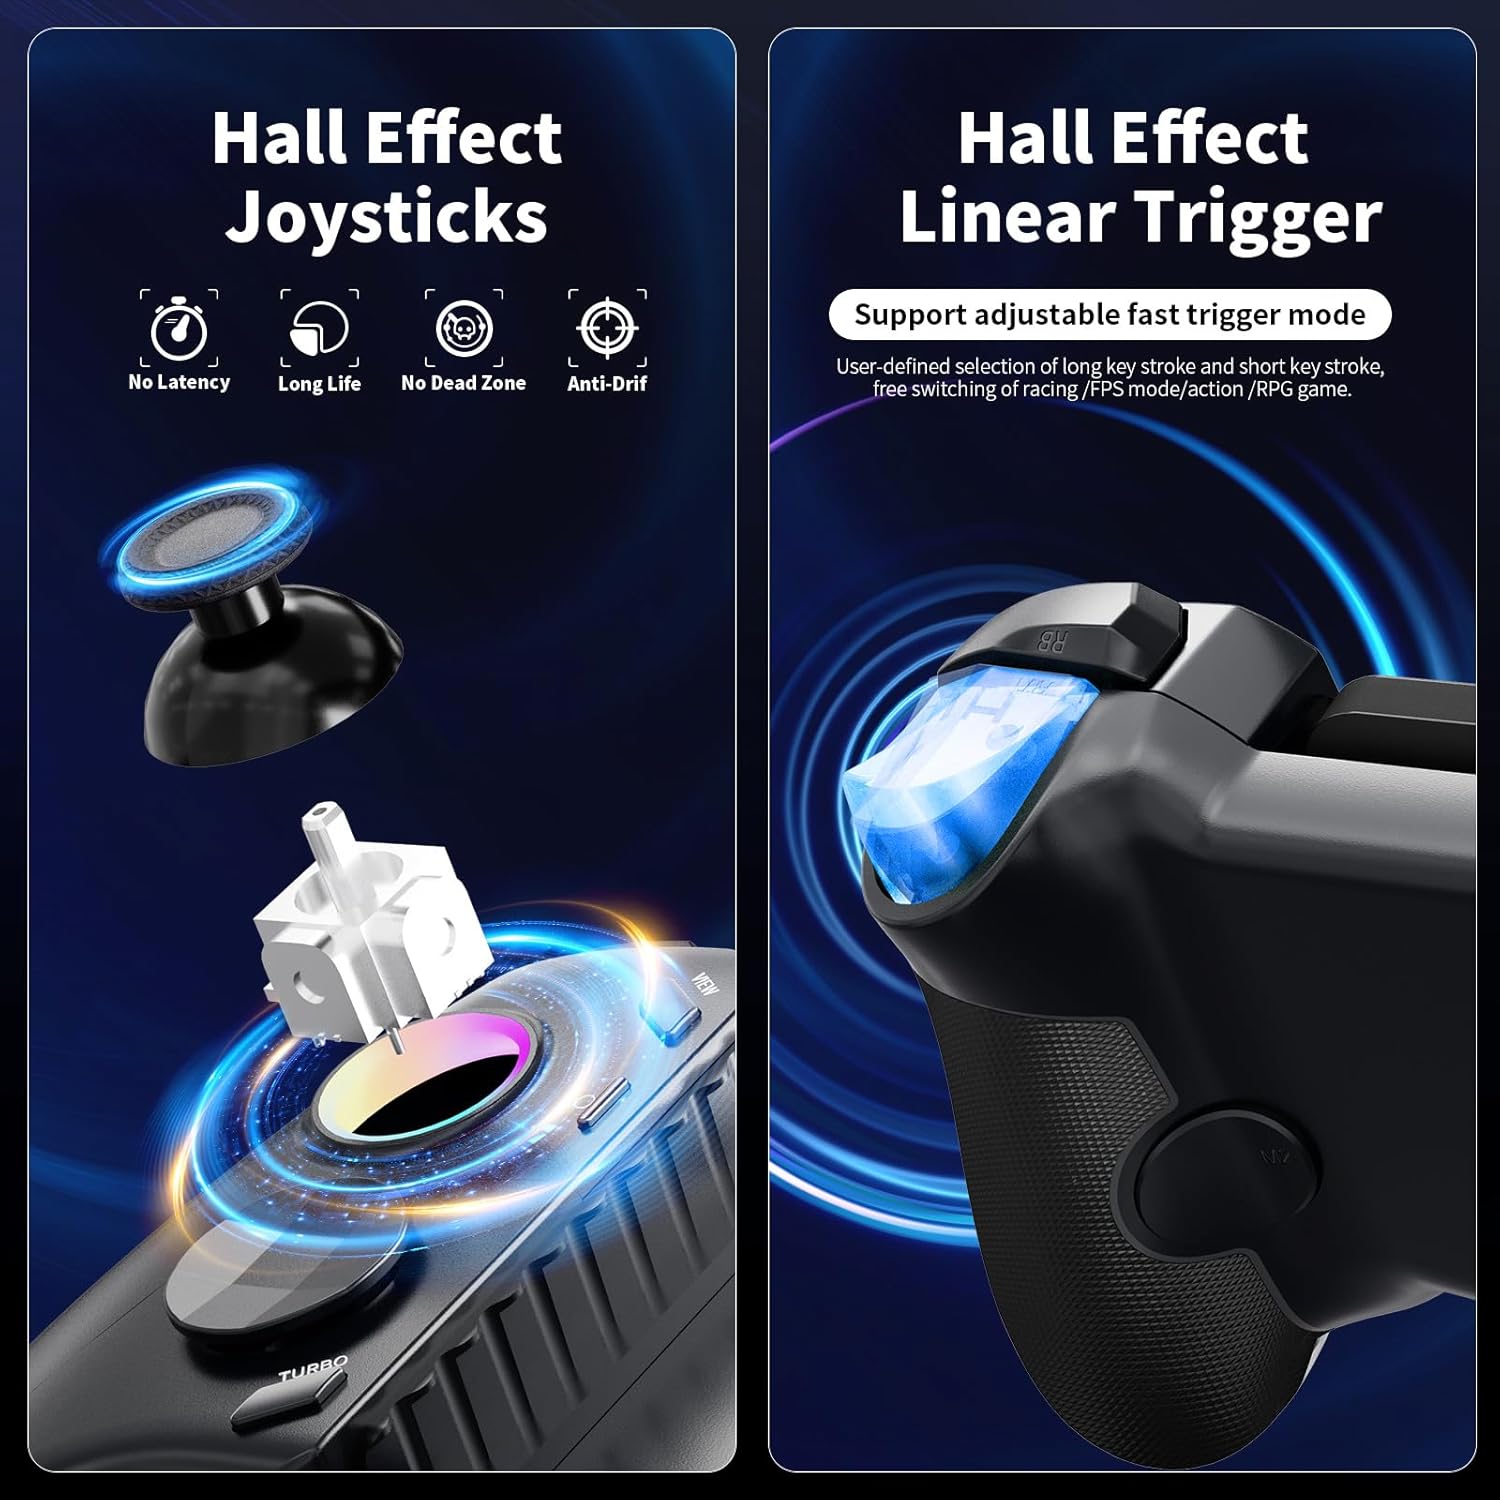
Image: A split image showing the internal mechanism of a Hall Effect joystick with its magnetic sensor and a Hall Effect linear trigger glowing blue, emphasizing their precision and contactless operation.
5.3 Mechanical Microswitch Buttons
The ABXY buttons are equipped with mechanical microswitches, designed for durability and responsive feedback.
- Withstand up to 5 million clicks.
- Offer hyper-responsive actuation with fast response and clear tactile feedback.
- The distinct "click" sound enhances the gaming experience.

Image: A close-up view of the controller's ABXY buttons, revealing the mechanical microswitches underneath. Below, a diagram illustrates the ABXY key value interchange between PC mode (Xbox layout) and Switch mode.
5.4 Advanced Features
5.4.1 Macro Programming
Program the M1 and M2 buttons with custom key combinations.
- Supports up to 24 key combinations.
- Features shutdown memory function, retaining your programmed macros.
5.4.2 Turbo Function
Activate rapid-fire for specific buttons.
- Adjustable to 3 speeds: 5, 12, or 20 presses per second.
- Applicable keys include A, B, X, Y, LB, RB, LT, RT.
- To activate: Press and hold the Turbo button, then press the desired action button. Repeat to cycle through speeds or deactivate.
- Note: Turbo settings are not saved after power off.

Image: A visual guide demonstrating macro programming for M1 and M2 buttons with up to 24 key combinations, and the three adjustable turbo speeds (5, 12, 20 shots/s) for various action buttons.
5.4.3 RGB Aperture Light Effects
Customize the joystick lighting to match your preference.
- 8-color switching: Cycle through different monochrome colors.
- Dazzle Mode: Displays a flowing multi-color effect.
- Light off Mode: Turns off the RGB lighting.
- Dynamic Brightness Adjustment: Joystick lighting changes based on joystick position.
- To change modes: Press Turbo + LED Key (usually the Home button or a dedicated light button).

Image: A visual guide demonstrating the customizable RGB light effects for the joysticks, including Dazzle Mode, Monochrome Mode, and Light off Mode, with instructions on how to change them.
5.4.4 ABXY Key Value Interchange
Switch the ABXY button layout between PC mode (Xbox layout) and Switch mode.
- To interchange: Press and hold Turbo + O + Home for 3 seconds. The lights will blink three times to confirm.
- Note: This function is not saved after power off.
5.4.5 Fast Trigger Mode
Shortens the trigger stroke for quicker response in shooting games.
- To activate: Press and hold Turbo + M for 3 seconds. The LED light will flash 2Hz for 1 second to confirm.
- Note: This function is not saved after power off.

Image: A diagram illustrating the steps to activate Fast Trigger Mode by pressing Turbo + M for 3 seconds, shortening the trigger stroke for shooting games.
5.4.6 One-Button Screenshot
Quickly capture screenshots during gameplay.
- Press the dedicated Screenshot button (located near the left joystick) to take a screenshot.
6. Maintenance
6.1 Cleaning
To maintain the controller's condition, wipe it regularly with a soft, dry cloth. Avoid using harsh chemicals or abrasive materials.
6.2 Storage
When not in use, store the controller in a cool, dry place away from direct sunlight and extreme temperatures. Ensure the controller is fully retracted to its compact size for storage.
7. Troubleshooting
7.1 Joystick Calibration (Deviation or Insensitivity)
If you experience joystick deviation or insensitivity, you can recalibrate them:
- Press and hold View + M + Home buttons simultaneously for 3 seconds. The LED lights and rocker lights will flash white.
- Press the 'A' button to confirm the initial state.
- Swing the left and right joysticks in a full circle 3 times each.
- Press the L2 and R2 triggers to the bottom 3 times each.
- Press the 'A' button to complete the calibration. The LED lights and rocker lights will return to normal.

Image: A four-step diagram illustrating the process of calibrating joystick deviation or insensitivity, showing button presses and joystick movements.
7.2 Turning Off Rocker Dead Zone (Zero Delay Mode)
To eliminate any joystick dead zone for maximum responsiveness:
- Press and hold Turbo + L1 for 3 seconds. The left rocker light will flash 2Hz twice to confirm.
- Press and hold Turbo + R1 for 3 seconds. The right rocker light will flash 2Hz twice to confirm.
Note: This function is not saved after power off.

Image: A diagram illustrating the steps to turn off the rocker dead zone (zero delay mode) for both left and right joysticks by pressing Turbo + L1 and Turbo + R1 respectively.
7.3 Connectivity Issues
- Ensure proper fit: Verify that your phone is securely connected to the USB-C port and that its case is not interfering with the connection (cases thicker than 1mm are not recommended).
- Restart device: Disconnect the controller, restart your mobile device, and then reconnect the controller.
8. Specifications
| Feature | Detail |
|---|---|
| Model Name | C16 Mobile Game Controller |
| Dimensions (Controller) | 240mm * 130mm * 57mm (approx.) |
| Item Weight | 0.317 ounces (approx. 9 grams) |
| Supported Phone Length | 102-176 mm (adjustable stretchable design) |
| Connectivity | USB-C Direct Connection |
| Charging Protocol | PD2.0 (for pass-through charging) |
| Joystick Type | Hall Effect Joysticks |
| Trigger Type | Hall Effect Linear Triggers |
| Button Type | Mechanical Microswitch Buttons (5 million click lifespan) |
| Special Features | Macro Programming, 3-Speed Turbo, RGB Lighting, ABXY Key Value Interchange, Joystick Non-Dead Zone Mode, Quick Trigger Mode, One-Button Screenshot |
| Manufacturer | AceGamer |
9. Warranty and Support
AceGamer provides warranty service for this product. If you encounter any questions or problems with your C16 Mobile Gaming Controller, please contact AceGamer customer support for assistance. Refer to your purchase documentation or the official AceGamer website for specific warranty terms and contact information.


