
LMBGM AR9 Pro-1
LMBGM AR9 Pro-1 UHF Mono Wireless In-Ear Monitor System User Manual
Model: AR9 Pro-1
1. Introduction
The LMBGM AR9 Pro-1 is a professional UHF Mono Wireless In-Ear Monitor System designed for studio, band rehearsal, and live performance environments. It provides precise and synchronized stage monitoring with advanced anti-interference technology and low latency.
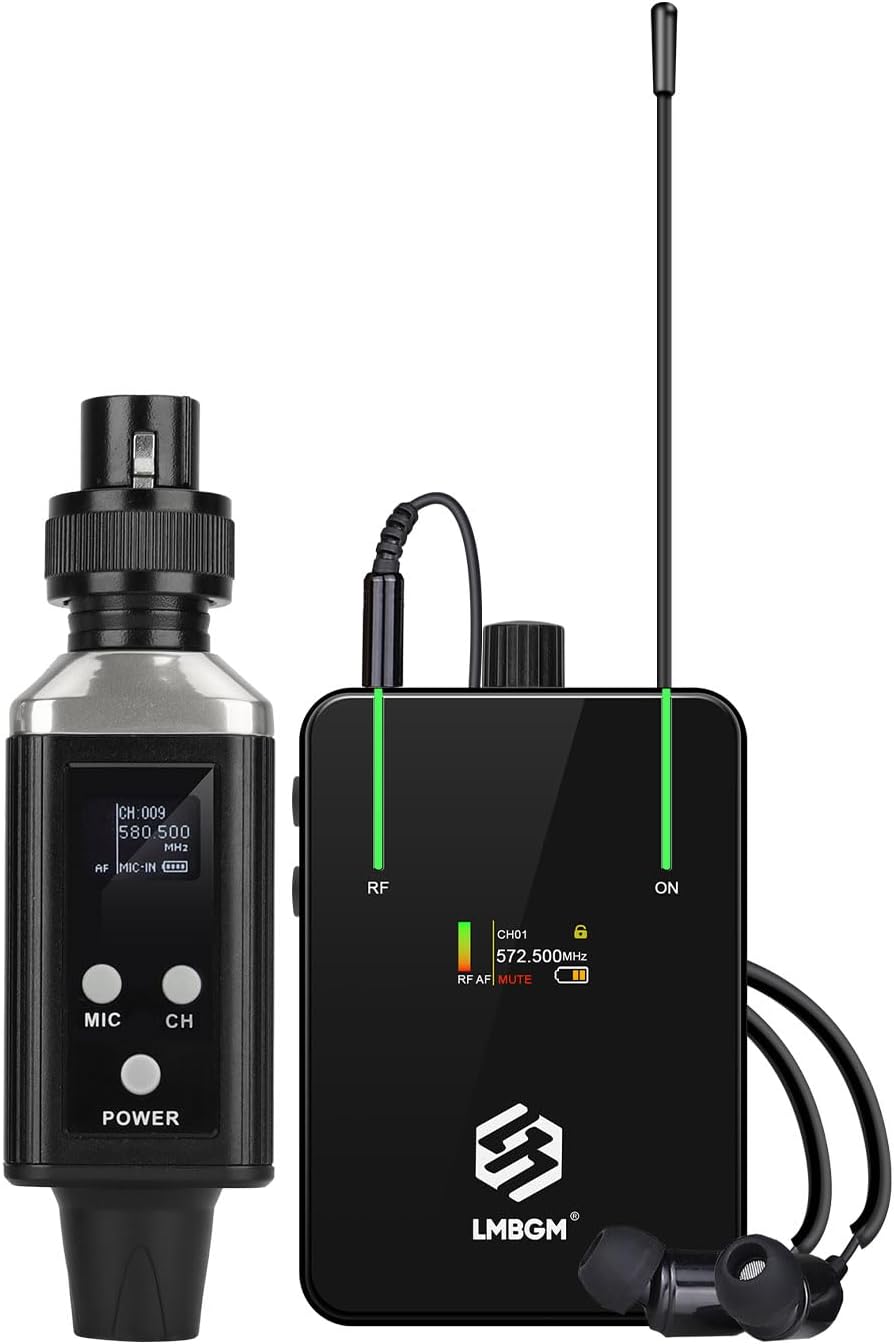
Figure 1: LMBGM AR9 Pro-1 System Components
This image displays the main components of the AR9 Pro-1 system, including the compact transmitter unit, the beltpack receiver with an antenna, and a pair of in-ear earbuds connected to the receiver.
2. Package Contents
Please verify that all items are present in your package:
- AR9 Pro-1 UHF Transmitter
- AR9 Pro-1 Beltpack Receiver
- In-Ear Earbuds (Ear Cushions included)
- USB Charging Cable (A2C dual USB charging cables)
- User Manual (this document)
3. Product Features
- Professional Mono Transmission: Wide frequency range of 50Hz-20kHz with less than 5ms delay for precise monitoring.
- Intelligent Dynamic Limiting: Automatically suppresses overload signals and eliminates pop distortion for pure sound quality.
- TFT Color Display: High-quality display panel on the receiver shows battery indicator, signal strength, and channel information.
- Durable Construction: Lightweight and sturdy metal aluminum case, resistant to drops and shocks.
- Extended Wireless Range: Stable operating range of 250 to 350 feet (up to 300 feet nominal).
- Advanced Anti-Interference: Ensures pure sound without delay or distortion.
- UHF Band PLL System: Frequency range 550 MHz-580 Mhz with 16 switchable frequencies. Improves overall performance, anti-frequency dropout, and anti-crosstalk.
- Dynamic Expansion Circuit: Significantly improves signal-to-noise ratio.

Figure 2: TFT Color Display on Receiver
This image highlights the receiver's TFT color display, which provides real-time information such as the selected channel (CH01, CH16), frequency (572.500MHz, 573.500MHz), RF and AF signal levels, mute status, and battery life. It also shows the indicator lights and metal bezel design.

Figure 3: UHF Transmission and Charging
This image illustrates the UHF transmission technology and the charging capability of the AR9 Pro-1 system. It shows both the transmitter and receiver connected to a power source via A2C dual USB charging cables, indicating a working time of 5-8 hours and a charging time of 3-4 hours.

Figure 4: Extended Transmission Range and Low Latency
This image demonstrates the AR9 Pro-1's capability for a 50-meter transmission distance, highlighting its UHF technology for anti-interference and broad frequency range, along with its impressive less than 5ms latency for real-time monitoring.

Figure 5: Strong Signal Penetration
This image visually represents the strong signal penetration capability of the AR9 Pro-1 system, showing how its signal can pass through obstacles to enhance signal stability and reliability in various environments.
4. Setup Guide
4.1 Charging the Devices
Before first use, ensure both the transmitter and receiver are fully charged. Use the provided USB charging cable to connect them to a 5V USB power adapter (not included).
- Charging time: Approximately 3-4 hours.
- Working time: Approximately 5-8 hours on a full charge.
4.2 Connecting the Transmitter
The AR9 Pro-1 transmitter can be connected to various audio sources:
- Mixing Console: Insert the transmitter directly into an available XLR or 6.35mm (1/4 inch) output on your mixing console.
- Dynamic Wired Microphone: The transmitter can act as a wireless adapter for a dynamic wired microphone. Connect your microphone to the transmitter's input.
- Mixing Soundcard: Connect the transmitter to the output of your mixing soundcard.

Figure 6: Transmitter Connection Options
This diagram illustrates the versatility of the AR9 Pro-1 transmitter, showing its compatibility with a mixing console, a dynamic wired microphone, and a mixing soundcard via XLR or 6.35mm jack connections.
4.3 Connecting the Receiver and Earbuds
Connect the provided in-ear earbuds to the 3.5mm headphone jack on the beltpack receiver. Secure the receiver to your belt or clothing using the integrated clip.
5. Operating Instructions
5.1 Powering On/Off
Press and hold the POWER button on both the transmitter and receiver to turn them on or off.
5.2 Channel Selection
The system supports 16 switchable frequencies within the 550 MHz-580 Mhz UHF band. To change the channel:
- On the transmitter, press the CH button to cycle through available channels.
- On the receiver, use the MENU and RET buttons (or similar navigation buttons) to select the desired channel to match the transmitter.
- Ensure both devices are set to the same channel for proper operation.
5.3 Volume Control
Adjust the monitoring volume using the volume control knob on the beltpack receiver.
5.4 Monitoring Your Audio
Once connected and powered on, the system will transmit audio from your source to the receiver. You can monitor your vocals or instrument sound directly through the in-ear earbuds.
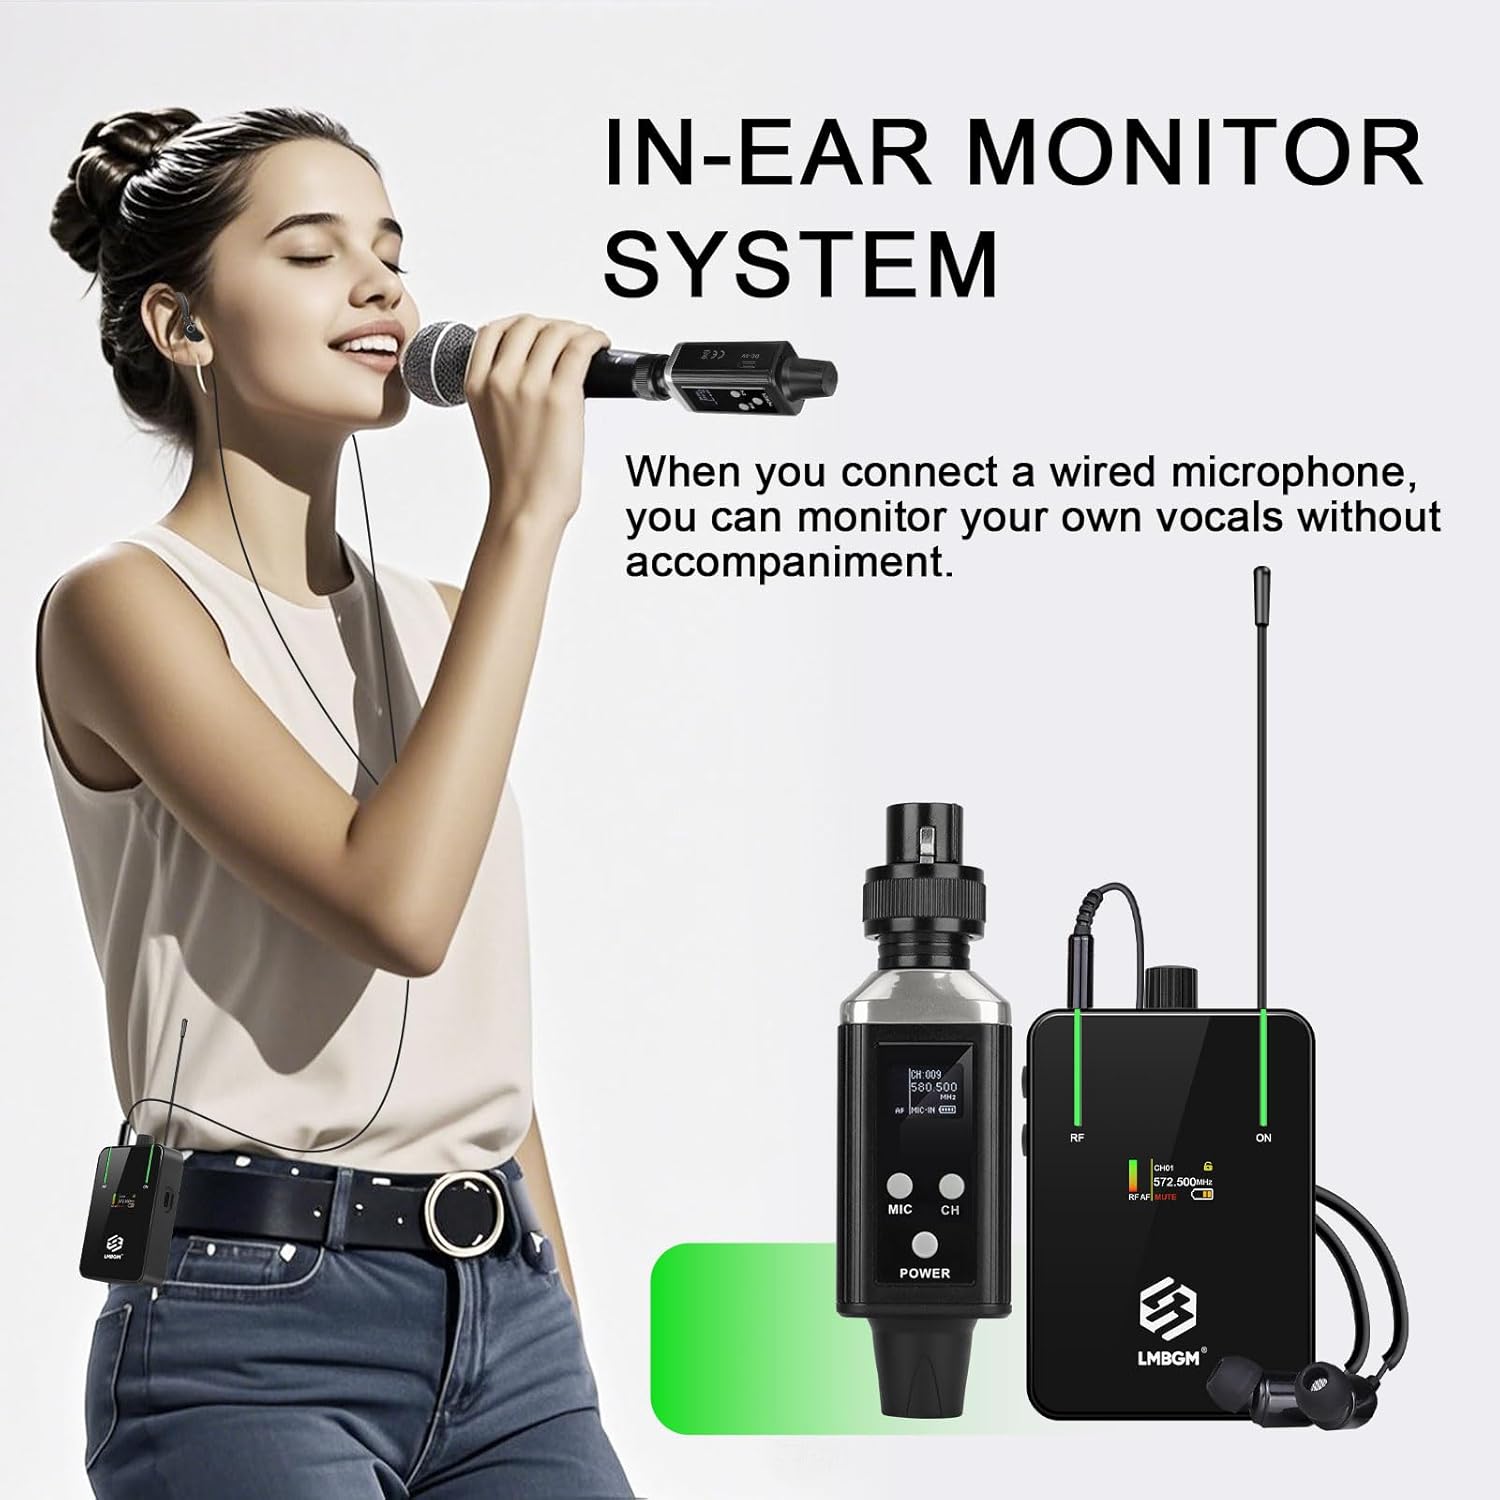
Figure 7: In-Ear Monitor System in Use
This image shows a singer utilizing the AR9 Pro-1 system. The transmitter is connected to her wired microphone, allowing her to monitor her own vocals without accompaniment, while the receiver is discreetly worn on her belt.

Figure 8: UHF Wireless In-Ear Monitor System for Musicians
This image depicts a musician performing with a keyboard and microphone, benefiting from the AR9 Pro-1 UHF wireless in-ear monitor system for clear and untethered audio monitoring.

Figure 9: Multi-Scenario Use
This image demonstrates the versatility of the AR9 Pro-1 system for multi-scenario use, showing multiple performers (singers and a guitarist) simultaneously utilizing the in-ear monitors for music composition, band rehearsals, and live performances.

Figure 10: Guitarist Using Wireless In-Ear Monitor System
This image features a guitarist on stage, actively using the LMBGM AR9 Pro-1 UHF wireless in-ear monitor system to receive clear audio feedback during a live performance, emphasizing the system's utility for instrumentalists.
6. Maintenance
- Cleaning: Use a soft, dry cloth to clean the surfaces of the transmitter and receiver. Do not use liquid cleaners or solvents.
- Storage: Store the system in a cool, dry place away from direct sunlight and extreme temperatures when not in use.
- Battery Care: For optimal battery life, avoid fully discharging the batteries frequently. Charge them regularly, even if the system is not in constant use.
- Earbuds: Clean ear cushions regularly with a damp cloth. Replace ear cushions if they become worn or damaged.
7. Troubleshooting
| Problem | Possible Cause | Solution |
|---|---|---|
| No sound from earbuds |
|
|
| Interference or static |
|
|
| Short battery life |
|
|
8. Specifications
| Feature | Detail |
|---|---|
| Model Name | AR9 Pro-1 |
| Brand | LMBGM |
| Connectivity Technology | Wireless (RF) |
| Wireless Frequency Range | UHF 550 MHz-580 Mhz |
| Number of Channels | 16 |
| Frequency Response | 50Hz-20kHz (System), 20.2 Hz (Headphones) |
| Latency | <5ms |
| Transmission Distance | Up to 300 feet (250-350 feet stable) |
| Headphones Jack | 3.5 mm Jack |
| Impedance | 16 Ohm |
| Sensitivity | 95 dB |
| Noise Control | Active Noise Cancellation |
| Material | Metal |
| Item Weight | 13.4 ounces |
| Power Source | 3 Nonstandard Battery batteries (included) |
| Working Time | 5-8 hours |
| Charging Time | 3-4 hours |

Figure 11: Product Dimensions
This image provides the physical dimensions of both the AR9 Pro-1 transmitter and the beltpack receiver, showing measurements in both centimeters and inches for various parts of the devices.
9. Warranty and Support
For warranty information and technical support, please refer to the official LMBGM website or contact your retailer. Keep your purchase receipt for warranty claims.
Manufacturer: LMBGM
Date First Available: May 19, 2025
Related documentsAR9 Pro-1


Ask a question about this manual
Ask about setup, troubleshooting, compatibility, parts, safety, or missing instructions. Manuals+ will review the question and use this page’s manual context to help answer it.