
Tribesigns HOGA-HL0158
Tribesigns HOGA-HL0158 Shoe Bench with Lift Top Storage Instruction Manual
Model: HOGA-HL0158
1. Introduction
This manual provides comprehensive instructions for the assembly, operation, and maintenance of your Tribesigns HOGA-HL0158 Shoe Bench with Lift Top Storage. Please read all instructions carefully before beginning assembly and retain this manual for future reference.
1.1 Safety Information
- Ensure all parts are present and undamaged before assembly.
- Assemble on a soft, clean surface to prevent scratches.
- Do not overtighten screws during assembly.
- Keep small parts away from children.
- Caution: Please lower the top hidden storage lid gently to avoid any accidental hand injuries.
- Do not exceed the maximum weight recommendation of 66 pounds on the bench top.

Figure 1: Tribesigns HOGA-HL0158 Shoe Bench with Lift Top Storage in a home entryway, showcasing its design and function.
2. Parts List
Before assembly, verify that all components and hardware are present. Refer to the assembly video for visual identification of parts.
Video 1: Assembly overview showing all parts and hardware. This video provides a visual guide to identify all components before starting assembly.
2.1 Components
- Top Panel (1 pc)
- Side Panels (2 pcs)
- Bottom Panel (1 pc)
- Back Panel (1 pc)
- Internal Dividers (2 pcs)
- Lift-Top Storage Lids (2 pcs)
- Rattan Doors (3 pcs)
- Legs (5 pcs)
- Other wooden panels as shown in the assembly video.
2.2 Hardware
- Cam Locks (Ø15x12mm)
- Cam Bolts (M6x40mm)
- Wooden Dowels (Ø8x30mm)
- Screws (Ø3.5x14mm, M4x18mm, M6x25mm)
- Hinges (various types for lift-top and doors)
- Metal Handles
- Allen Wrench (M4)
- Adhesive Pads
- Other fasteners as detailed in the assembly video.
3. Assembly Instructions
Follow these steps carefully to assemble your shoe bench. It is recommended to have a second person assist with certain steps.
Video 2: Detailed assembly guide for the Tribesigns Shoe Bench. Follow along for step-by-step visual instructions.
- Prepare Base Panels: Attach cam bolts (M6x40mm) and wooden dowels (Ø8x30mm) to the designated holes on the bottom panel and side support panels. Secure with cam locks (Ø15x12mm).
- Assemble Main Frame: Connect the side panels and internal dividers to the bottom panel using cam locks and dowels. Ensure all connections are snug.
- Attach Legs: Secure the five wooden legs to the underside of the bottom panel using M6x25mm screws.
- Install Back Panel: Slide the back panel into the grooves of the assembled frame. Secure it with Ø3.5x14mm screws and corner brackets (if provided).
- Attach Lift-Top Lids: Install the hinges onto the lift-top storage lids and then attach the lids to the top edge of the main frame using Ø3.5x14mm screws. Ensure smooth operation.
- Install Rattan Doors: Attach hinges to the rattan doors. Then, attach the doors to the front of the bench, aligning them with the pre-drilled holes. Secure with Ø3.5x14mm screws.
- Attach Handles: Fasten the metal handles to the rattan doors using M4x18mm screws.
- Final Checks: Verify all screws are tightened and the bench is stable. Gently test the lift-top mechanism and door operation.
4. Operating Instructions
Your Tribesigns Shoe Bench is designed for versatile storage and seating. Here’s how to utilize its features:
4.1 Hidden Lift-Top Storage
The bench features a lift-up top that reveals a hidden compartment. This space is ideal for storing smaller items such as keys, wallets, socks, gloves, or other entryway essentials. To access, gently lift the top panel. To close, lower the panel slowly and carefully to prevent pinching or injury.

Figure 2: Hidden lift-top storage for organizing small items like keys, socks, and accessories.
4.2 Shoe Storage Compartments
Behind the three rattan doors, you will find two main compartments with adjustable shelves. These compartments can accommodate up to 10 pairs of shoes, including flats, heels, and boots. The middle shelf allows for organization by shoe type, season, or user. The rattan doors promote airflow, helping to reduce odors and moisture, keeping your shoes fresh.

Figure 3: Interior view of shoe storage compartments with various footwear, demonstrating capacity.
Video 3: Demonstration of the Tribesigns Shoe Bench features, including hidden storage and shoe compartments.
5. Maintenance
Proper care will ensure the longevity and appearance of your shoe bench.
- Cleaning: Wipe the surface with a damp cloth, then immediately wipe dry with a clean, dry cloth. Avoid abrasive cleaners or harsh chemicals.
- Spills: Promptly clean any spills to prevent staining or damage to the wood finish.
- Inspection: Periodically check all screws and connections to ensure they remain tight. Retighten if necessary.
- Environment: Avoid placing the bench in direct sunlight or near heat sources to prevent warping or fading.
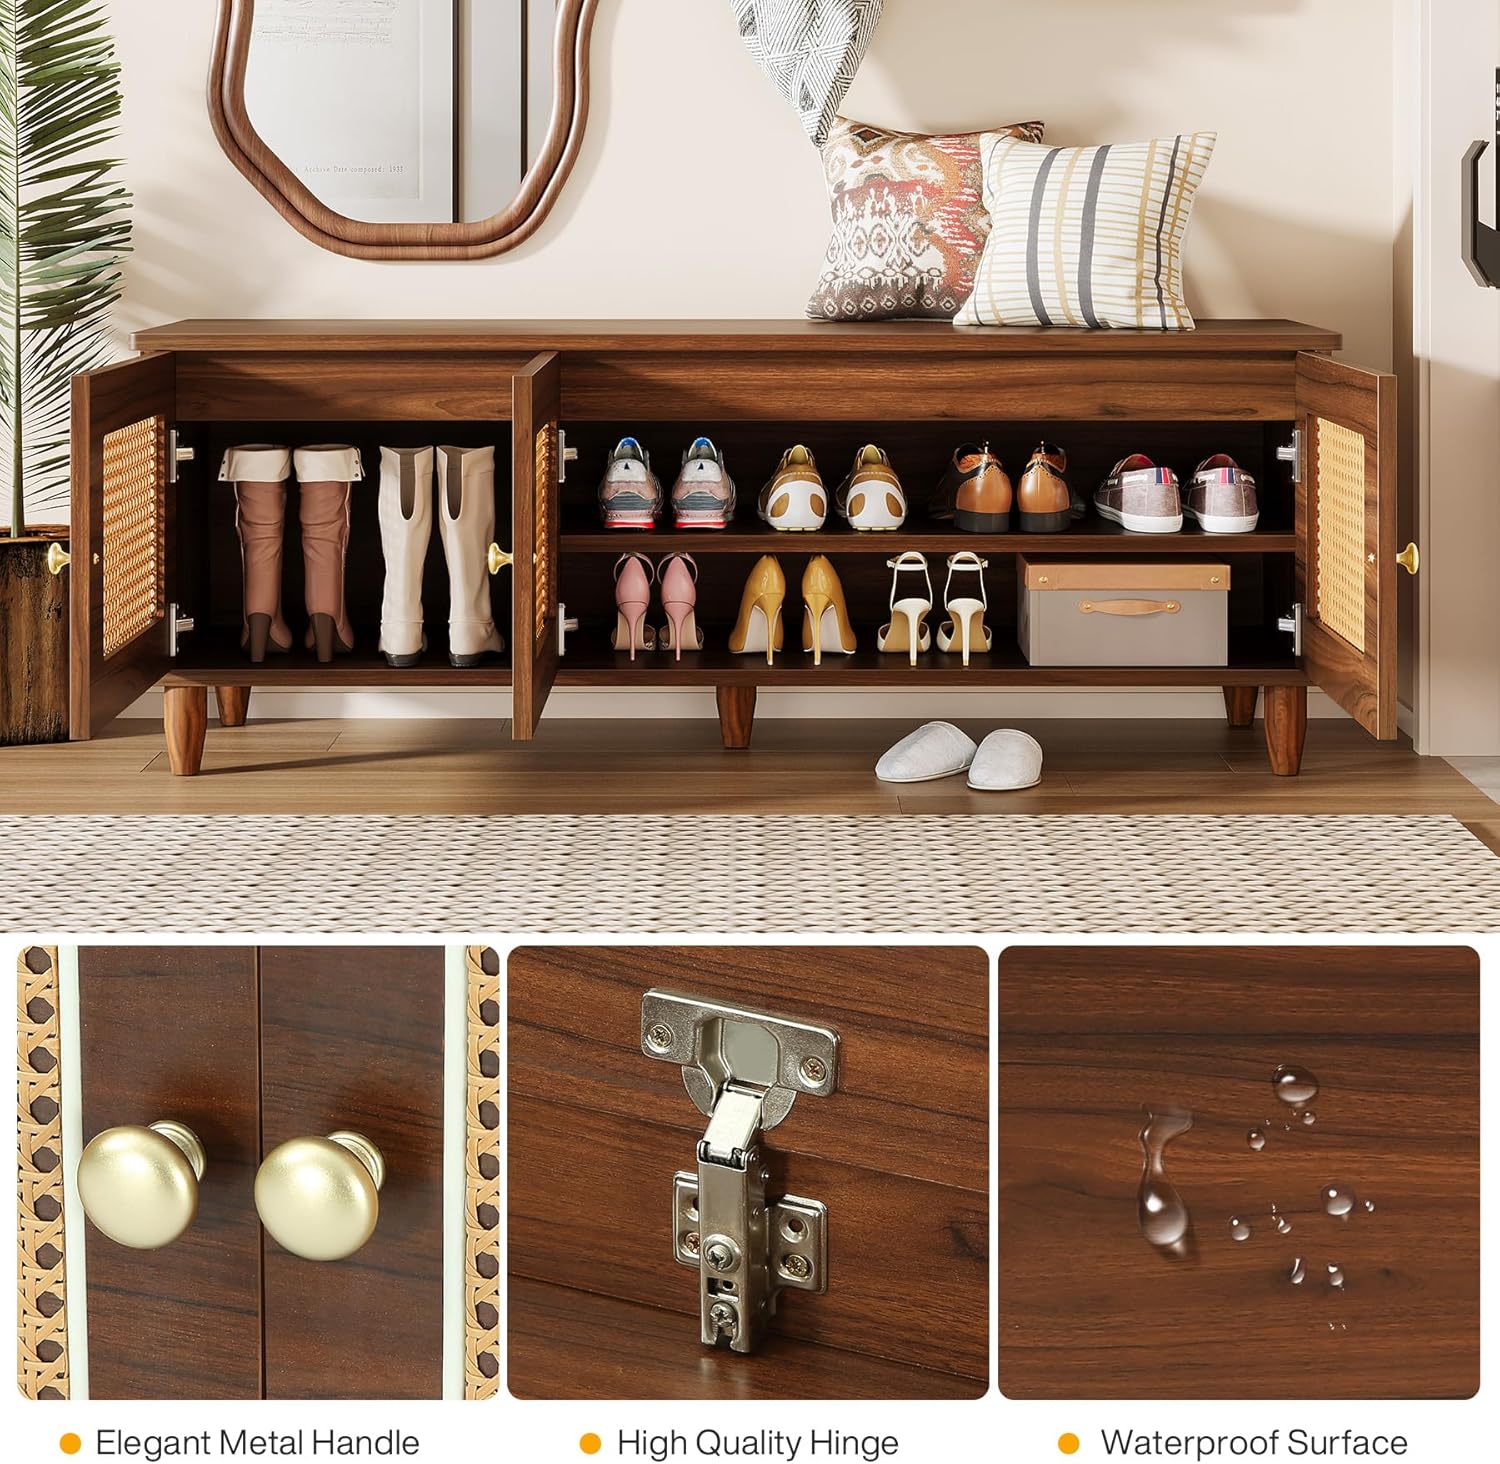
Figure 4: Details of the durable construction, including metal handles, quality hinges, and a waterproof surface.
6. Troubleshooting
If you encounter any issues with your shoe bench, refer to the following common solutions:
- Wobbly Bench: Ensure all screws are fully tightened. Check that the bench is on a level surface. Adjust leg levelers if applicable.
- Doors Not Aligning: Loosen the hinge screws slightly, adjust the door position, and then retighten. Small adjustments can often correct alignment issues.
- Lift-Top Lid Sticking: Check for any obstructions in the hinge mechanism or along the edges of the lid. Ensure hinges are properly lubricated if necessary.
- Missing Parts: If any parts are missing upon unboxing, contact customer support immediately with your product model number and a description of the missing items.
7. Specifications
| Feature | Detail |
|---|---|
| Product Dimensions | 14.96"D x 55.12"W x 20.47"H |
| Color | Brown |
| Size | Large |
| Furniture Finish | Wood; Rattan; Metal |
| Seat Height | 20.47 Inches |
| Brand | Tribesigns |
| Leg Style | Trumpet Leg |
| Product Care Instructions | Wipe with Damp Cloth, Wipe with Dry Cloth |
| Maximum Weight Recommendation | 66 Pounds |
| Seating Capacity | 3.0 |
| Manufacturer | Tribesigns |
| Item Weight | 65 pounds |
| ASIN | B0F93QC12T |
| Item Model Number | HOGA-HL0158 |
| Date First Available | May 19, 2025 |

Figure 5: Product dimensions and internal measurements for planning placement and storage.
8. Warranty and Support
For warranty information, product support, or to report missing/damaged parts, please contact Tribesigns customer service. Refer to your purchase documentation for specific contact details or visit the official Tribesigns website.
Online resources and FAQs may also be available on the Tribesigns brand store page: Tribesigns Store.
Related documentsHOGA-HL0158


Ask a question about this manual
Ask about setup, troubleshooting, compatibility, parts, safety, or missing instructions. Manuals+ will review the question and use this page’s manual context to help answer it.