
1. Introduction
This manual provides detailed instructions for the installation, operation, and maintenance of your ALSEYE Ai-Pro Black E-ATX Gaming PC Case. Please read this manual thoroughly before beginning assembly to ensure proper setup and to maximize the performance and longevity of your system. Keep this manual for future reference.
2. Product Features
- ARGB Front Panel: The Ai-Pro case features a sleek ARGB front panel with an integrated LED strip, designed to synchronize with other ARGB components within your system. It combines an aluminum sheet with a dense mesh for aesthetics and airflow.
- Pre-installed Halo-Pro ARGB Fan: This E-ATX PC case includes a pre-installed Halo-Pro ARGB fan, providing both effective cooling and customizable lighting.
- Tempered Glass Side Panel: An easy-lifting, high-quality tempered glass side panel with a snap-on handle allows for convenient access and showcases your internal PC components.
- Spacious Interior: The Ai-Pro computer case supports up to 7 x 120mm fans and 2 x 360mm radiators. It offers mounting space for 2 x 3.5" HDDs and 3 x 2.5" SSDs.
- Convenient I/O Panel: The top-mounted I/O panel provides easy access to modern connections, including a Type-C port, USB 3.0 port, USB 2.0 port, and a combined audio/microphone jack.
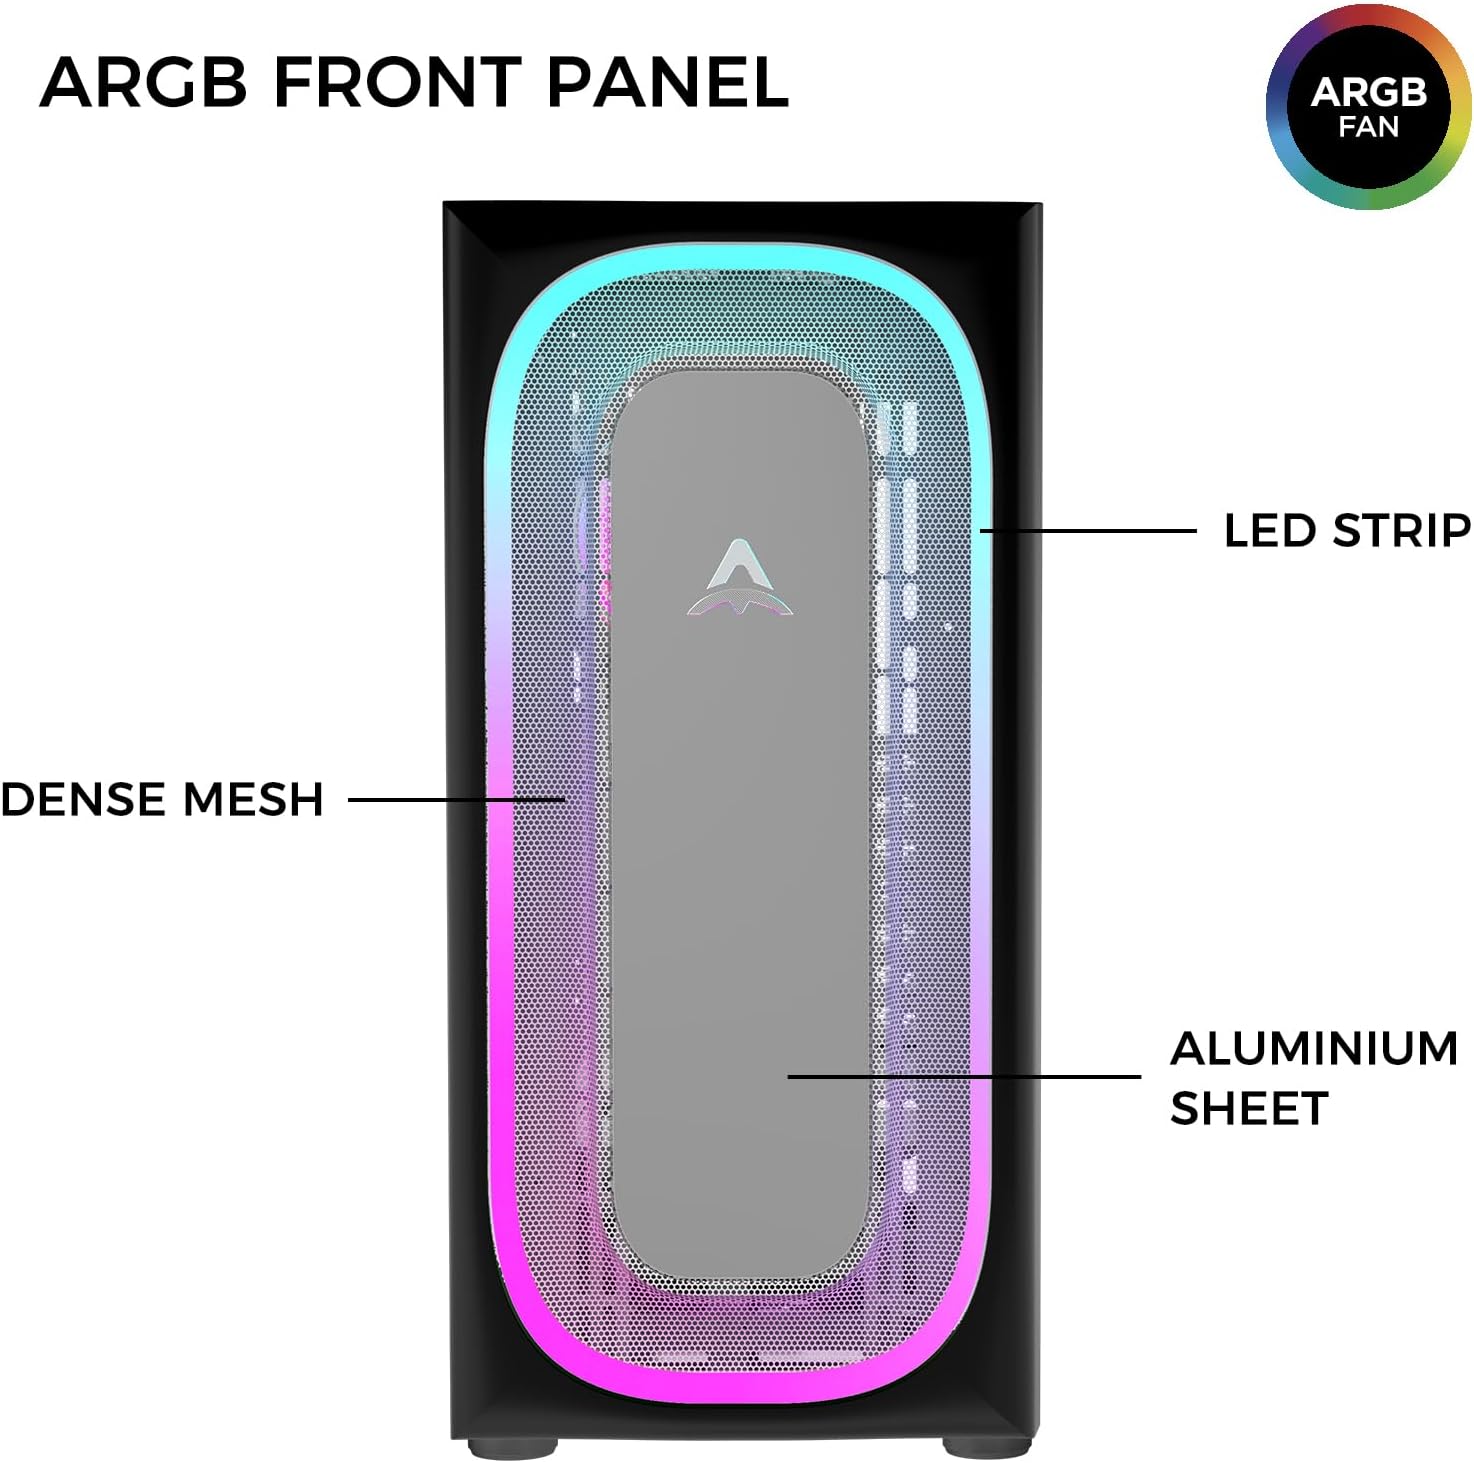
Image: Front view of the ALSEYE Ai-Pro Black PC Case, highlighting the ARGB front panel with LED strip, dense mesh, and aluminum sheet.

Image: Side view demonstrating the easy-lifting tempered glass side panel with a magnetic handle.

Image: Internal view of the ALSEYE Ai-Pro Black PC Case, showing the pre-installed Halo-Pro ARGB fan and overall dimensions.
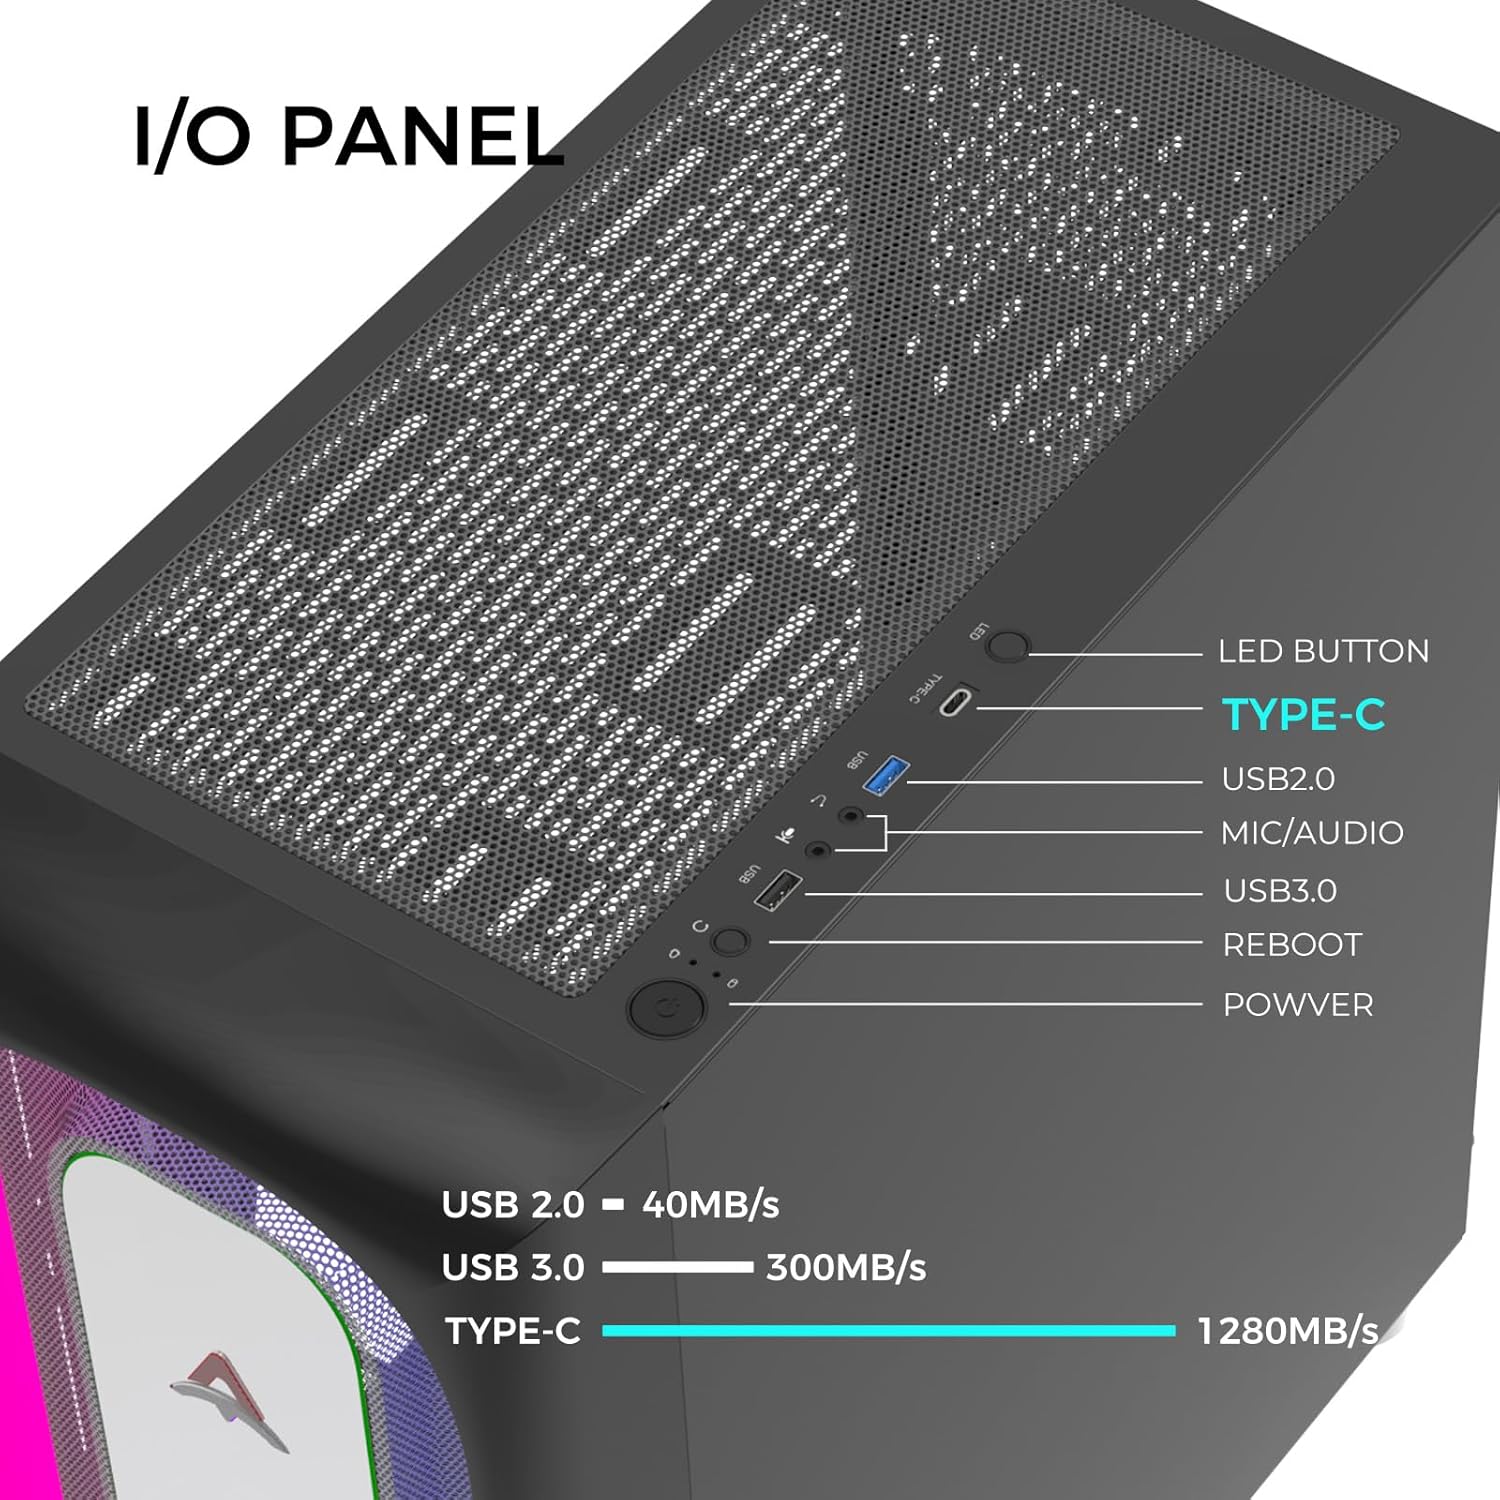
Image: Close-up of the top I/O panel, detailing the LED button, Type-C, USB 2.0, Mic/Audio, USB 3.0, Reboot, and Power ports.
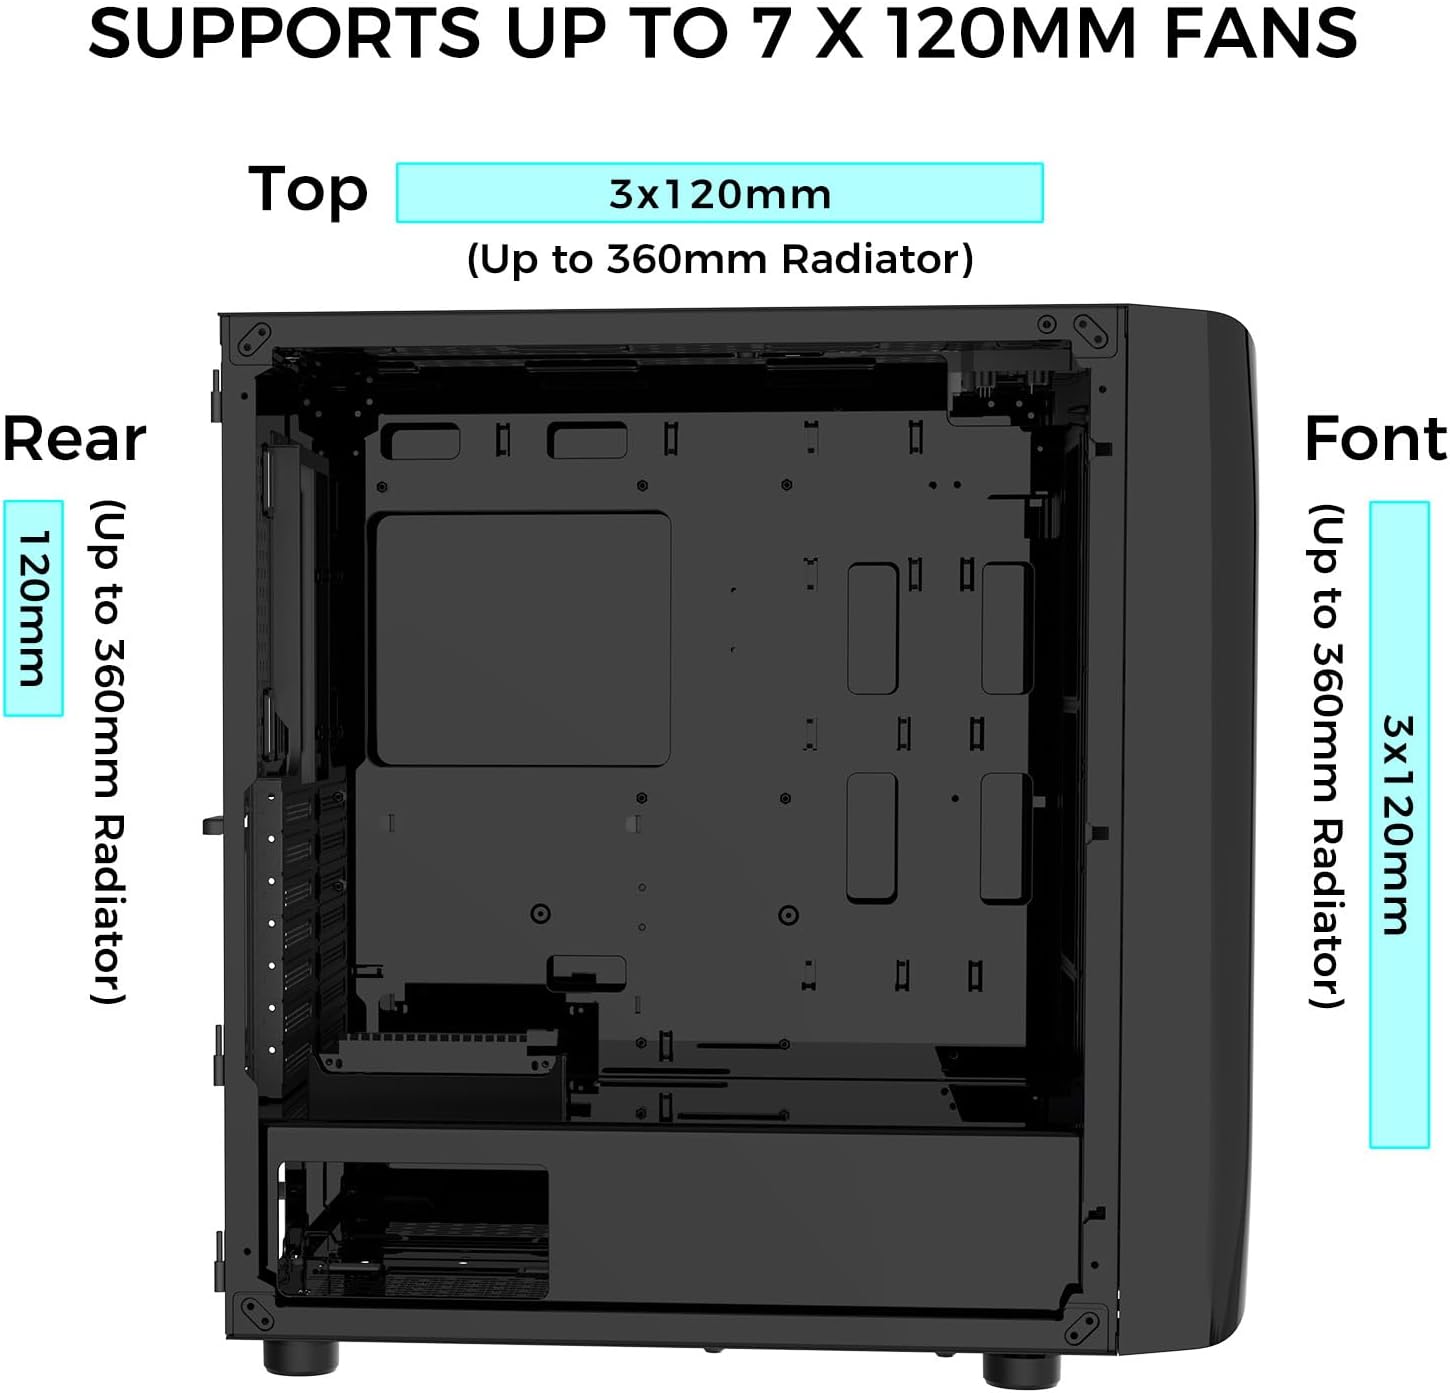
Image: Diagram illustrating the fan and radiator support, showing locations for 3x120mm fans (up to 360mm radiator) at the top and front, and 1x120mm fan (up to 360mm radiator) at the rear.

Image: Internal layout diagram showing support for Mini-ITX, Micro-ATX, ATX, and E-ATX motherboards, drive bays for SSDs and HDDs, and maximum dimensions for CPU cooler (175mm), GPU (360mm), and PSU (2000mm).

Image: Airflow diagram illustrating intake from the front and bottom, and exhaust from the top and rear for optimal cooling.
Video: An official product video showcasing the ALSEYE Ai-Pro PC Case in white, highlighting its design, tempered glass panel, and internal components with ARGB lighting.
3. Setup Guide
Follow these general steps for assembling your PC components within the ALSEYE Ai-Pro case. Always refer to your component manuals for specific installation details.
- Prepare the Case: Place the case on a stable, flat surface. Remove the tempered glass side panel by lifting it from its magnetic handle.
- Install Motherboard: Install the necessary standoffs for your motherboard form factor (Mini ITX, Micro ATX, ATX, or E-ATX). Carefully place your motherboard into the case and secure it with screws.
- Install CPU and Cooler: Install your CPU and CPU cooler onto the motherboard before securing the motherboard into the case, if possible. Ensure proper thermal paste application for air coolers or radiator mounting for liquid coolers.
- Install Graphics Card (GPU): Insert your graphics card into the appropriate PCIe slot on the motherboard and secure it with the retention clip and screws.
- Install Storage Drives: Mount your 3.5" HDDs and 2.5" SSDs into the designated drive bays. The case supports 2 x 3.5" HDDs and 3 x 2.5" SSDs.
- Install Power Supply (PSU): Install the power supply unit into the bottom mount area of the case and secure it with screws.
- Cable Management: Route all power and data cables through the designated cutouts and tie-down points behind the motherboard tray to ensure clean aesthetics and optimal airflow.
- Connect Front Panel Cables: Connect the front panel I/O cables (USB 3.0, USB 2.0, Type-C, audio, power, reset, LED) to their corresponding headers on your motherboard.
- Install Additional Fans/Radiators (Optional): If desired, install additional 120mm fans or 360mm radiators in the top, front, or rear positions as supported by the case.
- Close the Case: Once all components are installed and cables are managed, reattach the tempered glass side panel.
4. Operating Instructions
After successful assembly, follow these steps to operate your PC system within the ALSEYE Ai-Pro case:
- Power On: Connect the power cable to your PSU and a wall outlet. Press the power button on the top I/O panel to start your computer.
- ARGB Lighting Control: Use the dedicated LED control button on the top I/O panel to cycle through various ARGB lighting modes and colors for the front panel and pre-installed fan. For advanced synchronization with other ARGB devices, connect the case's ARGB cables to a compatible motherboard header and use the motherboard's software.
- USB and Audio Ports: Utilize the USB 3.0, USB 2.0, and Type-C ports for connecting peripherals and external devices. The combined audio/microphone jack supports headsets for communication and audio output.
5. Maintenance
Regular maintenance helps ensure optimal performance and longevity of your ALSEYE Ai-Pro PC case and its components.
- Dust Cleaning: Periodically clean dust filters (if present) and internal components using compressed air. Dust accumulation can impede airflow and lead to overheating.
- Exterior Cleaning: Wipe the exterior surfaces, including the tempered glass panel, with a soft, damp cloth. Avoid abrasive cleaners that may scratch the finish.
- Cable Management Check: Occasionally inspect internal cable routing to ensure no cables are obstructing airflow or fan operation.
- Fan Inspection: Check fans for any unusual noises or reduced performance. Clean fan blades if dust buildup is significant.
6. Troubleshooting
If you encounter issues with your ALSEYE Ai-Pro PC case, consider the following common troubleshooting steps:
- No Power:
- Ensure the PSU is switched on and properly connected to the wall outlet and motherboard.
- Verify that the front panel power button cable is correctly connected to the motherboard's power header.
- ARGB Lighting Not Working/Syncing:
- Check if the ARGB cables from the front panel and fan are securely connected to the motherboard's ARGB header or a dedicated ARGB controller.
- If using motherboard software, ensure it is installed and configured correctly.
- Try using the physical LED control button on the I/O panel to see if it responds.
- Poor Airflow/Overheating:
- Ensure all fans are spinning correctly and are oriented for optimal airflow (intake at front/bottom, exhaust at top/rear).
- Clean any dust filters and internal components to remove obstructions.
- Verify that no cables are blocking fan blades or airflow paths.
- USB Ports Not Functioning:
- Check if the front panel USB cables are correctly connected to the corresponding USB headers on your motherboard.
- Ensure motherboard drivers are up to date.
7. Specifications
| Feature | Specification |
|---|---|
| Brand | ALSEYE |
| Model Name | Ai Pro Black |
| Case Type | Mid Tower |
| Motherboard Compatibility | Mini ITX, Micro ATX, ATX, Extended ATX |
| Material | Aluminum, Tempered Glass |
| Color | Black |
| Item Dimensions (D x W x H) | 17.91"D x 8.86"W x 19.09"H |
| Item Weight | 9.5 Kilograms |
| Cooling Method | Air, Water |
| Fan Support | Up to 7 x 120mm Fans |
| Radiator Support | Up to 2 x 360mm Radiators |
| Drive Bays | 2 x 3.5" HDD, 3 x 2.5" SSD |
| I/O Panel | 1 x Type-C, 1 x USB 3.0, 1 x USB 2.0, 1 x Audio/Mic Jack, LED Control Button |
| Light Color | ARGB |
| Power Supply Mounting Type | Bottom Mount |
8. Warranty and Support
The ALSEYE Ai-Pro Black E-ATX Gaming PC Case comes with a 2 Year Manufacturer Warranty. For warranty claims, technical support, or any inquiries regarding your product, please contact ALSEYE customer service through their official website or the retailer where the product was purchased.
Please retain your proof of purchase for warranty validation.