
1. Safety Information
Please read all safety instructions carefully before installation and use. Failure to follow these instructions may result in electric shock, fire, or personal injury.
- Always mount the mirror securely to the wall using the provided hardware.
- Avoid placing heavy objects on the mirror to prevent breakage.
- Do not install near water sources without proper grounding protection to prevent electric shock.
- In case of breakage, handle with care as the glass may still have sharp edges.
- Ensure the power supply is disconnected before any installation or maintenance.
2. Product Features
- Independent Dual Lighting & Stepless Dimming: Separate controls for front-lit and backlit LEDs. Offers 3 color temperatures (3000K Warm Light, 4500K Natural Light, 6500K White Light) and 10%-100% stepless dimming. Button indicator light can be turned off.
- 30-Minute Auto-Off Anti-Fog & Memory Function: Integrated heating pad clears fog within 3 minutes, with a 30-minute auto-shutoff for energy efficiency. The smart memory function recalls your last brightness and color settings.
- HD Shatter-Proof Tempered Glass: Constructed from 5mm HD nano-tempered glass, designed to shatter into small, less harmful pieces if broken. Features a silver-coated layer with triple anti-oxidation finish to prevent black spots and corrosion.
- ETL Certified Safety & IPX4+ Waterproof: ETL listed for safety. Fully sealed IPX4+ waterproof design protects components from moisture. Equipped with high-density 196 LEDs/m (CRI > 95) for uniform, soft lighting without flicker or dark spots.
- Easy Installation: Supports both Plug-in and Hardwired connections (wall switch compatible). Can be mounted vertically or horizontally. Includes a 3.28ft power cord.
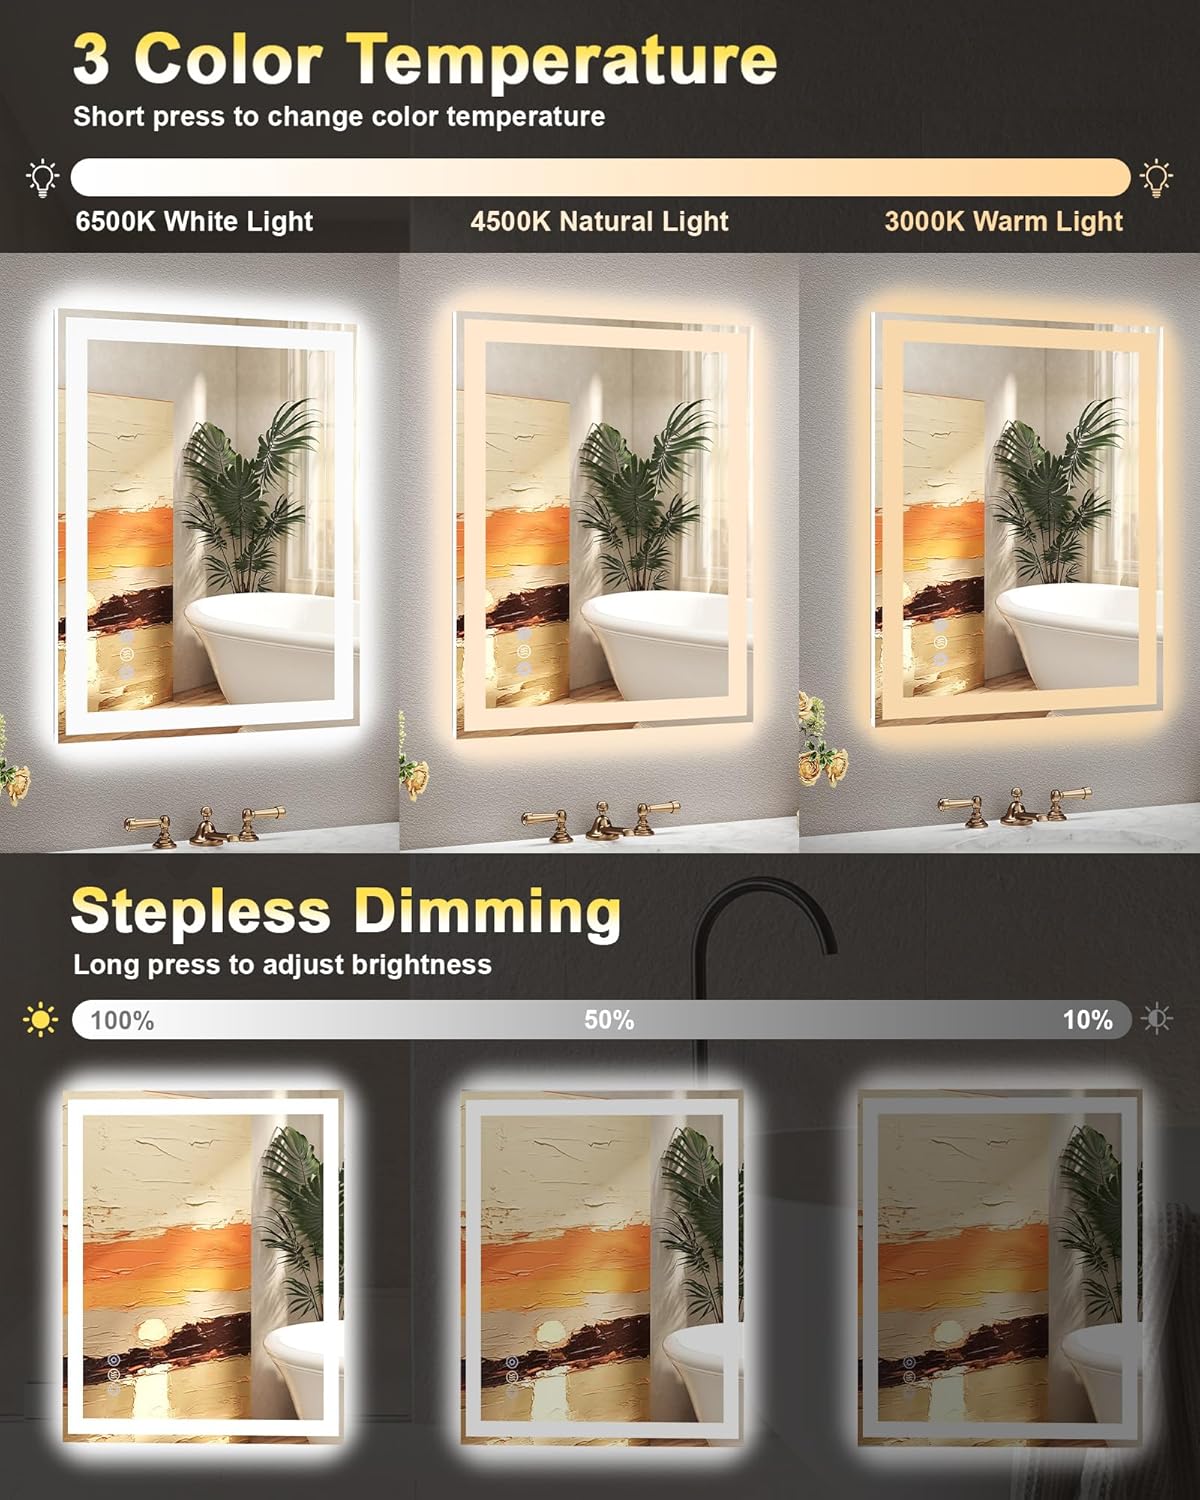
Figure 2.1: Illustration of the 3 color temperature options and stepless dimming capability.

Figure 2.2: Dual lighting and memory function overview.

Figure 2.3: Automatic anti-fog function in action.

Figure 2.4: Safety comparison of tempered glass vs. ordinary glass.
3. Setup and Installation
3.1 Package Contents
Before beginning installation, ensure all components are present:

Figure 3.1: Product accessories and internal components.
- LED Bathroom Mirror
- Hanging strips (x2)
- Screws (x5)
- Wall plugs (x5)
- Wire connector (x1)
- Back-adhesive pads (x4)
- Gloves (for handling)
3.2 Mounting Options
The mirror can be mounted vertically or horizontally. Choose the orientation that best suits your space.

Figure 3.2: Vertical mounting example and key features.
3.3 Wiring Options
The mirror supports two power connection methods: Plug-in or Hardwired.
- Option 1: Plug-in. Use the attached 3.28ft power cord to plug the mirror into a standard electrical outlet.
- Option 2: Hardwired. For a seamless look, the mirror can be hardwired directly into your electrical system, compatible with a wall switch. Consult a qualified electrician for hardwiring.

Figure 3.3: Plug-in and hardwired connection options.
3.4 Installation Steps
Follow these steps for secure installation:
- Prepare the Wall: Mark the desired position for the mirror. Ensure the location is suitable for mounting and power connection.
- Install Hanging Strips: Secure the two French cleats (hanging strips) to the wall using the provided screws and wall plugs. Ensure they are level and spaced correctly for your mirror's dimensions.
- Hang the Mirror: Carefully lift the mirror and hang it onto the installed French cleats. Ensure it is seated securely.
- Connect Power: Connect the mirror to the power source using either the plug-in method or by hardwiring (if applicable).
- Adjust and Secure: Make any final adjustments to ensure the mirror is level. Apply back-adhesive pads if needed for stability.

Figure 3.4: Three-step installation guide.
4. Operating Instructions
The mirror features intuitive touch controls located on the mirror surface.
4.1 Power On/Off and Lighting Control
- Power On/Off: Tap the power icon to turn the mirror lights on or off.
- Change Color Temperature: Short press the light icon to cycle through the 3 color temperatures: 3000K (Warm), 4500K (Natural), and 6500K (White).
- Adjust Brightness (Stepless Dimming): Long press the light icon to adjust the brightness from 10% to 100%. Release when the desired brightness is reached.
- Separate Light Control: The front and backlit LEDs can be controlled independently. Refer to the specific touch icons for each.
- Button Indicator Light: The button indicator light can be turned off to ensure a dark environment.
4.2 Anti-Fog Function
- Activate Anti-Fog: Tap the anti-fog icon to activate the defogging function. The integrated heating pad will begin to clear fog from the mirror surface.
- Automatic Shut-off: The anti-fog function will automatically turn off after 30 minutes to conserve energy.
4.3 Memory Function
The mirror is equipped with a smart memory function. It will recall your last used brightness and color temperature settings when turned back on, eliminating the need for daily readjustments.
Video 4.1: Demonstration of front and backlit LED mirror controls, including color temperature and dimming.
Video 4.2: Overview of the LED mirror's front and backlit features and controls.
5. Maintenance
Proper care and maintenance will ensure the longevity and optimal performance of your LED mirror.
- Cleaning the Mirror Surface: Use a soft, lint-free cloth and a non-abrasive glass cleaner. Spray the cleaner onto the cloth, not directly onto the mirror, to prevent liquid from seeping into the electrical components.
- Cleaning the Frame: If applicable, wipe the frame with a soft, damp cloth. Avoid harsh chemicals.
- Electrical Components: Do not attempt to clean or service the internal electrical components. If issues arise, contact customer support.
- Avoid Excessive Moisture: While the mirror is IPX4+ waterproof, avoid direct water spray or prolonged exposure to excessive moisture.
6. Troubleshooting
If you encounter any issues with your mirror, refer to the following common problems and solutions:
| Problem | Possible Cause | Solution |
|---|---|---|
| Mirror lights do not turn on. | No power supply; loose connection; faulty switch. | Check if the mirror is properly plugged in or hardwired. Ensure the wall switch (if hardwired) is on. Verify power outlet functionality. |
| Anti-fog function not working. | Anti-fog not activated; power issue. | Ensure the anti-fog icon is tapped to activate. Check power supply. |
| Lights flicker or are dim. | Low brightness setting; unstable power. | Long press the light icon to increase brightness. Ensure stable power supply. |
| Touch controls are unresponsive. | Temporary software glitch; moisture on sensor. | Wipe the touch sensor area dry. Disconnect power for 1 minute and reconnect to reset. |
If the problem persists after attempting these solutions, please contact Callsky customer support.
7. Specifications
| Feature | Detail |
|---|---|
| Brand | Callsky |
| Model | 30"L x 24"W LED Bathroom Mirror |
| Product Dimensions | 30"L x 24"W |
| Shape | Rectangular |
| Mounting Type | Wall Mount (Vertical/Horizontal) |
| Glass Type | 5mm HD Shatter-Proof Tempered Glass |
| Lighting | Front & Backlit LED, 196 LEDs/m, CRI > 95 |
| Color Temperatures | 3000K (Warm), 4500K (Natural), 6500K (White) |
| Dimming | 10%-100% Stepless Dimming |
| Anti-Fog Function | Yes, 30-minute auto-off |
| Memory Function | Yes |
| Safety Certification | ETL Listed |
| Waterproof Rating | IPX4+ |
| Power Cord Length | 3.28 ft |
| Item Weight | 8.91 Kilograms |
8. Warranty and Support
Your Callsky LED Bathroom Mirror is backed by a 3-year protection plan. This covers hassle-free repairs for 3 years from the date of purchase.
In addition, a damage replacement is offered free of charge within 90 days of purchase for any transit-related damage.
For any issues, questions, or support needs, please contact our dedicated support team:
- Phone: 480-788-2280
- Availability: 24/7 Customer Support (Quick email or phone response)