
Introduction
Thank you for choosing the Twisted Minds Dual Monitor Arm TM-84-C012. This heavy-duty mechanical spring mount is designed to enhance your workspace by providing a versatile and ergonomic solution for professionals, gamers, and content creators. It supports two screens from 17 to 35 inches, including curved monitors, facilitating seamless multitasking and an immersive viewing experience.
Each arm offers a robust weight capacity of up to 12 kg (26.4 lbs) for flat screens and 11 kg (24.2 lbs) for curved screens, ensuring your monitors are securely held. Enjoy unparalleled flexibility with 360-degree rotation, ±90-degree swivel, and +70/-45-degree tilt adjustments, allowing optimal screen positioning for comfort and productivity. The integrated cable management system helps maintain a tidy desk by concealing cables within the arms. Constructed from durable materials, the TM-84-C012 is built for long-lasting stability and reliability.
This manual provides comprehensive instructions for the safe and efficient installation, operation, and maintenance of your monitor arm. Please read it thoroughly before proceeding with installation.
1. Setup and Installation
1.1 Package Contents
Before starting, ensure all components are present. Refer to the included parts list in your product packaging.
1.2 Mounting Options
The TM-84-C012 offers two installation methods: C-clamp mounting and grommet mounting.
1.2.1 C-Clamp Installation
- Attach the C-clamp base to the main pole using the provided screws.
- Position the C-clamp on the edge of your desk. Ensure the desk thickness is compatible (typically 10-85mm).
- Tighten the C-clamp screw until the mount is securely fastened to the desk. Do not overtighten.
1.2.2 Grommet Installation
- If your desk has a grommet hole (typically 10-50mm diameter), disassemble the C-clamp to use the grommet base plate.
- Insert the main pole through the grommet hole.
- Secure the mount from underneath the desk using the grommet plate and tightening knob/screws.
1.3 Attaching Monitors
The monitor arm is compatible with VESA mounting patterns 75 x 75 mm and 100 x 100 mm.
- Attach the VESA plate to the back of your monitor using the appropriate screws. Ensure the screws are tightened securely but do not overtighten.
- Slide the VESA plate with the attached monitor onto the monitor arm head. Ensure it clicks into place.
- Tighten any security screws on the VESA plate to prevent accidental detachment.
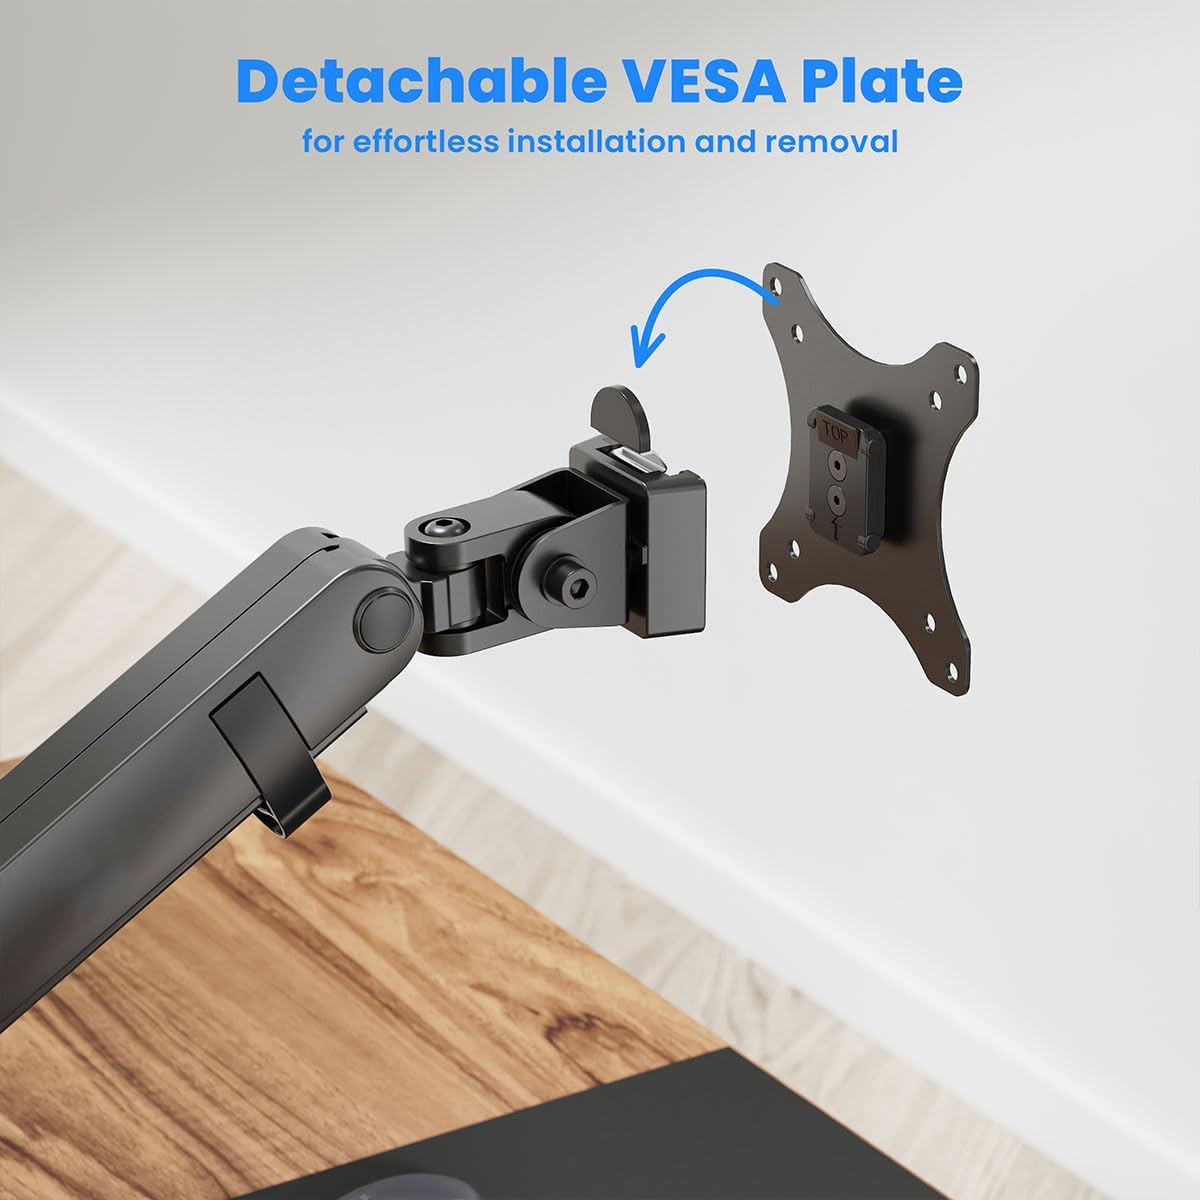
Figure 1: Detachable VESA plate for effortless installation and removal of monitors.
2. Operating and Adjustments
The TM-84-C012 offers full motion capabilities for optimal viewing comfort.
2.1 Height Adjustment
The mechanical spring arm allows for smooth vertical height adjustments. Gently push or pull the monitor to the desired height. The arm should hold its position once released.
2.2 Tilt, Swivel, and Rotation
- Tilt: Adjust the monitor screen vertically by tilting it +70 degrees upwards or -45 degrees downwards.
- Swivel: Pivot the monitor horizontally ±90 degrees left or right.
- Rotation: Rotate the monitor 360 degrees for landscape or portrait orientation.
2.3 Spring Tension Adjustment
If the monitor arm does not hold its position or is too stiff to move, you may need to adjust the spring tension. Use the included Allen key to adjust the tension screw located on the arm joint.
- Turn clockwise to increase tension (for heavier monitors or if the arm sags).
- Turn counter-clockwise to decrease tension (for lighter monitors or if the arm is too stiff).
Adjust gradually and test the arm's movement until it holds the monitor securely at any position.

Figure 2: Built-in spring tension mechanism for perfect weight adjustments.

Figure 3: The Twisted Minds Dual Monitor Arm in use, showcasing its robust support and adjustability.
3. Maintenance
3.1 Cleaning
Wipe the monitor arm with a soft, damp cloth. Avoid using abrasive cleaners or solvents, as these may damage the finish.
3.2 Cable Management
Utilize the integrated cable management channels to keep your cables organized and out of sight. This helps maintain a clean and clutter-free workspace.

Figure 4: Built-in cable management to create a clean look by eliminating cable clutter.
3.3 Periodic Checks
Periodically check all screws and connections to ensure they remain tight and secure. Re-tighten if necessary.
4. Troubleshooting
| Problem | Possible Cause | Solution |
|---|---|---|
| Monitor arm sags or does not hold position. | Spring tension is too low for the monitor's weight. | Increase spring tension by turning the adjustment screw clockwise with the Allen key. |
| Monitor arm is too stiff to move. | Spring tension is too high. | Decrease spring tension by turning the adjustment screw counter-clockwise with the Allen key. |
| Monitor wobbles after installation. | Mounting screws or clamp are not tight enough. | Ensure all VESA screws and desk clamp/grommet are securely tightened. |
| Cables are messy. | Cables are not routed through management channels. | Route all cables through the integrated cable management system on the arm. |
5. Specifications
| Feature | Detail |
|---|---|
| Model Number | TM-84-C012 |
| Screen Size Compatibility | 17 - 35 inches (including curved monitors) |
| Weight Capacity (per arm) | Flat Screens: Up to 12 kg (26.4 lbs) Curved Screens: Up to 11 kg (24.2 lbs) |
| VESA Compatibility | 75x75mm, 100x100mm |
| Tilt Range | +70° / -45° |
| Swivel Range | ±90° |
| Rotation | 360° |
| Mounting Options | C-clamp, Grommet |
| Cable Management | Integrated |
| Shipping Dimensions | 48 x 22.5 x 12 cm |
| Shipping Weight | 5.38 kg |
6. Warranty and Support
For warranty information and technical support, please refer to the warranty card included with your product or visit the official Twisted Minds website. If you encounter any issues not covered in this manual, please contact customer service for assistance.
Please retain your proof of purchase for warranty claims.