
1. Introduction
This manual provides detailed instructions for the installation and operation of your ninetom Wireless CarPlay Retrofit Kit Decoder. This device enhances your driving experience by integrating modern smartphone functionalities into your vehicle's existing display system.
1.1 Compatibility
The ninetom Wireless CarPlay Retrofit Kit is compatible with Lexus RX, NX, ES, UX, LS, LX, RC, LC, GS, and IS models manufactured between 2014 and 2019, provided they are equipped with the premium factory system. This kit is not compatible with mid- or low-end factory systems. For RX models, it specifically fits 2016–2019 models with freestanding screens only; it is not compatible with 2015 or earlier models that have embedded screens.
Please review the images below to confirm your car's system version before proceeding with installation.

Figure 1.1: Compatibility chart for Lexus models. High-configuration systems with a joystick or small touchpad (3 or 4 buttons) are compatible. Low-configuration systems with a knob and 3 buttons, or medium-configuration systems with a large touchpad (no frame), are not compatible.
2. Package Contents
Verify that all components listed below are included in your package:

Figure 2.1: Decoder unit and included accessories.
- ninetom Wireless CarPlay Retrofit Kit Decoder Unit
- Power Cable
- CAN Cable
- LVDS Cable
- USB Cable
- Wi-Fi Antenna
- Joystick Extension Cable (may not be needed for all installations)
3. Setup and Installation
Installation of this kit requires careful handling and removal of dashboard components. While the installation process does not damage your original wiring or affect your factory warranty, professional installation is recommended if you are not confident in performing the procedure yourself.
3.1 Pre-Installation Checklist
- Ensure your vehicle is compatible (refer to Section 1.1).
- Gather necessary tools (e.g., trim removal tools, screwdrivers).
- Disconnect the vehicle's battery before starting any electrical work.
- Review all cables and components to familiarize yourself with them.
3.2 Installation Steps (General Overview)
- Carefully remove the necessary dashboard trim and components to access the back of your car's display unit and control panel.
- Connect the provided cables (Power, CAN, LVDS, USB) to the corresponding ports on the decoder unit and your vehicle's wiring harness. Ensure all connections are secure.
- Install the Wi-Fi antenna in a location that allows for optimal signal reception.
- If necessary, connect the joystick extension cable. Note that this cable may not be required for all vehicle configurations.
- Before reassembling the dashboard, reconnect the vehicle's battery and test all functions of the CarPlay/Android Auto system, including audio, controls, and camera inputs.
- Once all functions are verified, carefully reassemble the dashboard components.
Important: Most issues encountered during installation are due to incorrect cable connections or settings. Always test thoroughly before final reassembly.
4. Operating Instructions
This section details how to use the ninetom Wireless CarPlay Retrofit Kit Decoder to access CarPlay and Android Auto functionalities.
4.1 System Switching
To switch between your original OEM car system and the CarPlay/Android Auto system, press and hold the 'Menu' button on your car's control knob for 3-5 seconds. This allows for seamless integration and access to both systems.

Figure 4.1: Switching between OEM, CarPlay, and Android Auto systems.
4.2 Wireless & Wired CarPlay/Android Auto
The unit supports both wireless and wired connections for CarPlay and Android Auto, depending on your smartphone type. Once connected, you can access various applications and features directly on your car's display.
- Supported Apps: Siri, Maps, Music, phone calls, Waze, Sygic, iTunes, Apple Music, and other third-party applications.
- Connectivity: Connect wirelessly via Bluetooth and Wi-Fi, or via the provided USB cable for a wired connection.
4.3 Steering Wheel and Car Knob Control
Maintain control over your new system using your vehicle's existing controls:
- Steering Wheel Buttons: Supports Siri, phone call functions, and volume +/- buttons. Other steering wheel buttons may not be supported.
- Car Control Knob: Use the car's control knob to navigate through the CarPlay/Android Auto interface, providing a familiar and convenient operation while driving.

Figure 4.2: Integration with original car controls.
4.4 Camera & Mirror Link Function
The system supports various camera inputs and screen mirroring capabilities:
- Reverse Camera: Supports original factory reverse cameras, parking radar, and aftermarket reverse cameras. The reverse camera activates automatically when the vehicle is put into reverse gear.
- Additional Cameras: Compatible with 360° cameras and front DVR cameras (CVBS input).
- Mirror Link: Supports AirPlay for iPhone and AutoLink for Android devices, allowing you to mirror your smartphone screen onto the car's display.
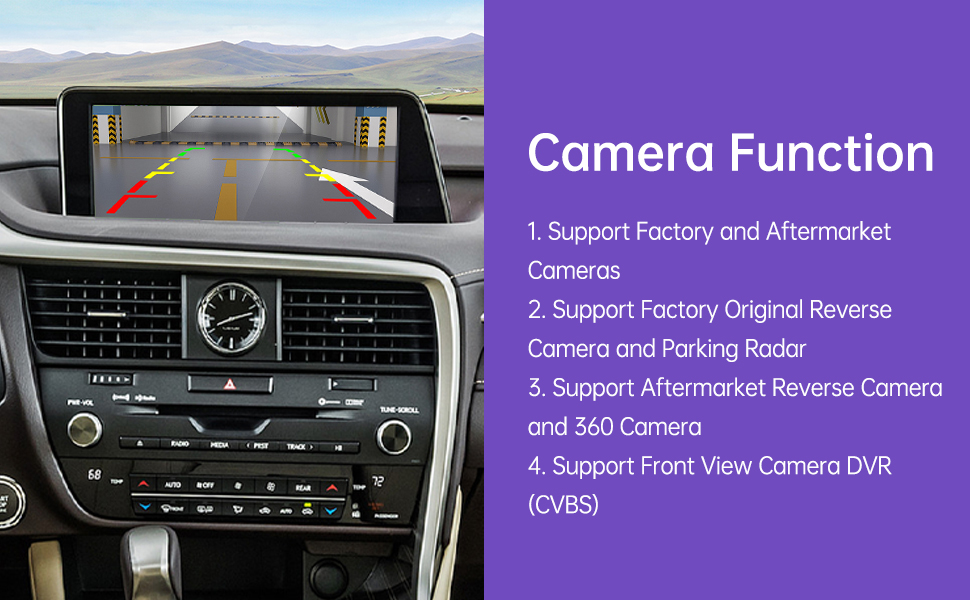
Figure 4.3: Camera function support.

Figure 4.4: Mirror Link functionality.
4.5 Voice Control
Utilize voice commands through Siri (for CarPlay) or Google Assistant (for Android Auto) to control navigation, music playback, phone calls, and more, allowing for hands-free operation.

Figure 4.5: Voice assistant features.
4.6 GPS Navigation
The system supports GPS navigation through various map applications available on CarPlay and Android Auto. This includes both online and offline navigation capabilities, compatible with most popular map apps.
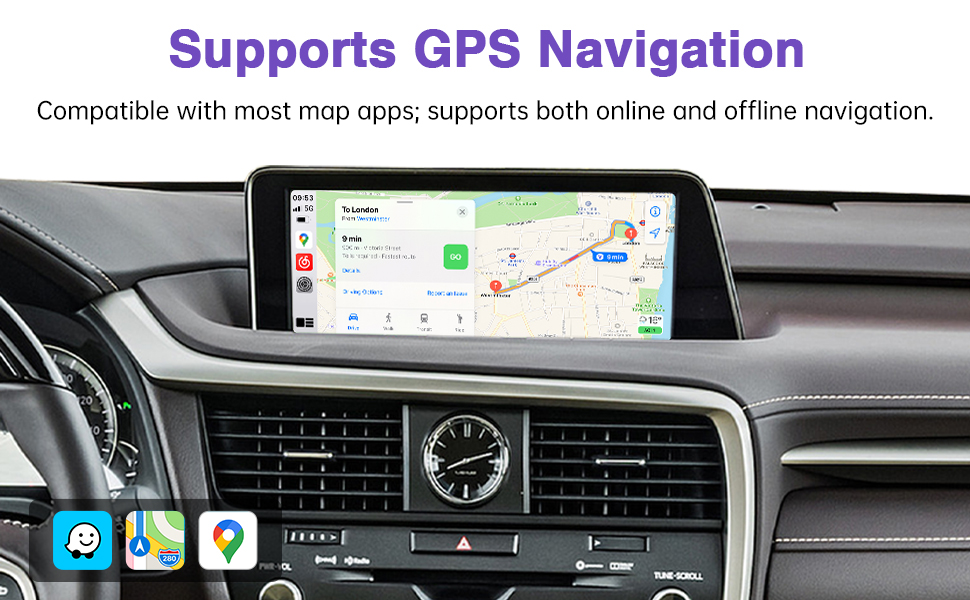
Figure 4.6: GPS Navigation support.
5. Maintenance
To ensure the longevity and optimal performance of your ninetom Wireless CarPlay Retrofit Kit Decoder, follow these general maintenance guidelines:
- Cleaning: Keep the decoder unit and connections free from dust and debris. Use a soft, dry cloth for cleaning. Avoid liquid cleaners directly on the unit.
- Environment: Ensure the unit is installed in a location that avoids extreme temperatures and direct exposure to moisture.
- Cable Integrity: Periodically check all connected cables for any signs of wear or damage. Ensure they remain securely connected.
- Software Updates: Check the manufacturer's website or contact support for any available firmware updates to improve performance and add new features.
6. Troubleshooting
This section addresses common issues you might encounter and provides potential solutions.
| Problem | Possible Cause | Solution |
|---|---|---|
| No display or system not turning on | Incorrect power connection; loose cables; incompatible system. | Verify all power and LVDS cables are securely connected. Ensure your vehicle's system is compatible (refer to Section 1.1). Recheck battery connection. |
| Screen flickering or display issues | Firmware issue; incorrect settings; loose LVDS cable. | Check LVDS cable connection. Consider a firmware update: obtain the update files from ninetom support. Use a USB drive (16MB or smaller), format to FAT32, copy files to the root. Plug USB into the unit's USB cable, navigate to System/Upgrade/.bin files, and press update. |
| CarPlay/Android Auto not connecting wirelessly | Bluetooth/Wi-Fi interference; incorrect phone settings; unit settings. | Ensure Bluetooth and Wi-Fi are enabled on your phone. Check the unit's settings and ensure "use car's bt channel" is switched on. Try restarting both the unit and your phone. |
| Steering wheel controls or car knob not working | Incorrect CAN bus connection; joystick extension cable not connected (if needed). | Verify the CAN cable connection. If your vehicle requires it, ensure the joystick extension cable is properly installed. |
| Reverse camera not displaying | Camera input not connected; incorrect settings. | Ensure the reverse camera input (CVBS) is correctly connected to the decoder unit. Check system settings for camera activation. |
| Mouse pad lags constantly | Software issue; hardware malfunction. | Try restarting the unit. Ensure firmware is up to date. If the issue persists, contact ninetom support. |
| ABS light comes on after installation | Potential wiring error or faulty unit. | Immediately recheck all wiring connections, especially CAN bus. If the issue persists, disconnect the unit and contact ninetom support. |
If you encounter issues not listed here or require further assistance, please contact ninetom support.
7. Specifications
| Feature | Detail |
|---|---|
| Brand | ninetom |
| Model Number | 032544ba-7f12-4942-a63f-a1346703e0d6 |
| Connectivity Technology | Bluetooth, USB |
| Controller Type | Push Button |
| Special Feature | Voice Control |
| Compatible Devices | Smartphone, Tablet |
| Connector Type | USB |
| Audio Output Mode | Stereo, Surround |
| Surround Sound Channel Configuration | 5.1 |
| Video Encoding | H.264, H.265/HEVC, VP9 |
| Number of Channels | 6 |
| Audio Output Type | HDMI, Optical, RCA |
| Smart Home Compatibility | Not Smart Home Compatible |
| Wireless Technology | Bluetooth |
| Format | Dolby, Surround Sound |
| Unit Count | 1.0 Count |
8. Warranty & Support
8.1 Warranty Information
The ninetom Wireless CarPlay Retrofit Kit Decoder comes with a 1-Year Warranty from the date of purchase. This warranty covers manufacturing defects and malfunctions under normal use. Please retain your proof of purchase for warranty claims.
8.2 Customer Support
For any questions, installation assistance, troubleshooting, or warranty claims, please contact ninetom customer support. Our support team is available to help resolve any issues you may encounter.
To contact support via Amazon:
- On the product page, locate and click the "ninetom" seller name, usually found near the "Add to Cart" button.
- On the seller's profile page, click the "Ask a question" button to send a message to our support team.


Figure 8.1: Steps to contact ninetom support via Amazon.
