
1. Introduction
Thank you for purchasing the Techni Home 3-in-1 Portable Evaporative Air Cooler. This appliance is designed to provide cooling, humidification, and air circulation for your home or office. Please read this manual thoroughly before operation to ensure proper use, maintenance, and safety. Keep this manual for future reference.
2. Safety Instructions
- Always place the unit on a stable, level surface to prevent tipping.
- Do not immerse the appliance, power cord, or plug in water or other liquids.
- Ensure the power supply matches the voltage specified on the rating label.
- Unplug the unit from the power outlet before cleaning, filling, or performing any maintenance.
- Keep children and pets away from the unit during operation.
- Do not block air inlets or outlets. Maintain at least 20 cm (8 inches) clearance from walls or other objects.
- Do not use the unit in areas with high humidity, such as bathrooms, or near flammable materials.
- Do not operate the unit if the cord or plug is damaged, or if the unit malfunctions or has been dropped.
- Only use original accessories and replacement parts.
- Do not attempt to repair or modify the unit yourself. Contact qualified service personnel.
3. Package Contents
Verify that all items are present in the package:
- Techni Home 3-in-1 Evaporative Air Cooler Unit
- Remote Control
- Ice Packs (x4)
- Instruction Manual (this document)
4. Product Overview
Familiarize yourself with the components and features of your evaporative air cooler.

Figure 4.1: The Techni Home 3-in-1 Portable Evaporative Air Cooler in a typical home environment, showcasing its compact and portable design.

Figure 4.2: Key features of the evaporative air cooler, including 3 fan modes (Normal, Cooling, Sleep), 3-in-1 functionality (Air Conditioner, Humidifier, Fan), 120° oscillation, 3 fan speeds, 1-15 hour sleep timer, 4 ice packs, remote control, 20L/5.3 gallon water tank, and 360° wheels.
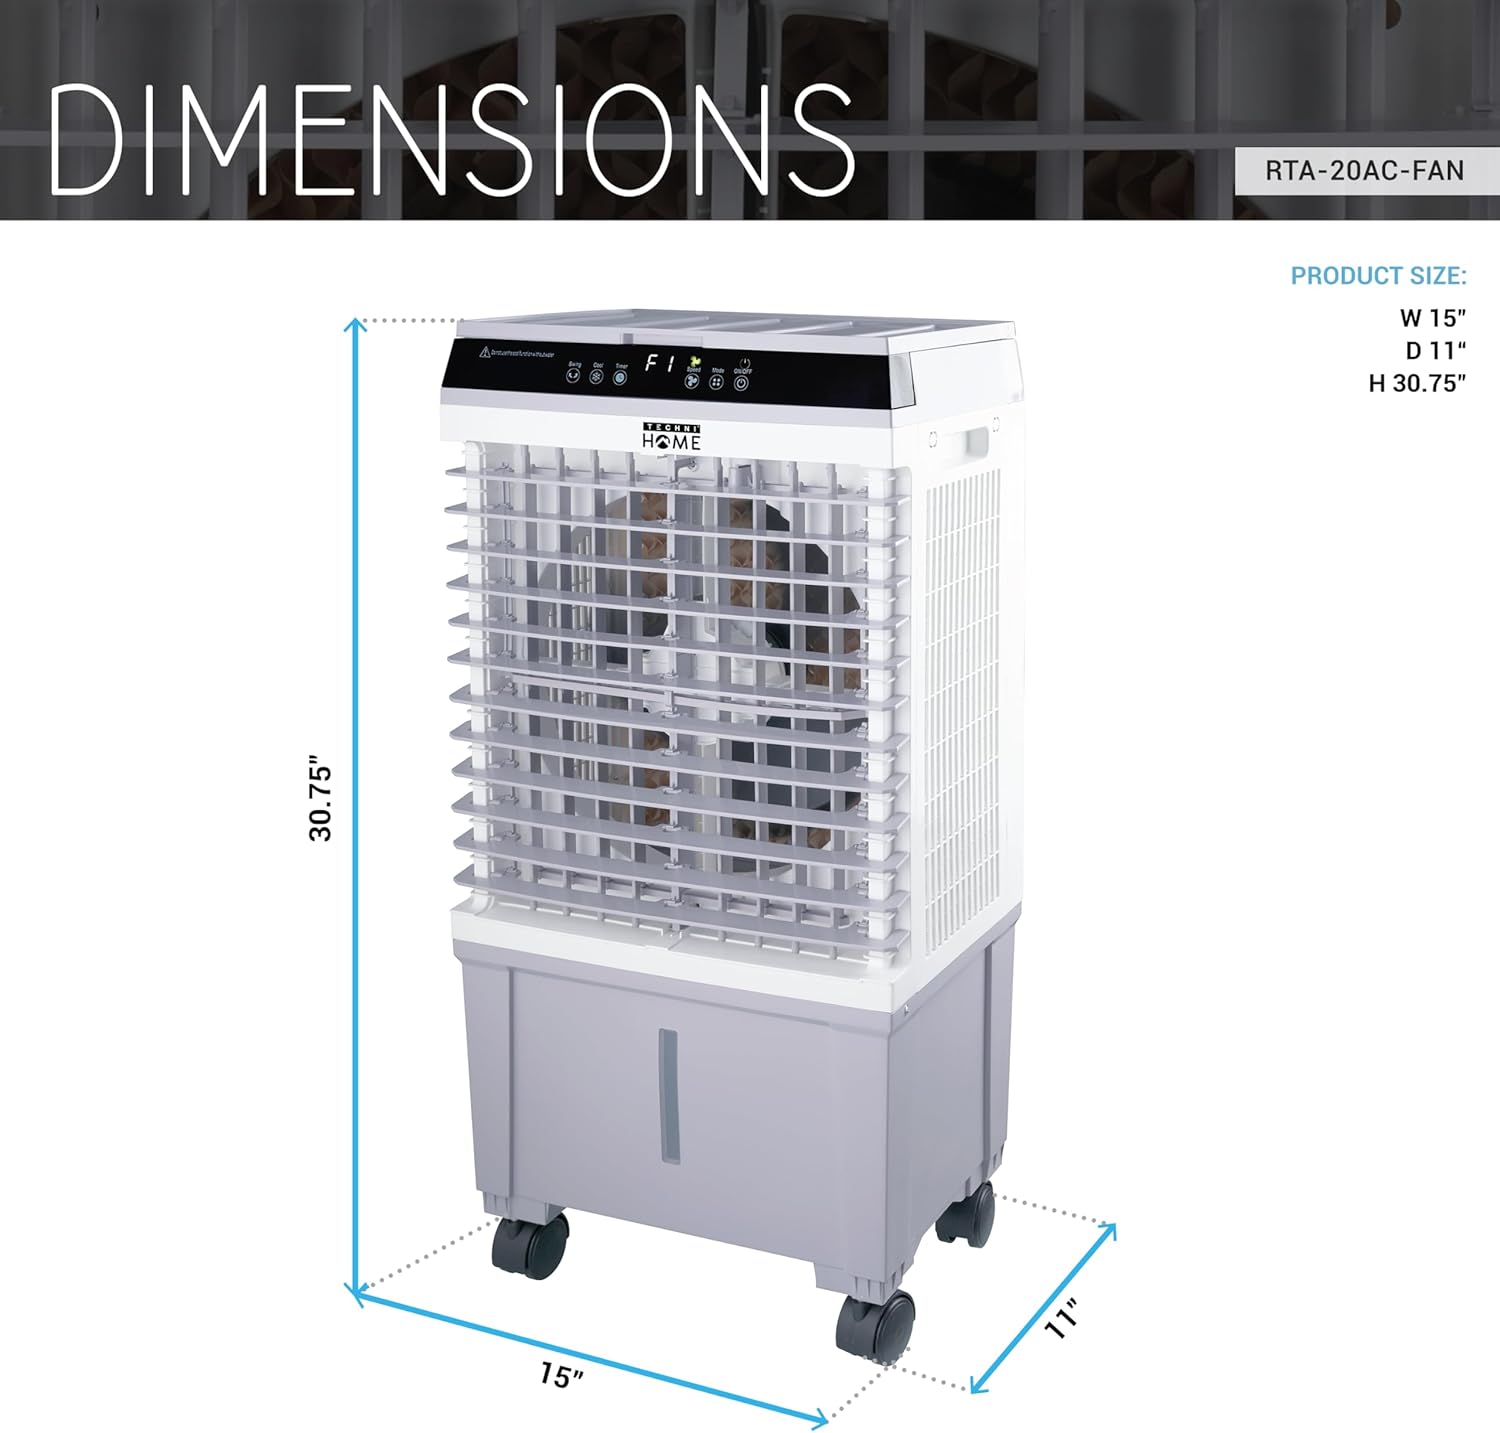
Figure 4.3: Dimensions of the unit: 15 inches (W) x 11 inches (D) x 30.75 inches (H).
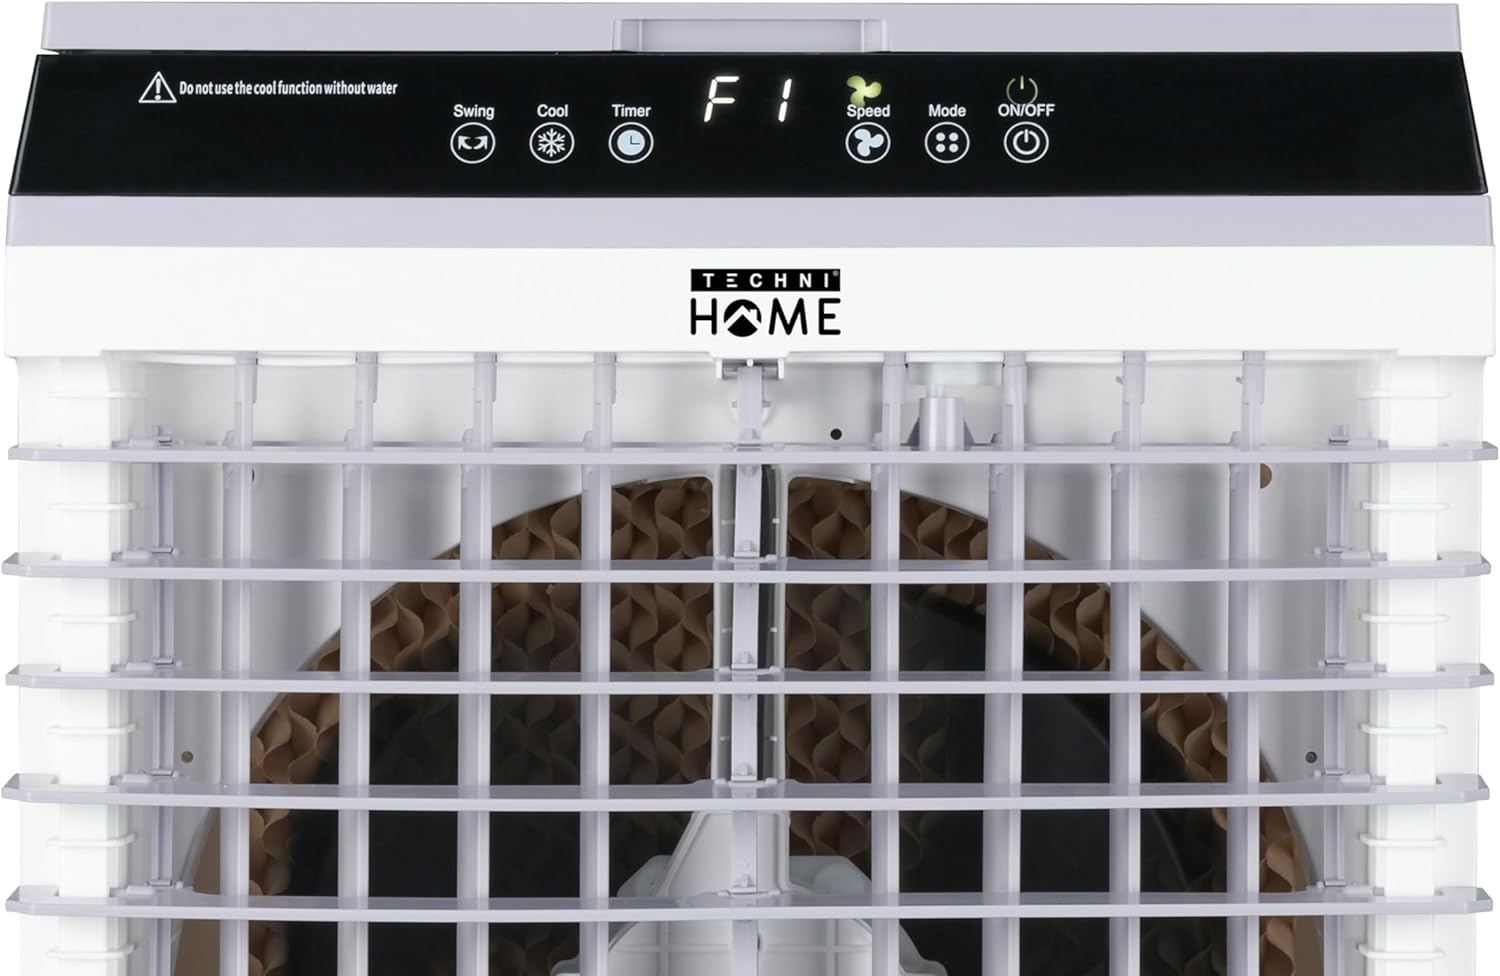
Figure 4.4: Detailed view of the top-mounted digital control panel, showing buttons for Swing, Cool, Timer, Speed, Mode, and On/Off, along with a digital display.

Figure 4.5: The remote control for convenient operation, featuring buttons for On/Off, Cool, Speed, Mode, Timer, and Swing functions.
5. Setup
5.1 Unpacking
- Carefully remove the unit from its packaging.
- Remove all packing materials, including any protective films or tapes.
- Inspect the unit for any damage. If damaged, do not operate and contact customer support.
5.2 Filling the Water Tank
- Ensure the unit is unplugged from the power outlet.
- Open the water tank cover located on the top of the unit.
- Fill the water tank with clean, cool water. Do not exceed the 'MAX' fill line indicated on the tank.
- Close the water tank cover securely.
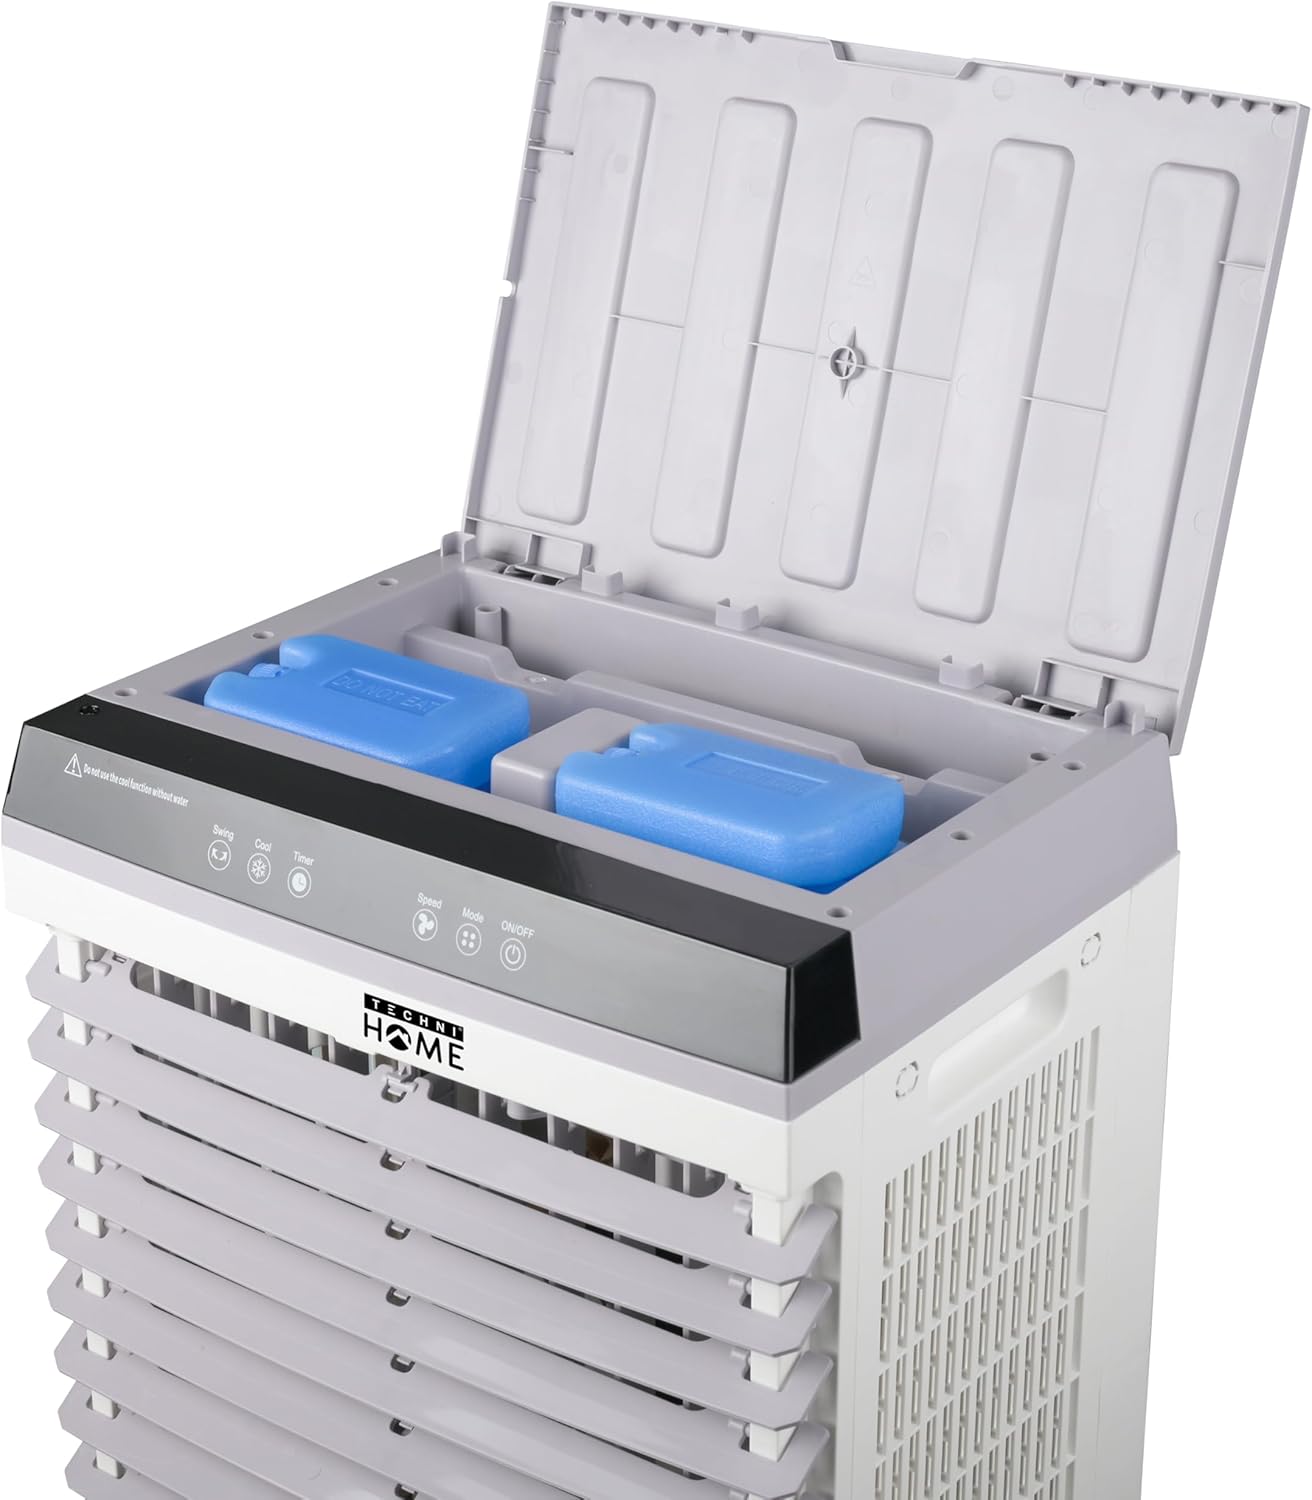
Figure 5.1: Open the top lid to access the water tank and place the ice packs.
5.3 Using Ice Packs for Enhanced Cooling
- Fill the provided ice packs with water and place them in a freezer until completely frozen.
- Once frozen, place the ice packs into the water tank along with the water. This will enhance the cooling effect.
- Do not open the ice packs or consume their contents.
6. Operating Instructions
The unit can be operated using the control panel on top or the included remote control.
6.1 Power On/Off
- Plug the power cord into a suitable electrical outlet.
- Press the ON/OFF button on the control panel or remote control to turn the unit on or off.
6.2 Fan Speed Adjustment
- Press the SPEED button repeatedly to cycle through the three fan speeds: Low, Medium, and High. The current speed will be indicated on the digital display.
6.3 Wind Mode Selection
- Press the MODE button repeatedly to select different wind modes:
- Normal: Provides a constant airflow at the selected speed.
- Natural: Simulates natural breeze by varying fan speed.
- Sleep: Gradually reduces fan speed and operates quietly for comfortable sleep.
6.4 Cooling/Humidifier Function
- Ensure the water tank is filled before activating the cooling function.
- Press the COOL button to activate the evaporative cooling and humidification function. The snowflake icon will illuminate.
- Press the COOL button again to deactivate this function.
6.5 Oscillation Function
- Press the SWING button to activate the 120° horizontal oscillation, distributing air across a wider area.
- Press the SWING button again to stop oscillation.
- Vertical airflow direction can be adjusted manually by tilting the front louvers.
6.6 Timer Function
- Press the TIMER button repeatedly to set the desired operating time, from 1 to 12 hours.
- The unit will automatically turn off once the set time has elapsed.
6.7 Remote Control Operation
The remote control allows for convenient operation from a distance. Ensure there are no obstructions between the remote and the unit's receiver. Insert two AAA batteries (not included) into the remote control, observing polarity.
Video 6.1: This video demonstrates the basic operation of the Techni Home 3-in-1 Portable Evaporative Air Cooler, including filling ice packs, powering on, adjusting fan speed, setting the timer, activating oscillation, and selecting modes (fan, AC, cool).
7. Maintenance
Regular cleaning and maintenance will ensure optimal performance and extend the lifespan of your unit.
7.1 Cleaning the Exterior
- Always unplug the unit before cleaning.
- Wipe the exterior surfaces with a soft, damp cloth. Do not use abrasive cleaners or solvents.
- Ensure no water enters the control panel or other electrical components.
7.2 Cleaning the Water Tank
- Unplug the unit and drain any remaining water from the tank.
- Remove the water tank (if detachable) or access the interior through the top opening.
- Clean the tank with a mild detergent and water. Rinse thoroughly to remove any residue.
- Allow the tank to air dry completely before reassembling or refilling.
- Clean the water tank regularly (at least once a week) to prevent mold and mildew growth.
7.3 Cleaning the Cooling Pads (Evaporative Media)
The cooling pads should be cleaned periodically, especially if you notice reduced airflow or an odor.
- Unplug the unit.
- Refer to the unit's design to locate and carefully remove the cooling pads. They are typically located behind the rear grille.
- Rinse the cooling pads under running water to remove dust and mineral deposits. For stubborn deposits, soak them in a solution of water and white vinegar for 30 minutes, then rinse thoroughly.
- Allow the pads to air dry completely before reinstalling them.
7.4 Storage
If the unit will not be used for an extended period:
- Unplug the unit and drain all water from the tank.
- Clean the water tank and cooling pads as described above.
- Allow all components to dry completely to prevent mold and mildew.
- Store the unit in a cool, dry place, away from direct sunlight and extreme temperatures.
8. Troubleshooting
Before contacting customer support, please refer to the following troubleshooting guide:
| Problem | Possible Cause | Solution |
|---|---|---|
| Unit does not turn on | No power supply Power cord not properly plugged in | Check if the unit is plugged into a working outlet Ensure the power cord is securely connected |
| No cooling effect | Water tank is empty Cooling function not activated Cooling pads are dirty | Fill the water tank Press the COOL button Clean the cooling pads (refer to Section 7.3) |
| Weak airflow | Air inlets/outlets blocked Fan speed set too low Cooling pads are dirty | Ensure clear space around the unit Increase fan speed Clean the cooling pads (refer to Section 7.3) |
| Unusual noise | Unit not on a level surface Foreign object in fan Water pump issue | Place the unit on a flat, stable surface Turn off and unplug, then check for obstructions Contact customer support |
| Odor from unit | Stagnant water or dirty cooling pads | Clean the water tank and cooling pads thoroughly (refer to Section 7.2 and 7.3) Use fresh water daily |
9. Specifications
| Feature | Specification |
|---|---|
| Model Number | RTA-20AC-FAN |
| Functions | Evaporative Air Cooler, Humidifier, Fan |
| Dimensions (W x D x H) | 15" x 11" x 30.75" (38.1 cm x 27.9 cm x 78.1 cm) |
| Water Tank Capacity | 5.3 Gallons (20 Liters) |
| Air Flow Capacity | 1800 Cubic Feet Per Minute (CFM) |
| Fan Speeds | 3 (Low, Medium, High) |
| Wind Modes | Normal, Natural, Sleep |
| Oscillation | 120° Horizontal (Automatic), Vertical (Manual) |
| Timer | 1-12 Hours |
| Noise Level | 25 Decibels (dB) |
| Control Type | Digital Control Panel, Remote Control |
| Included Accessories | 4 Ice Packs |
| Material | Plastic |
10. Warranty and Support
10.1 Warranty Information
This Techni Home product is covered by a 1-Year Limited Warranty from the date of purchase. This warranty covers manufacturing defects in materials and workmanship under normal use. It does not cover damage resulting from misuse, accident, unauthorized repairs, or normal wear and tear.
10.2 Customer Support
For technical assistance, warranty claims, or general inquiries, please contact Techni Home customer support. Please have your model number (RTA-20AC-FAN) and proof of purchase ready when contacting support.
Manufacturer: RTA Products LLC
Contact information (e.g., website, email, phone number) can typically be found on the product packaging or the official Techni Home website.

