
TILSWALL DREAMER 400
TILSWALL HVLP Paint Sprayer & White Paint - Instruction Manual
Model: DREAMER 400
1. Introduction
Thank you for choosing the TILSWALL HVLP Paint Sprayer. This manual provides essential information for the safe and efficient operation, maintenance, and troubleshooting of your new paint sprayer. Please read this manual thoroughly before first use and keep it for future reference.
The TILSWALL DREAMER 400 is an ultra-light, high-efficiency paint sprayer designed for various painting tasks, offering professional results with ease. It features interchangeable nozzles and adjustable spray patterns to suit different applications.
2. Safety Instructions
Always observe basic safety precautions to reduce the risk of fire, electric shock, and personal injury.
- Read All Instructions: Familiarize yourself with the controls and proper use of the equipment.
- Wear Personal Protective Equipment (PPE): Always wear safety glasses, a respirator mask, gloves, and appropriate clothing to protect against paint fumes and overspray.
- Ensure Adequate Ventilation: Use the sprayer in a well-ventilated area to prevent the accumulation of flammable vapors.
- Electrical Safety: Do not expose the sprayer to rain or wet conditions. Do not abuse the cord. Keep the cord away from heat, oil, sharp edges, or moving parts.
- Flammable Materials: Do not spray flammable liquids near open flames, pilot lights, or other ignition sources.
- Keep Children Away: Do not allow children or untrained persons to operate the sprayer.
- Proper Paint Handling: Always follow the paint manufacturer's safety instructions and recommendations for handling and disposal.
3. Package Contents
Verify that all items are present in your package:
- TILSWALL DREAMER 400 HVLP Paint Sprayer
- White Paint (16oz / 0.5kg)
- 1.5 mm Nozzle
- 2.0 mm Nozzle (pre-installed or separate)
- Paint Stirrer
- Disposable TPE Gloves
- Sandpaper
- Japanese Paper Protection Film
- Beautiful Paper Tape

Image: The Tilswall HVLP Paint Sprayer with its paint container, and various accessories including the white paint, stirrer, and other tools.
4. Product Overview
The TILSWALL DREAMER 400 is designed for ease of use and professional results. Key features include:
- Ultra-light Design: Reduces weight by 47% for fatigue-free use.
- Interchangeable Nozzles: Includes 1.5 mm and 2.0 mm nozzles for different paint viscosities and project types.
- Adjustable Spray Patterns: Easily switch between horizontal, vertical, and round spray patterns.
- Adjustable Flow Control Knob: Allows for precise control over paint output for fine finishes or large coverage.
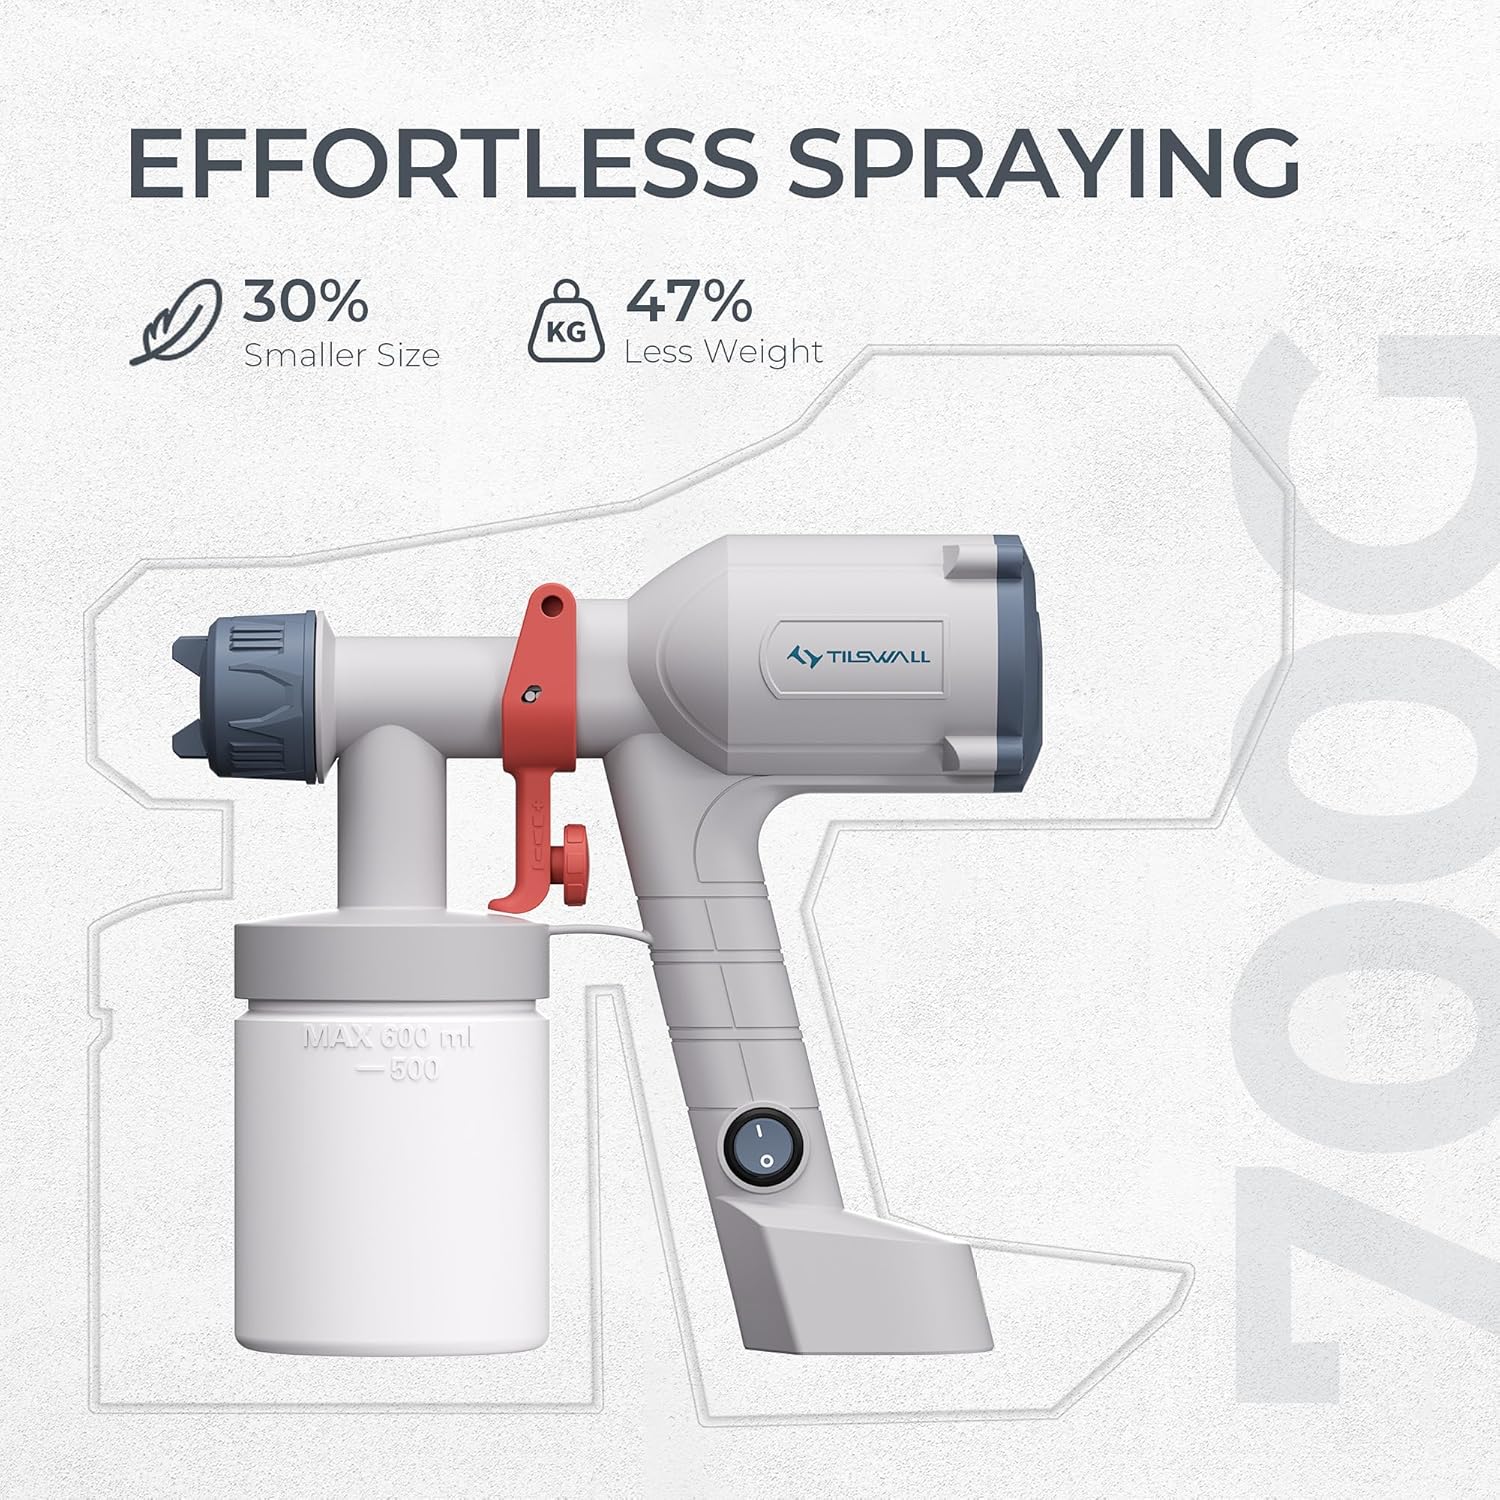
Image: A diagram illustrating the compact size and reduced weight of the Tilswall sprayer, highlighting its ergonomic design.
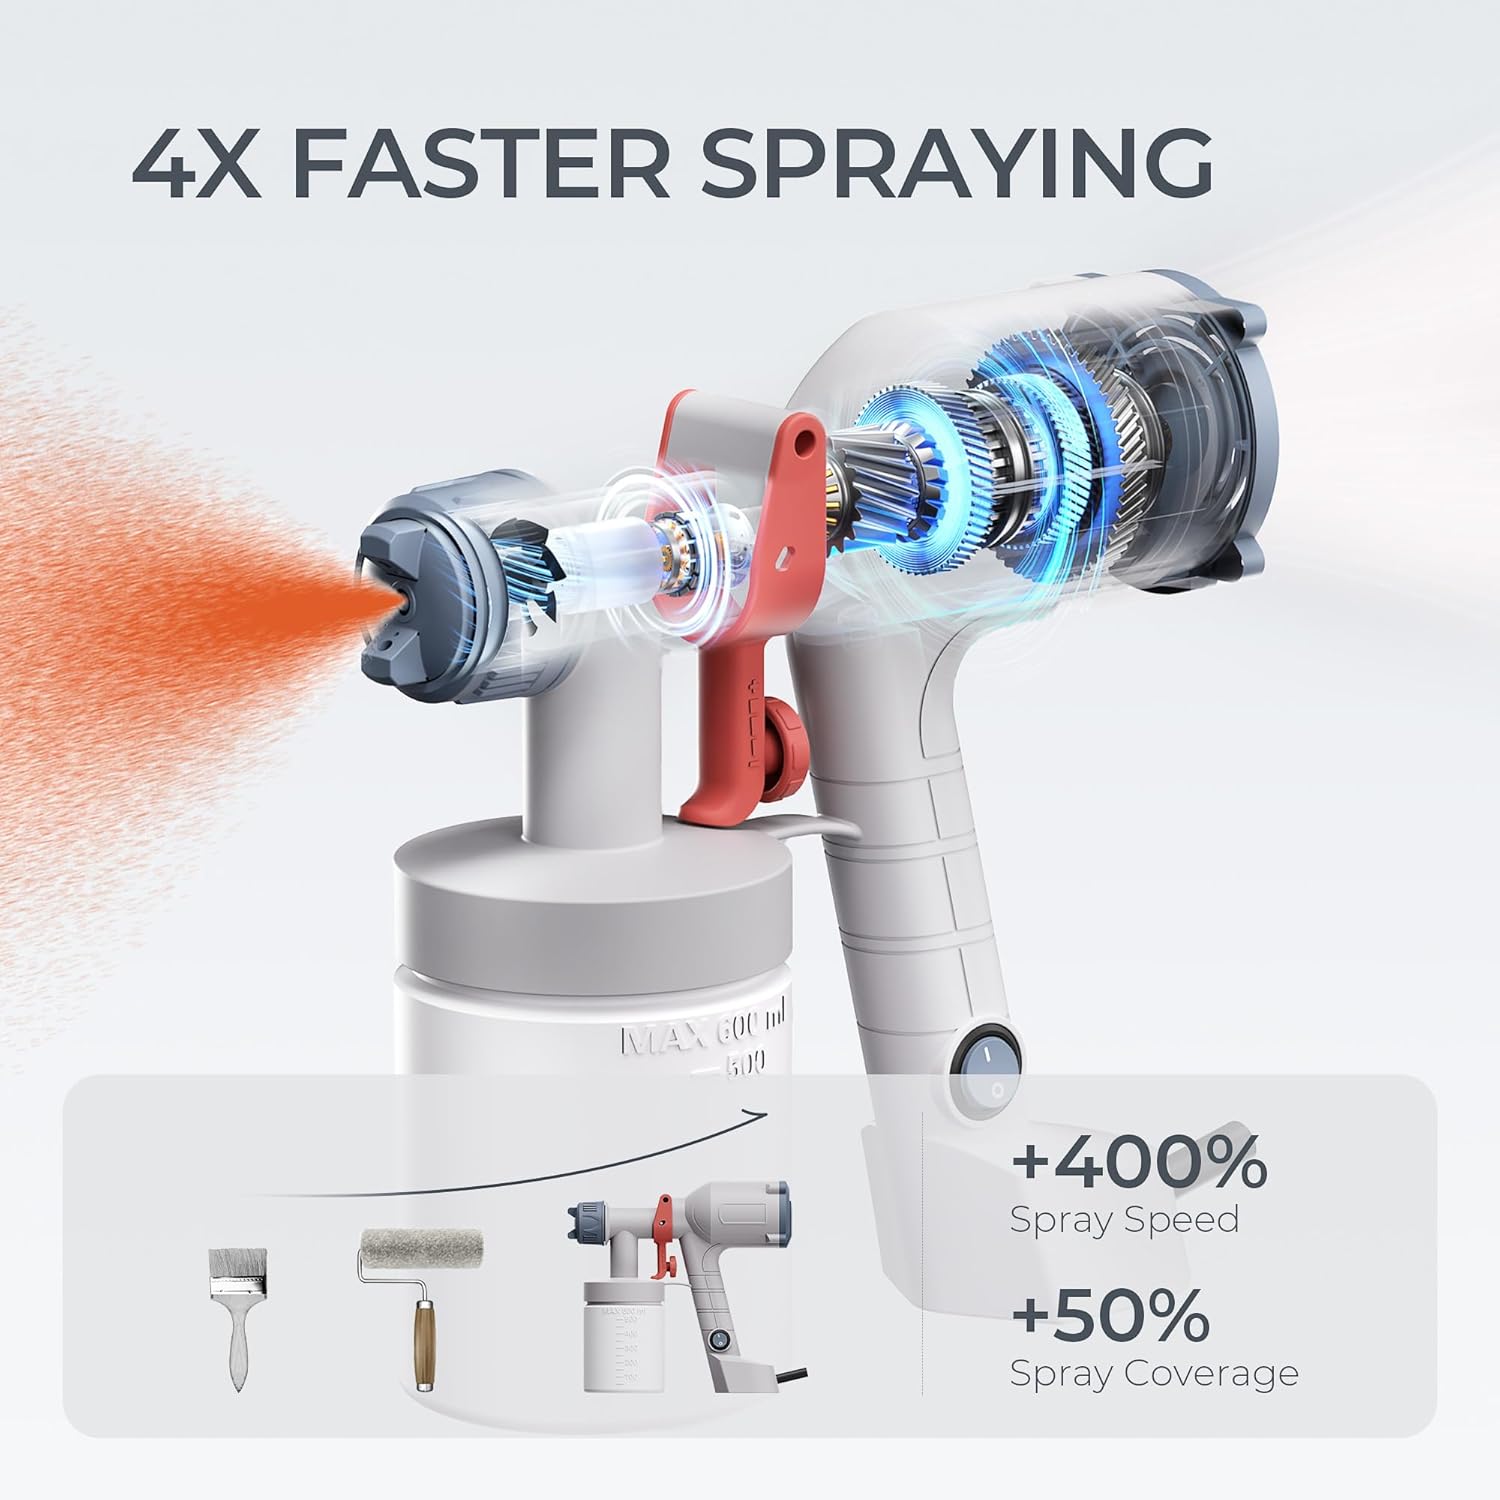
Image: A visual comparison demonstrating the Tilswall sprayer's efficiency, showing it sprays 4 times faster and provides 50% more coverage than brushes or rollers.
5. Setup
- Prepare Your Work Area: Ensure the area is clean, well-ventilated, and free from obstructions. Cover any surfaces you do not wish to paint with the provided paper protection film and tape.
- Select the Correct Nozzle: The sprayer comes with 1.5 mm and 2.0 mm nozzles. The 2.0 mm nozzle is generally suitable for wall painting and thicker materials, while the 1.5 mm nozzle is better for finer finishes.
- Prepare the Paint:
- The included water-based wood stain is ready-to-use at temperatures above 59°F (15°C).
- If the temperature is between 41°F (5°C) and 59°F (15°C), add 0-1.01 fl oz (0-30 ml) of water to the paint.
- It is not recommended for use below 41°F (5°C).
- For other paints, always refer to the paint manufacturer's instructions for dilution. The TILSWALL DREAMER 400 is designed to work with paint without excessive dilution for finer atomization.
- Fill the Container: Pour the prepared paint into the sprayer's paint container (Tank Volume: 20 Fluid Ounces / 600ml). Securely attach the container to the sprayer body.
- Test Spray: Before painting your actual project, test the spray pattern on a piece of scrap material to adjust the flow control and spray pattern as needed.
6. Operation
Operating the TILSWALL HVLP Paint Sprayer is straightforward, allowing for professional results with minimal effort.
- Hold the Sprayer Correctly: Hold the sprayer perpendicular to the surface you are painting, maintaining a consistent distance (typically 6-10 inches) for even coverage.
- Adjust Flow Control: Use the adjustable flow control knob to regulate the amount of paint being sprayed. Turn clockwise for less paint, counter-clockwise for more. Start with a lower setting and increase as needed.
- Select Spray Pattern: Rotate the air cap to select your desired spray pattern:
- Horizontal: For spraying up and down motions.
- Vertical: For spraying side to side motions.
- Round: For small areas, corners, or intricate details.
- Begin Spraying: Press the trigger to start spraying. Move your arm steadily across the surface, overlapping each pass slightly to ensure complete coverage. Release the trigger at the end of each pass.
- Achieve Professional Results: The sprayer is designed for finer atomization, reducing streaking and dripping for a smooth, mirror-like finish.

Image: A visual comparison demonstrating the superior texture and complete coverage achieved with the Tilswall Dreamer400 compared to traditional brush and roller applications.

Image: A woman demonstrating the use of the Tilswall sprayer for wall painting, highlighting the ease of use with the 2.0mm nozzle for larger surfaces.
7. Maintenance and Cleaning
Proper cleaning after each use is crucial for maintaining the performance and longevity of your paint sprayer.
- Empty Remaining Paint: Pour any unused paint back into its original container.
- Initial Rinse: Fill the paint container with clean water (for water-based paints) or appropriate cleaning solution (for other paints). Spray the cleaning liquid through the sprayer until it runs clear and no paint residue is visible.
- Disassemble for Thorough Cleaning: Disconnect the power. Unscrew the paint container. Disassemble the nozzle and air cap components. Clean all parts thoroughly with water or the appropriate cleaning solution and a brush.
- Important Cleaning Note: Do not clean the sprayer by holding it upside down with the container attached, as this can cause liquid to enter the motor housing.
- Dry and Store: Ensure all parts are completely dry before reassembling. Store the sprayer in a clean, dry place.
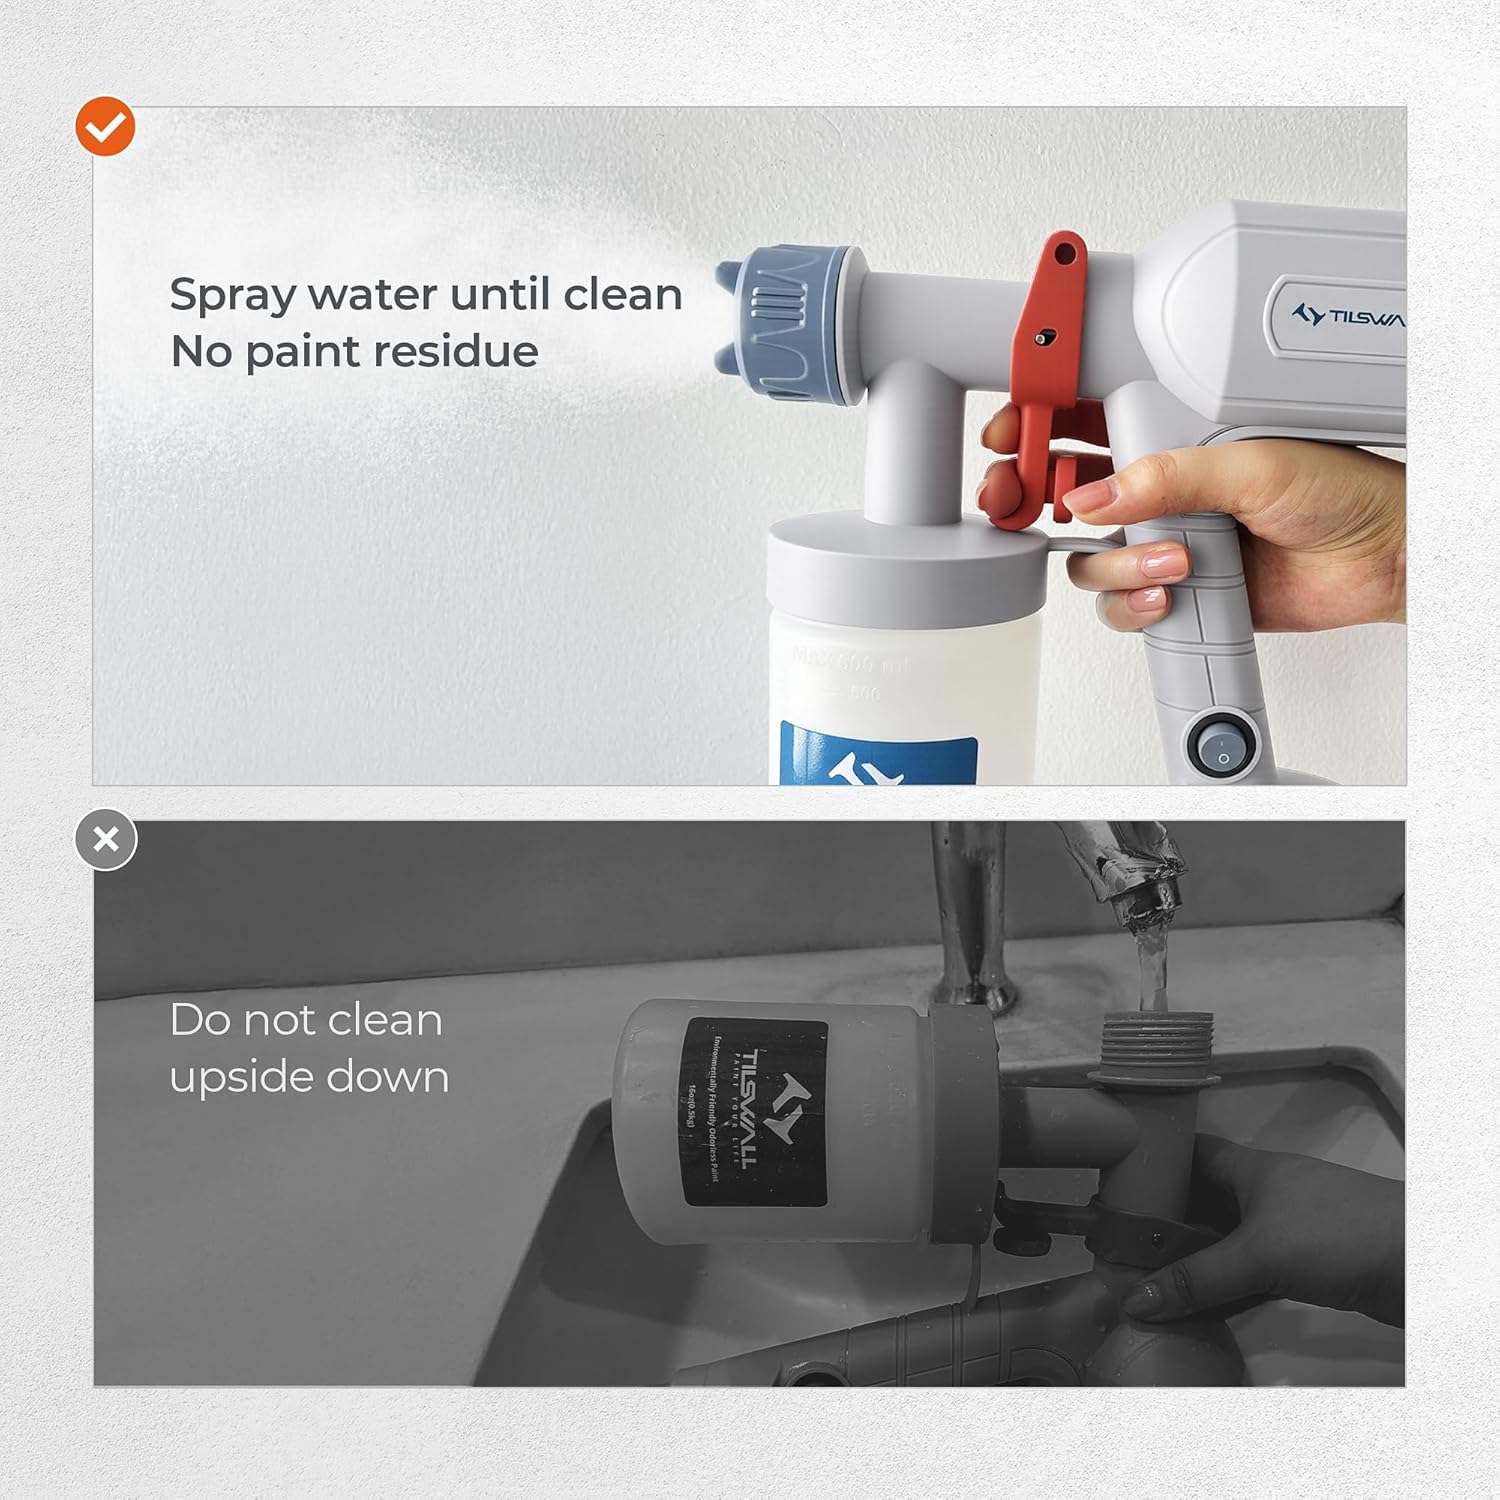
Image: Visual instructions on how to clean the sprayer by spraying water until clear, and a clear warning against cleaning the unit upside down.
8. Troubleshooting
If you encounter issues with your paint sprayer, refer to the following common problems and solutions:
| Problem | Possible Cause | Solution |
|---|---|---|
| No spray or weak spray | Clogged nozzle or air cap; insufficient paint; paint too thick; air leaks. | Clean nozzle and air cap; refill paint container; thin paint if necessary (refer to paint manufacturer); ensure all connections are tight. |
| Uneven spray pattern | Partially clogged nozzle; incorrect spray pattern setting; inconsistent spraying distance. | Clean nozzle; adjust air cap for desired pattern; maintain consistent distance from surface. |
| Paint dripping | Paint too thin; excessive flow rate; holding sprayer too close. | Adjust paint viscosity; reduce flow control; increase spraying distance. |
| Motor not running | No power; faulty switch. | Check power connection; contact customer support if switch is faulty. |
9. Specifications
- Model: DREAMER 400
- Brand: TILSWALL
- ASIN: B0F8R3DMJJ
- Tank Volume: 20 Fluid Ounces (approx. 600 ml)
- Nozzle Sizes: 1.5 mm, 2.0 mm
- Adjustable Spray Patterns: Horizontal, Vertical, Round
- Compatible Paint Type: Water-based wood stain (included), suitable for various other paints (check viscosity).
- Weight: Ultra-light design (47% reduced weight compared to traditional models).

Image: An illustration detailing the key properties of the included Tilswall paint, such as being eco-friendly, fast-drying, and having high hardness and wear resistance.
10. Warranty and Support
Specific warranty details are not provided in this manual. For information regarding warranty coverage, technical support, or replacement parts, please contact TILSWALL customer service directly through their official website or the retailer where the product was purchased.
Always refer to the official TILSWALL website for the most up-to-date product information and support resources.
Related documentsDREAMER 400

Ask a question about this manual
Ask about setup, troubleshooting, compatibility, parts, safety, or missing instructions. Manuals+ will review the question and use this page’s manual context to help answer it.