
1. Introduction
The FLASHFORGE AD5X is an advanced multi-color FDM 3D printer designed for both hobbyists and professionals. It features an innovative Intelligent Filament System (IFS) for seamless multi-color printing, high-speed capabilities up to 600mm/s, and a robust Core XY structure for precise and stable operation. This manual provides essential information for setting up, operating, maintaining, and troubleshooting your AD5X 3D printer.
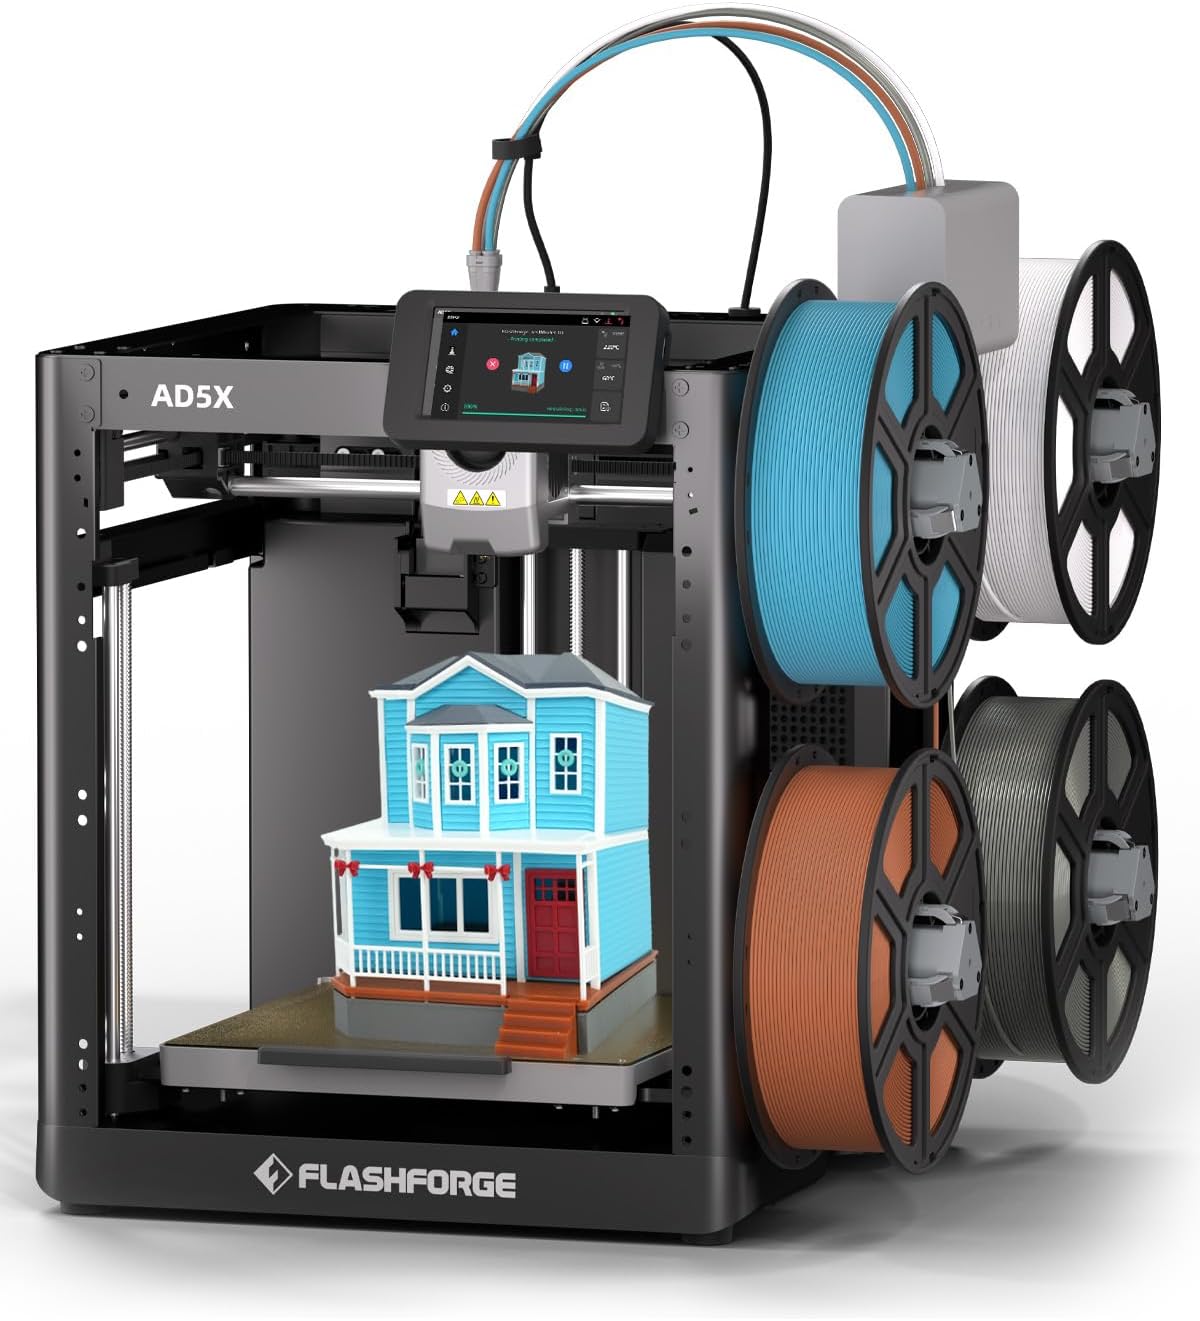
Figure 1.1: The FLASHFORGE AD5X 3D Printer with its multi-color printing setup.
2. Safety Information
Please read all safety warnings and instructions carefully before operating the printer to prevent injury or damage to the device.
- Electrical Safety: Ensure the printer is connected to a grounded power outlet. Do not operate with wet hands or in damp conditions.
- Hot Surfaces: The nozzle and build plate reach high temperatures during operation. Avoid direct contact to prevent burns. Allow components to cool before handling.
- Moving Parts: Keep hands, hair, and loose clothing clear of moving parts during operation to prevent entanglement.
- Ventilation: Operate the printer in a well-ventilated area, especially when printing with materials that may emit fumes.
- Filament Handling: Use caution when loading and unloading filament, as the extruder can be hot.
- Children and Pets: Keep the printer out of reach of children and pets. Adult supervision is required if children are present.
3. Package Contents
Verify that all items listed below are included in your package:
- AD5X 3D Printer (x1)
- Filament 10g (x4)
- Power Cord (x1)
- IFS Connection Cable (x1)
- 4-Color Module (IFS) (x1)
- Spool Holder (x4)
- 4-in-1 Guide Tube (x1)
- Mounting Plate (x1)
- Screw M3x6 (x4)
- After-sales Service Card (x1)
- Quick Start Guide (x1)
- Display Screen (x1)
- Grease (x1)
- Cable Clip (x1)
- Glue (x1)
- Allen Wrench (x3)
- Diagonal Pliers (x1)
- Unclogging Pin Tool (x1)
- Phillips Screwdriver (x1)

Figure 3.1: Visual representation of the AD5X packing list.
4. Setup Guide
4.1 Unpacking and Placement
Carefully remove the printer from its packaging. Place the printer on a stable, level surface in a well-ventilated area, away from direct sunlight, heat sources, or excessive dust.
4.2 Initial Power-On and Screen Setup
Connect the power cord to the printer and a suitable power outlet. Turn on the printer using the power switch. Follow the on-screen instructions on the 4.3-inch touch LCD screen for initial setup, including language selection and network connection (Wi-Fi/Ethernet).
4.3 Intelligent Filament System (IFS) Installation
Attach the four spool holders to the designated mounting points on the printer. Connect the 4-Color Module (IFS) to the printer using the IFS Connection Cable. Guide the filament from each spool through the 4-in-1 Guide Tube to the IFS module.
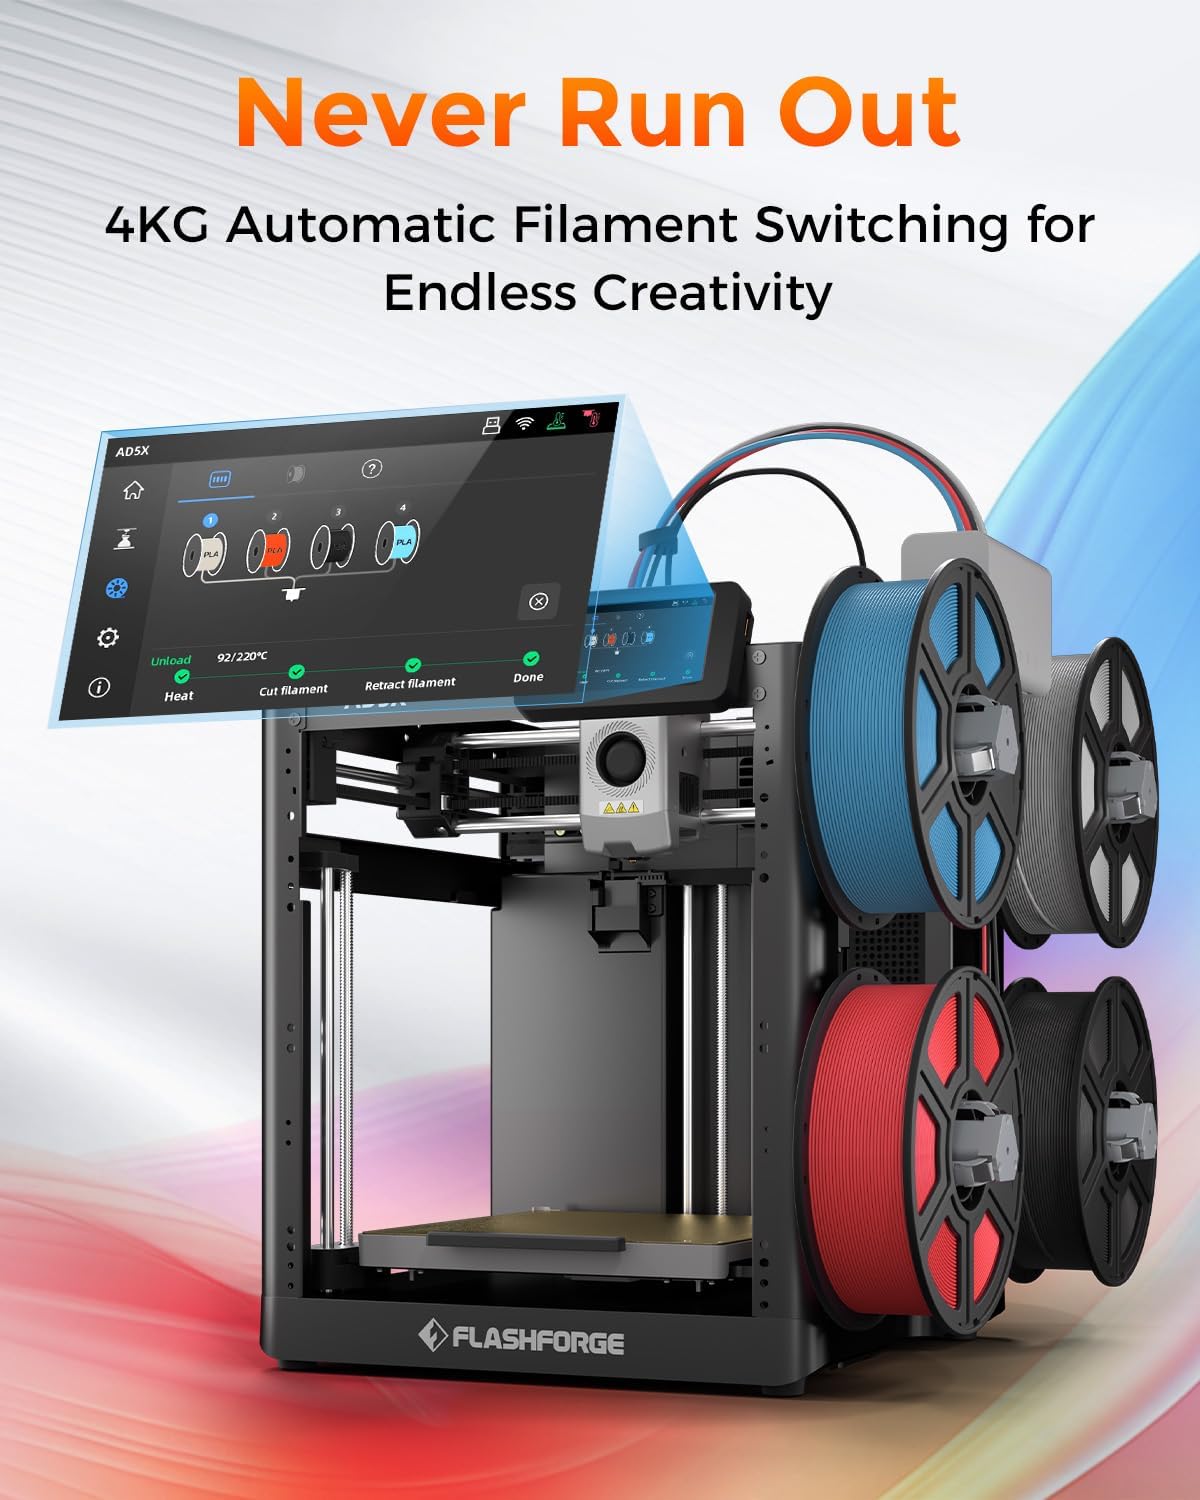
Figure 4.1: The AD5X's 4KG Automatic Filament Switching system.
4.4 Loading Filament
Ensure the printer is powered on. Select the filament loading option on the touch screen. Insert the end of the filament into the designated input port on the IFS module. The system will automatically detect and feed the filament into the extruder.
4.5 Automatic Leveling
The AD5X features a fully automatic leveling system. From the printer's touch screen, initiate the auto-leveling process. The printer will automatically probe the build plate at multiple points to ensure optimal bed adhesion and print quality. No manual adjustments are typically required.

Figure 4.2: Automatic leveling and Core XY structure for stable printing.
5. Operating Instructions
5.1 Software Overview (FlashPrint5)
The FLASHFORGE AD5X is compatible with FlashPrint5 slicing software (also compatible with Orca Slicer). Install FlashPrint5 on your computer. This software allows you to import 3D models, adjust print settings (layer height, infill, supports), and prepare the model for printing (slicing).
5.2 Starting a Print
After slicing your model in FlashPrint5, you can transfer the print file to the printer via USB disk, Wi-Fi, or Ethernet. Select the desired file on the printer's touch screen and initiate the print. The printer will preheat the nozzle and build plate to the required temperatures before starting the print.
5.3 Multi-Color Printing
The AD5X's multi-color printing capability allows for up to four colors simultaneously. In FlashPrint5, assign different colors to various parts of your model. The Intelligent Filament System will automatically manage filament switching during the print process, ensuring vibrant and intricate designs.

Figure 5.1: Key features: Precision, Speed, and Reliability of the AD5X.
5.4 High-Speed Printing
The AD5X boasts a maximum printing speed of 600mm/s and an acceleration of 20,000mm/s². This allows for significantly faster print times compared to conventional 3D printers, without compromising print quality. Ensure your model and slicing settings are optimized for high-speed printing.
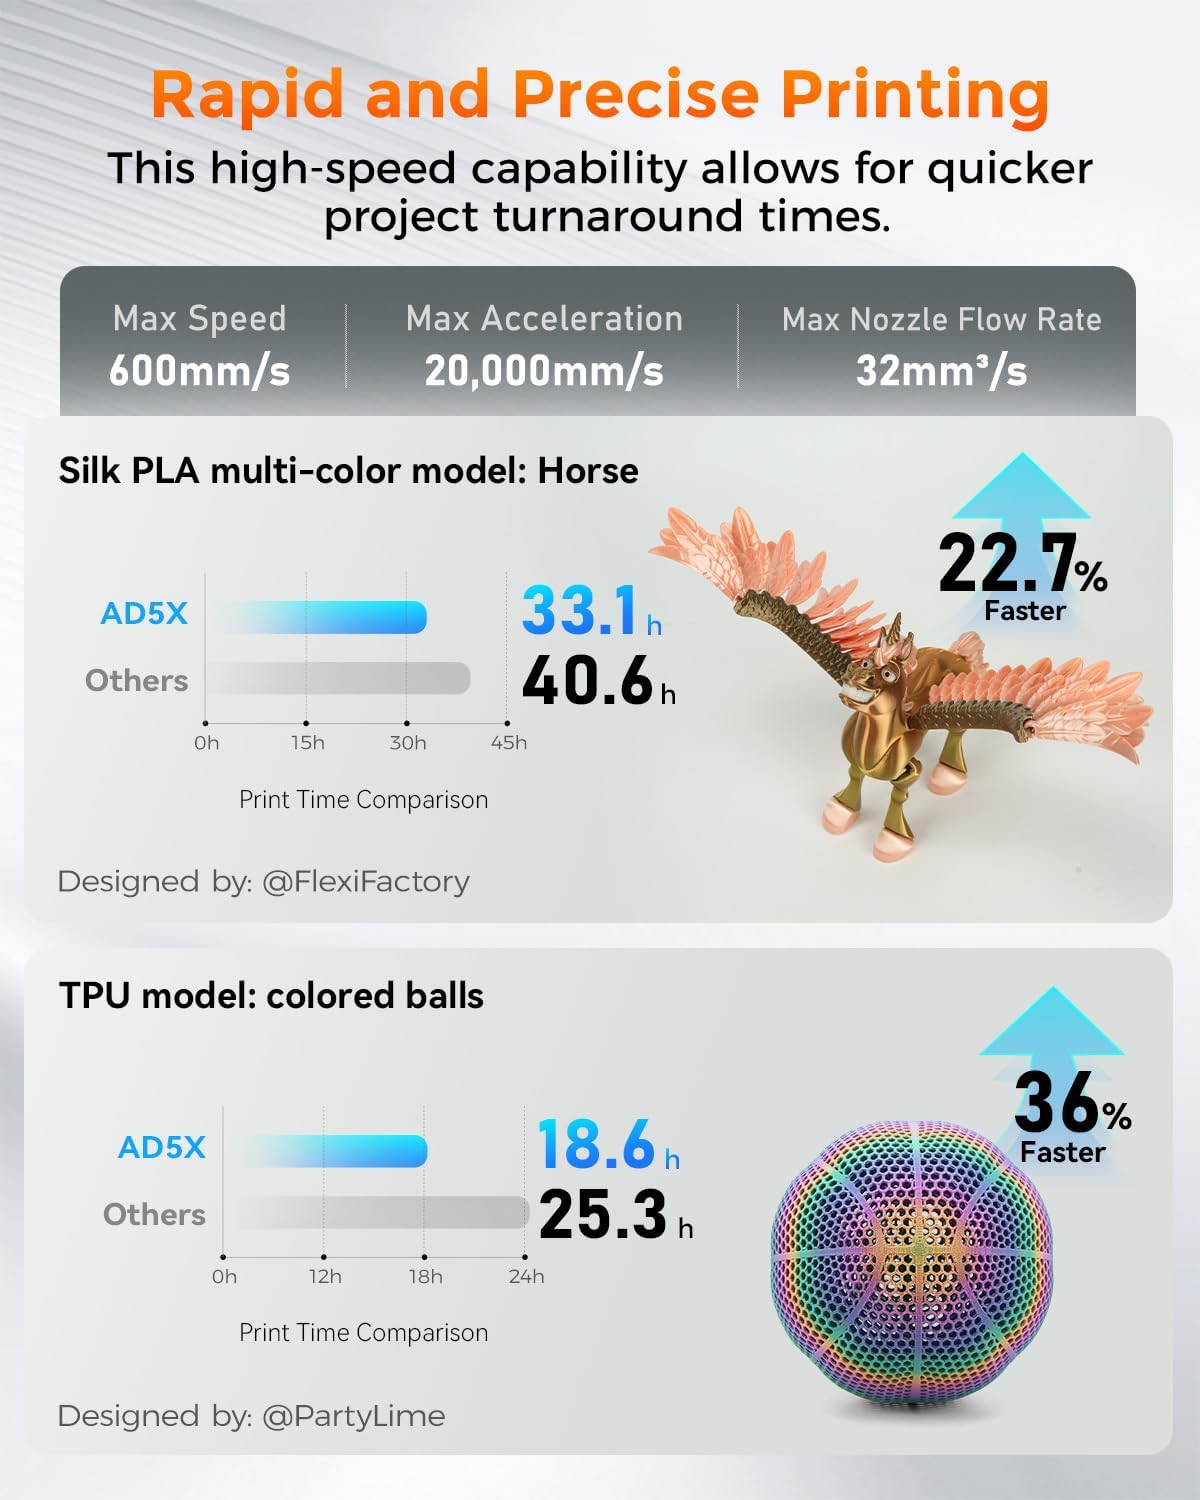
Figure 5.2: Print speed comparison demonstrating the AD5X's rapid printing capabilities.
5.5 Nozzle Replacement
The AD5X features a quick-release nozzle design, allowing for easy and rapid nozzle changes. To replace the nozzle, ensure the printer is off and the nozzle has cooled. Gently press the release mechanism and pull the nozzle assembly out. Insert the new nozzle until it clicks into place. The printer comes with a 0.4mm nozzle (default) and supports optional 0.25mm, 0.6mm, and 0.8mm nozzles.

Figure 5.3: Quick-release nozzle system and available nozzle diameters.
5.6 Supported Materials
The AD5X supports a wide range of filament types, including:
- PLA (Polylactic Acid)
- PETG (Polyethylene Terephthalate Glycol)
- TPU (Thermoplastic Polyurethane)
- PLA-CF (PLA Carbon Fiber)
- PETG-CF (PETG Carbon Fiber)
Always refer to the filament manufacturer's recommendations for optimal printing temperatures and settings.

Figure 5.4: Examples of prints using various supported filament types.
6. Maintenance
6.1 Cleaning Procedures
- Exterior: Wipe the exterior surfaces of the printer with a soft, dry cloth. Avoid using abrasive cleaners or solvents.
- Build Plate: After each print, remove any residual filament from the build plate. For stubborn residue, use a plastic scraper. The PEI flexible steel sheet provides strong adhesion and is easy to clean.
- Nozzle: Periodically clean any filament residue from the exterior of the nozzle using a brass brush (when cold) or a soft cloth (when warm, with caution).
6.2 Nozzle Care
To prevent clogs, ensure proper filament loading and unloading. If a clog occurs, use the provided unclogging pin tool to clear the nozzle. For severe clogs, the quick-release design allows for easy replacement of the nozzle assembly.
6.3 General Care
- Lubrication: Apply a small amount of the provided grease to the Z-axis lead screws and smooth rods periodically to ensure smooth movement.
- Firmware Updates: Check the FLASHFORGE official website for any available firmware updates to ensure optimal performance and new features.
- Storage: When not in use for extended periods, store the printer in a clean, dry environment.
7. Troubleshooting
This section addresses common issues you might encounter. For more detailed troubleshooting, refer to the official FLASHFORGE support resources.
| Problem | Possible Cause | Solution |
|---|---|---|
| Print not sticking to build plate | Improper bed leveling, dirty build plate, incorrect bed temperature, first layer too high. | Run automatic leveling. Clean the build plate with isopropyl alcohol. Adjust bed temperature in slicing software. Ensure first layer height is correct. Use glue stick if necessary. |
| Filament not extruding / Clogged nozzle | Nozzle clog, tangled filament, incorrect temperature, worn nozzle. | Use unclogging pin tool. Check filament path for tangles. Verify nozzle temperature. Replace nozzle if worn. |
| Grinding noise from extruder | Filament slipping, partial clog, foreign debris in gears. | Check for clogs. Ensure proper filament tension. Inspect extruder gears for debris. |
| Skipping layers / Poor print quality | Partial clog, inconsistent filament diameter, mechanical issues, incorrect slicing settings. | Clear any partial clogs. Use high-quality filament. Check for loose belts or screws. Review slicing settings (e.g., flow rate, retraction). |
| Printer not connecting to Wi-Fi | Incorrect password, out of range, network issues. | Double-check Wi-Fi password. Move printer closer to router. Restart router and printer. |
8. Specifications
| Feature | Detail |
|---|---|
| Model Number | AD5X |
| Product Dimensions | 14.3 x 16.3 x 14.8 inches (363 x 413 x 376 mm) |
| Item Weight | 24.3 pounds (11 kg) |
| Build Volume | 220 x 220 x 220 mm |
| Printing Technology | FDM (Fused Deposition Modeling) |
| Nozzle Diameter | 0.4mm (Default), Optional: 0.25mm, 0.6mm, 0.8mm |
| Max Nozzle Temperature | 300°C |
| Max Bed Temperature | 110°C |
| Max Printing Speed | 600mm/s |
| Max Acceleration | 20,000mm/s² |
| Filament System | Intelligent Filament System (IFS) for 4-color printing |
| Leveling | Fully Automatic Leveling |
| Build Plate Material | PEI Flexible Steel Sheet |
| Connectivity | USB Disk, Wi-Fi, Ethernet |
| Slicing Software | FlashPrint5, Orca Slicer |
| Compatible Operating Systems | Win XP/Vista/7/8/10, Mac OS, Linux |
| Material | All Metal Structure |
9. Warranty and Support
For warranty information and technical support, please refer to the After-sales Service Card included in your package or visit the official FLASHFORGE website. Keep your purchase receipt as proof of purchase for warranty claims.


