
1. Introduction
Thank you for choosing the Ollygrin Espresso Machine with Grinder. This manual provides essential information for the safe and efficient operation, maintenance, and troubleshooting of your new espresso machine. Please read this manual thoroughly before first use and retain it for future reference.
2. Safety Instructions
To prevent personal injury or damage to the appliance, always observe basic safety precautions:
- Read all instructions before operating the appliance.
- Do not touch hot surfaces. Use handles or knobs.
- To protect against fire, electric shock, and injury to persons, do not immerse cord, plugs, or appliance in water or other liquid.
- Close supervision is necessary when any appliance is used by or near children.
- Unplug from outlet when not in use and before cleaning. Allow to cool before putting on or taking off parts, and before cleaning the appliance.
- Do not operate any appliance with a damaged cord or plug or after the appliance malfunctions, or has been damaged in any manner.
- The use of accessory attachments not recommended by the appliance manufacturer may result in fire, electric shock, or injury to persons.
- Do not use outdoors.
- Do not let cord hang over edge of table or counter, or touch hot surfaces.
- Do not place on or near a hot gas or electric burner, or in a heated oven.
- Always attach plug to appliance first, then plug cord into the wall outlet. To disconnect, turn any control to 'off', then remove plug from wall outlet.
- Do not use appliance for other than intended use.
3. Package Contents
Verify that all items are present in the package:
- Ollygrin Espresso Machine with Grinder
- 58mm Portafilter
- Single Wall Filter Basket (for single shot)
- Dual Wall Filter Basket (for double shot)
- Tamper
- Milk Jug
- Grinder Cleaning Brush (Built-in Removable Grinder Cleaning Kit)
- User Manual

Figure 3.1: The espresso machine shown with all included accessories, such as the portafilter, tamper, milk jug, and cleaning brush.
4. Product Overview
The Ollygrin Espresso Machine is designed for home use, featuring an integrated conical burr grinder, a 20-bar pressure pump, and a milk frother. It includes a 2.8L removable water tank and an easy-to-use touchscreen interface.

Figure 4.1: Front view of the Ollygrin Espresso Machine, highlighting the main components including the control panel, portafilter, and steam wand.

Figure 4.2: Detailed view of the touchscreen control panel, showing icons for single/double dose, steam, hot water, smart dose memory, descale light, and grinder cleaning light.
5. Setup
5.1 Initial Preparation
- Unpack all components and remove any packaging materials.
- Place the machine on a stable, flat, and heat-resistant surface.
- Clean the water tank, portafilter, and milk jug with warm water and mild detergent before first use. Rinse thoroughly.
5.2 Filling the Water Tank
- Remove the 2.8L water tank from the back of the machine.
- Fill the tank with fresh, cold, filtered water up to the MAX line.
- Place the water tank back into its position, ensuring it is securely seated.
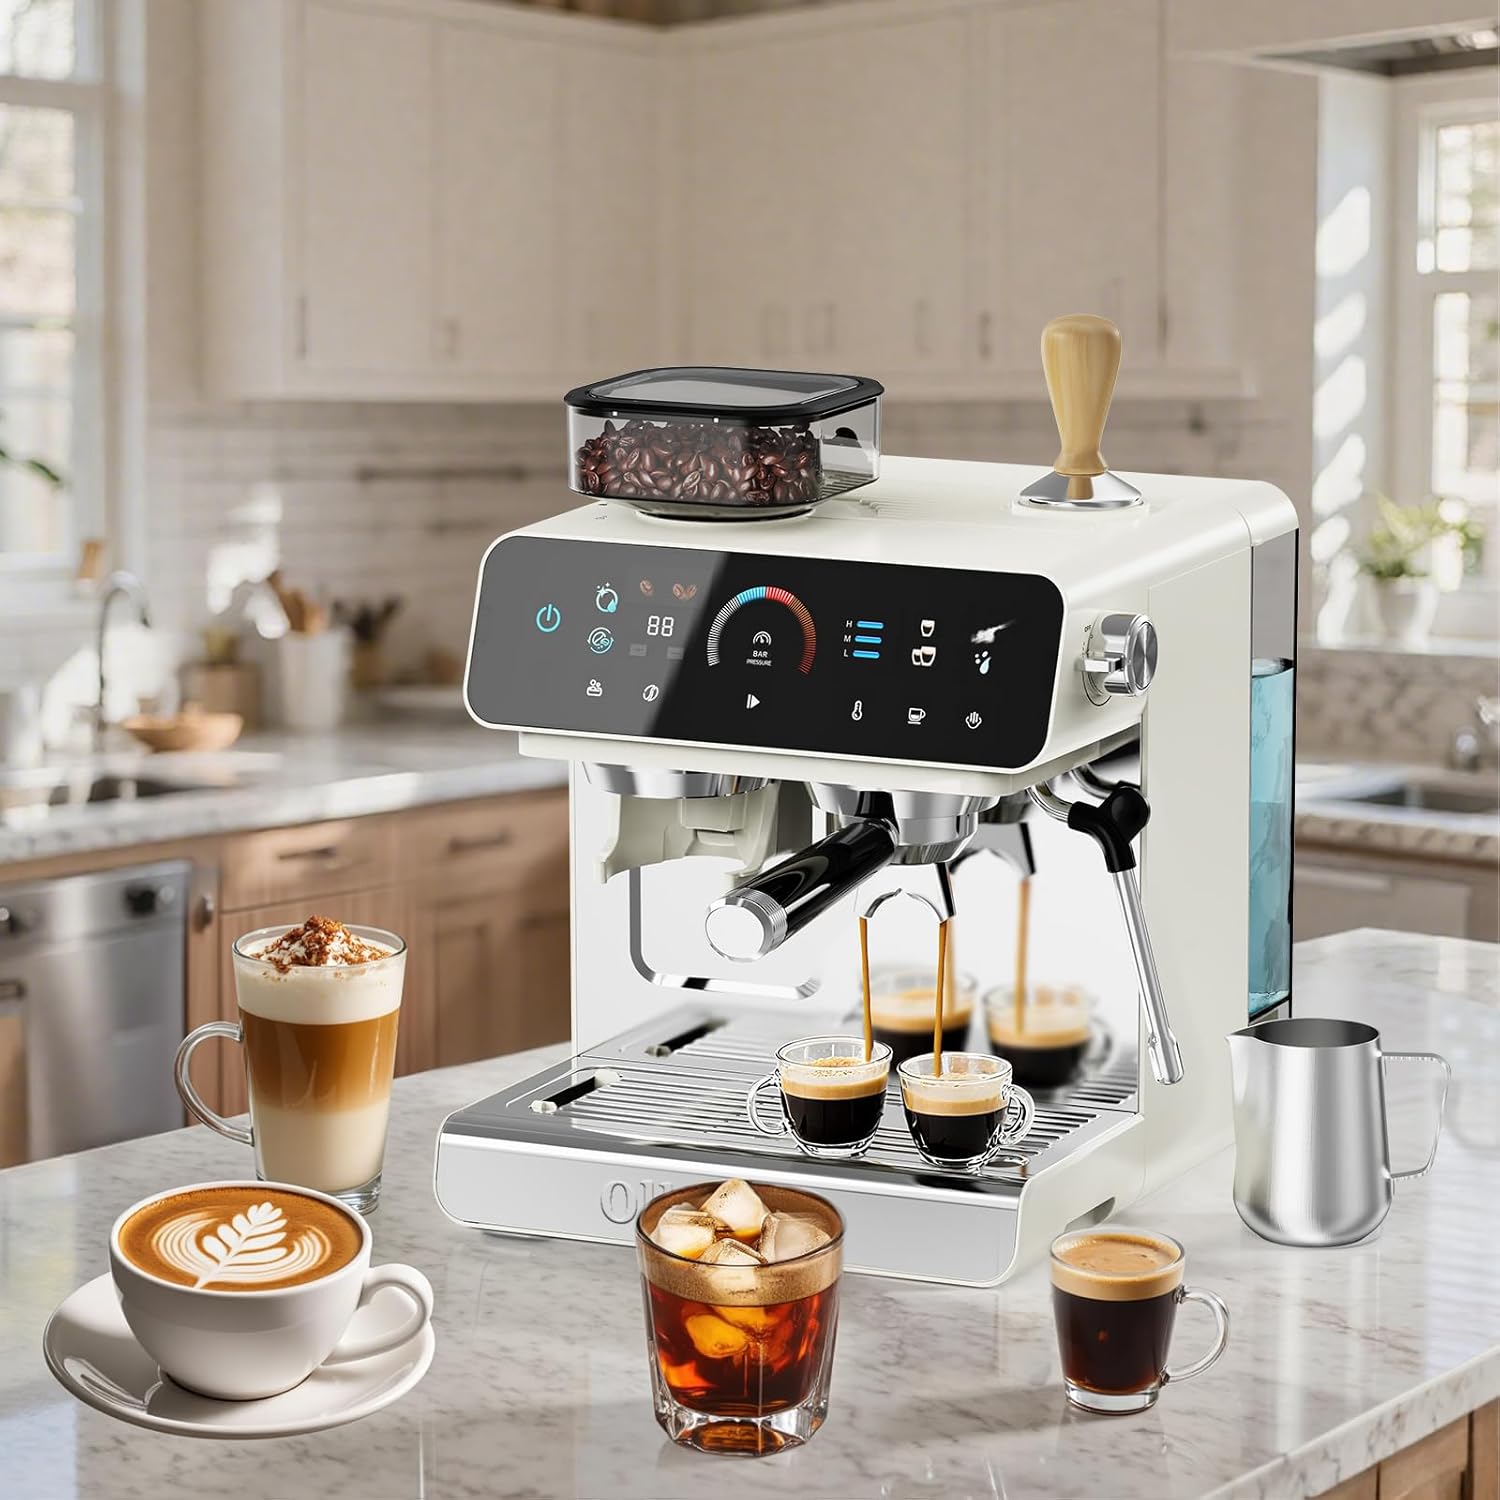
Figure 5.1: Illustration of the removable water tank being filled and reinserted into the machine.
5.3 Filling the Bean Hopper
- Open the lid of the bean hopper located on top of the machine.
- Pour fresh, whole coffee beans into the hopper. The hopper is designed with a seal ring to protect bean freshness.
- Close the lid securely.
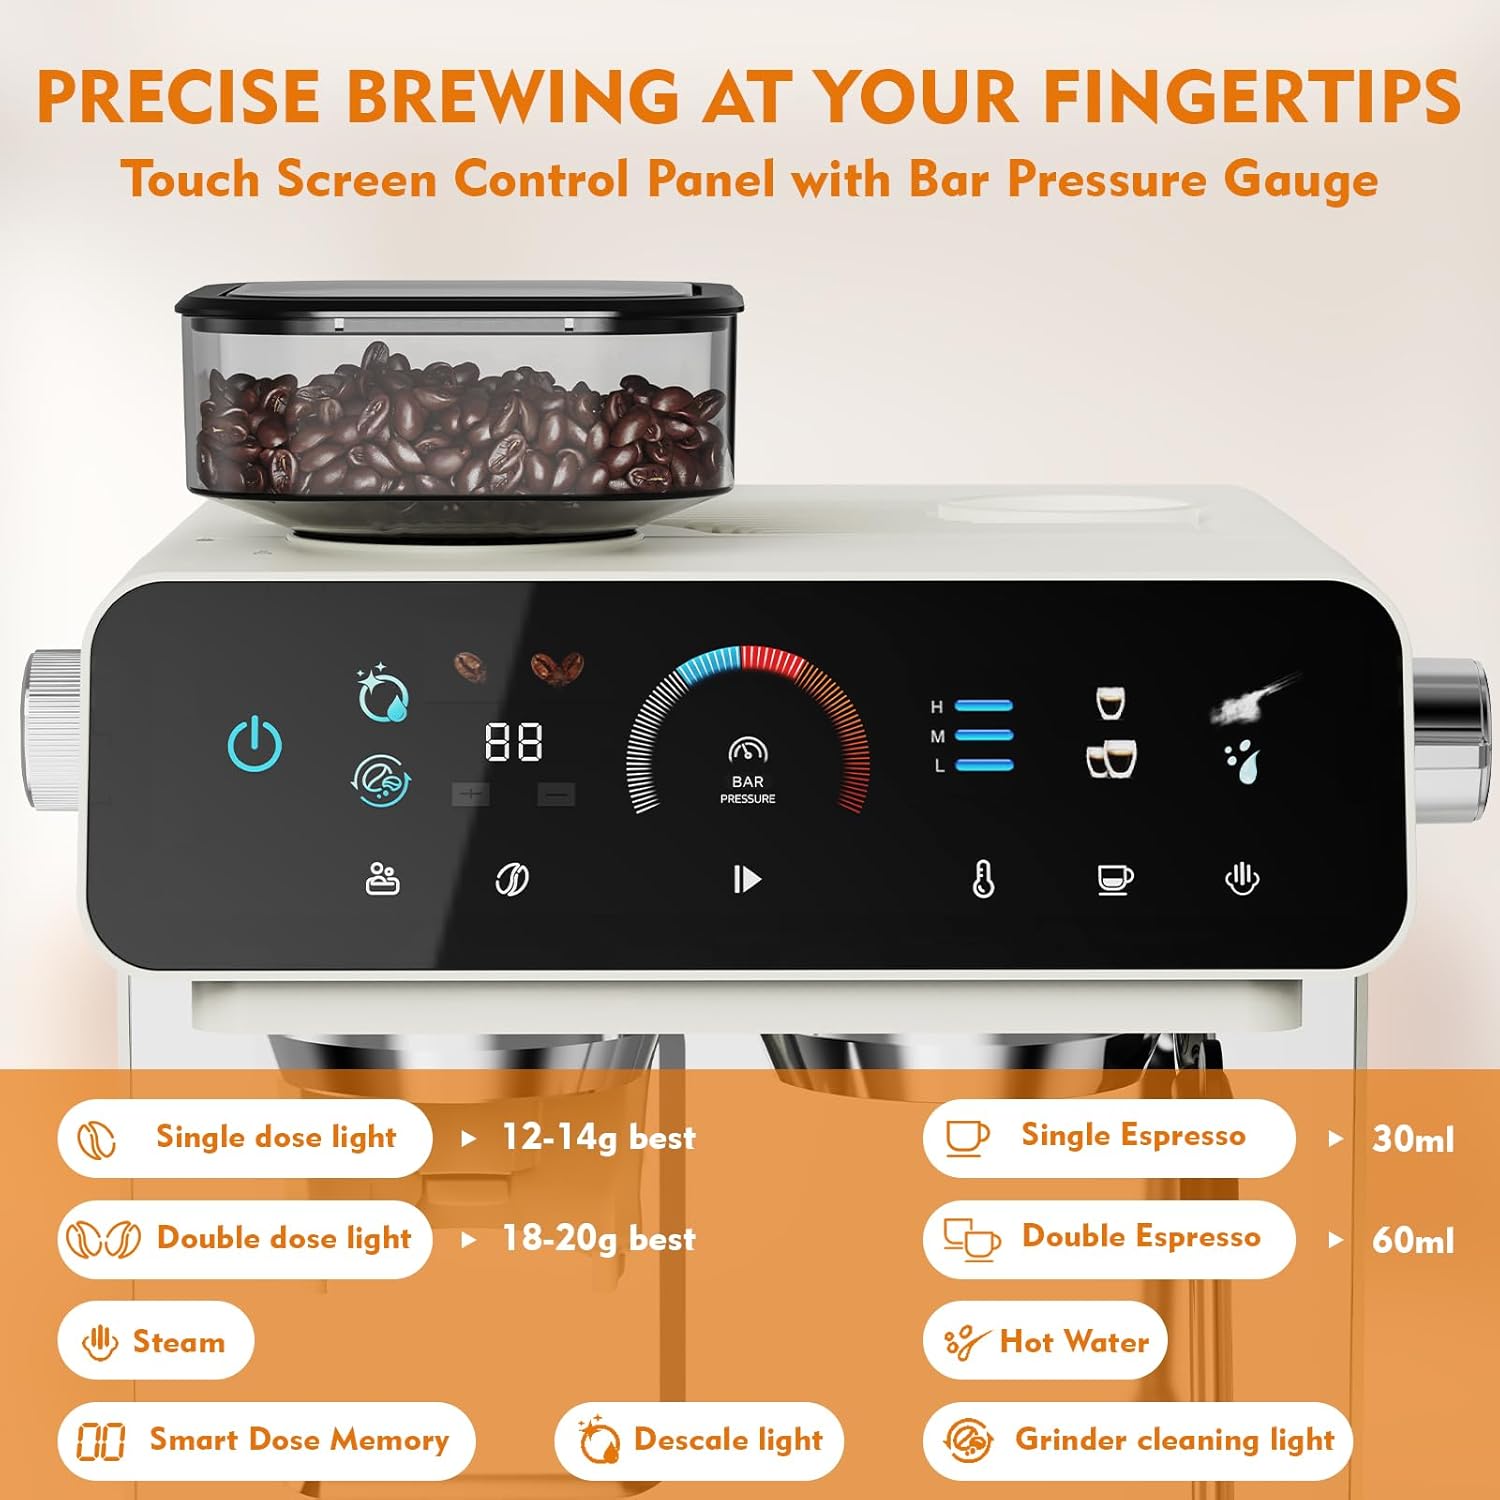
Figure 5.2: Coffee beans being added to the integrated hopper, which features a seal for freshness.
6. Operation
6.1 Grinding Coffee Beans
- Select the appropriate filter basket (single or double) and insert it into the portafilter.
- Adjust the grind size using the dial on the side of the machine. There are 19 grind settings. For espresso, levels 1-8 are generally recommended.
- Place the portafilter under the grinder outlet.
- Press the single or double shot button on the touchscreen to initiate grinding. The machine will dispense the pre-set amount of coffee grounds (12-14g for single, 18-20g for double).
- Remove the portafilter and tamp the grounds firmly and evenly.

Figure 6.1: The grind size selector with visual examples of fine, medium, and coarse grinds, and their impact on extraction.
6.2 Brewing Espresso
- Insert the filled and tamped portafilter into the group head and lock it into place.
- Place your cup(s) on the drip tray beneath the portafilter.
- Press the single or double espresso button on the touchscreen. The machine will begin brewing.
- Monitor the extraction pressure on the built-in display. Optimal pressure ensures a balanced flavor.
- The machine will automatically stop brewing after dispensing the pre-set volume (approx. 30ml for single, 60ml for double).
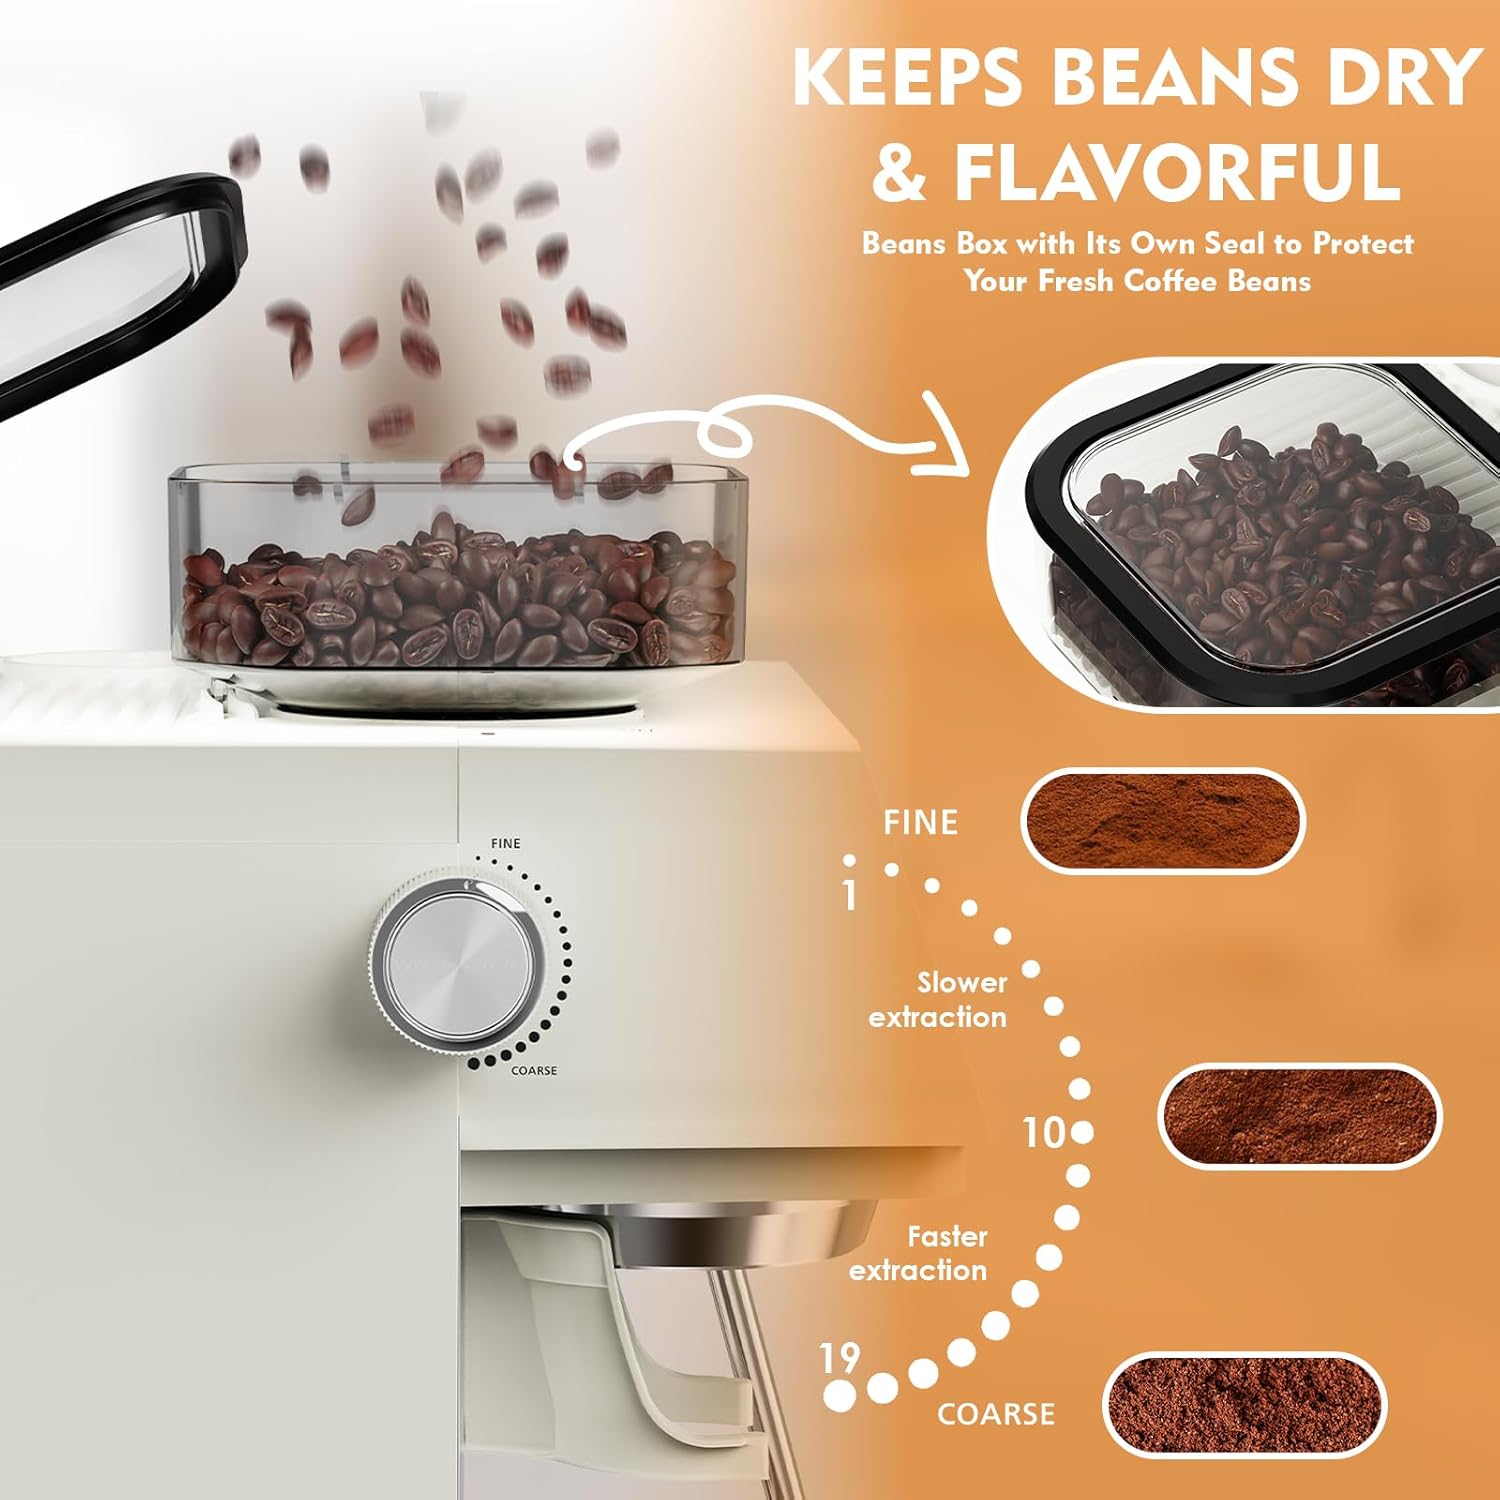
Figure 6.2: A visual guide illustrating the appearance of insufficient, perfect, and over-extracted espresso, with corresponding grind settings.
6.3 Milk Frothing
- Fill the milk jug with cold milk (dairy or non-dairy).
- Position the steam wand into the milk, just below the surface.
- Press the steam button on the touchscreen to activate the steam wand.
- Move the jug up and down to create foam and heat the milk to your desired temperature.
- Once finished, turn off the steam function and wipe the steam wand immediately with a damp cloth.

Figure 6.3: A user demonstrating the milk frothing process using the integrated steam wand and milk jug.
7. Maintenance
7.1 Daily Cleaning
- Portafilter and Filter Baskets: After each use, remove spent coffee grounds and rinse the portafilter and filter baskets under hot water.
- Steam Wand: Wipe the steam wand immediately after frothing milk to prevent milk residue from drying. Purge a small amount of steam to clear any internal blockages.
- Drip Tray: Empty and clean the detachable drip tray regularly.
- Grinder Cleaning: The machine includes a self-cleaning kit for the grinder. Follow the instructions on the touchscreen when the grinder cleaning light illuminates.

Figure 7.1: Diagram illustrating the internal grinder cleaning mechanism, showing how residual grounds are cleared.
7.2 Descaling
The machine will indicate when descaling is required via the 'Descale light' on the touchscreen. Follow these general steps:
- Empty the water tank and fill it with a descaling solution mixed according to the manufacturer's instructions.
- Place a large container under the group head and steam wand.
- Follow the descaling procedure as prompted by the machine's display or refer to the full descaling instructions in the comprehensive manual (if provided separately).
- After descaling, rinse the water tank and run several cycles with fresh water to flush out any remaining descaling solution.
8. Troubleshooting
Refer to the table below for common issues and their solutions:
| Problem | Possible Cause | Solution |
|---|---|---|
| No coffee dispenses | Water tank empty; machine not primed; clogged filter. | Fill water tank; prime machine (run hot water cycle); clean filter basket. |
| Espresso flows too fast | Grind is too coarse; not enough coffee; tamping too light. | Adjust grind to a finer setting; increase coffee dose; tamp more firmly. |
| Espresso flows too slow or not at all | Grind is too fine; too much coffee; tamping too hard; clogged filter. | Adjust grind to a coarser setting; reduce coffee dose; tamp lighter; clean filter. |
| Milk not frothing | Steam wand clogged; insufficient steam pressure. | Clean steam wand; ensure machine is fully heated for steam. |
| Machine not turning on | Not plugged in; power outlet issue. | Check power cord connection; try a different outlet. |
9. Specifications
| Feature | Detail |
|---|---|
| Brand | Ollygrin |
| Model Name | US-AEK-1520A-001 |
| Color | Ivory Beige |
| Product Dimensions | 13.43"D x 13.39"W x 15.02"H |
| Item Weight | 16.34 pounds |
| Coffee Maker Type | Espresso Machine |
| Special Feature | Built-in Grinder, Milk Frother, PID Temperature Control, Touchscreen |
| Grind Sizes | 19 settings |
| Water Tank Capacity | 2.8 Liters (94.7 oz) |
| Pressure | 20 Bar |
| Voltage | 120 Volts |
| Included Components | Tamper, Milk Jug, Filter Baskets, Grinder Cleaning Brush |
10. Warranty and Support
For warranty information and customer support, please refer to the warranty card included with your product or visit the official Ollygrin website. Keep your purchase receipt as proof of purchase for any warranty claims.