
1. Introduction
This manual provides detailed instructions for the installation, setup, and operation of your Breeze Bay RC93T Ceiling Fan Remote Control. This remote is designed to replace specific Harbor Breeze ceiling fan remote models, offering convenient control over fan speeds and lighting functions.
2. Compatibility
This remote control is compatible with specific Harbor Breeze ceiling fan models. To ensure compatibility, please verify the FCC ID on the back of your original remote control. This RC93T remote operates at a radio frequency of 304.25 MHz and is designed to replace the following FCC ID/Models:
- KUJCE10311 / TR214A
- KUJCE10712 / TR214B
- 2BB78-ITL-F304C
Important Note:
This remote is NOT compatible with models operating at different frequencies or with FCC IDs such as A25-FA0138, KUJCE10610, 2AQZU-18018, A25-TX001-R, A25-TX005R, A25-TX007R, A25-TX013, RRTX001R, ZJF-RT01A, FAN35T1, L3HFAN35T1, FAN-35T, L3HFAN35T, FAN-53T, 2AAZPFAN53T, 2AAZPFAN53T1, FAN-11T, L3HFAN11T, CHQ7202T, CHQ7202T1, KUJCE9603.
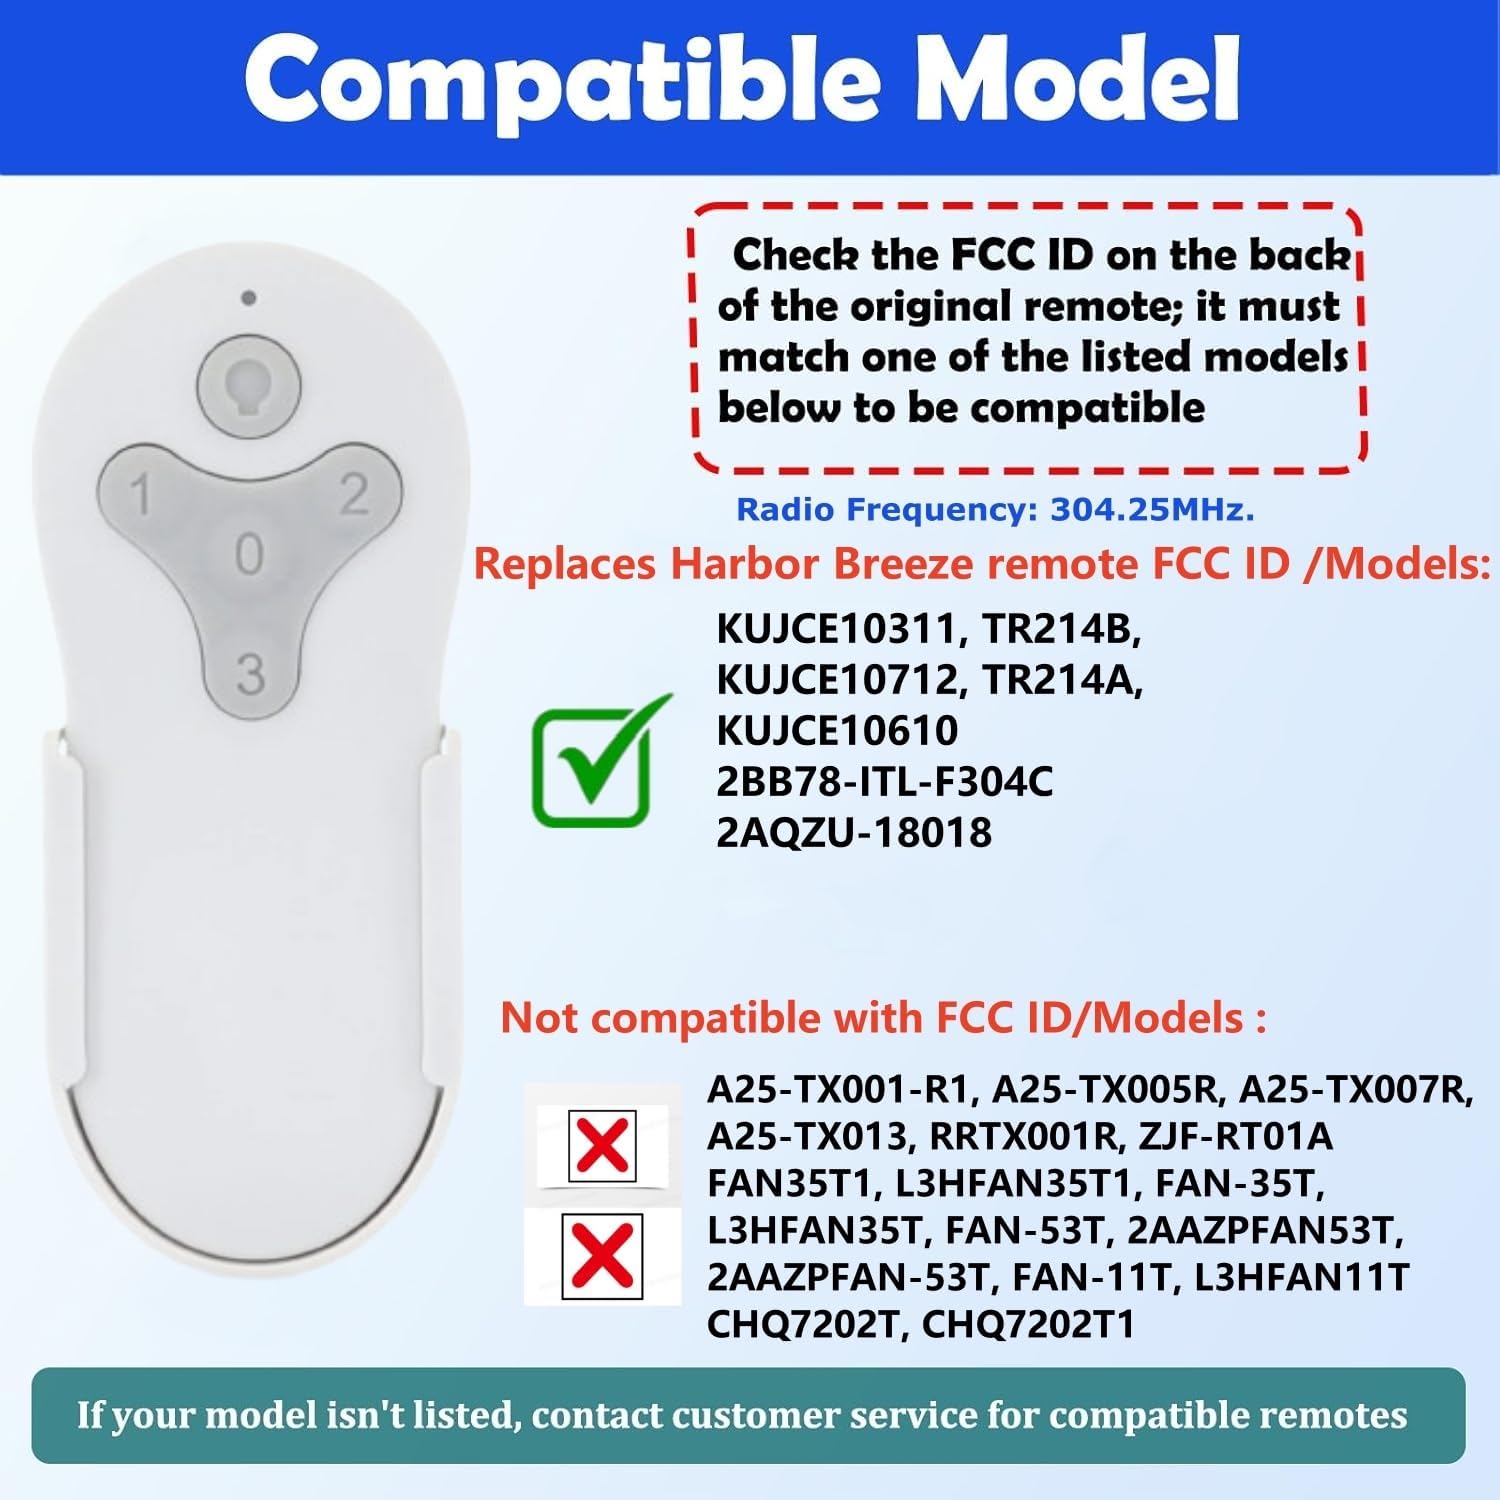
Image: Compatibility chart for the RC93T remote, highlighting compatible Harbor Breeze FCC IDs and listing incompatible models.
3. Package Contents
Please ensure all items are present in your package:
- 1 x RC93T Remote Control
- 1 x Wall Mount Bracket
- 2 x Bracket Screws
- 2 x Plastic Sleeves
- 1 x Instruction Manual (this document)
Note: A 12V 'A23' battery is required for the remote control and is not included in the package.

Image: Visual representation of all items included in the RC93T remote control package.
4. Setup and Pairing
4.1. Battery Installation
- Open the battery compartment on the back of the remote control.
- Insert one 12V 'A23' battery (not included), ensuring correct polarity (+/-).
- Close the battery compartment.
4.2. Pairing the Remote Control
There are two methods to pair your RC93T remote control with your ceiling fan receiver:
Method A: Using the "0" (FAN OFF) Key
- Turn off the power to the ceiling fan at the wall switch or circuit breaker.
- Wait for a few seconds, then turn the power back on.
- Within 30 seconds of restoring power, press and hold the "0" (FAN OFF) key on the remote control for 5 seconds.
- The indicator light on the remote will flash. If pairing is successful, the fan will turn on at low speed, and the light will be off.
Method B: Using the "Learn" Key
- Turn off the power to the ceiling fan at the wall switch or circuit breaker.
- Wait for a few seconds, then turn the power back on.
- Within 30 seconds of restoring power, press and hold the "Learn" key located inside the battery compartment for 5 seconds.
- The indicator light on the remote will flash. If pairing is successful, the fan will turn on at low speed, and the light will be off.

Image: Step-by-step visual guide for pairing the remote control using either the '0' key or the 'Learn' key.
5. Operating Instructions
The RC93T remote control provides comprehensive control over your ceiling fan's functions.
5.1. Fan Speed Control
Adjust the fan speed to your desired comfort level using the dedicated speed buttons:
- 1: Low Speed
- 2: Medium Speed
- 3: High Speed
- 0: Fan Off

Image: Visual guide to the fan speed buttons on the RC93T remote control.
5.2. Light Control and Dimming
The remote offers versatile control for your ceiling fan's light fixture:
- Press the ☼ (Light) button once to turn the light ON or OFF.
- To dim the light, press and hold the ☼ (Light) button. Release when the desired brightness level is reached.
This dimming function is compatible with dimmable LED, dimmable CFL, and incandescent light bulbs.

Image: Illustration of the light dimming feature, showing how brightness can be adjusted for different settings.

Image: Detailed view of light control options, including compatibility with various bulb types and smooth dimming.
6. Troubleshooting
- Remote not responding:
- Check if the 12V 'A23' battery is installed correctly and has sufficient charge. Replace if necessary.
- Ensure the remote is within range of the ceiling fan receiver.
- Re-attempt the pairing process (refer to Section 4.2).
- Fan or light not turning on:
- Verify that the main power to the ceiling fan is ON at the wall switch or circuit breaker.
- Confirm successful pairing of the remote control.
- Light not dimming:
- Ensure that the light bulbs installed are dimmable. Non-dimmable bulbs will only turn ON/OFF.
7. Specifications
| Feature | Detail |
|---|---|
| Model Number | RC-93T |
| Brand | Breeze Bay |
| Compatibility | Harbor Breeze KUJCE10311/TR214A, KUJCE10712/TR214B, 2BB78-ITL-F304C |
| Radio Frequency | 304.25 MHz |
| Fan Speeds | 3 (High, Medium, Low) + Off |
| Light Control | On/Off, Dimmer |
| Power Supply | 1 x 12V 'A23' battery (not included) |
| Color | White |
| Dimensions | 4.8 x 2.24 x 1.46 inches (Package) |
| Item Weight | 1.76 ounces |
8. Maintenance
To maintain the performance and longevity of your remote control:
- Clean the remote control periodically with a soft, dry cloth. Avoid using harsh chemicals or abrasive cleaners.
- Replace the battery when the remote's indicator light becomes dim or if the remote becomes unresponsive.
- Store the remote in a dry place, away from extreme temperatures and direct sunlight.
9. Important Safety Information
- Do not expose the remote control to water or excessive moisture.
- Keep batteries out of reach of children. If swallowed, seek immediate medical attention.
- Dispose of used batteries according to local regulations.
- Do not attempt to disassemble or repair the remote control yourself. Contact customer support for assistance.
10. Customer Support
For any questions, concerns, or technical assistance regarding your Breeze Bay RC93T remote control, please contact your retailer or the manufacturer's customer support. Refer to your purchase documentation for contact details.


