
1. Important Safety Information
Please read all instructions carefully before using your ICEPURE 3-in-1 Water Dispenser. Retain this manual for future reference.
- Electrical Safety: Ensure the dispenser is connected to a grounded power outlet. Do not use extension cords. Unplug the unit before cleaning or maintenance.
- Hot Water Safety: The hot water function can reach temperatures over 194°F (90°C). Always use the child lock feature to prevent accidental burns, especially if children are present.
- Placement: Place the dispenser on a flat, stable surface away from direct sunlight and heat sources. Ensure adequate ventilation around the unit.
- Water Quality: Use only potable water. Do not use any other liquids in the dispenser.
- Damage: Do not operate the dispenser if the power cord or plug is damaged, or if the unit malfunctions or has been damaged in any way. Contact customer support.
2. Product Overview
The ICEPURE 3-in-1 Water Dispenser provides instant access to hot, cold, and bullet-shaped ice cubes, offering convenience for various hydration needs in homes and offices.

Figure 2.1: Overall view of the ICEPURE 3-in-1 Water Dispenser.
Key Features:
- 3-in-1 Functionality: Delivers hot water, cold water, and bullet ice.
- Rapid Ice Making: Produces 9 bullet-shaped ice cubes in 6-11 minutes, up to 33 lbs per 24 hours.
- Top-Loading Design: Compatible with 2, 3, or 5-gallon water bottles.
- Child Lock: Safety feature for hot water dispensing.
- Detachable Drip Tray: Easy to clean and maintain.
- Quiet Operation: Operates at less than 43dB.

Figure 2.2: Detailed view of the control panel.
3. Setup
3.1 Unpacking and Placement
- Carefully remove the dispenser from its packaging.
- Place the dispenser upright on a firm, level surface. Ensure there is at least 4 inches of clearance from walls for proper ventilation.
- Do not plug in the unit immediately. Allow it to stand upright for at least 2 hours before plugging it in to allow refrigerants to settle.
3.2 Initial Cleaning
Before first use, it is recommended to clean the water tanks and lines:
- Remove the water bottle support collar from the top of the unit.
- Pour approximately 1 liter of clean water into the hot and cold water reservoirs.
- Dispense water from both hot and cold spouts until the reservoirs are empty. Repeat this process 2-3 times.
- Clean the drip tray and ice storage compartment with mild soap and water. Rinse thoroughly.
3.3 Installing the Water Bottle
- Remove the protective seal from the top of a 2, 3, or 5-gallon water bottle.
- Carefully lift the water bottle and place it onto the water bottle support collar on top of the dispenser. Ensure it is seated firmly and water begins to flow into the dispenser's reservoirs.
Figure 3.1: Proper placement of a top-loading water bottle.
3.4 Power Connection
- Once the water bottle is installed and reservoirs are filled, plug the power cord into a grounded electrical outlet.
- The power indicator light on the control panel will illuminate.
4. Operating Instructions
4.1 Dispensing Cold Water
- Place a cup under the cold water spout.
- Press the "Cold Water Dispense" button on the control panel. The cold water will flow.
- Release the button to stop dispensing.
4.2 Dispensing Hot Water (with Child Lock)
- Place a heat-resistant cup under the hot water spout.
- To dispense hot water, first press and hold the "Child Lock" button for 3 seconds to deactivate it. The child lock indicator will change.
- Immediately press the "Hot Water Dispense" button. Hot water will flow.
- Release the button to stop dispensing. The child lock will automatically re-engage after a short period of inactivity.

Figure 4.1: Child lock feature for hot water safety.
4.3 Ice Making Function
- Ensure the water bottle has sufficient water.
- Press the "Ice-Making" button on the control panel to activate the ice maker. The ice-making indicator light will illuminate.
- The first batch of bullet ice cubes will be ready in approximately 6-11 minutes.
- To collect ice, open the ice compartment door and use the provided scoop.
- The ice maker will automatically stop when the ice storage is full and resume when ice is removed.
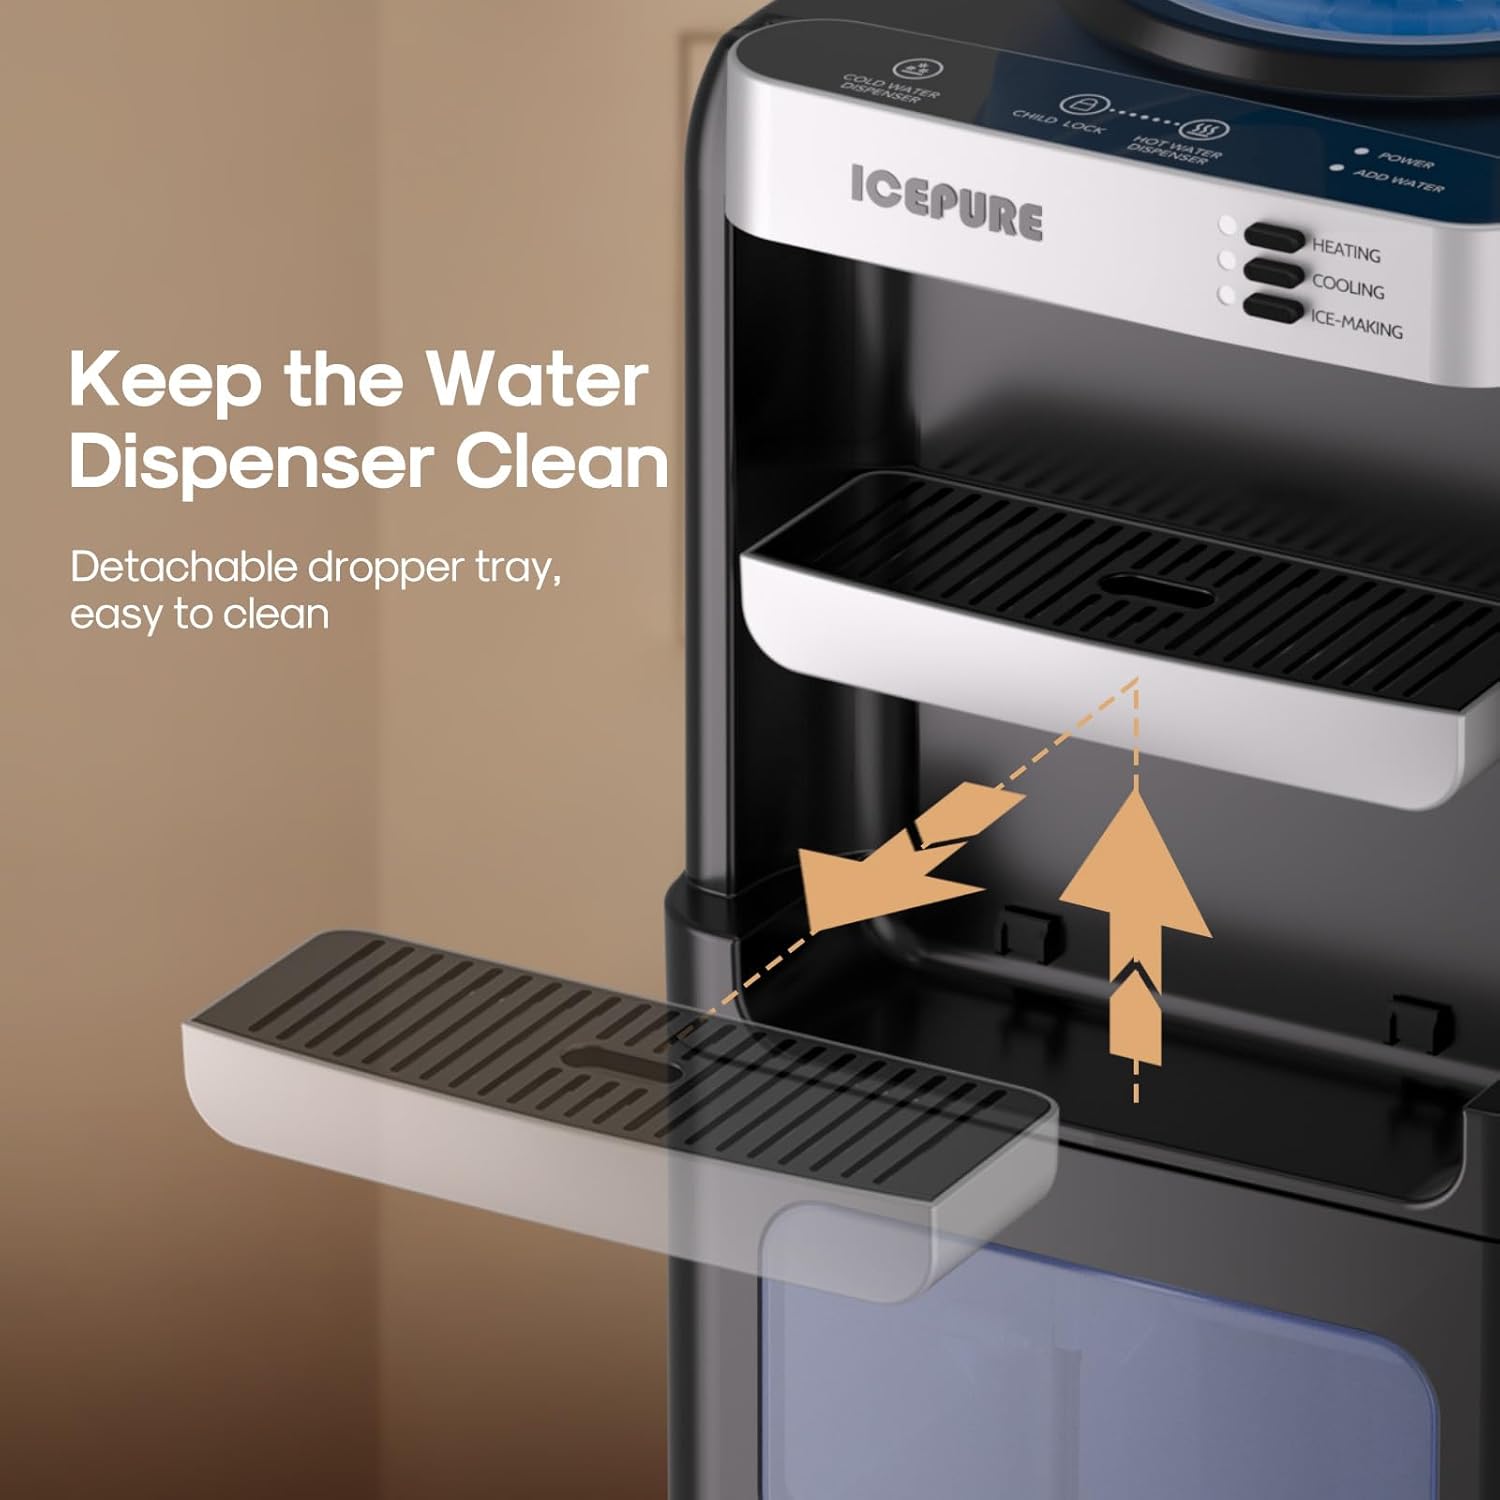
Figure 4.2: Efficient ice production of 9 bullet cubes per cycle.
4.4 Video Guide: ICEPURE 3-in-1 Water Cooler Dispenser with Ice Maker
Video 4.1: Official ICEPURE video demonstrating the 3-in-1 water cooler dispenser with ice maker, including setup and basic operation.
5. Maintenance
5.1 Cleaning the Drip Tray
The drip tray should be cleaned regularly to prevent water overflow and maintain hygiene.
- Gently pull the drip tray forward to remove it from the dispenser.
- Empty any collected water and wash the tray with mild soap and water.
- Rinse thoroughly and dry before reinserting.

Figure 5.1: Detachable drip tray for easy cleaning.
5.2 General Cleaning and Descaling
Regular cleaning and descaling are essential for optimal performance and hygiene.
- Unplug the dispenser from the power outlet.
- Drain all water from the hot and cold reservoirs using the drain plugs located at the back of the unit.
- Clean the exterior with a soft, damp cloth. Do not use abrasive cleaners.
- For descaling, use a food-grade descaling solution or a mixture of water and white vinegar. Follow the product instructions for the descaling solution.
- Rinse all internal components thoroughly with clean water after descaling.
6. Troubleshooting
| Problem | Possible Cause | Solution |
|---|---|---|
| No water dispensing | Water bottle empty or not properly installed. Airlock in system. | Replace water bottle. Re-seat bottle. Dispense water from both spouts to release air. |
| Water not hot/cold | Heating/cooling switch off. Unit recently plugged in. | Ensure heating/cooling switches are on. Allow 15-30 minutes for water to reach desired temperature. |
| Ice maker not producing ice | Ice making function off. Water shortage. Ice bin full. | Turn on ice making function. Replace water bottle. Empty ice bin. |
| Water leakage | Water bottle cracked or seal damaged. Drip tray full. | Inspect water bottle for damage. Empty and clean drip tray. |
7. Specifications
- Model Number: HZB-15YLR
- Brand: ICEPURE
- Color: Black
- Material: Plastic
- Capacity: Compatible with 2, 3, or 5 Gallon Bottles
- Product Dimensions: 13.15"D x 13.15"W x 34.6"H
- Installation Type: Freestanding
- Item Weight: 33.5 pounds
- Ice Production: Up to 33 lbs per 24 hours (9 bullet ice cubes in 6-11 minutes)
- Hot Water Temperature: >194°F (90°C)
- Cold Water Temperature: <46°F (8°C)
- Noise Level: <43dB
- Certifications: ETL Certified
8. Warranty and Support
ICEPURE products are designed for reliability and performance. For warranty information, technical support, or service inquiries, please refer to the warranty card included with your product or visit the official ICEPURE website.
Customer Service: For assistance, please contact ICEPURE customer support through the contact information provided on your product packaging or the brand's official website.